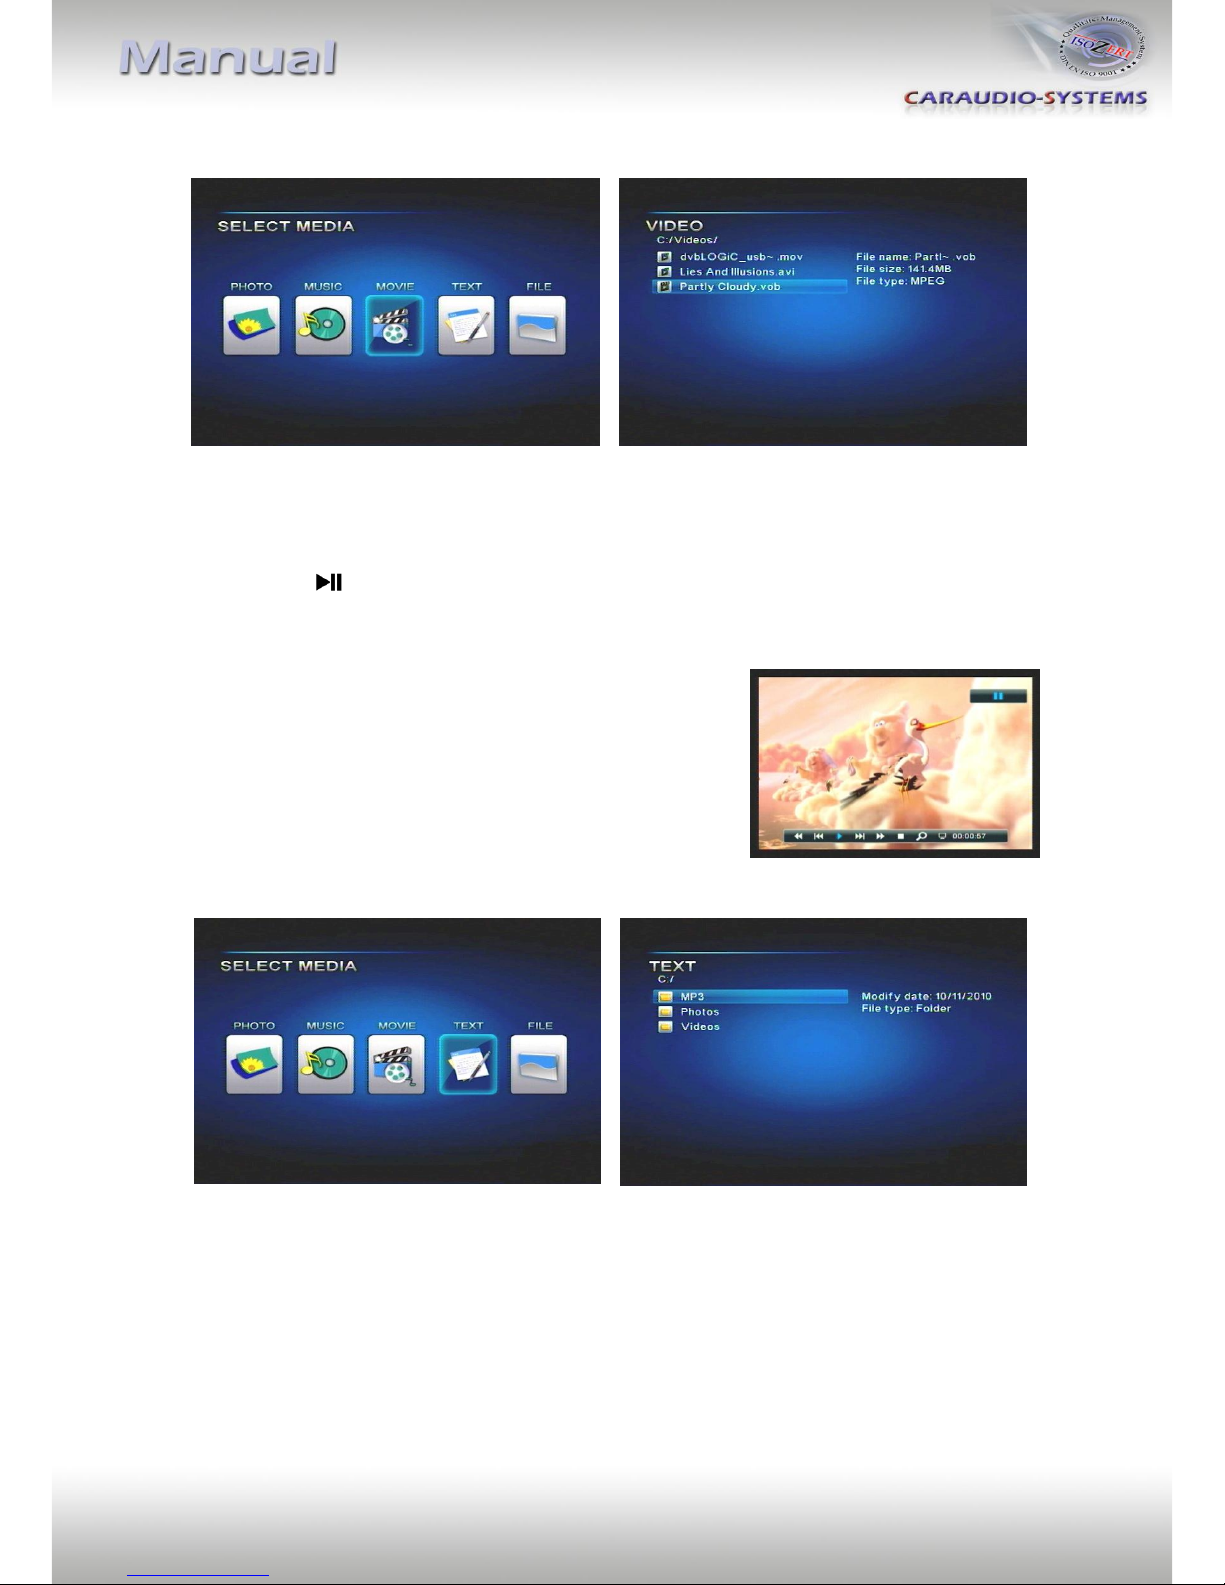
Caraudio-Systems usbLiNK AV-player Assembly instructions

Version 18.04.2011 USB-LINK
usbLiNK AV-player
USB-LINK
Universal
Audio-video player for USB-Media
Product features
• Playback of audio and video files from USB-media up to 2TB
• NTFS and FAT32 multi partition capable
• Compatible with MP3, AVI, VOB, MOV, RMVB, JPG and many more
• Last position memory
• Stand-alone
• Controllable by IR-sensor and remote control
• Visualisation via ON-screen display
• Controllable and combinable by dvbLOGiC or c.LOGiC

Version 18.04.2011 USB-LINK
Page1
Contents
1. Prior to installation
1.1. Delivery contents
2. Installation
3. Operation
3.1. Remote control
3.2. In combination with xLOGiC interfaces
3.3. “Home“ menu
3.4. “Settings“ menu
3.5. “Select Media” menu
4. Specifications
5. Technical support
Legal Information
By law, watching moving pictures while driving is prohibited, the driver must not be
distracted. We do not accept any liability for material damage or personal injury resulting,
directly or indirectly, from installation or operation of this product. This product should only
be used while standing or to display fixed menus or rear-view-camera video when the
vehicle is moving, for example the MP3 menu for DVD upgrades.
Changes/updates of the vehicle’s software can cause malfunctions of the interface. We offer
free software-updates for our interfaces for one year after purchase. To receive a free
update, the interface must be sent in at own cost. Labor cost for and other expenses
involved with the software-updates will not be refunded.

Version 18.04.2011 USB-LINK
Page2
1. Prior to installation
Read the manual prior to installation. Technical knowledge is necessary for installation. The
place of installation must be free of moisture and away from heat sources.
1.1. Delivery contents
2. Installation
Audio-Video output (Cinch)
Cable colour
Assignment
●Gelb
Video signal
●Rot
Audio signal right
●Weiß
Audio signal left
Connection for power supply
Cable colour
Assignment
● black
Ground
●red
+12V permanent
●pink
ACC
USB-box
USBC-M595
HW_____ SW_____
Harness
USBC-UNI
IR-sensor
C3C-SENSOR
Take down the SW-version and HW-version of the interface boxes, and store this
manual for support purposes.
Remote control
USBC-RC

Version 18.04.2011 USB-LINK
Page3
3. Operation
3.1. Remote control
Remote control operations
Button
Function
POWER
Select power-on or stand-by
SOURCE
Select Photo, Music, Movie, Text and File
MUTE
Mute control
Select play or pause
■
Stop
EXIT
Exit the current setup
AUDIO
No function
▲
Up
MEDIA
Select Photo, Music, Movie, Text and File
Left
OK
Select the highlighted item
Right
SETUP
Setup menu
▼
Down
OSD
OSD ON/OFF
Fast backward
Fast forward
VOL+
Volume up
Next track
Last track
VOL-
Volume down
3.2. In combination with xLOGiC interfaces
If the usbLiNK is connected to a xLOGiC interface, the usbLiNK is automatically powered
off/on when the xLOGiC input to which the usbLiNK is connected is (de-)activated. The last
playback position is saved.
Manual use of the usbLiNK’s remote control power button is not recommended other than
for rear-seat-entertainment. When switching the xLOGiC from usbLiNK to other sources, the
usbLiNK will be automatically powered off while saving the last playback position, but can be
powered back on for the use with rear-seat-entertainment by using the usbLiNK remote
control.

Version 18.04.2011 USB-LINK
Page4
3.3. “Home“ menu
In the “Home” menu, you can highlight the items
“USB” (if an data medium is connected) and
“Settings”. You can use [] and [] buttons to
highlight the item and press [OK] to set the setting.
USB
Selection of files on the data medium (photos,
music, etc.)
Settings
Configure the system setting like language, display mode, etc.
3.4. “Settings” menu
In the “Settings” menu you can configure the
settings. You can use [▲] and [▼] buttons to
highlight the item, you can use [] and [] buttons
to change the adjustment and press [OK] to set the
setting. Leave out the menu by pressing the [EXIT]
button.
Language
Selection of the language. Choose between English
and Chinese.
Slideshow duration
Selection of the slideshow duration Choose between 3s (3 seconds) / 5s (5 seconds) / 15s (15
seconds) / 1mins (1 minute) / 15mins (15 minutes) / 1hour (1 hour).
Slideshow mode
Selection of the slideshow mode. Choose between:
• Bottom_To_Top
• Top_To_Botton
• Left_To_Right
• Right_To_Left
• Door_Close
• Door_Open
• Hori_Cross
• Verti_Cross
• Random
• Fading
• Off

Version 18.04.2011 USB-LINK
Page5
Music repeat mode
Selection of the music repeat mode. Choose between Repeat all or Repeat one.
Movie repeat mode
Selection of the movie repeat mode. Choose between Repeat all or Repeat one.
Display mode
Selection of the display mode. Choose between 16:9 and 4:3.
TV system
Selection of the TV system. Choose between PAL Composite and NTSC Composite.
Autorun
Selection of autorun. Choose between On and Off.
Default
Reset of the factory settings.
3.5. “Select Media” menu
In the “Select Media” menu you can highlight the items “Photo”, “Music”, “Movie”, “Text”
and “File”. You can use [] and [] buttons to highlight the item and press [OK] to set the
setting.
Photo
Display of photos
Music
Display and playback of music files
Movie
Display and playback of movie files
Text
Display of text files
File
Diplay and playback of photos, music files , movie files and text files

Version 18.04.2011 USB-LINK
Page6
Photo
1. In menu mode, select “Photo“.
2. Press [OK] button to show all of the stored photos.
3. Press [], [], [▲] and [▼] buttons to select a photo and press the [OK] button to
show the photo.
4. Press [ ] button to start or pause the slideshow. Press [■] to stop.
5. Press the [EXIT] button to leave out the menu item.
Music
1. In menu mode, select “Music“.
2. Press [OK] button to show all of the stored music files.
3. Press [▲] and [▼] buttons to select a music file and press the [OK] button to start
the music file.
4. Press [ ] button to start or pause. Press [■] to stop.
5. Press the [EXIT] button to leave out the menu item.

Version 18.04.2011 USB-LINK
Page7
Movie
1. In menu mode, select “Movie“.
2. Press [OK] button to show all of the stored movie files.
3. Press [▲] and [▼] buttons to select a movie file and press the [OK] button to start
the movie file.
4. Press [ ] button to start or pause. Press [■] to stop.
5. Press the [EXIT] button to leave out the menu item.
Press [OSD] button while the movie is playing to get a
control line on the display. Press [] and [] buttons to
select a command and press the [OK] button to complete.
The control line will be removed after a short time by itself.
Text
1. In menu mode, select “Text“.
2. Press [OK] button to show all of the stored text files.
3. Press [▲] and [▼] buttons to select a text file and press the [OK] button to show the
text file.
4. Press the [EXIT] button to leave out the menu item.

Version 18.04.2011 USB-LINK
Page8
File
1. In menu mode, select “File“.
2. Press [OK] button to show all of the stored files.
3. Press [▲] and [▼] buttons to select a file and press the [OK] button to start as the
case may be show the file.
4. Control of the file as assembled specified under the current menu item (Photo,
Music, Movie, Text).
5. Press the [EXIT] button to leave out the menu item.
4. Specifications
Operation voltage 10.5 –14.8V
Stand-by power drain <1mA
Power consumption ~1,5A
Power rating USB-port 0,5A permanent (0,8A max)
Temperature range -30°C bis +80°C
Weight 112g
Measurements (box only) B x H x T 93 x 29 x 55 mm
5. Technical support
Caraudio-Systems Vertriebs GmbH NavLinkz GmbH
manufacturer/distribution corporate sales/tech dealer-support
Rheinhorststr. 22 Eurotec-Ring 45
D-67071 Ludwigshafen am Rhein D-47445 Moers
phone +49 180 3 907050
Legal disclaimer: Mentioned company and trademarks, as well as product names/codes are registered
trademarks ® of their corresponding legal owners.
This manual suits for next models
1
Table of contents
Popular Media Player manuals by other brands

VISIO
VISIO Co-Star LT quick start guide

Smart TV Box
Smart TV Box X5 user manual

Johnson Controls
Johnson Controls tyco exacqVision Standard C-Series quick start guide

Crestron
Crestron CEN-NVS200 Operations & installation guide

Iomega
Iomega ScreenPlay quick start guide

Fantec
Fantec QB-35US3 Brochure & specs