Version 14.02.2013 DVB-MK-AUX
• video-in-motion
Contents
1. Prior to Installation
1.1. Delivery contents
1.2. Check compatibility of vehicle and accessories
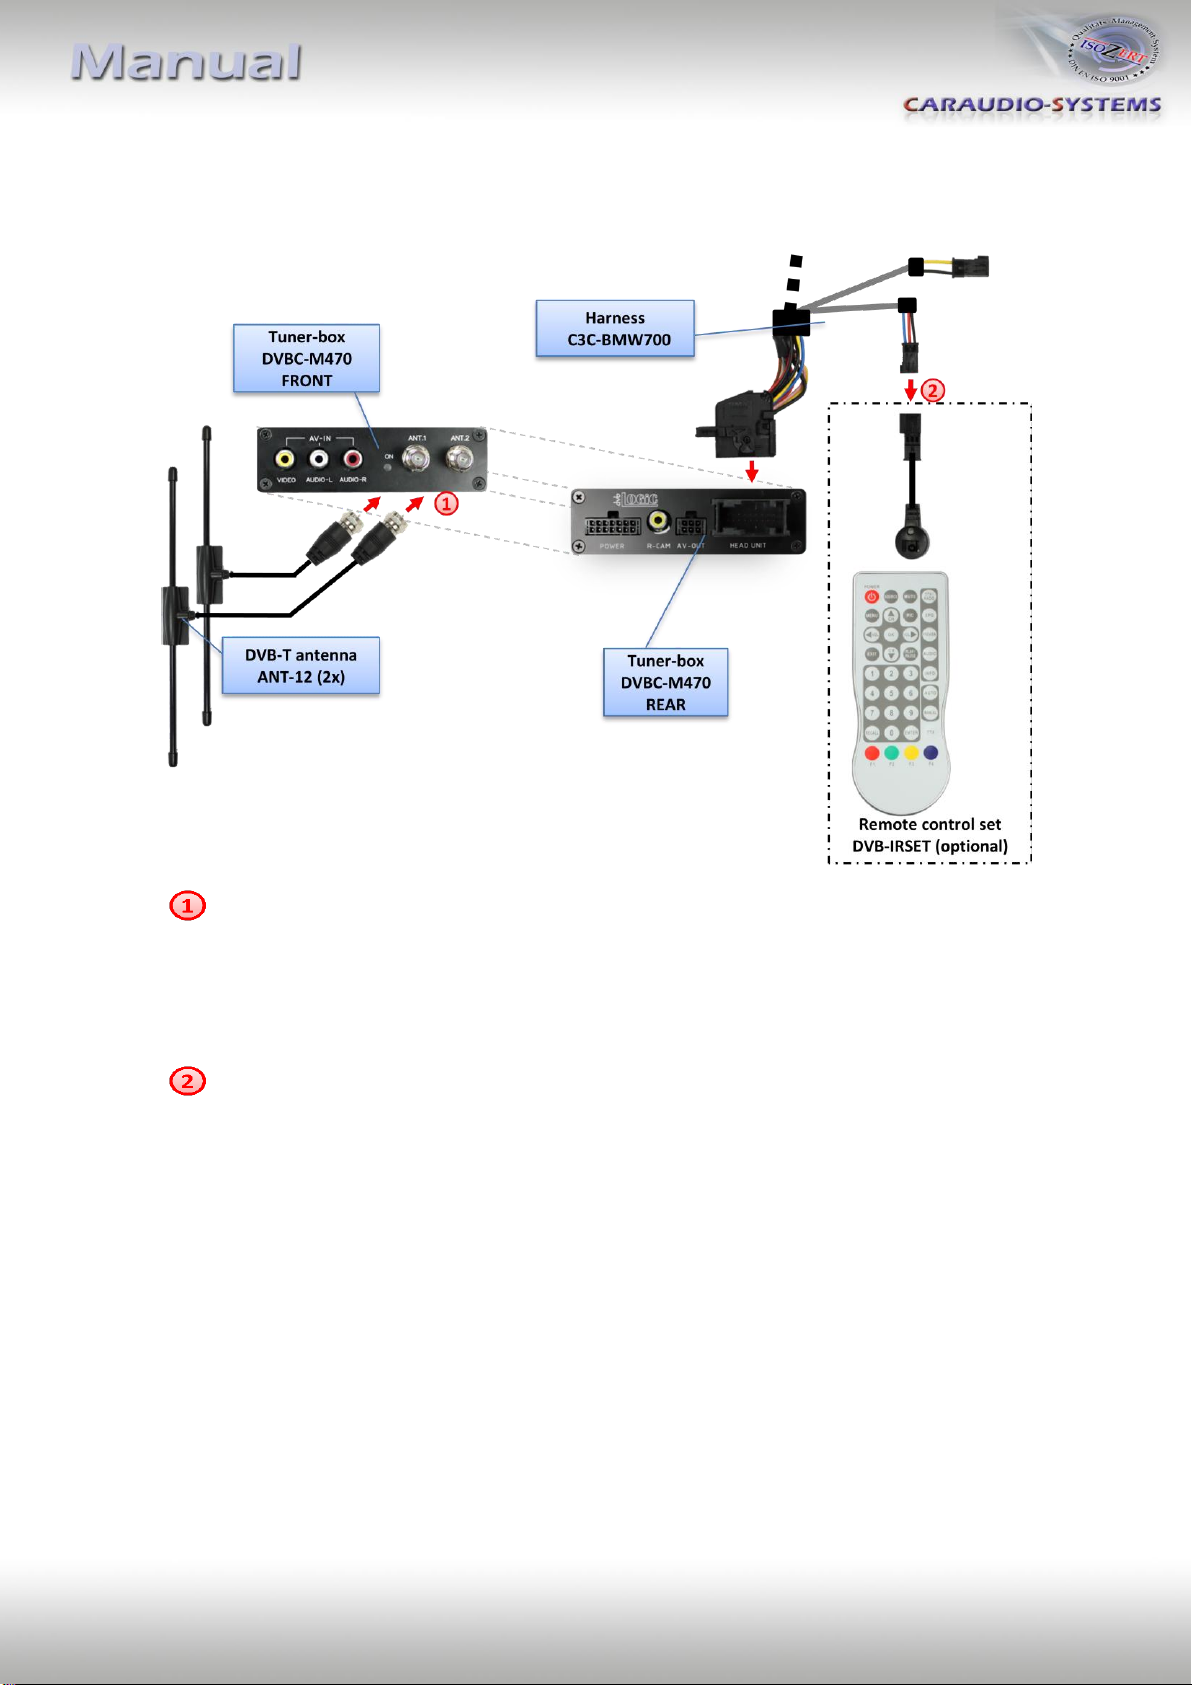
2. Connection schema
3. Installation
3.1. Interconnecting tuner-box and harnesses
3.2. Connections to the navigation computer or –if existing –to the TV-tuner
3.3. Connections to radio module
3.4. Antennas and optional IR-remote control set
3.5. Connecting peripheral devices
3.5.1. AV-source
3.5.2. Installing AV-source’s IR-sensor additionally
3.5.3. After-market rear-view camera
3.5.4. After-market rear-seat-entertainment
3.6. System settings/VI SETTINGS
3.6.1. Audio settings
3.6.2. Assigning device control for connected AV-source
3.6.3. Rear-view camera function
4. Operation
4.1. Activation of the video-in-motion function
4.2. Selecting the dvbLOGiC as current AV-source
4.3. Switching to internal DVB-T and AV-source
4.4. Picture settings
4.5. Button assignment table
5. Specifications
6. Technical support
Appendix A –Device control table
Appendix B –DVB-T function manual
Appendix C –Antenna positioning
Appendix D –DVBU optional USB-AV-port