manuals.online logo
Brands
  1. Home
  2. •
  3. Brands
  4. •
  5. Carefree of Colorado
  6. •
  7. Automobile Accessories
  8. •
  9. Carefree of Colorado TRUCKIN' AWN User manual

Carefree of Colorado TRUCKIN' AWN User manual

CAREFREE TRUCKIN’ AWN
OWNER’S MANUAL/INSTALLATION INSTRUCTIONS
052843-003 (Std. / B. F. Model)
READ ENTIRE INSTRUCTIONS BEFORE BEGINNING
OPERATION. FOLLOW ALL CAUTIONS, WARNINGS
AND NOTES TO PREVENT INJURY OR DAMAGE TO
AWNING OR VEHICLE.
THIS MANUAL CONTAINS SECTIONS FOR:
SAFETY, INSTALLATION, OPERATION, CARE AND
MAINTENANCE AND WARRANTY.
SECTION 1: SAFETY INFORMATION
CAUTION: means a hazard that may cause minor or moderate
injury if the warning is ignored. It also may mean a hazard that will
cause damage to property.
CAUTION: THE COTTER PINS ARE HOLDING THE PRE-WOUND
TENSION ON THE ROLLER ASSEMBLY. CARE MUST BE TAKEN
TO PREVENT ANY DAMAGE OR INJURY WHEN REMOVING
THESE PINS.
CAUTION: TAKE CARE NOT TO SCRATCH CAMPER SKIN!
CAUTION: THE AWNING IS NOW UNDER FULL SPRING TENSION:
IF RELEASED FROM THIS POINT IT WILL ABRUPTLY ROLL UP TO
THE STORED POSITION POSSIBLY CAUSING PERSONAL INJURY
OR DAMAGE TO BOTH THE AWNING AND THE RV.
WARNING: SAFETY STRAP MUST BE PROPERLY FASTENED
BEFORE MOVEMENT OF VEHICLE! FAILURE TO DO THIS WILL
RESULT IN THE AWNING COMING LOOSE WHICH COULD CAUSE
SERIOUS DAMAGE AND OR PERSONAL INJURY!
SECTION II: INSTALLATION
Read the following specifications before beginning
installation.
• Verify that there is at least 3” of horizontal unobstructed
mounting space above the door.
• Decide where the arms will fit and not interfere with lights,
ladders, etc. TRUCKIN’ AWN ROLLER ASSEMBLIES
MEASURE FROM CENTER OF ARM TO CENTER OF ARM. I.E.
4’ AWNING HAS BRACKET CENTERS OF 4’ EVEN.
• Verify that there is at least 2” of space for the mounting of
each vertical arm.
1. INSTALLATION OF AWNING RAIL
A. Remove awning rail from package. Apply sealer (putty tape or
silicone) to the back surface of the rail.
B. Determine point (left to right) where awning will best cover the door
and still allow for the mounting of the bottom brackets and upper
brace.
C. Position rail at least 3” above top of door
and at the pre-determined left to right
location.
D. Place safety strap behind center of rail
as shown to the right. (Buckle must be
on top side)
NOTE: THE AWNING RAIL MUST BE INSTALLED WITH THE SLOT
POINT UP.
E. Attach rail to camper by drilling 1/8” holes into camper and fastening
with supplied #10 x 3/4” hex head scrwes. If there is no support
behind the skin then drill 7/32” holes and secure rail using the 3/16”
molly rivets. NOTE: IN SOME CASES IT MAY BE NECESSARY
TO ADD ADDITIONAL SUPPORT TO HOLD
F. THE AWNING RAIL!
2. HANGING OF TRUCKIN’ AWN
A. Attach each arm assembly to the roller assembly by inserting arm
extrusion into the end cap casting. Secure using #10 x 3/4” black
hex head screws.
B. Unwrap enough vinyl from roller assembly to allow for easy insertion
into awning rail.
C. Slide entire awning into awning rail and position in pre-determined
location over door.
D. Carefully remove cotter pins from end caps.
CAUTION: THE COTTER PINS ARE HOLDING THE PRE-WOUND
TENSION ON THE ROLLER ASSEMBLY. CARE MUST BE TAKEN
TO PREVENT ANY DAMAGE OR INJURY WHEN REMOVING PINS.
3. MOUNTING BOTTOM BRACKETS
A. Align the arms parallel with the door frame, or as vertical as possible.
(If the door frame does not
appear to be straight).
B. Place the top of the bottom
brackets 55” below the awning
rail slot. Mark the location of the
bottom bracket. Have the height
positioned such that the roller end
cap such that it is resting against
the protective rubber bumper.
C. Remove cap nut, star washer and bolt used
to attach the bottom bracket to the arm
channel.
D. Position the bracket at the previously
marked location.
Drill 7/32” holes and secure with 3/16”
molly rivets, or drill 1/8” holes and secure
bracket with #10 x 3/4” hex head screws.
E. Reattach the arm channel to the bottom
bracket using the bolt, cap nut and star washer previously removed.
4. INSTALLING UPPER BRACE
A. Open the awning to its full extension by pulling down on the pull
strap. DO NOT EXTEND AWNING UPWARD AT THIS TIME!
B. Lift one of the inner rafters out of the outer arm. Hold rafter up until
it is perpendicular with the camper. CAUTION: TAKE CARE NOT
TO SCRATCH CAMPER SKIN!
C. Mark the position where the bottom of the rafter comes in contact
with the camper. (This is near the slot that is cut into the rafter).
This is the location where you will position the bottom of the hook
portion of the brace hook.
D.
4. INSTALLING UPPER BRACE (cont.)
D. Drill 1/8” holes into the camper and secure brace hook with the #10 x
¾” Hex Head screws. If there is no support behind the skin then
drill 7/32” holes and secure with 3/16” molly rivets. Repeat with
opposite side.
NOTE: IN SOME CASES IT MAY BE NECESSARY TO ADD
ADDITIONAL SUPPORT FOR MOUNTING THE BRACE HOOK.
NOTE: BE SURE THAT THE BRACE HOOK IS POSITIONED
SUCH THAT THE BRACE WILL REMAIN PERPENDICULAR
WITH THE CAMPER.
5. SECURING CANOPY
A. Check to see that the arms are aligned
properly allowing the canopy to roll up
straight.
B. Drill two 3/32” holes through the awning
rail, polycord and canopy approximately
2” from each end of the canopy. Secure
canopy using a #6 x 3/8” phillips head
screw
in each hole.
SECTION III: OPERATING INSTRUCTIONS
1. TO EXTEND AWNING
A. Unhook center safety strap.
B. Grasp or hook the pull strap loop and unroll the awning.
C. While holding on to the pull strap, lift
one of the inner rafters up and out of
the arm channel. Place the slotted
end of the rafter over the brace hook
that is installed on the camper.
D. Repeat with opposite side.
E. Loosen black locking knob and extend awning upward to a height
where it will clear the door. Tighten black knob. NOTE: IF IT IS AT
ALL POSSIBLE, TRY AND KEEP A LITTLE BIT OF
DOWNWARD SLOPE FROM THE AWNING RAIL TO THE
ROLLER ASSEMBLY!
2. TO CLOSE AWNING
A. Loosen black locking knobs and lower arms down to stop bolts.
B. Grasp pull strap and pull slightly outward. At the same time, release
one of the rafters from the brace hook and store in the arm channel.
C. Keep a firm grasp on the pull strap and then release the opposite
rafter and store it in the arm channel.
CAUTION: THE AWNING IS NOW UNDER FULL SPRING
TENSION: IF RELEASED FROM THIS POINT IT WILL
ABRUPTLY ROLL UP TO THE STORED POSITION POSSIBLY
CAUSING PERSONAL INJURY OR DAMAGE TO BOTH THE
CAMPER AND THE AWNING!
D. Securely fasten center safety strap.
WARNING: SAFETY STRAP MUST BE PROPERLY FASTENED
BEFORE MOVEMENT OF VEHICLE! FAILURE TO DO THIS WILL
RESULT IN THE AWNING COMING LOOSE WHICH COULD CAUSE
SERIOUS DAMAGE AND OR PERSONAL INJURY!
SECTION IV: CARE AND MAINTENANCE
1. CARE OF FABRIC
Mildew will not form on the awning material itself, but may form on
the dust allowed to accumulate on the canopy. A quality vinyl
cleaner such as Carefree Awning Magic will keep your vinyl awning
looking like new. Follow instructions on container.
NOTE: ALLOW CANOPY TO DRY COMPLETELY
BEFORE ROLLING AWNING UP.
Metal surfaces should be cleaned with warm soapy solution and
thoroughly rinsed.
2. PERIODIC MAINTENANCE
Like any other part of the RV, an owner should periodically inspect
the awning. The following items should be checked.
1. All mounting screws are tight.
2. Check all pivot points for enlargements of holes or broken rivets.
3. Check that the awning rail is tight against coach and all screws are
tight.
4. Check canopy for loose stitching and possible shrinkage.
SECTION V: WARRANTY
Know your rights and responsibilities before operating this
product! Please read the “limited” warranty provisions below
carefully. Improper operation and maintenance, abuse, neglect,
etc., will void your warranty.
1. Duration: Two Year Limited Warranty. Two years parts, labor and
freight on all components.
2. Who gives this warranty?
Carefree of Colorado, A Scott Fetzer Company (the “Company”).
3. Who receives this warranty?
The original purchaser (the “Purchaser”), other than for purposes of
resale, of Carefree Truckin’ Awn. This warranty is not transferable.
4. Responsibilities of the Company under this warranty.
Repair or replace at Warrantor’s option, of the covered part(s)
which Warrantor, in the exercise of its reasonable discretion,
determines to be effective; provided that the Warrantor receives
notice of the defect within the stated warranty period for the
respective product/ component. Warrantor will also pay the
respective servicing dealer or agent for performing any repairs
authorized by Warrantor as per the terms of this warranty.
Company will allow for normal freight and labor charges - labor is
based on Flat Rate Form. CHARGES FOR TRAVEL TIME AND
MILEAGE ARE NOT COVERED BY THE WARRANTY.
5. Responsibilities of the Purchaser under this warranty.
A. Promptly notify seller, or alternately, the Company of any claim
hereunder.
B. Retain dated proof of purchase for specified product, and provide it as
requested.
C. Inspect the awning upon purchase to confirm the condition of the
canopy and the proper operation of the product.
D. Perform “Periodic Preventative Maintenance” as specified in
Owners Manual.
E. Deliver any product claimed or found defective during warranty
period to the nearest Carefree of Colorado Authorized Service
Dealer. The Original Purchaser is responsible for any expenses
related to delivery or pick up of product to/from the Service
Dealer. Visit carefreeofcolorado.com for the name of nearest
Authorized Service Dealer, or call Carefree a the phone number
shown above.
F. At the option the Company, return the product or part to Carefree
Colorado for inspection. Carefree Authorization to Return form
must be obtained before any product or part is returned.
G. Use reasonable care in maintenance, operation, use and storage of
the product in accordance with the instructions contained in the owner’s
manual.
6. What is covered by this warranty?
Defects on the manufacturer’s material and workmanship of product
under normal use, and which occur within the duration of the warranty
period. On all awnings, the following parts are covered only as follows:
(a) Fabrics, free from quality defects (normal wear and fading
are excluded); (b) Roller Tube, against extrusion defects; (c) Springs (or
Motor) Assembly(ies), against breakage; and (d) Hardware, against
extrusion defects.
7. What is not covered under this warranty?
A. Fabric damage such as pinholes or tears not reported within ten (10)
calendar days of purchase.
B. Improper installation and/or any damage or failure that results
from improper installation of the product, including fabric damage
caused by improper installation.
C. Product abuse and normal wear. ”Normal Wear” includes the
occasional need to re-tension the awning.
D. Conditions that are not related to the material or workmanship of the
product: including any failure that results from an accident, wind, rain,
water pooling, or other acts of God; purchaser’s abuse; neglect;
failure to operate, or use or maintain the product in accordance with the
instructions provided in the Owners Manual supplied with the
product; (failure to operate the product(s) in accordance with
instructions in the Owner’s Manual and on the product shall also
include the removal or alteration of any product component or device. In the
event of any such removal or alteration, this warranty is void).
E. Any component not sold or manufactured by the Company.
F. ANY INCIDENTAL, INDIRECT, OR CONSEQUENTIAL LOSS,
DAMAGE, OR EXPENSE THAT MAY RESULT FROM ANY
DEFECT, FAILURE, OR MALFUNCTION OF THE CAREFREE OF
COLORADO PRODUCT. Some states do not allow the exclusion or
limitation on incidental or consequential damages, so the above
limitation or exclusion may not apply to you.
G. Damage while traveling due to the awning not being properly stowed.
H. Any failure that results from the use of another product with a
Warrantor’s product that is not specifically approved by the
Warrantor.
8. When Warrantor will perform repair or replacement under
warranty.
A. Repair or replacement will be scheduled and performed according to
normal work flow at the nearest Authorized Service Dealer, and
depending on the availability of replacement parts.
B. If the Purchaser does not receive satisfactory results from the
Authorized Service Dealer, the Purchaser should contact the Carefree of
Colorado Customer Care Department.
THIS WARRANTY GIVES YOU SPECIFIC LEGAL RIGHTS AND YOU
MAY ALSO HAVE OTHER RIGHTS WHICH VARY FROM STATE TO
STATE. No action to enforce this warranty shall be commenced later than 30
days expiration of the warranty period. The duration of this Limited Warranty
also limits the duration of any implied warranty such as warranty of
merchantability or fitness for a particular use or purpose. Some states do not
allow such limitations so the implied warranty limitation may not apply to you.
Carefree of Colorado reserves the right to change the specifications and
design of any product without notice and with no obligation to make
corresponding changes to products previously manufactured.
A Scott Fetzer Company
2145 W. 6th Ave
Broomfield, CO 80020
(800) 622-3230
CAREFREEFABRICEXTENDEDPROTECTIONPLAN
PlanCoversFabricDamageDuetoWind&Rain!
Carefree Awnings use the best fabrics in the industry. No other brand can match Carefree’s heavy duty
vinyl and extra durable Weatherguard. But, the fact is, no part of the awning endures more abuse than the
canopy. That’s why no manufacturer can guarantee the fabric against wind and rain or other abuse.
Carefree’s outstanding TWO & FOUR YEAR Limited Awning Warranty on conventional patio awnings and
window awnings provides the best overall awning warranty protection in the industry! As the original
purchaser, you get 100% parts, labor and freight on material and workmanship defects for the first two
years of ownership on fabric; and 100% parts, labor and freight for the first four years of ownership on
materials and workmanship defects on springs (or motor and electronics), roller and hardware. Consult the
actual warranty for details, and you’ll feel really good about your Carefree purchase.
Plan Even Covers Fabric Damage Due to Wind and Rain for 5 Years from Purchase Date!
But we want to make you even more confident by giving you an opportunity to purchase an Extended
Protection Plan on the most vulnerable part of your awning, the canopy. Sign up below, here’s what you’ll
get:
•the Extended Warranty will expand the Two Year Limited Warranty coverage that comes with your
new Carefree Awning Fabric to also cover the fabric against wind, hail, rain and water
pooling. If it’s damaged, we’ll send you a new canopy FREE of charge. We’ll pay the freight on the
replacement fabric; you will still be responsible for any labor/installation charges.
•three additional years (for a total of five years from the date of purchase) of protection on the
awning FABRIC - same coverage, same conditions as above - 100% free canopy, we’ll pay the
freight, labor is not included.
Canopy replacement under the Fabric Extended Protection Plan is non-transferable and is limited to ONE
FREE CANOPY. To take advantage of the Fabric Extended Protection Plan offer, simply complete the
Extended Plan Registration Form below and mail it to Carefree with your check (payable to Carefree Fabric
Protection Plan) and dated proof of awning purchase. Your canceled check will be your receipt.
Extended Protection Offer Expires 45 Days
From Date of RV or Awning Purchase!
Product(s) Purchased Hardware Model #
& Production Code Roller
Serial # $US Fabric Ext.
Plan Cost
Vinyl Patio Awnings
Fiesta or Simplicity $69.95
Window Awnings Vinyl $19.95
Window Awning Vinyl $19.95
Truckin’ Awn $19.95
Note: Hardware Model # Production code found on the inside bottom of the front arm channel. Roller Serial # found on the
roll bar toward the front end of the awning and on the care instruction label on valance; on window awnings, also
found on sewn in side hem label!
Owners Name: Date RV/Product Purchased:
Address:
City: State: Zip:
Phone Number: E-Mail:
q Check totaling all purchased plans is enclosed! q Dated Proof of Purchase is Enclosed!
Send Check to: Carefree of Colorado; 2145 West 6th Avenue; Broomfield, CO 80020

Other Carefree of Colorado Automobile Accessories manuals

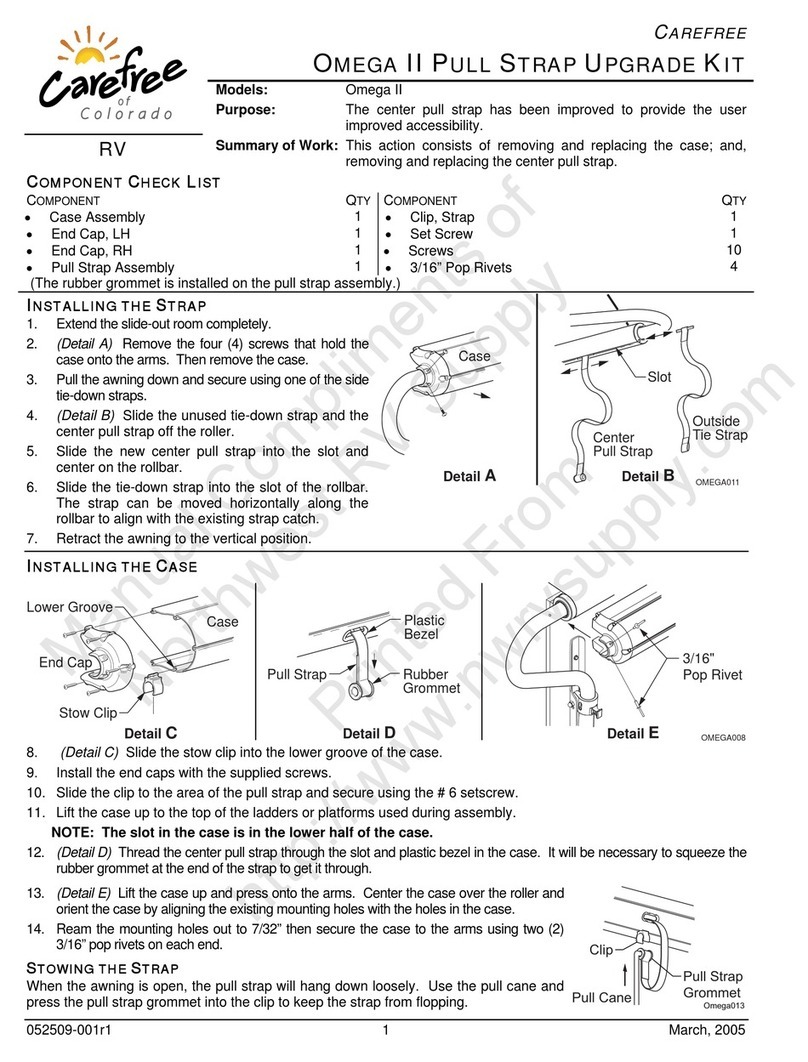
Carefree of Colorado OMEGA II User manual

Carefree of Colorado

Carefree of Colorado OMEGA II User manual

Carefree of Colorado 1628626972 User manual

Carefree of Colorado

Carefree of Colorado 1628626972 User manual

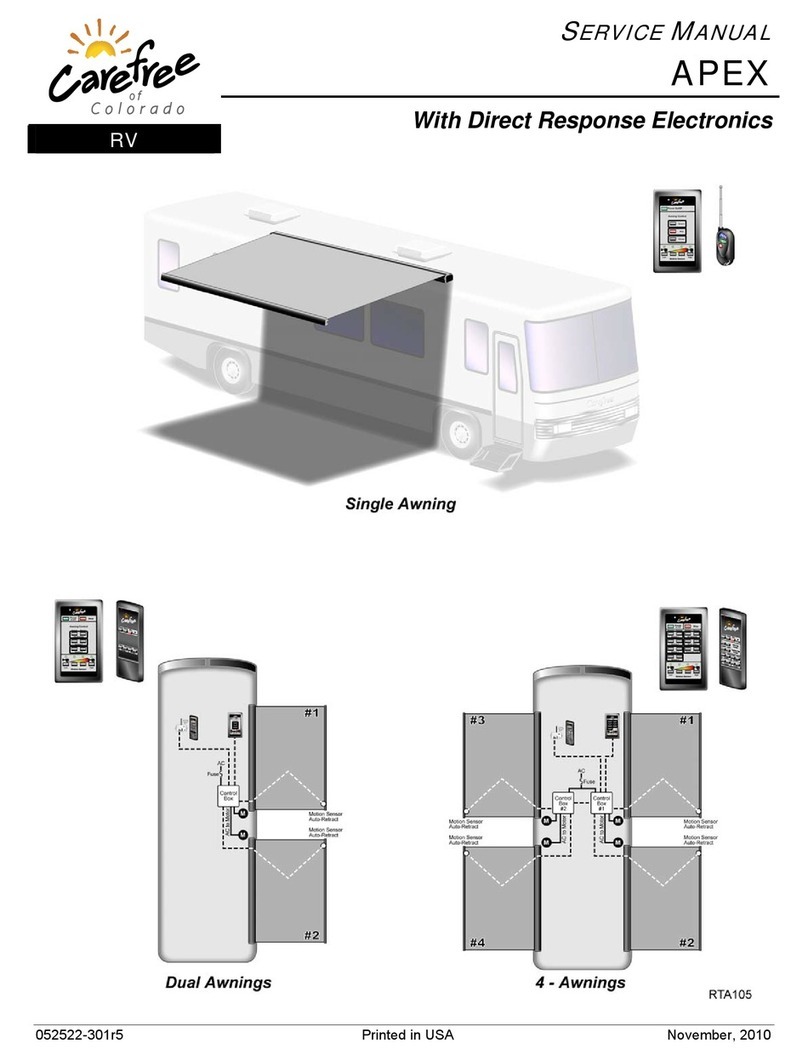
Carefree of Colorado APEX User manual

Carefree of Colorado

Carefree of Colorado APEX User manual

Carefree of Colorado APEX BLANK User manual

Carefree of Colorado

Carefree of Colorado APEX BLANK User manual

Carefree of Colorado APEX User manual

Carefree of Colorado

Carefree of Colorado APEX User manual

Popular Automobile Accessories manuals by other brands

Pyle PLCM34WIR instruction manual

Pyle

Pyle PLCM34WIR instruction manual

1UP USA Sportube Bracket 1 Series manual

1UP USA

1UP USA Sportube Bracket 1 Series manual

Mont Blanc BU1 + FK212 Fitting instructions

Mont Blanc

Mont Blanc BU1 + FK212 Fitting instructions

Quadratec 12057.0102 installation manual

Quadratec

Quadratec 12057.0102 installation manual

Racepak 280-SN-MAGPU installation instructions

Racepak

Racepak 280-SN-MAGPU installation instructions

Metra Electronics 107-TO7HG installation instructions

Metra Electronics

Metra Electronics 107-TO7HG installation instructions

Kuda-Phonebase 286300 Installation instruction

Kuda-Phonebase

Kuda-Phonebase 286300 Installation instruction

Winmate FM08 Product reference guide

Winmate

Winmate FM08 Product reference guide

Haldex EB+ Soft Docking installation guide

Haldex

Haldex EB+ Soft Docking installation guide

GE Smart Home user guide

GE

GE Smart Home user guide

Quadratec 12033.1000 Assembly & installation manual

Quadratec

Quadratec 12033.1000 Assembly & installation manual

VERIGA PRO COMPACT 9 instructions

VERIGA

VERIGA PRO COMPACT 9 instructions

Cruz 909-602 Assembly instructions

Cruz

Cruz 909-602 Assembly instructions

Kuda-Phonebase 291060 Installation instruction

Kuda-Phonebase

Kuda-Phonebase 291060 Installation instruction

Calix M5T 163 Assembly instructions

Calix

Calix M5T 163 Assembly instructions

Lippert Components Levelegs Installation operation & maintenance

Lippert Components

Lippert Components Levelegs Installation operation & maintenance

Mont Blanc Scott Fitting instructions

Mont Blanc

Mont Blanc Scott Fitting instructions

Audiovox MEDIABRIDGE Installation guide & user manual

Audiovox

Audiovox MEDIABRIDGE Installation guide & user manual

manuals.online logo
manuals.online logoBrands
  • About & Mission
  • Contact us
  • Privacy Policy
  • Terms and Conditions

Copyright 2025 Manuals.Online. All Rights Reserved.