manuals.online logo
Brands
  1. Home
  2. •
  3. Brands
  4. •
  5. Carel
  6. •
  7. Humidifier
  8. •
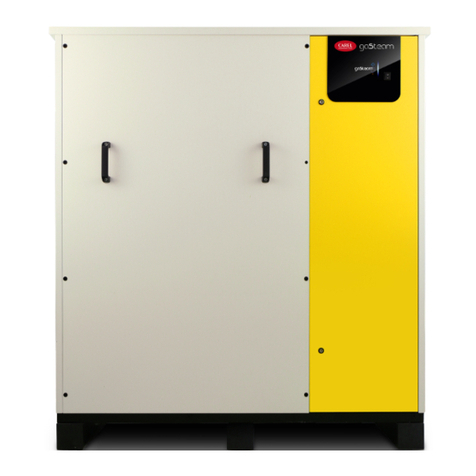
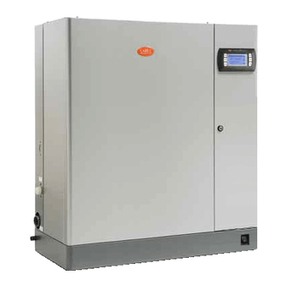
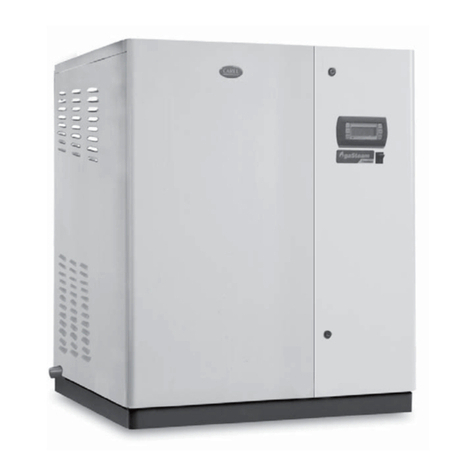
  9. Carel compactSteam User manual

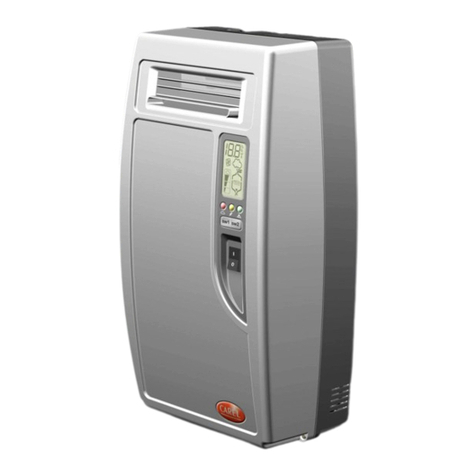
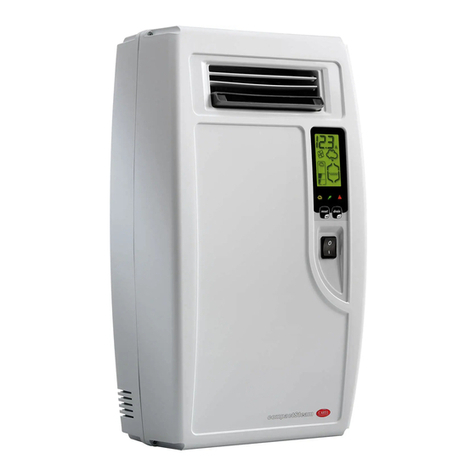
Carel compactSteam User manual

NO
C
NC
ALARMEXT FAN
N2
GND
N1
AB
AB
GND
IN
C
NO
GND
24V
5 G0
6 G
7 AOUT
8 G0
9 NTCE
10 DIN
1
2
compactSteam
clima
set point
(SPH)
Differential
(dFH)
10 V
0 V %rH
Convention
“set point” indicates the level of humidity to be achieved.
General features
The compactSteam and clima kit lets you automatically regulate room humidity. The humidity gauge turns the
humidifier on/off based on two periods (DAY and NIGHT) and regulates humidifying in two different ways:
proportional regulation (default): The control algorithm works as shown in Fig. 2 diagram where humidity•
request is at maximum (10 V on output on terminal 7 AOUT in fig. 1) until the “set point – differential” range
threshold is reached. After this threshold is reached, the clima output signal gradually lowers within the set
differential to 0 V when the set point is reached;
ON/OFF regulation: The control algorithm works as shown in Fig. 4 diagram where the humidity request is•
turned on (the relay closes contacts 1 and 2 in fig. 3) when humidity is under the “set point – differential” range
and is turned off (the relay opens contacts 1 and 2 in fig. 3) when the set point is reached.
Set point and differential are set on the Clima humidity gauge to define the relative humidity operating range.
Factory settings
Clima ADCD000110: Humidity gauge with proportional humidity regulation, in winter mode (humidify), with
dip-switch SW1=ON, SW2=OFF, SW3=OFF, SW4=ON. Humidity set point 50%rH, differential 5.
compactSteam CH******H*: Humidifier, set to be controlled by an external proportional regulator 0 to 10 V
(parameter P1=1).
Installation
install the two devices following the instructions in the respective installation manuals;•
leave the front panels open: connection terminals in both devices must be visible;•
turn off the two devices;•
prepare the supplied wire.•
Note:
wire is not long enough to cover the distance between the devices, use 10 m with minimum
0.5 mm2section wires.
Connections between clima and compactSteam for proportional regulation
(DEFAULT)
The two devices are already set for proportional humidity regulation. Proceed as follows to connect:
connect the two devices with the supplied wire as shown in Fig. 1 diagram;1.
continue following the instructions in paragraph “Programming operations”.2.
Connections between clima and compactSteam for ON/OFF regulation
To change the default setting, it is necessary to set compactSteam for ON/OFF regulation:
1. Turn compactSteam off.
2. Turn compactSteam on again, while holding the two buttons, “reset/sel” and “drain”, until the display
shows“00” and the spanner symbol flashes; then release the two buttons.
3. Then hold the “reset/sel” button to scroll the numeric parameters on the display. Hold “reset/sel” for a few
seconds until the display shows “02”.
WARNING: If the display shows a value higher than “02” do not confirm, but rather press “reset/sel” until the
display returns to normal operating mode and start again from point 1.
4. Press the “drain” button for at least 1 second to confirm the value: the display will show “P1” for 1 second and
then the value of parameter P1 currently set will be displayed alongside.
5. Pressing “reset/sel” switches the value of P1 between “0” and “1”: 0 = humidistat; 1 = external 0 to 10 V
modulating signal
6. Press the “drain” button for at least 1 second to confirm the new value of parameter P1 and return to normal
operating mode.
7. Turn compactSteam off: now clima can be connected, following the diagramm in Fig. 3 using shielded cables
with a minimum cross-section of 0.5 mm² (not included).
Note: If no selection is made within 3 s, the software automatically returns to normal operating mode.
clima programming operations
Regardless of the type of connection, it is necessary to turn on the clima and define the following:
desired humidity (set point);•
differential;•
periods (to turn regulation on/off during certain hours of the day);•
turn on Clima:•appears on the display.
Note
If the humidity value is lower than set point less the differential, also appears on the display.
CH (compactSteam) ADCD000110 (clima) - Регулирование влажности / Controlled humidity regulation
Fig. 2
Fig. 1
CHF CH0
CLIMA
Терминология
“Уставка” означает требуемый уровень влажности
Описание
Увлажнитель compactSteam и гигростат Clima позволяют автоматически регулировать уровень влажности
в помещении. Гигростат включает и выключает увлажнитель в зависимости от времени суток DAY (день)
или NIGHT(ночь) и регулирует процесс увлажнения одним из 2 способов:
- пропорциональный режим (по умолчанию): Алгоритм управления представлен на рис. 2 , где запрос на
максимальную выработку пара соответствует выходному сигналу 10 В на контакте «7 AOUT», пока
влажность в помещении не достигнет порога “уставка – дифференциал”. По достижении данного порога
влажности выходной сигнал на гигростате clima постепенно снижается до 0 В в точке уставки;
- режим ON/OFF (ВКЛ/ВЫКЛ): Алгоритм управления представлен на рис. 4. Сигнал на выработку пара
подается (замыкание контактов реле 1 и 2 на рис.3), когда влажность опускается до порога “ уставка –
дифференциал ” и отключается (размыкание контактов реле 1 и 2 на рис.3) по достижении уставки.
Уставка и дифференциал задаются на панели управления гигростата Clima.
Заводские уставки
Гигростат Clima ADCD000110: пропорциональный режим управления влажностью в зимний период,
положение dip-переключателей SW1=ON, SW2=OFF, SW3=OFF, SW4=ON. Уставка влажности 50%rH,
дифференциал 5.
Увлажнитель compactSteam CHF*****H*: параметр P1=1, что соответствует управлению от внешнего
пропорционально сигнала от 0 до 10 В.
Монтаж
- Установите увлажнитель и гигростат в соответствии с прилагаемыми к ним инструкциями;
- Оставьте передние панели снятыми, чтобы были доступны контактные колодки обоих устройств;
- Убедитесь, что оба прибора выключены;
- Подготовьте прилагаемый 3-жильный провод.
Примечание
Если 3 метров провода недостаточно, можно воспользоваться проводом до 10 м с сечением каждой
жилы не менее 0,5 мм2.
Подключение гигростата clima кувлажнителю compactSteam для
пропорционального управления (по умолчанию)
Оба устройства настроены на работу впропорциональном режиме. Последовательность действий:
1. Соедините оба устройства прилагаемым проводом как показано на рис. 1;
2. Перейдите кпараграфу “Программирование гигростата Clima”.:
Подключение гигростата clima кувлажнителю compactSteam для управления врежиме
ON/OFF (ВКЛ/ВЫКЛ)
Увлажнитель compactSteam необходимо перевести врежим управления ON/OFF:
1. Выключите compactSteam
2. Удерживая кнопки «reset/sel» и«drain» одновременно, включите увлажнитель
compactSteam: на экране появится величина «00» исимвол "КЛЮЧ" ;Отпустите обе кнопки;
3. Нажмите кнопку reset/sel идержите пока на экране не появится величина «02» (настройка
параметра P1); Если проскочите мимо, нажмите "reset/sel”, чтобы вернуться внормальный
рабочий режим ивернитесь кп.1
4. Нажмите кнопку "drain" втечение 1сек, на экране высветится текущая величина параметра
P1 =01 (пропорциональный режим);
5. Нажмите кнопку «reset/sel»: на экране высветится 00 (режим ON/OFF);
6. Нажмите кнопку «drain» для подтверждения настроек;
7. Выключите увлажнитель compactSteam; Соедините оба устройства используя
экранированный провод сечением не менее 0,5 мм2,как показано на рис. 3;
Прим.: Если не производить каких-либо действий, через 3 сек происходит возврат в нормальный
режим работы.
Программирование гигростата Clima
Независимо от режима управления необходимо задать следующие параметры:
- Требуемая влажность (уставка);
- Дифференциал;
- Периоды включения/выключения увлажнителя в течение суток;
- Включение гигростата Clima: на экране появится символ
Примечание
Если влажность в помещении ниже порога «уставка-дифференциал», на экране появится символ
Пропорциональное управление - соединения
Connection for proportional humidity regulation
Пропорциональное управление / Proportional humidity regulation
Disposal of the product
The appliance (or the product) must be disposed of separately in accordance with the local waste
disposal legislation in force.
LEA Y GUARDE
ESTAS INSTRUCCIONES
READ AND SAVE
THESE INSTRUCTIONS
NO
C
NC
ALARMEXT FAN
N2
GND
N1
AB
AB
GND
IN
C
NO
GND
24V
5 G0
6 G
7 AOUT
8 G0
9 NTCE
10 DIN
1
2
compactSteam
clima
set point
(SP H)
Differential
(dFH)
%rH
1
2
3
Setting the set point
press either•or : the set point [2] blinks;
to set, press either•or 
to confirm, press•
PRG
.
Setting the differential to start humidity regulation/modulation
to enter programming mode, press and hold down SET for at least 5 s;•
scroll parameters using•and until the dFH [2] parameter appears;
press SET: the currently set value appears [1];•
to change the differential value, press•or ;
press SET;•
to exit programming mode, press•
PRG
.
Regulation mode
Once on compactSteam is be turned, with the start key is posibile to enable/disable the humidity regulation using
clima in three modes and in two periods:
regulation always on (default, parameter SFH= 0);•
regulation on in DAY mode (parameter SFH= 1);•
regulation on in NIGHT mode (parameter SFH= 2).•
It is possible to connect to compactsteam a remote management contact. For the installation, refrer to compact-
steam user manual.
Operating mode
To enter programming mode, press and hold down1. SET for at least 5 s;
Scroll parameters using2. and until the SFH parameter appears;
Press3. SET: the currently set value appears;
Press to4. or set the value to:
0: Humidity regulation always on, periods are ignored;•
1: Regulation on in DAY mode;•
2: Regulation on in NIGHT mode;•
Press5. SET;
Press6.
PRG
.
How to set DAY/NIGHT periods
Humidity regulation can be set in defined time intervals using this mode. Clima lets you set a DAY and NIGHT
period. First set the starting time for the two intervals and then indicated whether humidity regulation should be
turned on or off in one or the other periods.
Clock settings
press1.
PRG
: the hour and RTC parameter appear;
press SET: minutes appear;2.
press to3. or set the current time;
press SET;4.
press5.
PRG
.
Setting DAY time interval
press1.
PRG
: the hour and RTC parameter appear;
press2. and until the DAY parameter appears;
press SET: minutes appear;3.
press4. and to increase/decrease the DAY period start time;
press SET;5.
press6.
PRG
.
Setting NIGHT time interval
press1.
PRG
: the hour and RTC parameter appear;
press2. and until the n9T parameter appears;
Press SET: minutes appear;3.
press4. and to increase/decrease the NIGHT period start time;
press SET;5.
press6.
PRG
.
Fig. 3
Fig. 4
Fig. 5
Display
IMPORTANT WARNINGS
The CAREL product is a state-of-the-art product, whose operation is
specified in the technical documentation supplied with the product or
can be downloaded, even prior to purchase, from the website
www.carel.com.
The client (builder, developer or installer of the final equipment)
assumes every responsibility and risk relating to the phase of
configuration the product in order to reach the expected results in
relation to the specific final installation and/or equipment. The lack of
such phase of study, which is requested/indicated in the user manual,
can cause the final product to malfunction of which CAREL can not be
held responsible.
The final client must use the product only in the manner described in
the documentation related to the product itself.
The liability of CAREL in relation to its own product is regulated by
CAREL’s general contract conditions edited on the website www.carel.
com and/or by specific agreements with clients.
Управление ВКЛ/ВЫКЛ/ ON/OFF humidity regulation
Режим ВКЛ/ВЫКЛ - соединения
Connections for ON/OFF humidity regulation
Символы на экране
1. Большие цифры: фактическая влажность или
величина программируемого параметра;
2. Малые цифры: уставка влажности или имя
программируемого параметра;
3. Индикация включенного увлажнителя (режим работы
или ожидания).
Legenda:
1. large field: % humidity measured or parameter settings while
programming;
2. small field: set point value or parameter name while programming;
3. winter mode indication with regulation ON.
Изменение уставки
Нажмите кнопку ▲или ▼: замигает уставка [поз.2, рис.5];
Чтобы изменить величину, нажмите ▲или ▼;
Чтобы подтвердить, нажмите кнопку PRG
Изменение дифференциала для плавного управления процессом увлажнения
Чтобы войти в режим программирования, нажмите и удерживайте кнопку SET в течение
5 сек;
С помощью кнопок ▲и▼перейдите к параметру dFH [поз.2, рис.5];
Нажмите кнопку SET: на экране появится текущее значение дифференциала [поз.1, рис.5];
С помощью кнопок ▲и▼установите новое значение;
Нажмите кнопку SET;
Чтобы выйти из режима программирования , нажмите кнопку PRG
Запуск
После включения увлажнителя, с помощью гиростата clima можно задать 3 режима работы:
Постоянное управление влажностью (параметр SFH= 0 – выставлен по умолчанию);
Управление влажностью в дневное время DAY (параметр SFH= 1);
Управление влажностью в ночное время NIGHT (параметр SFH= 2).
Увлажнитель compactSteam можно включить непосредственно на панели управления
увлажнителя или дистанционно через контакты AB-AB (см. инструкцию на увлажнитель
compactSteam).
Как задать режим работы
1. Чтобы войти в режим программирования, нажмите и удерживайте кнопку SET в течение 5 сек;
2. С помощью кнопок ▲и▼перейдите к параметру SFH;
3. Нажмите кнопку SET: на экране появится текущее значение параметра;
4. С помощью кнопок ▲и▼установите новое значение :
0: постоянное управление влажностью, периоды переключения игнорируются;
1: управление влажностью в дневное время DAY;
2: управление влажностью в ночное время NIGHT;
5. Нажмите кнопку SET;
6. Чтобы выйти из режима программирования , нажмите кнопку PRG
Как задать дневной и ночной режимы DAY/NIGHT
Сначала необходимо задать время переключения с одного режима на другой, а потом -
указать включение или выключение режима увлажнения в тот или иной период.
Как задать текущее время
1. Нажмите кнопку PRG : на экране появятся часы и параметр rTC;
2. Нажмите кнопку SET: на экране появятся минуты;
3. С помощью кнопок ▲и▼установите текущее время;
4. Нажмите кнопку SET;
5. Нажмите кнопку PRG
Как задать интервал дневного режима DAY
1. Нажмите кнопку PRG: на экране появятся часы и параметр rTC;
2. С помощью кнопок ▲и▼перейдите к параметру dAY;
3. Нажмите кнопку SET: на экране появятся минуты;
4. С помощью кнопок ▲и▼установите время начала дневного периода;
5. Нажмите кнопку SET;
6. Нажмите кнопку PRG
Как задать интервал ночного режима NIGHT
1. Нажмите кнопку PRG : на экране появятся часы и параметр rTC;
2. С помощью кнопок ▲и▼перейдите к параметру n9T;
3. Нажмите кнопку SET: на экране появятся минуты;
4. С помощью кнопок ▲и▼установите время начала ночного периода;
5. Нажмите кнопку SET;
6. Нажмите кнопку PRG
relé cerrado
realy closed
relé abierto
realy open

Other manuals for compactSteam

6

This manual suits for next models

5

Other Carel Humidifier manuals

Carel humiSonic User manual

Carel

Carel humiSonic User manual

Carel SD Instruction Manual

Carel

Carel SD Instruction Manual

Carel humiSteam Basic User manual

Carel

Carel humiSteam Basic User manual

Carel humiDisk User manual

Carel

Carel humiDisk User manual

Carel humiDisk User manual

Carel

Carel humiDisk User manual

Carel compactSteam User manual

Carel

Carel compactSteam User manual

Carel humiDisk 65 User manual

Carel

Carel humiDisk 65 User manual

Carel heaterSteam User manual

Carel

Carel heaterSteam User manual

Carel HUMISONIC HSU00FC000 User manual

Carel

Carel HUMISONIC HSU00FC000 User manual

Carel ultimateSAM User manual

Carel

Carel ultimateSAM User manual

Carel humiSteam Basic User manual

Carel

Carel humiSteam Basic User manual

Carel humiFog Multizone User manual

Carel

Carel humiFog Multizone User manual

Carel humiSteam Wellness User manual

Carel

Carel humiSteam Wellness User manual

Carel gaSteam-UG User manual

Carel

Carel gaSteam-UG User manual

Carel humiSteam UE Series User manual

Carel

Carel humiSteam UE Series User manual

Carel humiSonic User manual

Carel

Carel humiSonic User manual

Carel humiSonic Compact User manual

Carel

Carel humiSonic Compact User manual

Carel ultimateSAM User manual

Carel

Carel ultimateSAM User manual

Carel MC Instruction manual

Carel

Carel MC Instruction manual

Carel compactSteam CH002V1000 User manual

Carel

Carel compactSteam CH002V1000 User manual

Carel humiFog direct User manual

Carel

Carel humiFog direct User manual

Carel gaSteam 45 User manual

Carel

Carel gaSteam 45 User manual

Carel heaterSteam User manual

Carel

Carel heaterSteam User manual

Carel humiSteam Basic Series User manual

Carel

Carel humiSteam Basic Series User manual

Popular Humidifier manuals by other brands

Be Cool BCLB20601 manual

Be Cool

Be Cool BCLB20601 manual

Lanaform Hello Kitty instruction manual

Lanaform

Lanaform Hello Kitty instruction manual

MoistAir MA12010 owner's manual

MoistAir

MoistAir MA12010 owner's manual

Habitat 40-687-000 instruction manual

Habitat

Habitat 40-687-000 instruction manual

Comodita RAINBOW AIR 3IN1 S manual

Comodita

Comodita RAINBOW AIR 3IN1 S manual

Spector&Co SPECFIT HW102 user manual

Spector&Co

Spector&Co SPECFIT HW102 user manual

Honeywell TrueSTEAM owner's manual

Honeywell

Honeywell TrueSTEAM owner's manual

ALPATEC HU 25 E user manual

ALPATEC

ALPATEC HU 25 E user manual

easywell EW-030HDA Operation manual

easywell

easywell EW-030HDA Operation manual

Bionaire BWM5850DN-CN Instruction leaflet

Bionaire

Bionaire BWM5850DN-CN Instruction leaflet

anko HF1209-SA user manual

anko

anko HF1209-SA user manual

Brune B 125 Instructions for use

Brune

Brune B 125 Instructions for use

Bionaire COOL MIST BCM5521 Instruction leaflet

Bionaire

Bionaire COOL MIST BCM5521 Instruction leaflet

CARNES HBGH Installation, operation and maintenance manual

CARNES

CARNES HBGH Installation, operation and maintenance manual

Air Oasis Cool Mist owner's manual

Air Oasis

Air Oasis Cool Mist owner's manual

Venta Airwasher LW 14 user manual

Venta Airwasher

Venta Airwasher LW 14 user manual

Rowenta DH4224F0 Safety instructions

Rowenta

Rowenta DH4224F0 Safety instructions

Honeywell TrueSTEAM HM506 installation guide

Honeywell

Honeywell TrueSTEAM HM506 installation guide

manuals.online logo
manuals.online logoBrands
  • About & Mission
  • Contact us
  • Privacy Policy
  • Terms and Conditions

Copyright 2025 Manuals.Online. All Rights Reserved.