Caremart Litetravel User manual

CAREMART
CAREMART
CAREMART
CAREMART
CAREMART
CAREMART
User Manual
Caremart Litetravel

~ 1 ~
© 2013 VAN OS MEDICAL UK Ltd., Excel House, Escrick Business Park,
Escrick, York,YO19 6FD -
Tel. +44-(0)1904-720170, Fax +44-(0)1904-720398,
E-mail: sales@vanosmedical.com,
www.vanosmedical.cominfo@vanosmedical.nl, www.vanosmedical.com
YOU AND/OR YOUR ATTENDANT MUST READ AND FULLY UNDERSTAND
THIS MANUAL BEFORE USE.
General Information
You have just purchased a rollator from Van Os Medical UK Ltd. We want to thank
you for your confidence in our Caremart products. The rollator is a quality product.
The policy of Van Os Medical UK Ltd. is to continuously improve the quality and
reliability of our products. We reserve the right, therefore, without proper
notification, to alter this guide.
It is important that you read this manual carefully. The manual contains important
information on the safe use and maintenance of your manual rollator. We
recommend that you keep this manual, it is also your proof of warranty and it can
come in useful later.
The safety instructions in this guide are general guidelines that should be seen as
broad guidelines.
Your new rollator requires frequent maintenance much of which you can do yourself.
We want you to take your rollator once a year to be inspected by an expert.
Caution!
In this guide you will find informative notes and warnings. These are clearly
identified by the symbols and the appearance of the text.
Tip
Information.
Warning:
To avoid personal injury, follow the instructions.

~ 2 ~
© 2013 VAN OS MEDICAL UK Ltd., Excel House, Escrick Business Park,
Escrick, York,YO19 6FD -
Tel. +44-(0)1904-720170, Fax +44-(0)1904-720398,
E-mail: sales@vanosmedical.com,
www.vanosmedical.cominfo@vanosmedical.nl, www.vanosmedical.com
Enter the information from your authorized dealer:
Company : …………………………………………………………………
Address: …………………………………………………………………
…………………………………………………………………
Telephone number: …………………………………………………………………
Fax number: …………………………………………………………………
E-mail address: …………………………………………………………………
Website: …………………………………………………………………

~ 3 ~
© 2013 VAN OS MEDICAL UK Ltd., Excel House, Escrick Business Park,
Escrick, York,YO19 6FD -
Tel. +44-(0)1904-720170, Fax +44-(0)1904-720398,
E-mail: sales@vanosmedical.com,
www.vanosmedical.cominfo@vanosmedical.nl, www.vanosmedical.com
1INDENTIFICATION ................................................................................................................4
2GENERAL EXPLANATION OF YOUR ROLLATOR...............................................................5
2.1 COMPONENTS OF THE ROLLATOR .................................................................................................5
ONDERDELEN VAN DE ROLLATOR .......................................................................................................5
2.2 GENERAL EXPLANATION OF THE FUNCTION AND POSSIBILITIES OF YOUR ROLLATOR ...................................5
3SAFFETY REGULATIONS ......................................................................................................6
3.1 GENERAL SAFETY......................................................................................................................6
3.2 WARNINGS FOR SAFE USE ..........................................................................................................6
4USER INSTRUCTIONS ..........................................................................................................7
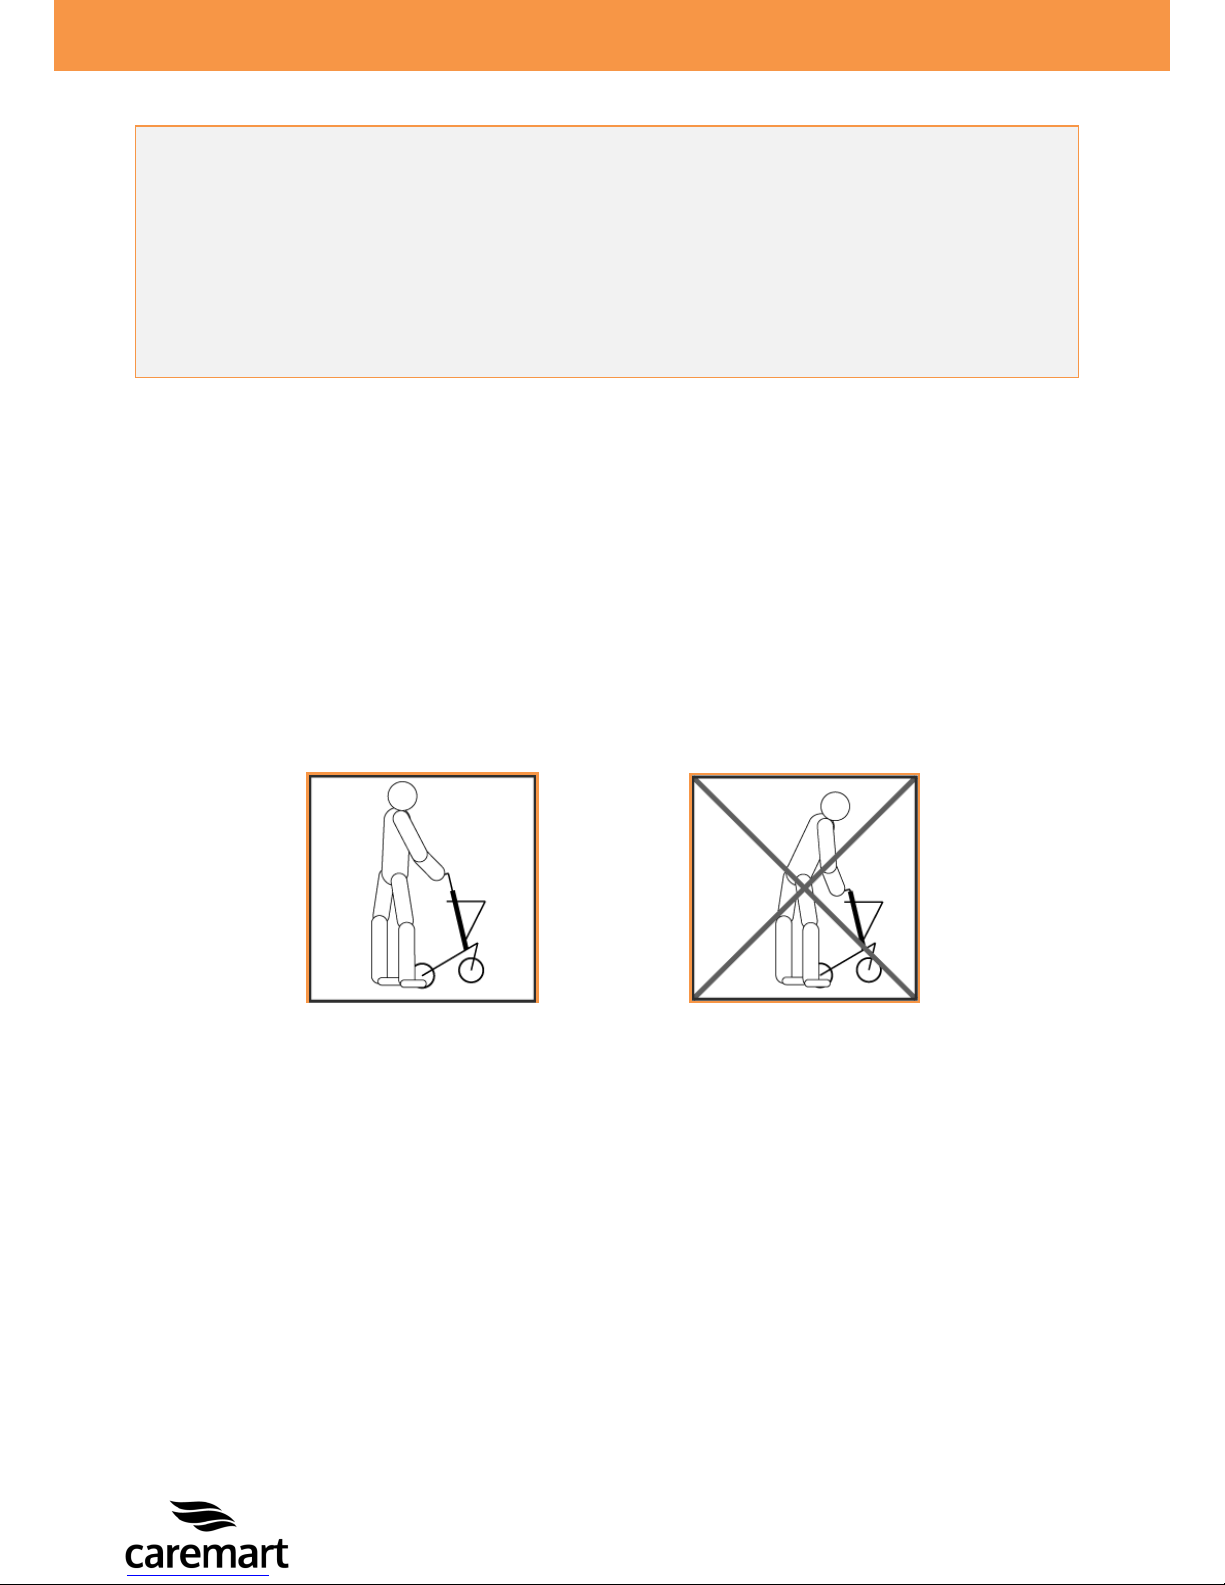
4.1 WALKING WITH YOUR ROLLATOR .................................................................................................7
4.2CONFRONTING PAVEMENTS AND UNEQUAL SURFACES .......................................................................8
5 INSTRUCTIONS FOR USE AND MOUNTING OPTIONS ....................................................9
5.1 TECHNICAL INFORMATION ..........................................................................................................9
5.2 UNFOLDING AND FOLDING THE ROLLATOR ....................................................................................10
5.3 BRAKES................................................................................................................................11
5.4 SEATING ..............................................................................................................................12
5.5 SETTING THE HEIGHT OF THE PUSH HANDELS .................................................................................12
5.6 REMOVING AND REPLACING THE FRONT CASTOR ............................................................................13
5.7 PLACING AND REMOVING THE SHOPPING BAG ...............................................................................14
5.8 USING THE STEPPER ................................................................................................................15
5.9 TIGHTEN YOUR CRUTCH ...........................................................................................................15
6 TRANSPORTING YOUR ROLLATOR..................................................................................16
7 MAINTAINANCE..................................................................................................................16
8 PROBLEM ANALYSIS AND SOLUTIONS ..........................................................................17
9WARRANTY .........................................................................................................................18
9.1 WARRANTY APPLICATION .........................................................................................................18
9.2 WARRANTY DEFINITION ...........................................................................................................18
10 GENERAL MAINTENANCE INSTRUCTIONS .....................................................................19

~ 4 ~
© 2013 VAN OS MEDICAL UK Ltd., Excel House, Escrick Business Park,
Escrick, York,YO19 6FD -
Tel. +44-(0)1904-720170, Fax +44-(0)1904-720398,
E-mail: sales@vanosmedical.com,
www.vanosmedical.cominfo@vanosmedical.nl, www.vanosmedical.com
6
7
1 INDENTIFICATION
Your Caremart Litetravel rollator is equipped with a unique serial number. You can
find this number on the frame of your rollator. Below is an example of the frame
label on which you can find the identification number. Furthermore you will find the
explanation of the various data stored on the frame label listed below.
1. Model name The model name from your rollator.
2. Definition Description of the design of your scooter.
3. Warranty This is the warranty period. Chapter 9 describes
your warranty terms and conditions in more
detail.
4. Serial number The unique serial number. You will need this
number when making technical requests or if
warranty parts are required.
5. Maximum weight The largest occupant weight allowed for your
rollator.
6. Production date Production date of your rollator.
7. Type number This number indicates what type of rollator you
have, again this is always required when making
technical calls.
6
4
4
1
2
3
7
5

~ 5 ~
© 2013 VAN OS MEDICAL UK Ltd., Excel House, Escrick Business Park,
Escrick, York,YO19 6FD -
Tel. +44-(0)1904-720170, Fax +44-(0)1904-720398,
E-mail: sales@vanosmedical.com,
www.vanosmedical.cominfo@vanosmedical.nl, www.vanosmedical.com
17
2 GENERAL EXPLANATION OF YOUR ROLLATOR
2.1 Components of the rollator
Onderdelen van de rollator
1
Push handle
8
Backrest
2
Brake lever
9
Brake cable
3
Seat
10
Shopping bag
4
Star knob for adjusting the
height of the push handle
11
Cross frame
5
Side frame
12
Push button for removing
front castor
6
Rear wheel
13
Front castor
7
Front fork
Your rollator is equipped with a number of elements and parts. You should know
these before continue reading this manual. Designs and specifications may change
without prior notice.
2.2 General explanation of the function and possibilities of your rollator
The rollator is designed for indoor and outdoor use. The rollator is equipped with
multifunction brakes and stable wheels which roll easily. The rollator is especially
developed so that it can be adjusted to every individual user. Your rollator is a
medical equipment product and is not a standard consumer product. You must follow
this manual completely to ensure good, optimal and safe use of your rollator
10
12
13
9
1
2
3
4
5
6
7
8
11

~ 6 ~
© 2013 VAN OS MEDICAL UK Ltd., Excel House, Escrick Business Park,
Escrick, York,YO19 6FD -
Tel. +44-(0)1904-720170, Fax +44-(0)1904-720398,
E-mail: sales@vanosmedical.com,
www.vanosmedical.cominfo@vanosmedical.nl, www.vanosmedical.com
3 SAFFETY REGULATIONS
Van Os Medical UK Ltd. specifically disclaims responsibility for any body injury or
property damage which may occur during any use which does not comply with laws or
ordinances. The Caremarte Litetravel is if the instructions for use as described in this
manual are followed you will have a highly secure and stable product. It is however
possible that, when the Caremart Litetravel is not used properly, dangerous
situations may occur.
3.1 General safety
Protect your Caremart Litetravel rollator by checking it regularly. When a part of
your rollator is not functioning properly, a dangerous situation could occur.
Warning:
You must keep your rollator in a good state to guarantee safe use.
3.2 Warnings for safe use
Warnings:
Avoid using your rollator on roads. Use pavements if possible;
Do not use your rollator in sand, rough area, wet and slippery surfaces or
surfaces with little grip;
Do not drive into curbs;
Never attach anything to the wheels;
Engage the parking brakes when you are in or on a lift and when you want to
get off;
The maximum weight capacity has been indicated on your frame label;
Unauthorized modification and or use of parts not supplied byVan Os Medical
UK ltd. will invalidate the warranty and may lead to injury to the user and or
damage to the rollator;
Do not push the rollator to far in front of you, this can cause falls and incorrect
postures;
Before using your rollator, always check if the brakes are working perfectly;
When unfolding the rollator, check if the folding mechanism is locked into
place;
Use the parking brake if you are stopping or parking;
Make sure that your rollator is adjusted to the correct height to avoid incorrect
positions and falls;
When folding and unfolding the rollator be aware that you do not get stuck
with clothing or body parts between moving parts. This may cause injury;
Engage the parking brakes when you are in or on a lift and when you want to
get off;
Do not use the rollator for transporting people or heavy loads;

~ 7 ~
© 2013 VAN OS MEDICAL UK Ltd., Excel House, Escrick Business Park,
Escrick, York,YO19 6FD -
Tel. +44-(0)1904-720170, Fax +44-(0)1904-720398,
E-mail: sales@vanosmedical.com,
www.vanosmedical.cominfo@vanosmedical.nl, www.vanosmedical.com
Do not let children play with your rollator;
The rollator is not intended to be self-propelled while seated;
All wheels must be in contact with the floor at all times during use. This will
ensure the rollator is properly balanced;
Should you need to wash the tray of your rollator, you can wash it in a
dishwasher at 40◦ MAX;
The parking brakes must be engaged before using the seat;
Do not use your rollator when it is damaged or has any malfunction.
4 USER INSTRUCTIONS
This rollator is designed for people with reduced walking distance, with balance
disturbances or other disabilities which prevent people to have a normal standing
posture. The use of the rollator will help people improve their mobility.
4.1 Walking with your rollator
When you are walking with your rollator make sure that you walk fully upright, with
the rollator near your body, see figure 1. This is for the best support and the safest
movements. If you follow this order for movement with your rollator you will have
the correct body position.
Figure 1

~ 8 ~
© 2013 VAN OS MEDICAL UK Ltd., Excel House, Escrick Business Park,
Escrick, York,YO19 6FD -
Tel. +44-(0)1904-720170, Fax +44-(0)1904-720398,
E-mail: sales@vanosmedical.com,
www.vanosmedical.cominfo@vanosmedical.nl, www.vanosmedical.com
4.2 Confronting pavements and unequal surfaces
Going up the pavement:
When you want to go up a pavement you should do this in the following manner;
Step with your foot on the stepper, see paragraph 5.8, to tip up the front castors;
Push your rollator forwards;
When the front castors are above the pavement you can let the rollator down;
Now you can push the rollator forwards and place the rear wheels on the
pavement.
Going down the pavement:
Step with your foot on the stepper to tip up the front castors;
Carefully roll the rollator forwards;
When the front castors are off the pavement you can let the rollator down;
Now you can push the rollator forwards and place the rear wheels back onto the
ground.
Warning:
Do not drive into curbs!
Inspect the slope always for risks, such as holes or slippery and uneven
surfaces before you walk further.
Drive

~ 9 ~
© 2013 VAN OS MEDICAL UK Ltd., Excel House, Escrick Business Park,
Escrick, York,YO19 6FD -
Tel. +44-(0)1904-720170, Fax +44-(0)1904-720398,
E-mail: sales@vanosmedical.com,
www.vanosmedical.cominfo@vanosmedical.nl, www.vanosmedical.com
MAKING ADJUSTMENTS TO YOUR ROLLATOR CAN CAUSE BIG RISKS FOR YOUR
SAFETY AND THE FUNCTION OF YOUR ROLLATOR. ADJUSTMENTS MADE BY
YOURSELF ARE STRONGLY ADVISED AGAINST AND CARRIED OUT AT YOUR OWN
RISK.
5 INSTRUCTIONS FOR USE AND MOUNTING OPTIONS
In this chapter we will explore all the possibilities that you have with your rollator.
All setting and user instructions, such as the removal of the footrest, will be
discussed.
Your rollator is a Caremart Litetravel
5.1 Technical information
Caremart Litetravel
Total width (opened) 65 cm
Total length (opened) 70.5 cm
Total height minimum 84 cm
Total height maximum 95 cm
Seat height (from the ground) 53.5 cm
Seat depth 20 cm
Width folded 30 cm
Width between push handles 45 cm
Maximum weight shopping basket 5 kg
Maximum user weight 135 kg
Total weight of the rollator 7.6 kg

~ 10 ~
© 2013 VAN OS MEDICAL UK Ltd., Excel House, Escrick Business Park,
Escrick, York,YO19 6FD -
Tel. +44-(0)1904-720170, Fax +44-(0)1904-720398,
E-mail: sales@vanosmedical.com,
www.vanosmedical.cominfo@vanosmedical.nl, www.vanosmedical.com
5.2 Unfolding and folding the rollator
Your rollator can be folded. In this way you can easily carry and transport your
rollator. In folded position your rollator will provide stability in standing position.
Folding the rollator
Make sure you stand behind the rollator;
Grab the lever, see photo 1 and move it upwards;
Bring the frame together until it is completely folded, see photo 2.
Unfolding the rollator
Make sure you stand behind the rollator;
Push both sides of the seat downwards;
Make sure the frame is completely unfolded.
Warning:
When folding or unfolding the rollator be aware of the danger of trapping
injuries!
Photo 1
Photo 2

~ 11 ~
© 2013 VAN OS MEDICAL UK Ltd., Excel House, Escrick Business Park,
Escrick, York,YO19 6FD -
Tel. +44-(0)1904-720170, Fax +44-(0)1904-720398,
E-mail: sales@vanosmedical.com,
www.vanosmedical.cominfo@vanosmedical.nl, www.vanosmedical.com
5.3 Brakes
Your rollator has two kinds of brakes. While driving you should use the driving brake
and when you are standing still you can use the parking brake.
Driving brake
When you need to slow down speed while pushing the rollator, you have to
squeeze the brake lever to reduce your speed, see photo 3;
Be aware that you do not push the rollator while squeezing the brake lever. If
you do attempt to do this, this will cause damage on the tyres and the brakes,
which will result in damaged brakes;
As mentioned earlier in paragraph 3.2, do not use the rollator if the brakes are
defect!
Parking brake
Push the brake lever downwards to engage the parking brake, see photo 4, you
will hear a click that will confirm that the parking brake is engaged;
To disengage the parking brake, you need to push the brake upwards. This will
be confirmed when you hear a click, see photo 3.
Photo 3
Photo 4

~ 12 ~
© 2013 VAN OS MEDICAL UK Ltd., Excel House, Escrick Business Park,
Escrick, York,YO19 6FD -
Tel. +44-(0)1904-720170, Fax +44-(0)1904-720398,
E-mail: sales@vanosmedical.com,
www.vanosmedical.cominfo@vanosmedical.nl, www.vanosmedical.com
5.4 Seating
Check if the parking brake is engaged, before you take a seat on the rollator;
Make sure that your feet are between the rear wheels when you’re seated and
with your back towards the direction of travel, see photo 5.
5.5 Setting the height of the push handels
You can adjust the height of the push handles for optimal use of your rollator.
Go stand next to your rollator;
Turn the star knob, see photo 6 counter-clockwise;
Move the push handle up and down, see photo 7 to the desired height;
Turn the star knob clockwise to tighten;
Make sure the star knob is securely fastened;
The push handle is now locked.
Photo 5
Photo 6
Photo 7

~ 13 ~
© 2013 VAN OS MEDICAL UK Ltd., Excel House, Escrick Business Park,
Escrick, York,YO19 6FD -
Tel. +44-(0)1904-720170, Fax +44-(0)1904-720398,
E-mail: sales@vanosmedical.com,
www.vanosmedical.cominfo@vanosmedical.nl, www.vanosmedical.com
5.6 Removing and replacing the front castor
Removing the front castor
Make sure you stand in front of the rollator;
Press the red button at top of the front fork, see photo 8;
Move the front castor down wards of the receiving tube of the rollator;
The front castor is now removed.
Warning:
Take care when adjusting the height of the handlebars. The handles of the Caremart
Litetravel are height adjustable by using the star buttons on the handles (see
picture 6 on the previous page). The height of the handlebars can be adjusted in
different heights, which incrementally indicated (see photo 8, section A).
The setting of the height of the handlebars is going by a snap mechanism. If you
want to set the height, turn the star button loose. Then you can pull / push the
handle quietly, to incrementally choose the right height that way. When you hear a
click you can be sure that the push handle is set correctly. Only when you hear a
click, you can tighten the star button. If you hear no click, the handlebars are not
aligned and the handles are not set properly.
Photo 8

~ 14 ~
© 2013 VAN OS MEDICAL UK Ltd., Excel House, Escrick Business Park,
Escrick, York,YO19 6FD -
Tel. +44-(0)1904-720170, Fax +44-(0)1904-720398,
E-mail: sales@vanosmedical.com,
www.vanosmedical.cominfo@vanosmedical.nl, www.vanosmedical.com
Replacing the front castor
To replace the front castor onto the rollator please repeat all of the above steps at
the opposite way.
5.7 Placing and removing the shopping bag
You have to remove the shopping bag before folding the rollator. The shopping bag
will not move along with the frame of the rollator. If you would like to place or
remove the shopping bag please use the following steps.
Placing the shopping bag
Make sure you stand in front of the rollator;
Place the loops, see photo 9 of the shopping bag onto the receiving tubes, see
photo 10.
Fasten the Velcro, see photo 11 onto the frame of the rollator;
The shopping bag is now attached to the rollator.
Remove the shopping bag
To replace the shopping bag onto the rollator please repeat all of the above steps at
the opposite way.
Photo 9
Photo 10
Photo 11

~ 15 ~
© 2013 VAN OS MEDICAL UK Ltd., Excel House, Escrick Business Park,
Escrick, York,YO19 6FD -
Tel. +44-(0)1904-720170, Fax +44-(0)1904-720398,
E-mail: sales@vanosmedical.com,
www.vanosmedical.cominfo@vanosmedical.nl, www.vanosmedical.com
5.8 Using the stepper
When you want to use the stepper, you should follow the following steps.
Place your feet on the stepper, see photo 12;
Step with your foot on the stepper to lift the front castors;
Remove your foot of the stepper to lower the front castors.
5.9 Tighten your crutch
Place your crutch into the crutch holder, see photo 13 number 2;
To fasten the crutch you must click in into the correct place, see photo 13
number 1;
A click confirms that the crutch is tightened right.
Photo 12
Photo 13
1
2

~ 16 ~
© 2013 VAN OS MEDICAL UK Ltd., Excel House, Escrick Business Park,
Escrick, York,YO19 6FD -
Tel. +44-(0)1904-720170, Fax +44-(0)1904-720398,
E-mail: sales@vanosmedical.com,
www.vanosmedical.cominfo@vanosmedical.nl, www.vanosmedical.com
6 TRANSPORTING YOUR ROLLATOR
Your Caremart rollator is designed to be easily transported by car. With the push
handles you can easily carry your rollator in or out of the vehicle, see photo 14.
7 MAINTAINANCE
It is important to clean your rollator regularly.
Clean the frame;
We advise you to clean the frame regularly with warm soapy water;
Clean the brake blocks and springs regularly;
Clean the storage bag;
Dry the rollator after cleaning;
Dry the rollator after cleaning. Also dry your rollator after you have been, for
example, in a rainstorm.
Tip
You can also use a car shampoo. This cleans, protects and gives a beautiful
gloss to your wheelchair.
Photo 14

~ 17 ~
© 2013 VAN OS MEDICAL UK Ltd., Excel House, Escrick Business Park,
Escrick, York,YO19 6FD -
Tel. +44-(0)1904-720170, Fax +44-(0)1904-720398,
E-mail: sales@vanosmedical.com,
www.vanosmedical.cominfo@vanosmedical.nl, www.vanosmedical.com
8 PROBLEM ANALYSIS AND SOLUTIONS
Your Caremart Litetravel rollator is inspected and adjusted so that you can use it
immediately.
The following troubleshooting guide lists several common problems that may occur
and offers corrective actions for each.
Malfunction
Possible cause
Solution
Wheels are not turning
properly
Wheels are dirty
Cleaning the wheels
Parking brake doesn`t
work
The brake pads are
rubbing on the brakes
The brake is bent
Contact your dealer
Tires are worn up
Contact your dealer

~ 18 ~
© 2013 VAN OS MEDICAL UK Ltd., Excel House, Escrick Business Park,
Escrick, York,YO19 6FD -
Tel. +44-(0)1904-720170, Fax +44-(0)1904-720398,
E-mail: sales@vanosmedical.com,
www.vanosmedical.cominfo@vanosmedical.nl, www.vanosmedical.com
9 WARRANTY
9.1 Warranty application
Together with your Caremart Litetravel rollator you get the factory warranty. This
warranty is only granted to you as the consumer. It is not intended to be used
commercially (like hiring or institutional use). The warranty is limited to defects to
materials and possible hidden shortages. Van Os Medical UK ltd. offers a warranty
period of 1 year.
9.2 Warranty definition
Your manual is also the warranty form, fill in the relevant details and store it
carefully.
Warranty conditions
The warranty period commences upon the date of purchase. If within the warranty
period, your rollator will be defect, it will be repaired or replaced. However you do
need to provide to Van Os Medical UK ltd. a complete filled in warranty registration
form, a copy of the bill with the date of purchase and the original packaging.
This warranty does not include any labour charges incurred by replacements.
Under normal circumstances no responsibility is accepted Van Os Medical UK ltd.
when the rollator needs replacement or repairs as a direct result from:
Not maintaining the rollator and parts according to the recommendations of the
manufacturer, or not using the specific original parts;
Damaging the rollator or parts by inattentive use, accident or wrong use;
Adjusting the rollator or parts, different from the specifications of the
manufacturer, or reparations done before the service agent is warned;
If the product is not equipped with an original factory frame number and
identification label as described in the manual, see chapter 1.
Tip
We recommend the use of only Van Os Medical UK ltd. replacement parts. If
you do not use original parts, the warranty will be expired.
Tip
Warranty is not transferrable.

~ 19 ~
© 2013 VAN OS MEDICAL UK Ltd., Excel House, Escrick Business Park,
Escrick, York,YO19 6FD -
Tel. +44-(0)1904-720170, Fax +44-(0)1904-720398,
E-mail: sales@vanosmedical.com,
www.vanosmedical.cominfo@vanosmedical.nl, www.vanosmedical.com
Warning:
Van Os Medical UK ltd. can not be liable for any consequent or individual
damage whatsoever. While this manual is created with care it is not exclusive.
The warranty is only valid during the indicated period. If adjustments are
made to the rollator, which have structural impact on the product, the
warranty will expire completely. You can visit www.vanosmedical.com for an
enlarged warranty and supply conditions and an address list of service agents.
10 GENERAL MAINTENANCE INSTRUCTIONS
Your rollator needs periodical maintenance. A badly maintained rollator will give
more technical problems, turn less flexible and fall out the warranty terms.
Preventive maintenance is most important and many of these things you can easily
do yourself or a friend or family member can help you. We highlight below the
maintenance you can do yourself.
Every month Check the fold ability of the rollator;
Check the upholstery for wear;
Check wheel movement front and rear and check turn
ability of the wheel;
Check if the brakes are working correct;
Every quarter Check all bolts, screws and nuts and tighten if necessary,
were needed tighten;
Check if the tyres are worn up.
Table of contents
Other Caremart Mobility Aid manuals