Carnival King SNO CONE MACHINE User manual

www.CarnivalKingSupplies.com
Item #382SCM350TUB
1/2020
user manual
TUB-STYLE
SNO CONE MACHINE

2
www.CarnivalKingSupplies.com .||||| info@carnivalking.com
TUB-STYLE
SNO CONE MACHINE
Manual
General Safety Precautions
To ensure safe operation, read the following statements carefully. This manual will outline safety warnings and
precautions, operating, maintenance and cleaning. The warnings and instructions reviewed in this manual cannot
cover all possible conditions and situations that may occur. Factors such as caution and common sense cannot be
built into this product and it is trusted the operator will follow these measures.
These precautions should be followed at all times. Failure to follow these precautions could result in injury.
IMPORTANT: Do not remove any permanent instruction labels or the data labels on your appliance.
NOTE: The appliance is for indoor use only.
To reduce risk of injury or damage to the unit:
1. Do not operate unattended.
2. Unit must be only used in a flat, level position.
3. No minor should operate this machine unsupervised. Keep hands, foreign objects, long hair, and loose clothing
away from the ice blades while in use. Some areas may become hot while in use.
4. This machine must never be modified and should only be used for its intended purpose.
5. Always check that the ice shaver machine is plugged into a grounded outlet with the appropriate electrical supply.
6. Ensure that the wall outlet being used is properly grounded. If it is not, you must install a grounded outlet.
7. Before disconnecting from the power source, be sure that all switches have been turned OFF. To unplug the
machine, firmly grasp the plug and remove from the outlet – never pull on the cord itself.
8. Ensure that the power outlet, plug and cord being used are in good, working condition. Even with a properly
functioning power cord, keep water away from the cord and avoid letting your power cord run over carpets or
heating devices.
9. Do not operate if unit has been damaged or is malfunctioning in any way.
10. Always use the machine in a clean and dry area.
11. Do not spray controls or outside of unit with liquids or cleaning agents.
12. When not in use, do not leave the machine running for more than 60 minutes.
Items Included
with this Unit
-Stainless Steel Sno-Cone Scoop
-Plastic Tub
-Replacment Blade

3
www.CarnivalKingSupplies.com .||||| info@carnivalking.com
TUB-STYLE
SNO CONE MACHINE
Manual
Installation and Operation Instructions
Operation
1. Remove plastic tub and wipe with a dry cloth, check that the blade is firmly installed.
2. Open the handle assembly/ice pusher and fill the horn with the desired amount of either cube or chunk ice,
do not overfill.
3. Close the handle assembly/ice pusher and please ensure that the machine is on a level stable surface, the
feet are intact and level.
4. Press the switch to start the unit, depress the handle to push the ice cubes through the blade.
Ice Shaver Machine Specs
Item # 382SCM350TUB
Overall Dimensions 21.65” W x 16” D x 16.25” H
Tub Size 20" x 15” x 5.5”
Tub Capacity 50 lbs.
Frame Material Stainless Steel
Horsepower 1/3 HP
Capacity 500 lbs. Per Hour
5. Crushed ice will be directed into the plastic tub.
a. The plastic tub is freezer safe and can be used to store crushed ice.
6. Once the desired amount of ice is crushed, press the switch to turn off the motor and cutting head.
7. Scoop the crushed ice into a serving container or cup and pour or pump Sno- cone syrup onto the finished cone.
Two ounces of syrup is recommended for a 6 oz. serving of ice.
8. Repeat steps 3-6 for multiple batches
9. This unit is equipped with a manual reset button to prevent injury. If the unit becomes jammed and shuts down
you will need to Unplug the machine from the power source, remove the ice that has cause the jam, plug the
machine back into the power source and press and release the reset button
RPM 1700 RPM
Wattage 350W
Voltage 120V
Amps 2.8 Amps
Hertz 60Hz
Phase 1
Plug NEMA 5-15P
Function and Purpose
This unit is intended to be used for shaving and crushing ice in commercial foodservice operations only. It is not intended
for household, industrial, or laboratory use.
Before using this equipment, it must be cleaned and dried thoroughly. Clean all surfaces before use. Failure to clean
surfaces before using the unit could cause food contamination.
This ice crusher is intended for crushing ice cubes for use in sno-cones, ice cubes should be a maximum of 2 inches in
diameter. Larger pieces should be broken up before processing through the machine. Your sno-cone machine can produce
up to 500 lbs. of ice per hour, or about 1000 6 oz. sno-cones per hour.

4
www.CarnivalKingSupplies.com .||||| info@carnivalking.com
TUB-STYLE
SNO CONE MACHINE
Manual
Warning
ELECTRIC SHOCK HAZARD
Keep water and other liquids from entering the inside of the equipment. Liquid inside the equipment could cause an
electrical shock.
Warning
Sharp blades, do not place hands in or near the ice holder while the motor is running.
Plastic Bus Tub /
Food Storage Box
(176BT20155BK )

5
www.CarnivalKingSupplies.com .||||| info@carnivalking.com
TUB-STYLE
SNO CONE MACHINE
Manual
Cleaning and Maintenance
To maintain the appearance and increase the service life, clean your unit daily.
NOTE: Do not clean the unit with steel wool.
1. Operate the motor for several minutes to remove any water collection on the cutter head.
2. Turn off the POWER switch and allow the unit to cool completely before cleaning.
3. Remove all ice from the ice horn and storage compartment.
4. Unplug the power cord from the electrical outlet.
5. Using a clean cloth, wipe down the following items:
a. The inner surface of the ice horn (Caution: Sharp Blades)
b. The outside surface of the ice horn casting.
c. The ice pusher.
d. All interior and exterior surfaces.
6. To clean the tub:
a. Remove the tub from the frame.
b. Dump the excess water from the tub.
c. Clean tub with light soap and water.
7. The base and exterior of the unit can be cleaned with a damp cloth, light soap and water.
a. Recommended: Use Spiffy Shine (999SPIFSHINE) for exterior base and frame.
8. Do not immerse in or use excessive water when cleaning this unit.
9. Only use food grade cleaners.
Warning
Do not spray water or cleaning products. Liquid could contact the electrical components and cause a short circuit or an
electrical shock. Do not use unit if power cord is damaged or has been modified.

6
www.CarnivalKingSupplies.com .||||| info@carnivalking.com
TUB-STYLE
SNO CONE MACHINE
Manual
Parts and Accessories
Sno-Cone Machine Specs
Wiring Diagram
382SCMCORD
176BT20155WH
382SCMHAND
382SCMSWT
382SCMRSETR
Item
Number
Name
1Power Cord
2Handle Assembly
3Master Switch
4Reset Button
5Motor Cover
6Plastic Tub
7Replacement Blade
M
L
N
450Vac, 25 F
120Vac, 10A
120Vac, 350W
120Vac, 16A120Vac, 16A
Capacitor
Micro Switch
Motor
Restart SwitchPower Switch
4
32
6
5
1

7
www.CarnivalKingSupplies.com .||||| info@carnivalking.com
TUB-STYLE
SNO CONE MACHINE
Manual
Remove the Cutting Head (Caution: Sharp Blades)
Note: you may have to remove the motor cover to access cutting head.
1. Turn off the POWER switch.
2. Rotate the cutting head until the setscrew is accessible through the discharge opening located inside the top panel of the
tub frame.
3. Use a 1/8” hex wrench to loosen the set-screws.
4. Carefully slide the cutting head off the motor shaft and remove the cutting head out of the top side, inlet, of the ice horn.
Cutting Head Blade Replacement
5. Remove the two screws per blade.
6. Lift the old blades out.
7. Position the new blades on the head with the cutting edge extending between 1/32” to 1/16” out from the cutting head
surface. This setting will determine the size of the ice. The more blade that is exposed beyond the head will create a
coarser ice chip.
8. Use the blade screws to secure the blades to the head.
Installing the Cutting Head
9. Slide the cutting head down into the ice horn with the coupler end first.
10. As the cutting head is slipped onto the motor shaft, align the setscrews to the flat location of the motor shaft.
11. Tighten the setscrews with a 1/8” hex wrench.
12. Machine is now ready for use.
13. Reinstall motor cover.
Blade Maintenance & Replacement Instructions

8
www.CarnivalKingSupplies.com .||||| info@carnivalking.com
TUB-STYLE
SNO CONE MACHINE
Manual
Equipment Limited Warranty
To Make a Warranty Claim:
For Warranty Inquiries contact the location where you purchased the product:
• WebstaurantStore.com: Contact help@webstaurantstore.com. Please have your order number ready.
• The Restaurant Store: If you purchased this unit from your local store, please contact your store directly.
• TheRestaurantStore.com: Online purchases, call 717-392-7261. Please have your order number ready.
Failure to contact the designated location prior to obtaining equipment service may void your warranty.
Carnival King makes no other warranties, express or implied, statutory or otherwise, and HEREBY DISCLAIMS ALL
IMPLIED WARRANTIES, INCLUDING THE IMPLIED WARRANTIES OF MERCHANTABILITY AND OF FITNESS FOR
A PARTICULAR PURPOSE.
This Limited Warranty does not cover:
• Equipment sold or used outside the Continental United States
• Use of unfiltered water (if applicable)
• Carnival King has the sole discretion on wearable parts not covered under warranty
• Equipment not purchased directly from an authorized dealer
• Equipment used for residential or other non-commercial purposes
• Equipment that has been altered, modified, or repaired by anyone other than an authorized service agency
• Equipment where the serial number plate has been removed or altered.
• Damage or failure due to improper installation, improper utility connection or supply, and issues resulting from
improper ventilation or airflow.
• Defects and damage due to improper maintenance, wear and tear, misuse, abuse, vandalism, or Act of God.
Any action for breach of this warranty must be commenced within 1 year of the date on which the breach occurred.
No modification of this warranty, or waiver of its terms, shall be effective unless approved in a writing signed by
the parties. The laws of the Commonwealth of Pennsylvania shall govern this warranty and the parties’ rights and
duties under it. Carnival King shall not under any circumstances be liable for incidental or consequential damages
of any kind, including but not limited to loss of profits.
Carnival King warrants its equipment to be free from defects in material and workmanship for a period of 1 year.
This is the sole and exclusive warranty made by Carnival King covering your Carnival King brand equipment.
A claim under this warranty must be made within 1 year from the date of purchase of the equipment.
Only the equipment’s original purchaser may make a claim under this warranty. Carnival King reserves the right to
approve or deny the repair or replacement of any part or repair request. The warranty is not transferable.
Carnival King Equipment installed in/on a food truck or trailer will be limited to a period of 30 days from the
original date of purchase.
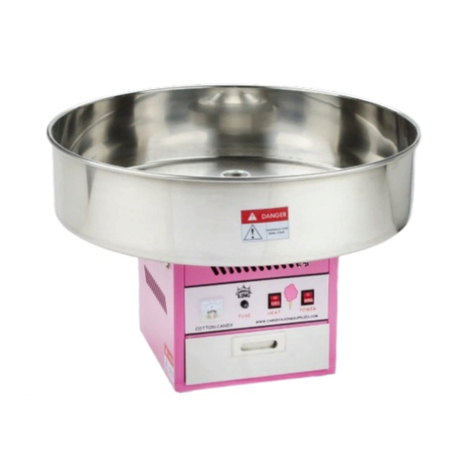
This manual suits for next models
2
Table of contents
Other Carnival King Kitchen Appliance manuals

Carnival King
Carnival King 382CCM28 User manual

Carnival King
Carnival King ROYALTY 382TCM16 User manual

Carnival King
Carnival King 382PM30R User manual

Carnival King
Carnival King 382CCME21 User manual

Carnival King
Carnival King 382TCM16DBL User manual

Carnival King
Carnival King 382CCM21CT User manual

Carnival King
Carnival King 382GCM16LP User manual

Carnival King
Carnival King 382PMW17R User manual

Carnival King
Carnival King 4 oz. User manual

Carnival King
Carnival King Royalty Series User manual