FILE NAME ( SM_VersaTouch.pmb ras 04-01-03303303)
Casablanca Fan Co. - Factory Service Department - Technical Library
Chapter (5)
V-5.32
VERSA•TOUCHW-42OPERATION
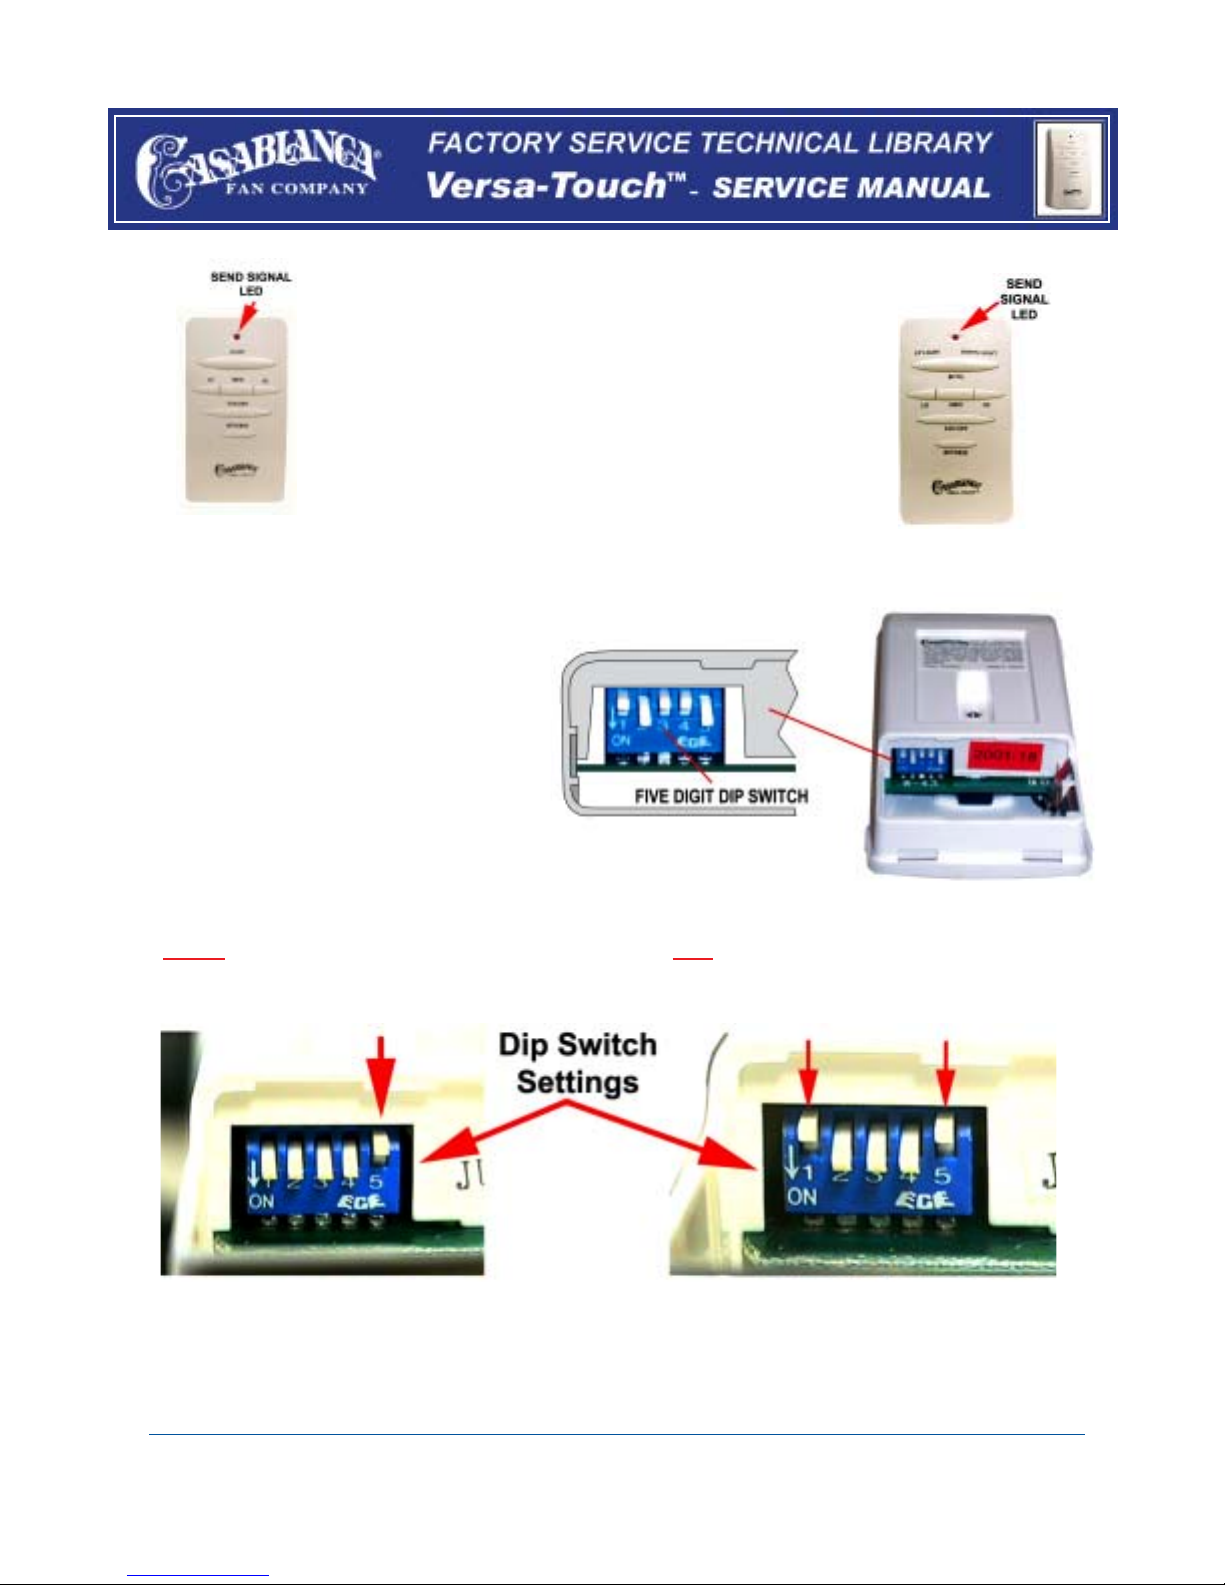
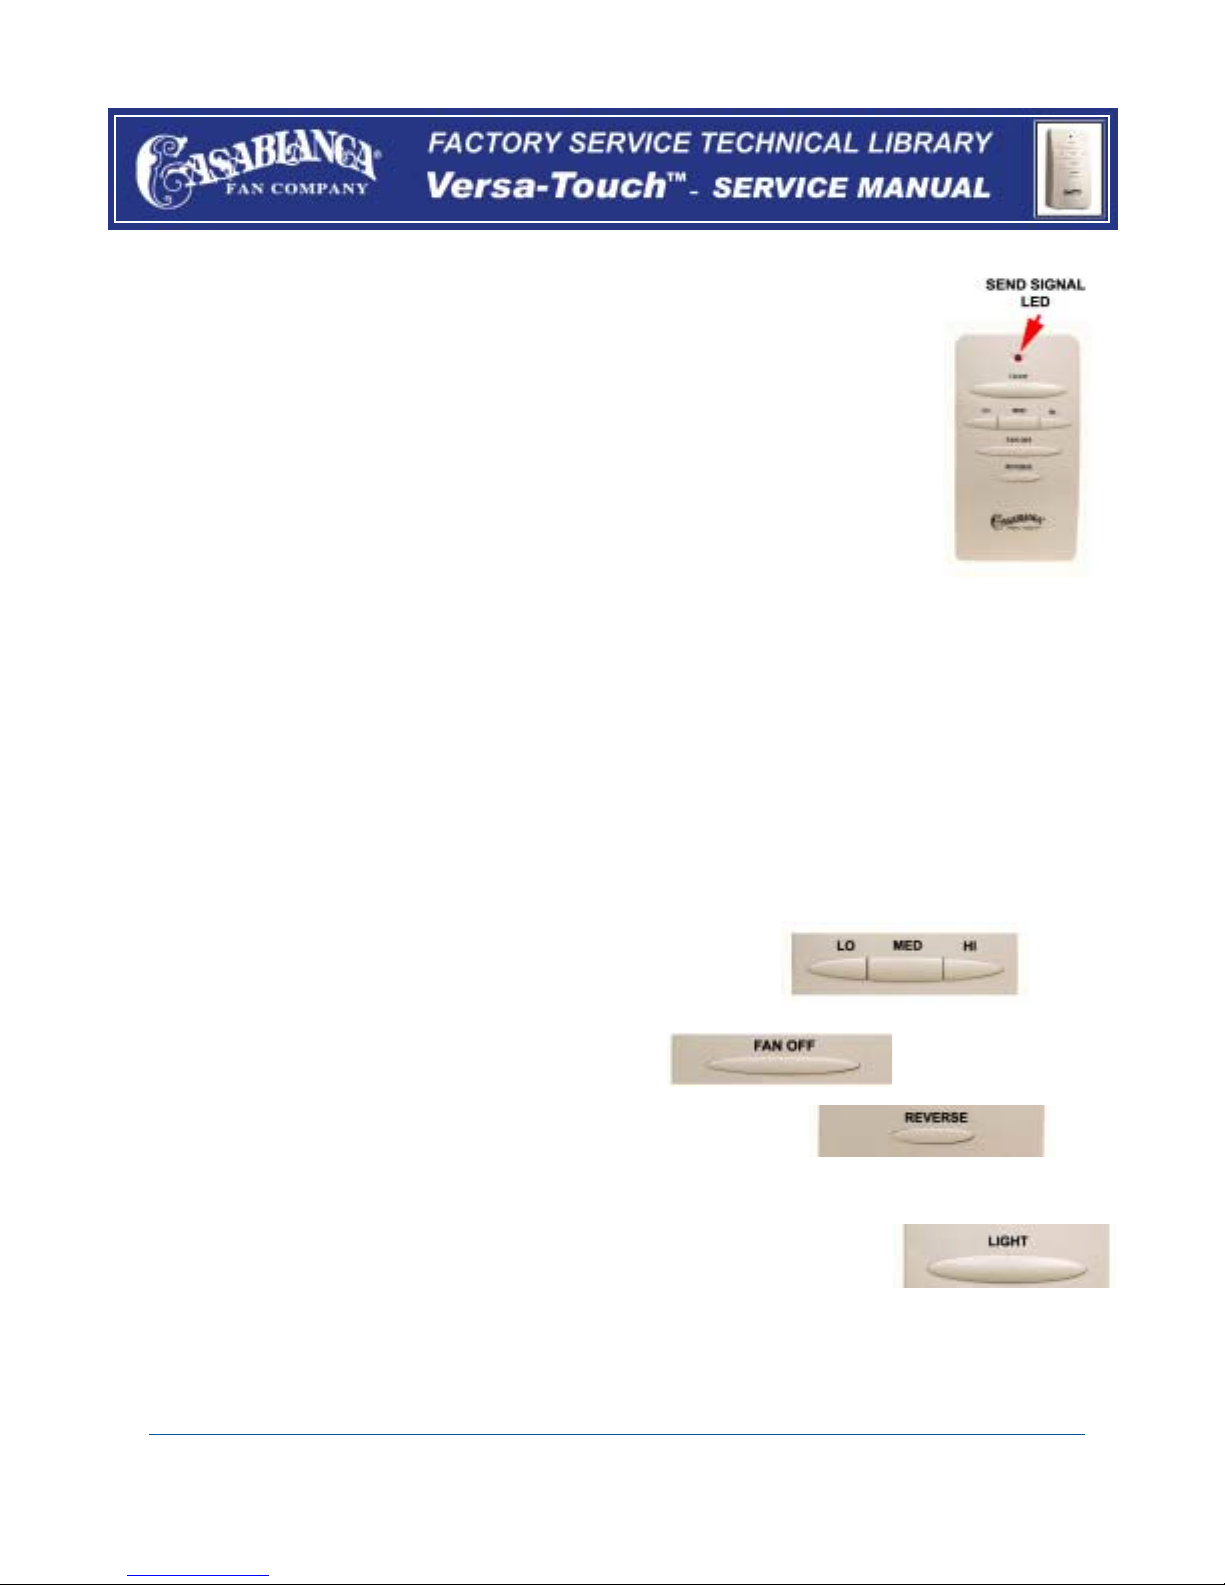
SEND SIGNAL LED
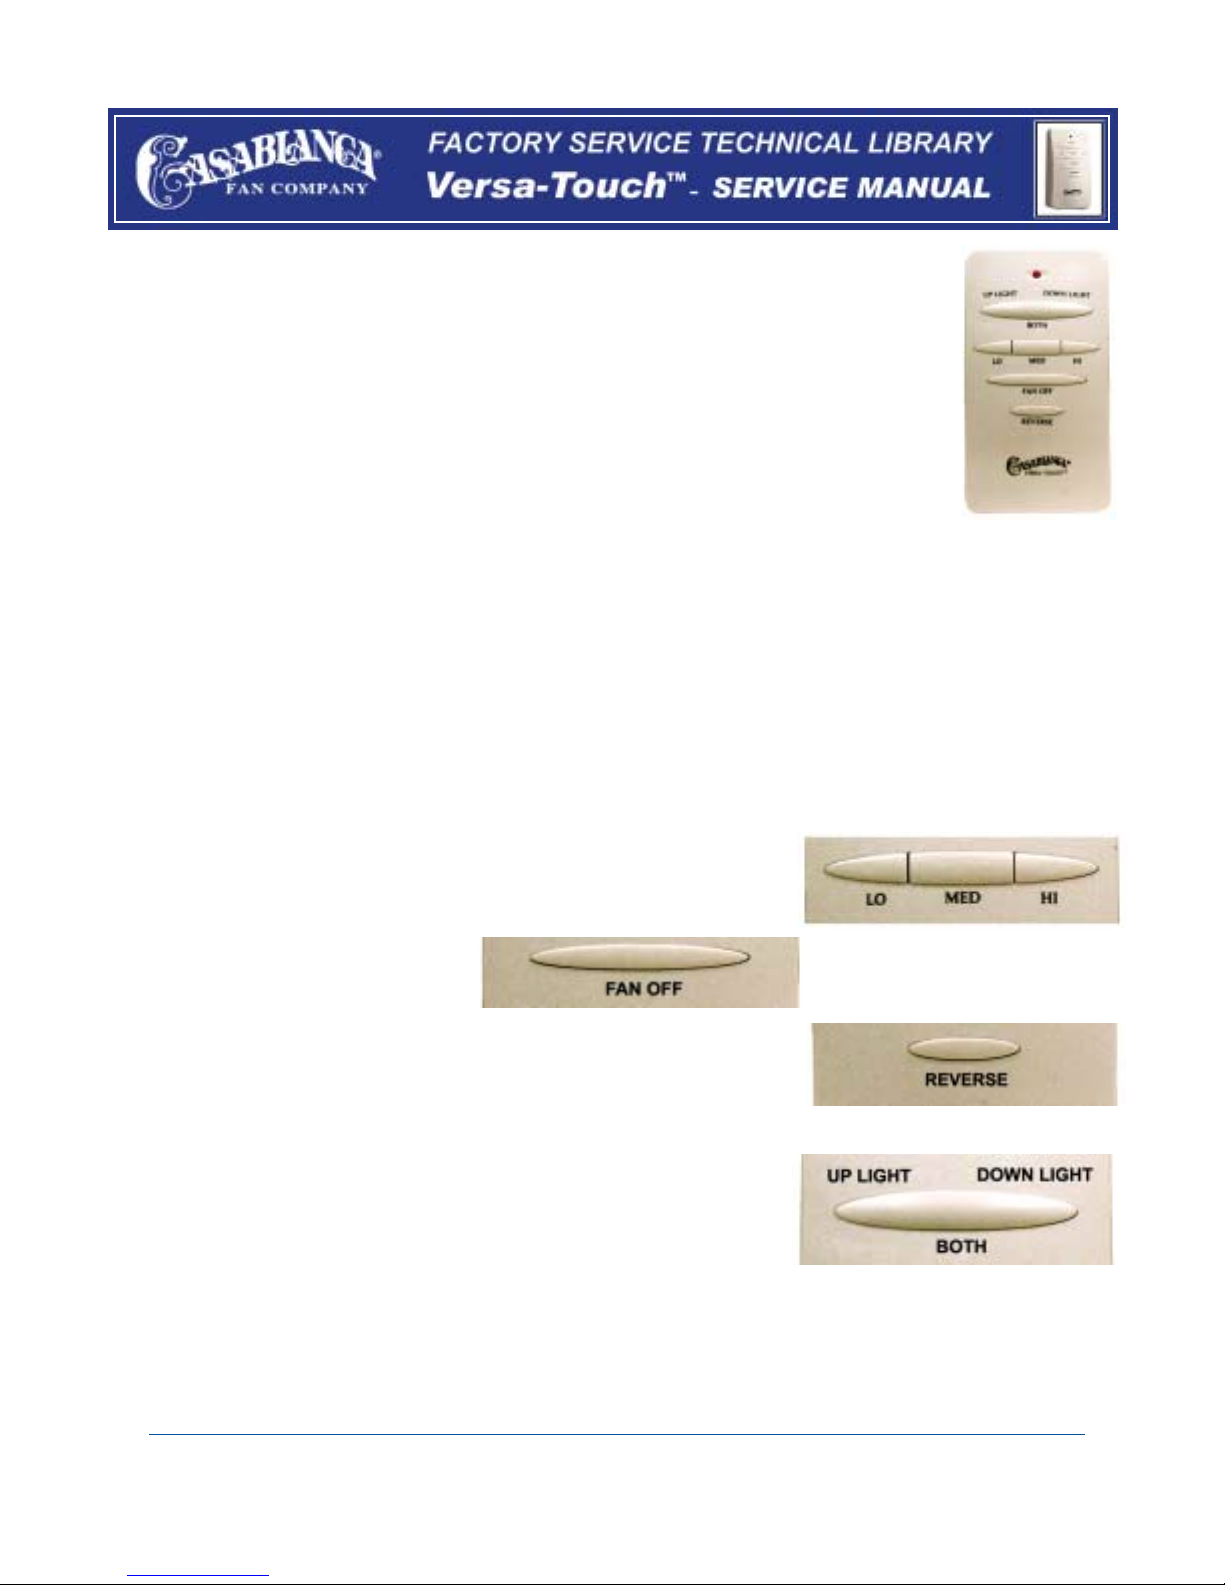
Fan Control
To start the fan. Press the selected speed button to run the fan at the desired speed.
LO = Low speed MED = Medium speed HI = High speed
To turn off the fan. Press the FAN OFF button.
Airflow Direction
To reverse the airflow press theREVERSE button.Reverse operates at any speed whether
fan is on or off. The fan returns to its set speed after reversing.
Light Control
Turnthe light on or off independently fromthe fan by pressing the LIGHT button.
Keep pressing the button in excess of 0.7 seconds, it becomes a dimmer. The light varies from ‘bright’to ‘dim’over
approximately 8 seconds. This sequence will reverse the light when it reaches the brightest or dimmest level if you
continue to hold the LIGHT button. Release the button when the desired level is reached.
Auto Resume
Quick (pressing less than 0.7 seconds) on/off operation of the LIGHT button maintains the desired brightness level
setpreviously.
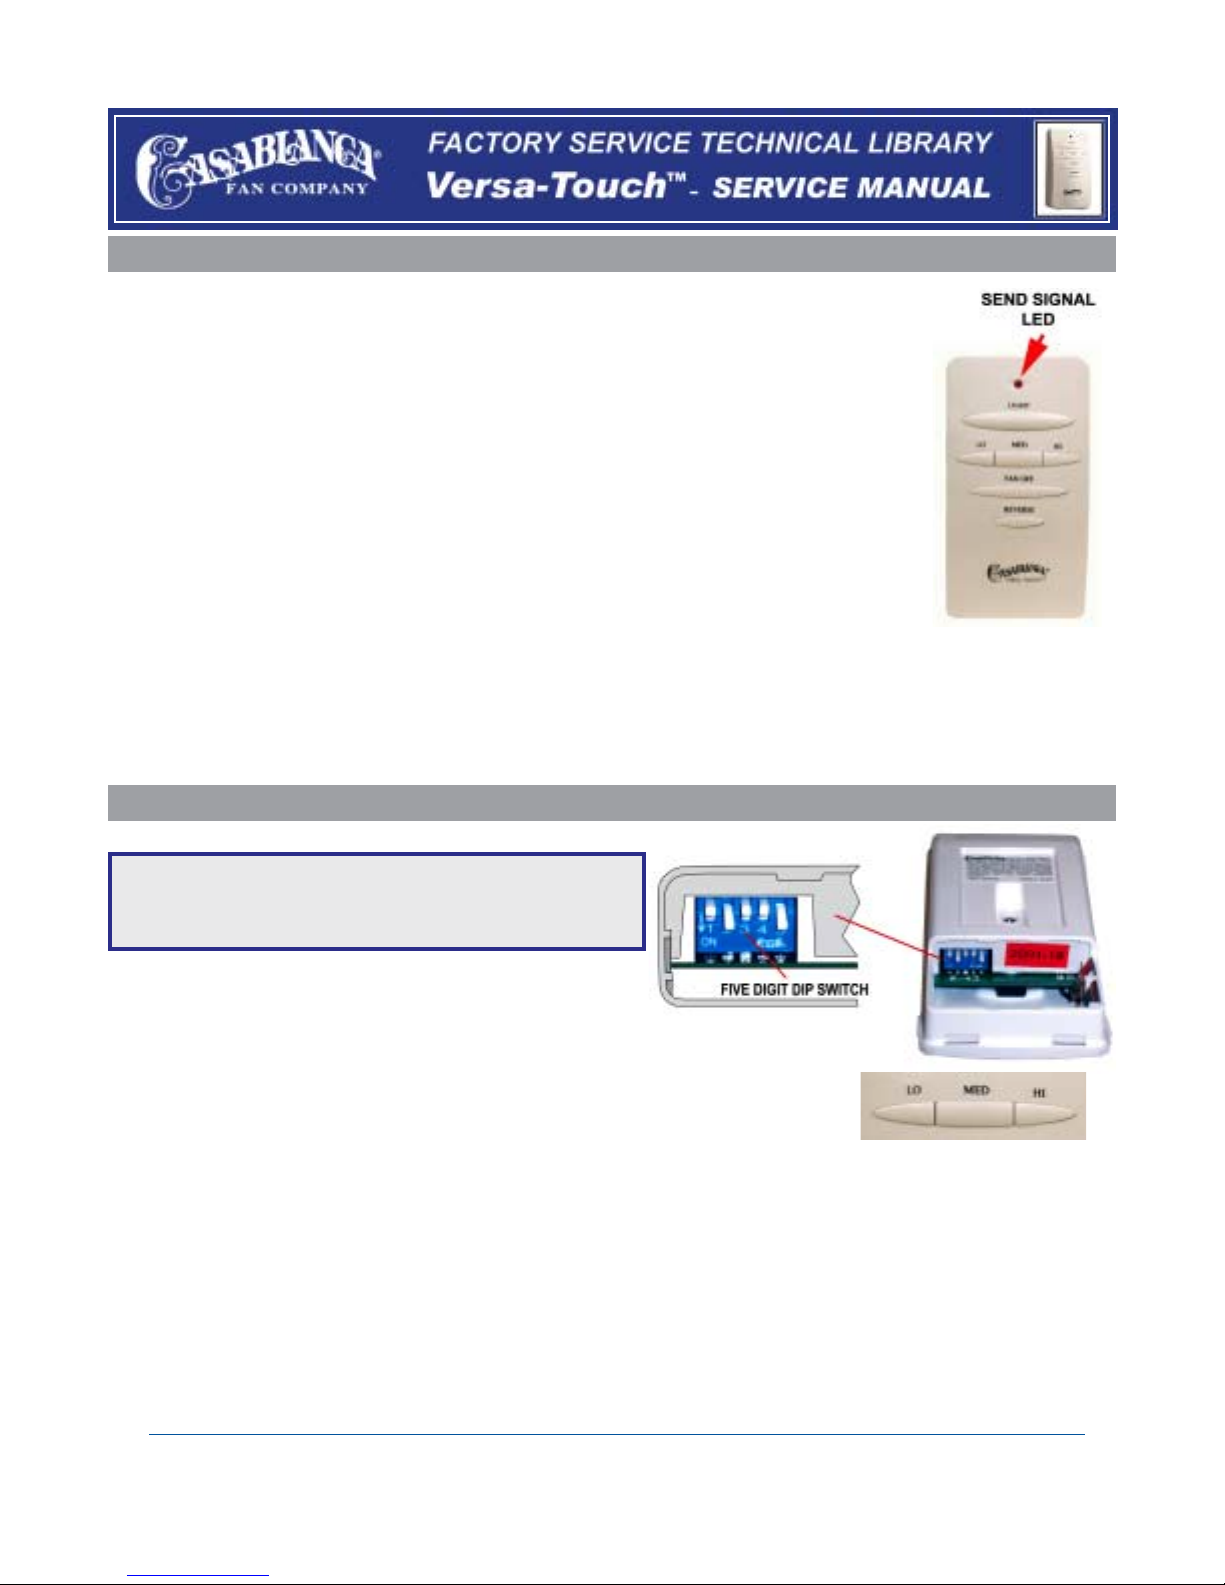
FAN REMOTE CONTROL INFORMATION
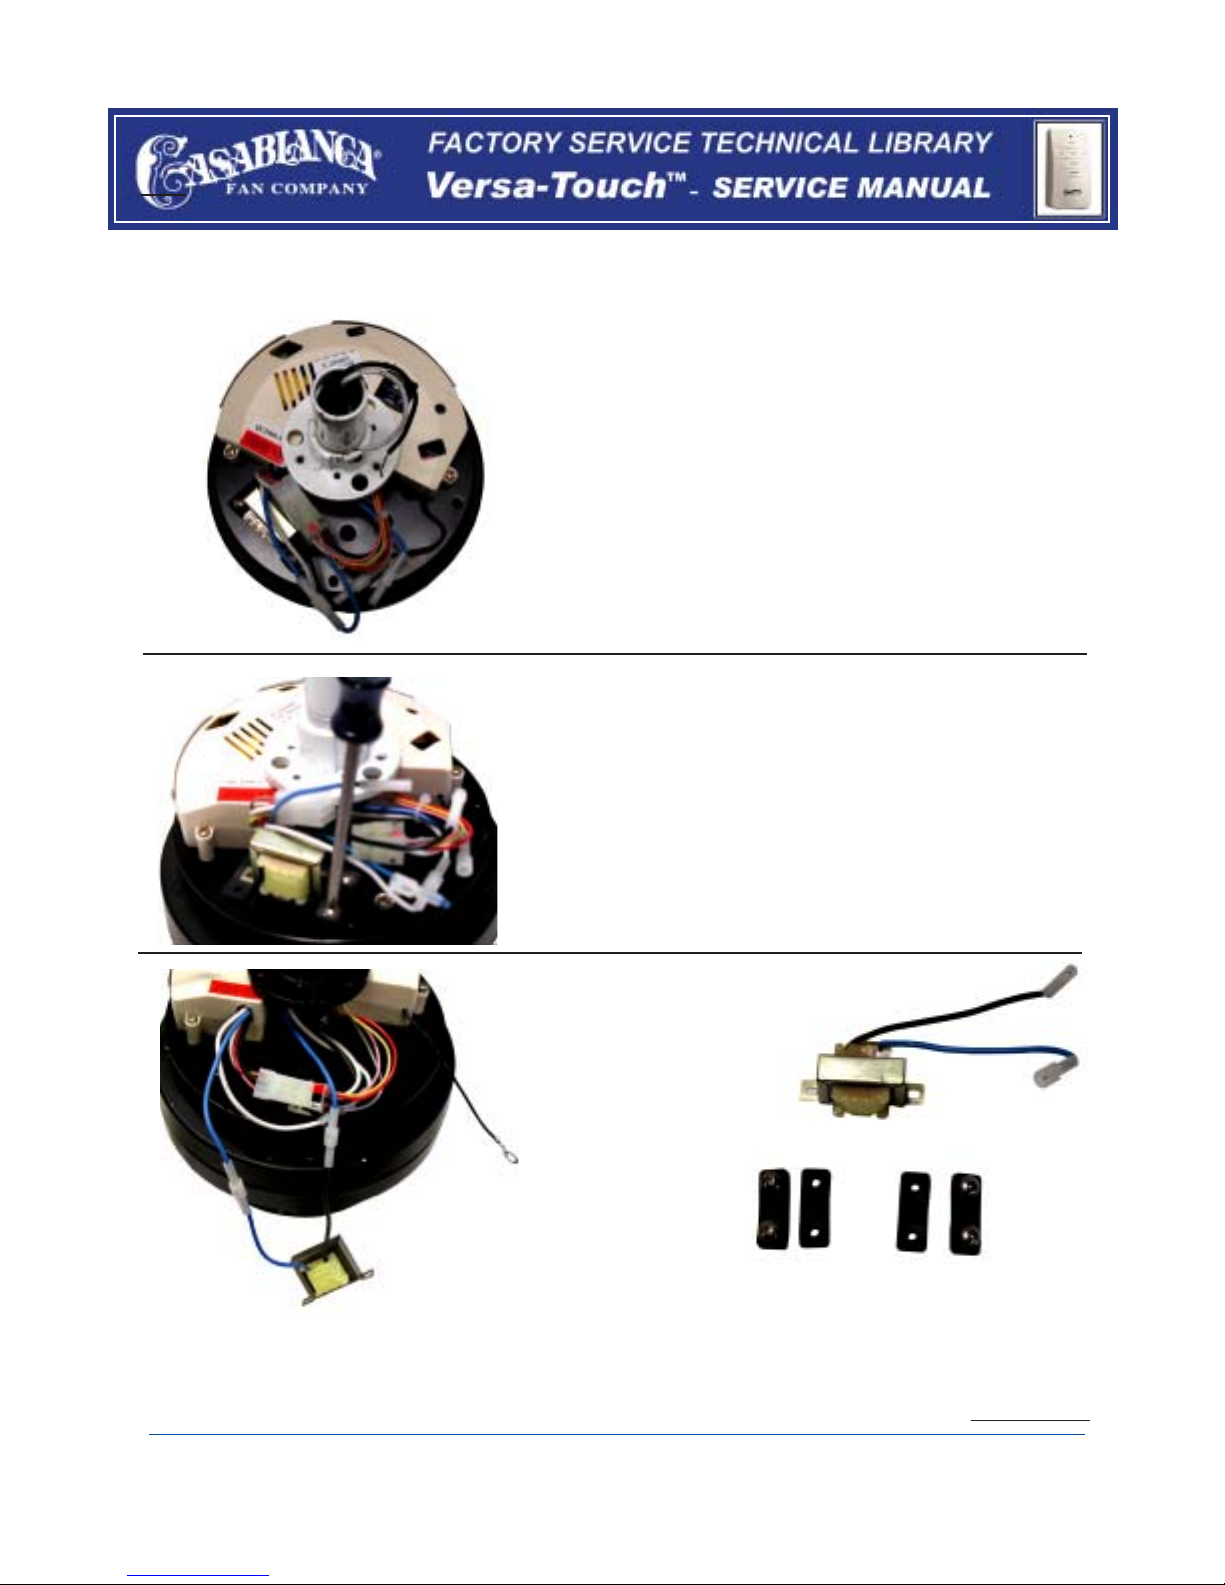
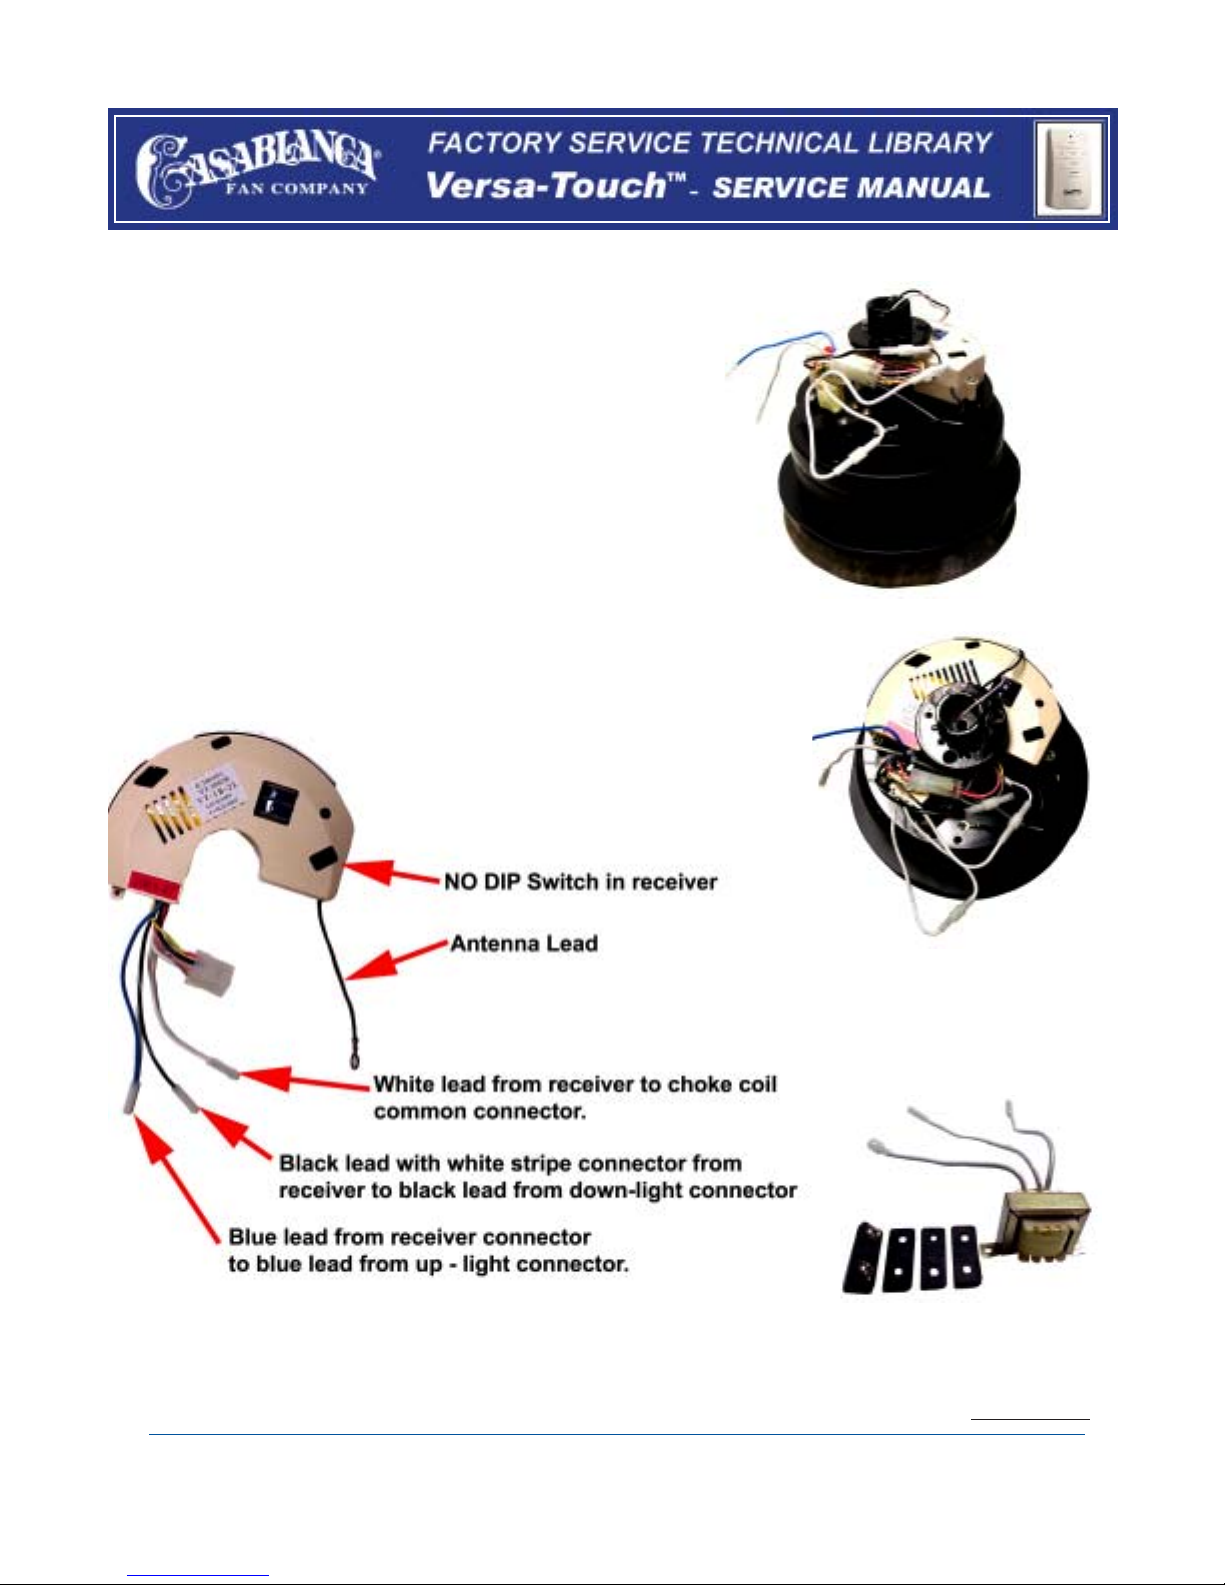
( W 42 No Dip Switch In Receiver Version )
VERSA - TOUCH W - 42 REMOTE CONTROL OPERATION
VERSA•TOUCH© CHANGINGFREQUENCYSETTING
Changing Frequency Setting
You will need to change the dip switch settings in the remote
if you are using more than one fan in the same area and want to control them separately.
Step 1. At the circuit breaker or fusebox, turn the power off for the fan you want to change.
Step 2. Open the battery door of the Versa•Touch control and remove the battery to
gain access to the dip switches.
Step 3. Change the dip switch settings, assuring that they are different from the
previously installed Versa•Touch fan(s).
Step 4. Re-install the battery in the proper polarity and the battery door on the control.
Step 5. At the circuit breaker or fuse box, turn the power back on for the fan whose frequency you are changing.
Step 6`. Fan(s) With the no Dip switch in receiver to set the frequency. Within 20 seconds of restoring power, push the Hi,
Med, and Lo buttons ( in that order).
WITHIN20SECONDSOFTURNING
THEFANON,PRESSINTHISORDER
TOSETNEW FREQUENCY:
1. HI
2.MED
3. LO
WARNING: Do not turn the power off at the circuit
breaker, then back on, for the previously installed
Versa•Touch fan(s), as you may inadvertantly change
the frequency settings for it as well.