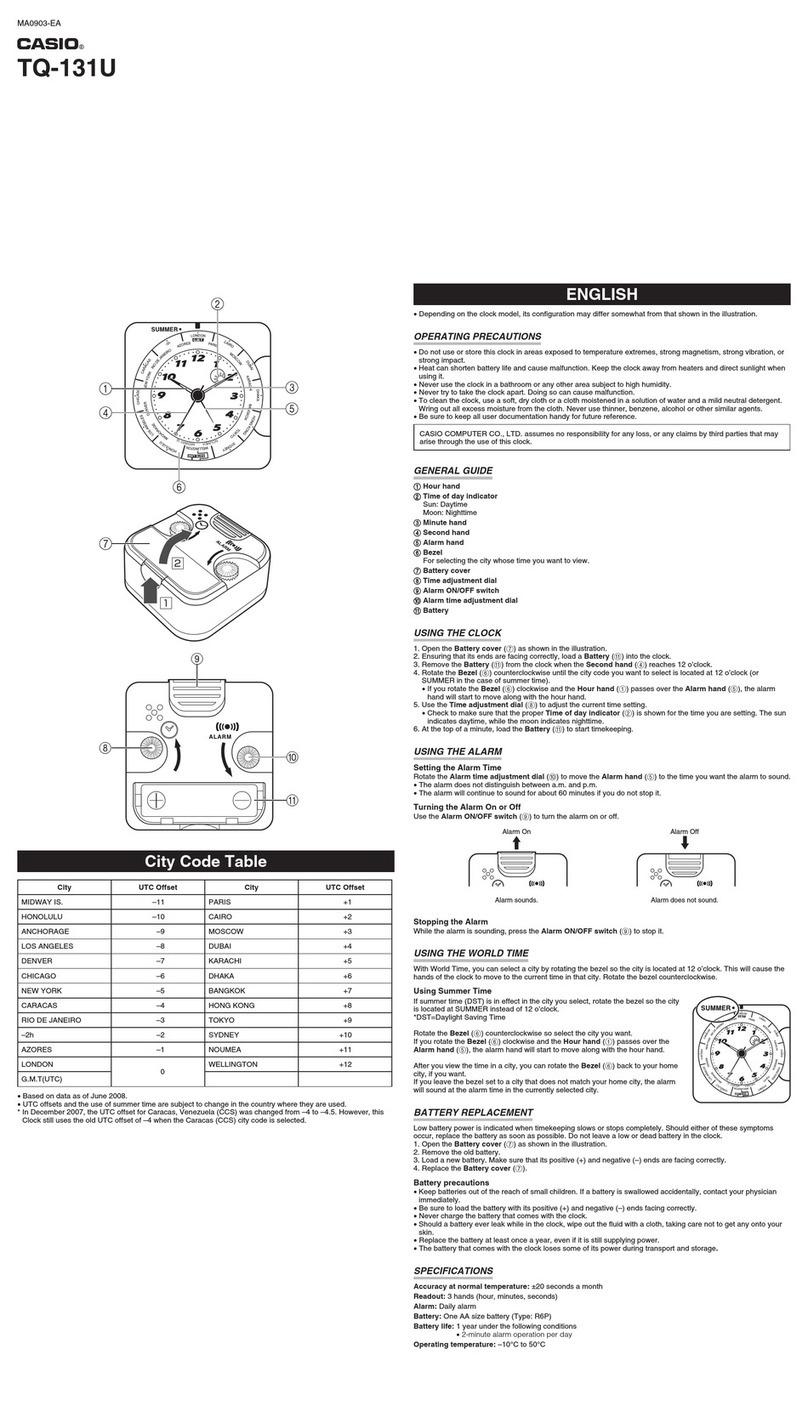
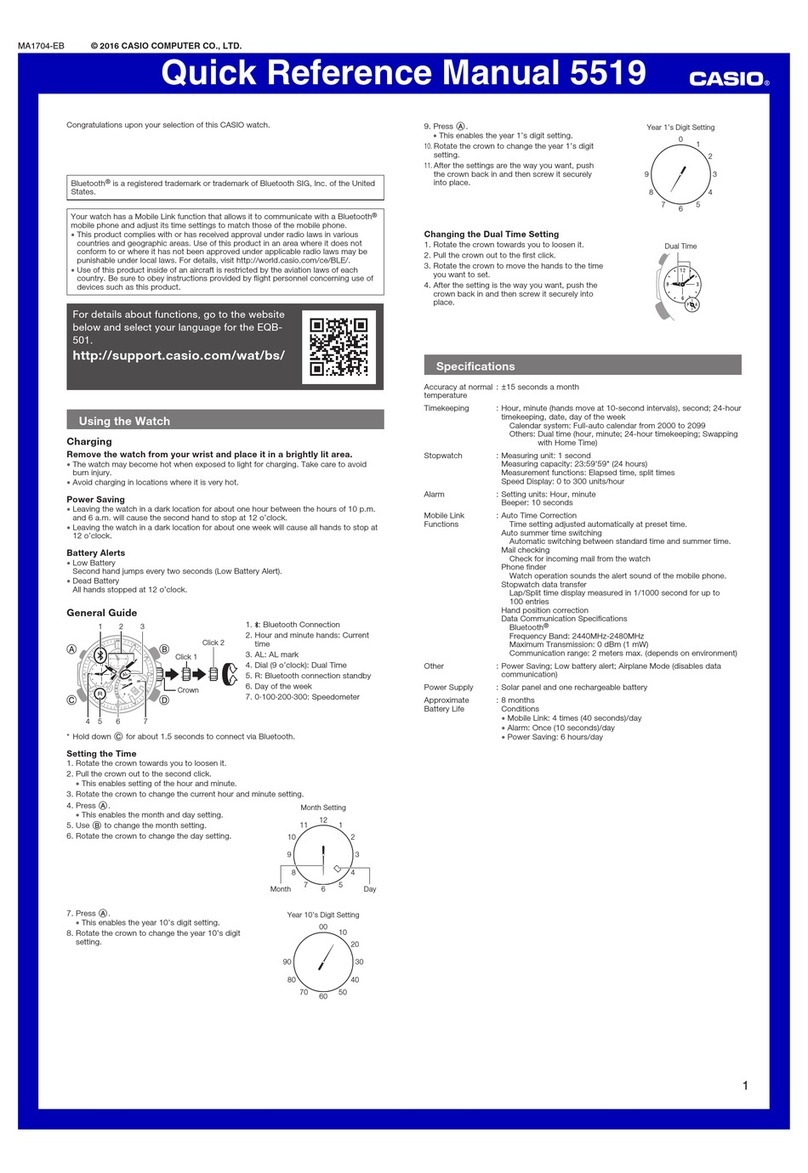
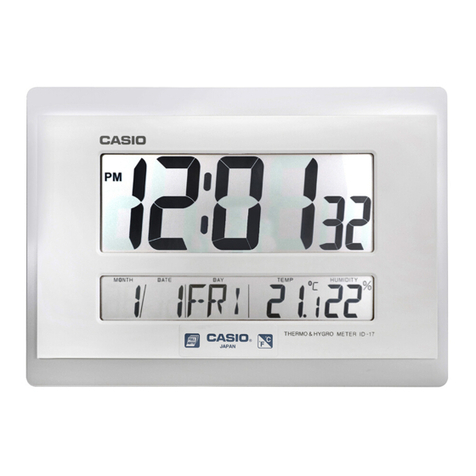
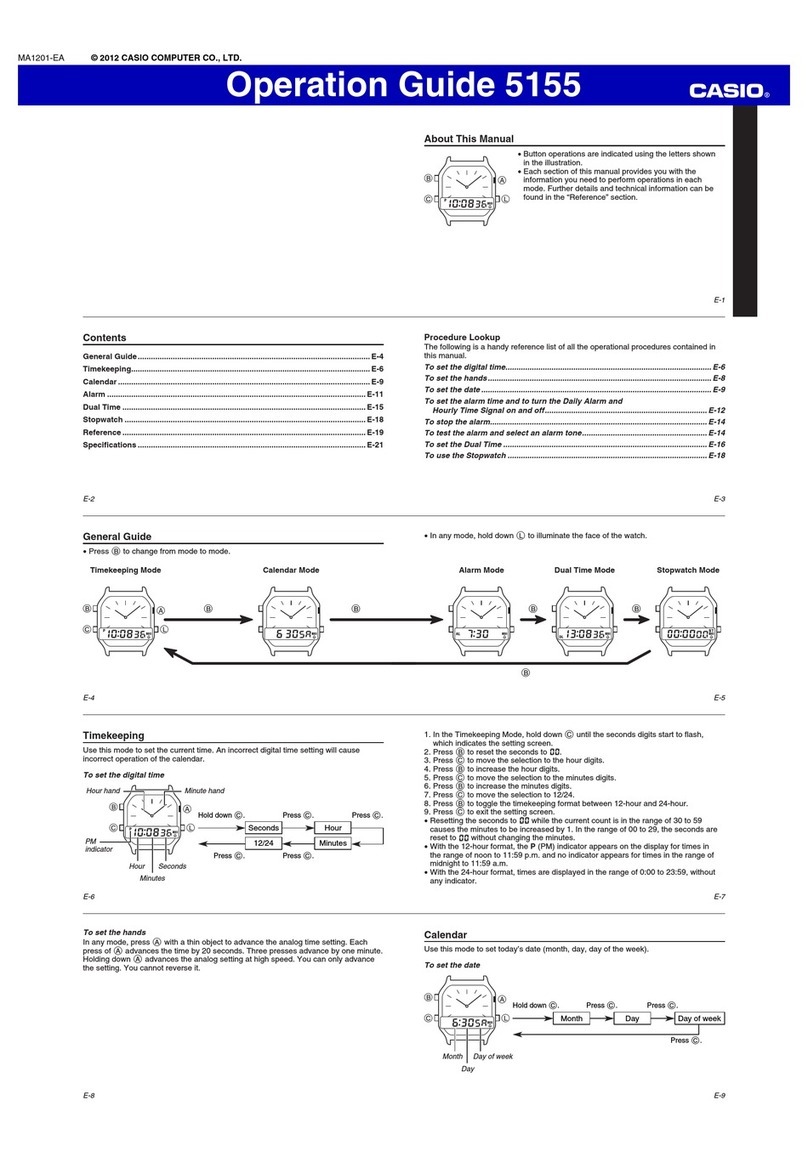
manuals.online logo
Brands
  1. Home
  2. •
  3. Brands
  4. •
  5. Casio
  6. •
  7. Clock
  8. •
  9. Casio PQ-75 User manual

Casio PQ-75 User manual

Operation Guide PQ-75
1
MA1310-EA
© 2013 CASIO COMPUTER CO., LTD.
•••A•sticker•is•affixed•to•the•glass•of•the•clock•when•you•purchase•it.•Be•sure•to•remove•the•sticker•before•using•
the•clock.
•••Depending•on•the•clock•model,•its•configuration•may•differ•somewhat•from•that•shown•in•the•illustration.
Alarm Off
Current time (Hour, minutes, seconds)
Current temperature
PM indicator
Date (month - day - day of the week) Alarm time
Alarm on indicator
Snooze Alarm On
General Guide
1  SNOOZE/LIGHT button
••••Press•this•button•to•illuminate•the•display•for•about•five•seconds.
••••Pressing•this•button•while•the•alarm•is•sounding•stops•the•alarm.
2  ALARM SNZ/ON/OFF, KEY LOCK switch
••••Use•this•switch•to•switch•the•alarm•between•snooze,•on,•and•off.
••••This•switch•is•also•used•to•lock•buttons•to•disable•their•operations.
Important!
When•buttons•are•locked,•operation•of•all•buttons•except•for•the•RESET button•(7)•is•disabled.
3  LIGHT ON/AUTO/OFF switch
Use•this•switch•to•switch•the•LED•flashlight•between•on,•auto,•and•off.
4  + / – buttons
Use•these•buttons•to•change•the•alarm•time•or•the•setting•that•is•flashing•on•the•display.
5  DEMO button
Press•to•test•the•alarm•tone.
To test the alarm tone
Press•the•DEMO button•(5)•to•sound•the•alarm•tone.•Pressing•the•DEMO button•(5)•again•while•the•alarm•
tone•is•sounding•will•stop•it.
6  SET button
Use•this•button•when•setting•the•current•time.
7  RESET button
Press•this•button•to•reset•the•clock•after•replacing•its•batteries.
8  LED Flashlight
Stand (included with clock)
Use•the•stand•to•hold•the•clock•vertically•
upright.
•••Buttons•marked•“INVALID”•have•no•function.
3
5
8
2
4
1
7
6
1
2
LED flashlight batteries
Pilas para la linterna LED
Pilhas da lanterna LED
Clock batteries
Pilas del reloj
Pilhas do relógio
Operation Guide PQ-75
2
Locking Clock Buttons
You•can•lock•the•buttons•of•the•clock•to•protect•against•unintentional•operation•when•packing•the•clock•in•a•bag,•
or•while•using•the•clock’s•LED•light•for•illumination,•etc.
Slide•the•ALARM SNZ/ON/OFF, KEY LOCK switch•(2)•to•the•KEY•LOCK•position.
•••The•RESET button•(7)•remains•enabled•while•clock•buttons•are•locked.
2
Using the LED Flashlight for Illumination
You•can•select•the•LED•flashlight•mode•using•the•LIGHT ON/AUTO/OFF switch•(3).
To have the LED light turn on whenever the clock is removed from the stand
Set•the•LIGHT ON/AUTO/OFF switch•(3)•in•the•AUTO•position•and•place•the•clock•onto•the•stand.
3
Remove•the•clock•from•the•stand•will•cause•the•LED•light•to•light•for•about•two•minutes.
•••If•you•want•the•LED•light•to•remain•on•longer•than•two•minutes,•set•the•LIGHT ON/AUTO/OFF switch•(3)•in•
the•ON•position.
Note•that•the•LED•light•will•turn•on•even•if•the•clock•accidentally•tips•over•from•a•vertical•position.•Be•sure•to•use•
the•stand•when•standing•up•the•clock•in•a•vertical•position.
To keep the LED light lit
Slide•the•LIGHT ON/AUTO/OFF switch•(3)•to•the•ON•position.
3
•••Do•not•forget•to•turn•off•the•LED•light.•Leaving•the•LED•light•on•not•only•shortens•battery•life,•it•can•also•cause•
its•batteries•to•leak•and•damage•the•clock.
•••If•the•LED•flashlight•does•not•turn•on•when•expected,•replace•its•batteries•as•soon•as•possible.
Caution!
LED Flashlight Precaution
Do•not•look•directly•into•the•LED•flashlight.•Doing•so•can•cause•eye•injury.
To disable the LED light
Slide•the•LIGHT ON/AUTO/OFF switch•(3)•to•the•OFF•position.
USING THE CLOCK
1.•Press•the•SET button•(6)•to•cycle•through•the•setting•screens•as•shown•below.
Normal Timekeeping Screen 12-hour/24-hour Timekeeping
Screen
Time Setting Screen
Month and Day Setting
Screen
Year Setting Screen
Operation Guide PQ-75
3
2.•While•the•screen•you•want•is•displayed,•use•the•+•and•– buttons•(4)•to•change•the•flashing•digits.
Press – to decrease the flashing digits. Press + to increase the flashing digits.
•••Holding•down•+•or•–•changes•the•flashing•digits•at•high•speed.
•••You•can•set•the•year•in•the•range•of•2000•to•2099.•The•day•of•the•week•is•set•automatically•in•accordance•
with•the•date•setting.
•••Pressing•+•or•–•while•the•Time•Setting•Screen•is•on•the•display•causes•the•seconds•count•to•be•reset•to•00.
•••Each•press•of•+•or•–•while•the•12-hour/24-hour•Timekeeping•Screen•is•on•the•display•toggles•between•
12-hour•and•24-hour•timekeeping.
3.•After•making•the•settings•you•want,•use•the•SET button•(6)•to•display•the•Normal•Timekeeping•Screen.
•••The•clock•automatically•returns•to•the•Normal•Timekeeping•Screen•if•you•leave•a•setting•screen•on•the•
display•for•about•five•minutes•without•performing•any•operation.
USING THE ALARM
The•alarm•sounds•when•the•alarm•time•you•set•is•reached.•You•can•also•use•the•ALARM SNZ/ON/OFF, KEY
LOCK switch•(2)•to•select•the•snooze•alarm•feature.
Setting the Alarm Time
Use•the•+•and•– buttons•(4)•to•set•the•alarm•time.•
Pressing•the•+•and•– buttons•(4)•causes•the•alarm•time•to•appear•in•place•of•the•date•on•the•display.
•••Holding•down•+•or•–•changes•the•digits•at•high•speed.
Turning the Alarm On and Off
Use•the•ALARM SNZ/ON/OFF, KEY LOCK switch•(2)•on•the•side•of•the•clock•to•turn•the•alarm•on•and•off,•and•
to•select•the•snooze•feature.
ALARM SNZ/ON/OFF, KEY LOCK switch Description
SNZ
The•alarm•sounds•at•the•preset•time•for•one•minute,•and•
up•to•seven•more•times•every•five•minutes•thereafter.•Even•
if•you•stop•the•alarm•by•pressing•the•SNOOZE/LIGHT
button•(1),•the•alarm•sounds•again•five•minutes•later.
•••The•indicator• •flashes•on•the•display•to•indicate•that•
the•snooze•feature•is•activated.
ON
The•alarm•sounds•at•the•preset•time•for•one•minute.
OFF The•alarm•does•not•sound.
•••The•alarm•time•appears•in•place•of•the•date•on•the•display•whenever•the•ALARM SNZ/ON/OFF, KEY LOCK
switch•(2)•is•set•to•ON•or•SNZ.
•••The•alarm•sound•changes•over•four•levels•as•it•sounds.
Stopping the Alarm
•••When•alarm•is•sounding,•press•the•SNOOZE/LIGHT button•(1)•to•stop•it.•When•the•snooze•feature•is•turned•
on,•the•alarm•will•sound•again•in•about•five•minutes.
•••To•turn•off•the•snooze•feature,•slide•the•ALARM SNZ/ON/OFF, KEY LOCK switch•(2)•to•OFF.
USING THE LIGHT
Pressing•the•SNOOZE/LIGHT button•(1)•turns•on•the•light•and•illuminates•the•display•for•easy•reading•in•the•
dark.
Important!
•••Overuse•of•the•light•can•shorten•battery•life.
THERMOMETER FUNCTIONS
•••A•built-in•sensor•measures•temperature•and•shows•the•measured•value•on•the•display.
•••The•temperature•display•shows•“LL”•for•temperatures•below•–20°C•and•“HH”•for•temperatures•above•50°C.
•••Though•temperature•readings•are•displayed•up•to•0°C•and•greater•than•41°C,•note•that•such•readings•are•
actually•outside•the•guaranteed•temperature•range•of•this•clock.
BATTERY REPLACEMENT
Replace•batteries•whenever•the•display•of•the•clock•becomes•dim•and•difficult•to•read.
1.•Open•the•battery•compartment•cover•as•shown•in•the•illustration.
2.•Remove•all•of•the•old•batteries.
3.•Load•a•full•set•of•new•batteries.•Make•sure•that•their•positive•(+)•and•negative•(–)•ends•face•in•the•correct•
directions.•If•you•load•batteries•incorrectly,•they•can•burst•and•damage•the•clock.
4.•Press•the•RESET button•(7).•Be•sure•to•press•the•RESET button•(7)•after•replacing•batteries.
5.•Replace•the•battery•compartment•cover.
Battery precautions
•••Keep•batteries•out•of•the•reach•of•small•children.•If•a•battery•is•accidentally•swallowed,•contact•your•physician•
immediately.
•••Be•sure•to•load•the•batteries•with•their•positive•(+)•and•negative•(–)•ends•facing•correctly.
•••Never•mix•old•and•new•batteries,•or•batteries•of•different•brands.
•••Never•charge•the•batteries•that•come•with•the•clock.
•••Should•batteries•ever•leak•while•in•the•clock,•wipe•out•the•fluid•with•a•cloth,•taking•care•not•to•let•any•get•onto•
your•skin.
•••Replace•the•batteries•at•least•once•a•year,•even•if•the•current•batteries•are•working•properly.
•••The•batteries•that•come•with•the•clock•lose•some•of•their•power•during•transport•and•storage.
SPECIFICATIONS
Accuracy at normal temperature:•±30•seconds•a•month
Calendar system:•Auto-calendar•pre-programmed•from•the•year•2000•to•2099
Alarm:•Setting•unit:•minutes;•Alarm•duration:•1•minute
Alarm beeper:••Daily•alarm
Snooze•alarm:••(Alarm•sounds•up•to•7•times•at•5-minute•intervals.)
Demo•alarm•(alarm•tone•test)
Thermometer Functions:••Measuring•range:•0°C•to•40°C•
Though•temperature•readings•are•displayed•up•to•0°C•and•greater•than•41°C,•note•that•such•readings•are•
actually•outside•the•guaranteed•temperature•range•of•this•clock.
Temperature Sensor Precision:••±2°C•in•range•of•0°C•to•40°C
Other:••12/24-hour•timekeeping;•LED•face•illumination;•LED•flashlight
Included•accessories:••Stand
Operating temperature:••0°C•to•40°C
Clock batteries:••2•AAA-size•manganese•batteries•(R03)
LED•flashlight•batteries:•2•AAA-size•manganese•batteries•(R03)
Clock battery life:••Approximately•1•year•(5•seconds•of•face•illumination•per•day;•1•minute•of•alarm•sound•per•
day)
LED•flashlight•battery•life:•Approximately•12•hours•continuous•operation
Other Casio Clock manuals

Casio DQ-970 User manual

Casio

Casio DQ-970 User manual

Casio Clock DQ-747 User manual

Casio

Casio Clock DQ-747 User manual

Casio IQ-66 User manual

Casio

Casio IQ-66 User manual

Casio TQ-216 User manual

Casio

Casio TQ-216 User manual

Casio ID-12 User manual

Casio

Casio ID-12 User manual

Casio PQ-60 User manual

Casio

Casio PQ-60 User manual

Casio 2529 User manual

Casio

Casio 2529 User manual

Casio TMR-72 User manual

Casio

Casio TMR-72 User manual

Casio ID-17 User manual

Casio

Casio ID-17 User manual

Casio 3286 User manual

Casio

Casio 3286 User manual

Casio ID-16 User manual

Casio

Casio ID-16 User manual

Casio MA-1 User manual

Casio

Casio MA-1 User manual

Casio IQ-55 User manual

Casio

Casio IQ-55 User manual

Casio TQ-362 User manual

Casio

Casio TQ-362 User manual

Casio 5519 Service manual

Casio

Casio 5519 Service manual

Casio DQ-542 User manual

Casio

Casio DQ-542 User manual

Casio IQ-18W User manual

Casio

Casio IQ-18W User manual

Casio MO0410-EA User manual

Casio

Casio MO0410-EA User manual

Casio MA0309-EA User manual

Casio

Casio MA0309-EA User manual

Casio 5155 User manual

Casio

Casio 5155 User manual

Casio ID-25B User manual

Casio

Casio ID-25B User manual

Casio W-CLO.H User manual

Casio

Casio W-CLO.H User manual

Casio 5513 Service manual

Casio

Casio 5513 Service manual

Casio TQ-379 User manual

Casio

Casio TQ-379 User manual

Popular Clock manuals by other brands

uPunch HN1000 product manual

uPunch

uPunch HN1000 product manual

Fascinations XP3 Ultra instructions

Fascinations

Fascinations XP3 Ultra instructions

Oregon Scientific RM329P user manual

Oregon Scientific

Oregon Scientific RM329P user manual

Aktobis WDH-TH205 instruction manual

Aktobis

Aktobis WDH-TH205 instruction manual

Oregon Scientific PRYSMA B manual

Oregon Scientific

Oregon Scientific PRYSMA B manual

Oregon Scientific RM313PA user guide

Oregon Scientific

Oregon Scientific RM313PA user guide

Uniden Clock operating guide

Uniden

Uniden Clock operating guide

Daikin BRC15A61 Operation manual

Daikin

Daikin BRC15A61 Operation manual
BEARWARE 302208 manual

BEARWARE

BEARWARE 302208 manual

La Crosse Technology World Time Center WS-7092U operating manual

La Crosse Technology

La Crosse Technology World Time Center WS-7092U operating manual

Arbiter Systems 1095A Operation manual

Arbiter Systems

Arbiter Systems 1095A Operation manual

Oregon Scientific PRYSMA B manual

Oregon Scientific

Oregon Scientific PRYSMA B manual

Valcom V-A2412 installation manual

Valcom

Valcom V-A2412 installation manual
IROX ORA-1 quick guide

IROX

IROX ORA-1 quick guide

TFA 60.3001 operating instructions

TFA

TFA 60.3001 operating instructions

Denver EC-33 instruction manual
Denver

Denver EC-33 instruction manual
La Crosse Technology 513-1419v4-WA user manual

La Crosse Technology

La Crosse Technology 513-1419v4-WA user manual

TFA 60.2557 instruction manual

TFA

TFA 60.2557 instruction manual

manuals.online logo
manuals.online logoBrands
  • About & Mission
  • Contact us
  • Privacy Policy
  • Terms and Conditions

Copyright 2025 Manuals.Online. All Rights Reserved.