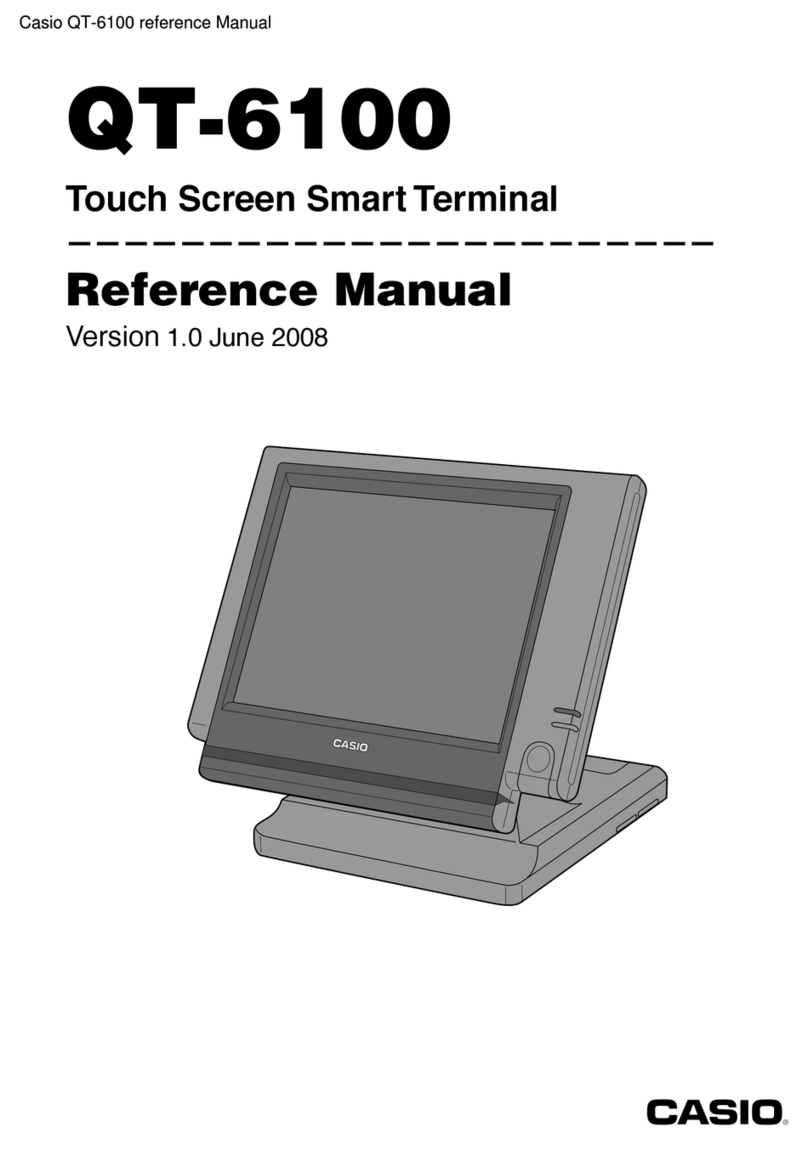
Casio QT-6600 User manual

QT-6600
Touch Screen Smart Terminal
———————————————————————
Installation &
Down Recovery Manual
Version 1.1 December 2008
c
C
C

Contents
I-2
This manual is intended for use as a reference to the QT-6600 system. It provides details to
install systems and down recovery. This manual does not describe actual programming,
which is covered in the QT-6600 programming manual.
This manual consists of the following chapters:
1. System installation
This chapter show the procedure of installing QT-6600 systems.
2. System down and recovery
This chapter explains actions to take and recovery methods when the system goes down.
Note: Casio reserves the right to change equipment and specifications without obligation and
notification. The terms used in this manual may be different from those used in other
manuals of Casio’s products.
Printing history
Manual version Software version
Version 1.0 : November, 2008 First Edition: November, 2008 Version 1.0
Version 1.1 : December, 2008 Second Edition: December, 2008 Version 1.1
Revised points

I-3
QT-6600 Installation & Down Recovery Manual
1. System installation........................................................................................ I-4
1-1.How to load IPL (Initial Program Loading) ................................................................... I-4
1-1-1. From CF card to a terminal .............................................................................. I-4
1-1-2. Remote IPL (from remote host to a terminal) ................................................... I-5
1-2.How to install the system ............................................................................................. I-6
1-2-1. Stand alone system (with external printer / slip printer) ................................... I-6
1-2-2. Master/satellite system with external (local) printer.......................................... I-6
1-2-3. Master/satellite system with external (remote) printer ...................................... I-7
1-2-4. The system with LAN printer ............................................................................ I-8
2. System down and recovery .......................................................................... I-9
2-1.Measures to prevent trouble ...................................................................................... I-10
2-2.Master terminal failure ............................................................................................... I-11
2-2-1. Check tracking master terminal failure ........................................................... I-11
2-2-1-1. Detection of check tracking master terminal failure ............................................... I-11
2-2-1-2. Master failure during check tracking operation ...................................................... I-12
2-2-2. Remote printer failure ..................................................................................... I-13
2-2-2-1. Detection of remote printer failure ......................................................................... I-13
2-2-2-2. Master printer failure during printing on remote printer ......................................... I-13
2-3.Recovery processing ................................................................................................ I-14
2-3-1. Master/backup master down detection ........................................................... I-14
2-3-2. When both master and backup master go down ............................................ I-14
2-4.Master failure during X/Z collection/consolidation or terminal data transfer .............. I-14
2-5.Satellite terminal down............................................................................................... I-14
2-6.LAN printer down ....................................................................................................... I-15
To prevent malfunctions caused by the weak batteries, charge the memory
protection batteries for over 12-hours before installation or after a longtime vacation
(over 30 days).
• Before installation, initialize the terminal and leave it power on over 12-hours.
• After a longtime vacation, initialize the terminal and restore the program data if the
terminal is in malfunction, and leave it power on over 12-hours.
• QT-6600 consumes batteries for saving data during 2 minutes after turning off the
terminal.
• Do NOT power off the terminal over 10 times while a short term. (Except INIT or FC
operation) Otherwise, it makes weak batteries.

I-4
System Installation
1. System installation
In this chapter shows how to install QT-6600 systems and peripherals.
1-1. How to load IPL (Initial Program Loading)
Normally, IPL is not necessary since the terminal has efficient programmable options to
meet your circumstances.
In some cases, you need to change the application program to meet your requirements, the
IPL is necessary to download the application program to the terminal.
To load IPL, there are two methods:
1) From CF card to a terminal
2) Remote IPL via Internet
1-1-1. From CF card to a terminal
1. Insert the CF card to the CF card slot of the target terminal.
2. Power on the terminal with pressing the INIT switch. (IPL
start)
3. After IPL completion, continue to the initialize operation.
CF card
IPL source IPL target
IPL Data
CF card slot is located
on the leftside of the terminal.
C
C
CF slot
INIT Sw

I-5
QT-6600 Installation & Down Recovery Manual
1-1-2. Remote IPL (from remote host to a terminal)
Before remote IPL, perform step 1 to 3.
1. Set the terminal as “FTP server”. (refer to 4-1-30. Program-
ming TCP/IP section of the programming manual on page 71.)
2. Insert vacant CF card (more than 128MB) to the CF card slot
of the target terminal.
3. Power on every peripheral devices and all terminals of the
cluster.
Do NOT operate the terminal until the IPL has completed.
After IPL completion, you can get the result of the IPL by PC
operation.
IPL source
LAN port
defined as FTP server
IPL target
IPL Data
PC
C
C
CF slot

I-6
System Installation
1-2. How to install the system
1-2-1. Stand alone system (with external printer / slip printer)
1. Set up the system (refer to the left figure).
2. Turn on all external / slip printer(s).
3. Initialize the terminal (refer to the Initialization chapter of the
programming manual page 8.)
Note 1:
If the terminal cannot recognize the printer(s) correctly,
check the dip switch settings on the printer or printer cable
and try initialization operation again. Casio printer cable
(PRT-CB-8A/-8B) is required for proper recognition of the
local printer.
Note 2:
Slip printer should be connected to COM 2 port. If COM
2 is not vacant for the slip printer, use port 4 ~ 6. But the
automatic printer detection during initialization is not
performed. So you have to program the I/O parameter file
manually and flag clear the machine.
4. Complete the initialize operation.
If your system has LAN printer(s), refer to 1-2-4 section.
1-2-2. Master/satellite system with external (local) printer
1. Set up the system (refer to the figure below).
2. Turn on all external / slip printer(s) connected with master
terminal.
3. Initialize the master terminal (refer to the Initialization chapter
of the programming manual page 8.)
Note 1:
1. Do not turn on other terminals.
2. If the terminal cannot recognize the external printer(s)
correctly, check the dip switch settings on the printer or
printer cable and try initialization operation again. Casio
printer cable (PRT-CB-8A/-8B) is required for proper
recognition of the local printer.
Note 2:
Slip printer should be connected to COM 2 port. If COM
2 is not vacant for the slip printer, use port 4 ~ 6. But the
automatic printer detection during initialization is not
performed. So you have to program the I/O parameter file
manually and flag clear the machine.
Slip
In-line
PRN (1) PRN (1)
Master
Backup
master
Satellite Satellite
C
C
C
C
Slip
PRN (1) PRN (2)
Printer Printer
C
C

I-7
QT-6600 Installation & Down Recovery Manual
4. Initialize satellite terminals one by one. (Turn on all external
/ slip printer(s) with that terminal before initialization.)
Note:
When you want to copy master program to satellites,
complete the master program first, and then initialize the
satellite and receive the master program during initializa-
tion procedure of satellites.
1-2-3. Master/satellite system with external (remote) printer
1. Set up the system (refer to the figure below).
2. Turn on all external / slip printer(s) connected with master
terminal.
3. Initialize the master terminal (refer to the Initialization chapter
of the programming manual page 8.)
Note 1:
Do not turn on other terminals.
Note 2:
Slip printer should be connected to COM 2 port. If COM
2 is not vacant for the slip printer, use port 4 ~ 6u. But the
automatic printer detection during initialization is not
performed. So you have to program the I/O parameter file
manually and flag clear the machine.
4. Initialize satellite terminals one by one. (Turn on all external
/ slip printer(s) with that terminal before initialization.)
Note:
When you want to copy master program to satellites,
complete the master program first, and then initialize the
satellites and receive the master program at the end of
initialization procedure of satellites.
5. Declare remote printer by programming the printer connection
table to all terminals in the cluster (refer to the page 59 of the
programming manual.)
If your system has LAN printer(s), refer to 1-2-4 section.
Slip
In-line
LAN PRN PRN (1) PRN (2)
C
C
C
C
C
C
C
C

I-8
System Installation
1-2-4. The system with LAN printer
1. Set the printer ID No. (Printer ID No. is an unique number in
the cluster). (Refer to the UP-400 user’s manual)
2. Perform “System connection check” in the manager mode.
(Refer to 3-3-1. System connection check in the reference
manual.)
3. Set the pritner connection. (Refer to 4-1-13. Programming
printer connection in the programming manual.)
• In case of using printer by IP No., set the dip switch of the printer to “not to use
DHCP server” and set the IP No. (Also refer to the UP-400 user’s manual.)
• Please define one terminal controlling one LAN printer. In other words, do NOT
define multiple terminals controlling one LAN printer. Otherwise it will cause
printer error.

I-9
QT-6600 Installation & Down Recovery Manual
2. System down and recovery
In the QT-6600 system, the check tracking system has their master and backup master and
remote printer printing system has their master printer and backup master printer. If both
masters (or corresponding printers) go down, the check tracking system, cannot continue
any processing. And also if both masters (or corresponding printers) go down, remote
printer printing system cannot continue any processing. Therefore, the system must be
designed such that even if the master goes down, their processing remains unaffected.
The QT-6600 system whose master and backup master, respectively, have files for above
systems simultaneously updates their data during operations. If the master goes down,
control is transferred (automatically for only the remote printer printing system /manually
only for check tracking system) to the backup master, preventing their operation from
being interrupted.
Nevertheless, system reliability should be improved so as to minimize the possibility of
system failure. Poor system reliability disables the system to work efficiently.
System reliability could be improved by the following method.
1) Use reliable system components.
2) Design reliable circuitry.
3) Make sure that trouble with the system can be remedied easily.
4) Provide complete backup to minimize damage caused by trouble.
Item 1) and 2) are concerned with hardware design. Needless to say, they were given the
utmost consideration in designing the QT-6600 system. Item 3) is related to software
design. As an effective solution to these problems, the terminal offers a diagnostic routine
and backup functions.
This section describes the measures provided by the system to prevent trouble, the system
function performed when the system goes down, and the method of system recovery.

I-10
Down Recovery
2-1. Measures to prevent trouble
The QT-6600 system hardware boasts exceptional reliability. However, no machine can
be completely free from trouble. When a given system can predict a possible trouble or
permits a failing point to spotted easily, the time required for repair can be cut and
consequently, the overall system reliability can be improved.
The QT-6600 system offers a self-diagnostic program for servicemen to enable individual
devices to be checked at the terminal level. For a detailed description of this program, see
the service manual.
If a system error occurred during an actual operation, error informations output to the
terminal display.
Trouble with the terminal CPU can be fatal to the system. In this case, it is impossible even
to obtain an error log. As long as the number of retries is within a predetermined limit, the
processing being performed is not interrupted. By the time the processing is interrupted,
error information is logged, so that the serviceman can repair or replace defective parts
before the system goes down.
To summarize,
1) Terminal-level hardware check:
Self-diagnostic program.
2) Error information, etc. during in / online data transmission:
The error is displayed on the in / online master terminal display and logged in the error
log file.
3) Abnormal completion of processing due to error:
An error message is output to the terminal display.
Needless to say, a backup master is indispensable, since trouble with the master can lead
to system down. In the QT-6600 system, both the master and backup master have the check
tracking system, the files are updated simultaneously (main-mirror system). Thus, even if
either master goes down, the index and detail data remain intact.
And the QT-6600 terminal stores maintenance data in the internal flash memory.
Reading this data by the manager operation (refer to 3-3-22. Maintenance data in the
reference manual) helps troubleshooting.

I-11
QT-6600 Installation & Down Recovery Manual
2-2. Master terminal failure
The master plays an important role, such as controlling check tracking files. If the master
terminal goes down, the following undesirable condition results:
1) The check tracking processing (open check, close check. etc.) being performed cannot
be continued. (In case of Check Tracking master goes down.)
2) The receipt cannot be printed out to remote printers. (In case of Remote printer master
goes down.)
If the master terminal failed, therefore, the user should call the serviceman as soon as
possible.
2-2-1. Check tracking master terminal failure
2-2-1-1. Detection of check tracking master terminal failure
With the QT-6600 system, the satellite terminal assumes that the master terminal is down
when it could not obtain any response to its inquiry. The master terminal is assumed to have
gone down in the following cases:
1) The power cable is disconnected from the outlet.
2) Trouble with the inline between the master and the satellite terminal.
3) Trouble with the master terminal hardware.
Note that the master terminal is not really down in the first two cases.
When a satellite detects the master terminal down, the satellite asks the operator by the
message below. If the operator of the satellite selects master removal, the satellite turn on
the “Master down” flag and broadcast all of the terminals (including backup master)
connected inline. After broadcasting this flag, all of the terminals do not access any check
tracking data to the master.
Operation when detecting master down
1. When the terminal detects master down, the message appears
on the screen.
REG
C
01 10-10-01 12:34 000001
MC #01
E105 Check/TBL tracking Master
d wn.
Please call Manager!!
YES:Retry f r c nnecti n.
NO :Rem ve it fr m system.
NEW/OLD 123456
←Machine No. of master

I-12
Down Recovery
2. Selecting “YES” retries communication with the master.
Selecting “NO” turns on the master’s down flag and broadcast
it to all of the terminals. Then the “Cut off Master/BM icon”
is lit.
Note:
Do not press “No” key unless attempting “Retry” operation.
Press “ Yes” key to retry to send data to master terminal
when the error message is shown on the display.
3. When there is no backup master, this message will appear on
the display.
2-2-1-2. Master failure during check tracking operation
1The satellite makes an inquiry about check tracking data, but it cannot obtain any
response from the master.
2If “No” key is pressed on the above situation, the satellite turns on its own “Master
Down” flag and broadcast this flag all of the terminals. The “Cut off Master / BM icon”
of all terminals received this flag are lit.
3Then the satellite makes an inquiry to the backup master.
Note:
When the backup master goes down, the satellite turns on the “Backup master Down” flag
and makes no further inquiry to the backup master.
Satellite Satellite
Master Backup
master
Check
tracking Check
tracking
12
3
REG
C
01 10-10-01 12:34 000001
E107 B th Master&Backup master
d wn. CHK/TBL tracking r
Clerk interrupt is n t
available.
REG
C
01 10-10-01 12:34 000001
MC #01
E108 CHK/TBL Master is rem ved
fr m system.
NEW/OLD 123456
ß←Cut off Master/BM icon
←Machine No. of master

I-13
QT-6600 Installation & Down Recovery Manual
2-2-2. Remote printer failure
2-2-2-1. Detection of remote printer failure
With the QT-6600 system, the satellite terminal assumes that the master printer is down
when it could not obtain any response to its inquiry. The master printer is assumed to have
gone down in the following cases:
1) The power cable is disconnected from the outlet (the terminal or the printer).
2) Trouble with the inline between the terminal connected with the master remote printer
and the satellite terminal.
3) Trouble with the connection of printer and terminal.
4) Trouble with the terminal hardware connected with the master printer.
5) Trouble with the printer hardware.
Note that the master terminal or the remote printer is not really down in the first three cases.
When a satellite detects the master printer down, the satellite sends the data to the backup
printer automatically. (No operation is necessary at the terminal.)
2-2-2-2. Master printer failure during printing on remote printer
1The terminal requires an inquiry about the printing data, but it cannot obtain any
response from the terminal with remote master printer.
2Then the terminal makes an inquiry to the terminal with remote backup printer.
Note :
When the remote backup printer or the terminal with remote backup printer goes down,
there is an option to retry printing / to display its own receipt / to discard data.
Terminal Terminal
Terminal
w/ remote prt
Terminal
w/ remote prt
12
Remote
master
printer
Remote
backup
printer

I-14
Down Recovery
2-3. Recovery processing
With the QT-6600 system, the processing being performed can be continued by a backup
master even when a master goes down. However, at the end of the daily operations, the
master which has been down should be restored so that it can operate normally on the next
day.
2-3-1. Master/backup master down detection
1) After daily operations, check the “Cut off Master/BM” icon.
2) If the icon is lit on any terminal, the system has been downed in the day.
3) Turn off / on the master and backup master (not by the <Disp on/off> key but by the main
power switch in the power switch cover).
4) After this operation, the “System error” icon is lit on the master (or backup master) or
both master/backup master.
5) In case of the icon of one terminal is lit, disconnect this terminal from the inline and
repair it. If the icon of both terminal are lit, both master have been downed. This case,
jump to the next section.
6) Issue open check reset report on the alive master or backup master terminal.
7) Connect the restored master terminal with the inline, initialize it and download the
terminal program from the other master.
8) Perform the “System Re-configuration” at the restored master terminal.
2-3-2. When both master and backup master go down
1) Restore both masters immediately, load the program file to them.
2) Perform the “System Re-configuration” at the master terminal.
2-4. Master failure during X/Z collection/consolidation or terminal data transfer
With the master goes down during X/Z collection / consolidation or transfer of terminal
program file, it is necessary to take the following procedure:
1) When the master goes down during Z collection / consolidation, the satellite is not
released from locked condition.
2) In this case, press the <ESC> key twice at that satellite to release the locked condition.
3) After step 2), cut off the downed master from the system connection table and perform
Z collection / consolidation from other terminal.
This command should be issued by the good (not downed) terminal.
2-5. Satellite terminal down
When the satellite terminal goes down during check tracking registration, the check
number cannot be used for other terminal.
In this case, performing the “Busy Reset” command in the manager mode releases this flag.
ß←Cut off Master/BM icon
¶←System error icon

I-15
QT-6600 Installation & Down Recovery Manual
2-6. LAN printer down
When the LAN printer goes down perform system connection check (refer to 3-3-1.
System connection check in the reference manual) after replacing the LAN printer.

CASIO COMPUTER CO., LTD.
6-2, Hon-machi 1-chome
Shibuya-ku, Tokyo 151-8543, Japan
MA0901-00501A
Printed in Japan
QT-6600IDR*E
c
Other manuals for QT-6600
6
Table of contents
Other Casio Touchscreen manuals
Popular Touchscreen manuals by other brands

InFocus
InFocus INF5532AG Handling guide

Allo RemoteControl
Allo RemoteControl NICE Era TOUCH HSTS2FR instructions

Bosch
Bosch Control Air M Installation & operation manual

Faytech
Faytech 7 Inch user manual

Elo TouchSystems
Elo TouchSystems 3200L user manual

Matrix Orbital
Matrix Orbital HTT Series Firmware Guide

Elo TouchSystems
Elo TouchSystems 1930L user manual

Tyco Electronics
Tyco Electronics Elo Entuitive Touchmonitor ET1925L Series user guide

Phonak
Phonak Roger Touchscreen How to connect

ViewSonic
ViewSonic IFP50-5 Series user guide

ViewSonic
ViewSonic ViewBoard IFP70 Series quick start guide

Elo TouchSystems
Elo TouchSystems 3243L user manual