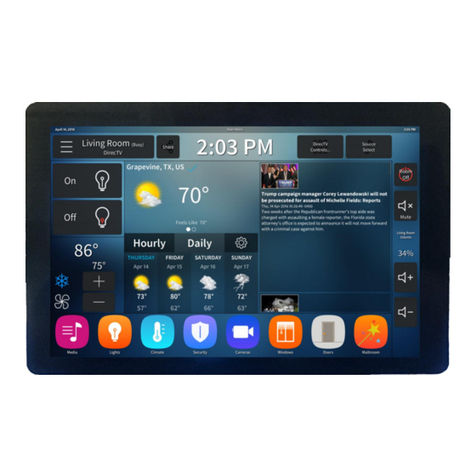
NEXIO HID Touch-screen User manual

1
Last Updated: 2012.12.07
NEXIO HID Touch-screen
User Guide
[note] The information in this manual written based on Windows 7 and images used in this manual may differ from
the actual image.

2
CONTENTS
1. Introduction ........................................................................................................................................................................ 4
1.1 Touch-screen with OS Compatibility................................................................................................................ 4
2. Connection of USB .......................................................................................................................................................... 5
2.1 Connecting to Computer with USB cable of Touch-screen................................................................... 5
2.2 Check Touch-screen connection ........................................................................................................................ 5
2.2.1 Check Digitizer Touch Screen Mode........................................................................................................ 5
2.2.2 Check Mouse Mode......................................................................................................................................... 6
3. Setting ................................................................................................................................................................................... 7
3.1 Setting for touch calibration and Option....................................................................................................... 7
3.1.1 Setting for multi display and calibration................................................................................................ 7
3.1.2 Setting for Touch-screen display............................................................................................................... 7
3.1.3 Identify Touchscreen in Multiple Monitors ........................................................................................... 8
3.1.4 Calibration ............................................................................................................................................................ 9
3.1.5 Pen and Touch Option. ................................................................................................................................13
3.1.6 Key board of Tablet PC................................................................................................................................13
3.1.7 Option of Tablet PC input board.............................................................................................................14
4 Application for HID support and control .............................................................................................................15
4.1 Introduction of Application ................................................................................................................................15
4.2 Application Install....................................................................................................................................................15
4.2.1 Start Install .........................................................................................................................................................15
4.2.2 Agreement to use application...................................................................................................................16
4.2.3 Start to copy files............................................................................................................................................16
4.2.4 Complete Install...............................................................................................................................................18
4.3 Verifying Install ....................................................................................................................................................18

3
4.4 Application Remove...............................................................................................................................................19
4.4.1 Start Remove.....................................................................................................................................................20
4.4.2 Complete Remove ..........................................................................................................................................20
4.5 detailed setting of Application..........................................................................................................................21
4.5.1 Information ........................................................................................................................................................21
4.5.2 General.................................................................................................................................................................22
4.5.3 Calibration & Rotation..................................................................................................................................23
4.5.4 USB Downloader..............................................................................................................................................29
5. Windows 7 Basic gesture definition and support program........................................................................30
5.1 Windows 7 Basic gesture definition ...............................................................................................................30
5.2 Program List Supported Gesture......................................................................................................................31

4
1. Introduction
The Nexio HID Touch-screen is provides new computing environment. You may simply control all of
programs with you finger(touching), HID totally support Windows 7 touch functions.
1.1 Touch-screen with OS Compatibility
Windows XP
Windows 7
Professional 이상
Touch type
Mouse
Digitizer multi-touch
Plug and Play
O
O
Device driver
O
O
Nexio application
O
O
Firmware upgrade
O
O
Calibrate coordinate
O
O
Gestures
O
O
SDK
O
O
TUIO
O
O
Display rotation
O
O
Multiple monitors
O
O
Category : X Not supported △Partial supported O Supported

5
2. Connection of USB
2.1 Connecting to Computer with USB cable of Touch-screen
As USB cable is connected to computer, it automatically sensors HID Touch-screen (hereinafter referred
to as Touch-screen) and shows message as below..
2.2 Check Touch-screen connection
2.2.1 Check Digitizer Touch Screen Mode.
Check message Pen and Touch Input Available with N Touch Points as below after connecting
Touch-screen
Path for execution: Start (window key) →Control panel →system and security →System

6
2.2.2 Check Mouse Mode
Make sure of HID-compliant mouse added onto Mouse and Other pointing devices in Device Manager.
- Click (+) next to Mouse and Other pointing devices to see subordinate devices.
+ Open Properties of HID-compliant and go to Details to check Hardware IDs
+ It is check if “VID_1870”is involved in Value.
[note] Right Click on HID and other pointing devices > Properties > Details > Hardware ID
Action route : Start →Control Panel →System and Security →System →Device manager

7
3. Setting
3.1 Setting for touch calibration and Option
Tablet PC Settings is available only in the mode of Digitizer Touch screen.
[note] Refer to [1.1 touch screen & OS Compatibility] to check the touch type.
3.1.1 Setting for multi display and calibration
You can set for display and calibration to use Touch-screen.
[note] Please, refer to Windows 7’s manual for more detail setting.
Path for execution: Start(Window Key) →Control panel →Hardware and Sound →Tablet PC setting
3.1.2 Setting for Touch-screen display
When user connect to computer as fist time or use multi monitor, user must set display setting. It
begins processing for censoring Touch-screen as selecting touch method.
[note] Please, refer to Windows 7’s manual for more detail setting.
Path for execution: Start (Window Key) →Control panel →Hardware and Sound →Tablet PC setting
→Display Tab →Setting

8
3.1.3 Identify Touchscreen in Multiple Monitors
What is Multiple Monitors more than two monitors on one computer. To use Tablet PC Settings
option for setting Touchscreen in Multiple Monitors. Multi Monitors settings on your computer
please refer to the graphic card documentation.
The figure above shows Windows 7’s Screen resolution settings, the 4 monitors are connected.
3.1.3.1 Identify Touchscreen
Tablet PC Settings →Display tab, select Setup button.

9
To identify display as the Touchscreen by appear as below screen on the display.
[note] Please, refer to Windows 7’s manual for more detail setting.
3.1.4 Calibration
In case of difference touch location and appear point on the display. It can adjust to use Calibrate
option.
3.1.4.1 Windows 7 Coordinate Calibration.
Tablet PC Settings →Display tab →Display options, Select Display for calibrate

10
Tablet PC Settings →Display tab →Display options, Select Calibrate button to start calibration
If you calibrate for the first time, it is 16 Point calibration, Tap the crosshair each time that it
appears on the screen.

11
If you calibrate again, it is 4 Point calibration to press “+”on screen
However, the calibration is not able to proceed if the diagonal size is changed from 16:9 to 4:3
which the coordinate would be much out of original touching area, since the 4 Point calibration
only can be done by touching “+”area.
[note] Carry out 16 Point calibration when the coordinate is much incorrect. Reset the coordinate to make it correct if the
system is set as 4 Point.
3.1.4.2 Reset Windows 7 Coordinate Calibration.
Tablet PC Settings → Display tab → Display Options, Select Reset button to initialize the
calibrate values.
[note] Reset(R) does not act as Setup(S) on Configure.

12
3.1.4.3 Windows Vista Coordinate Calibration
Tablet PC Settings →Select the Calibrate button on General tap to carry out the coordinate
calibration.
Select the Calibrate button to start the 4 Point calibration. Press “+”on screen.
However, the calibration is not able to proceed if the diagonal size is changed from 16:9 to 4:3
which the coordinate would be much out of original touching area, since the Vista calibration only
can be done by touching “+”area
[note] It is not able to reset the coordinate calibration in Windows Vista.

13
3.1.5 Pen and Touch Option.
Use can set pen and touch operation.
[note] Please, refer to Windows 7’s manual for more detail setting.
Path for execution: Start (Window Key) →Control Panel →Hardware and Sound →Pen and Touch
3.1.6 Key board of Tablet PC
User can input hand writing. Please refer to manual at upper right corner.
There is Hand writing board and Keyboard switching key button at upper left corner.
[note] user can manipulate size of keyboard. Try resizing as you wish.
[Hand writing board]
[Keyboard]
Path for execution: Start (Window Key) →All Programs →Accessories →Tablet PC →Tablet PC Input Panel

14
3.1.7 Option of Tablet PC input board
User can change setting of Tablet PC input board
[note] Please, refer to Windows 7’s manual for more detail setting.
Path for execution: Tablet PC Input Panel →Tools →Option

15
4 Application for HID support and control
4.1 Introduction of Application
All of OS support Nexio HID without application, but there would be some function limitation due
to(or caused by) the lack of the application.
4.2 Application Install
Proceed with the application installation following to Install Shield Wizard.
4.2.1 Start Install
Select Next button to start installation in InstallShield Wizard window.

16
4.2.2 Agreement to use application
Press I Agree to go to the next step of the installation.
4.2.3 Start to copy files
Select Install button to copy.

17
Install JAVA to use TUIO
Complete installing JAVA

18
4.2.4 Complete Install
Click Finish to complete install.
4.3 Verifying Install
iNexio →HID folder will be appeared on Start Menu.

19
4.4 Application Remove
Click Uninstall on Start Menu or go to Add or Remove Programs of Control Panel to remove
program. Follow Remove Wizard instruction.
[Uninstall on Start Menu]
[iNexio HID Utility on Add or Remove Programs of Control Panel]

20
4.4.1 Start Remove
Select Remove Only. Select [YES].
4.4.2 Complete Remove
Click [OK].
This manual suits for next models
1
Table of contents