Operation Guide 5468/5495
E-9
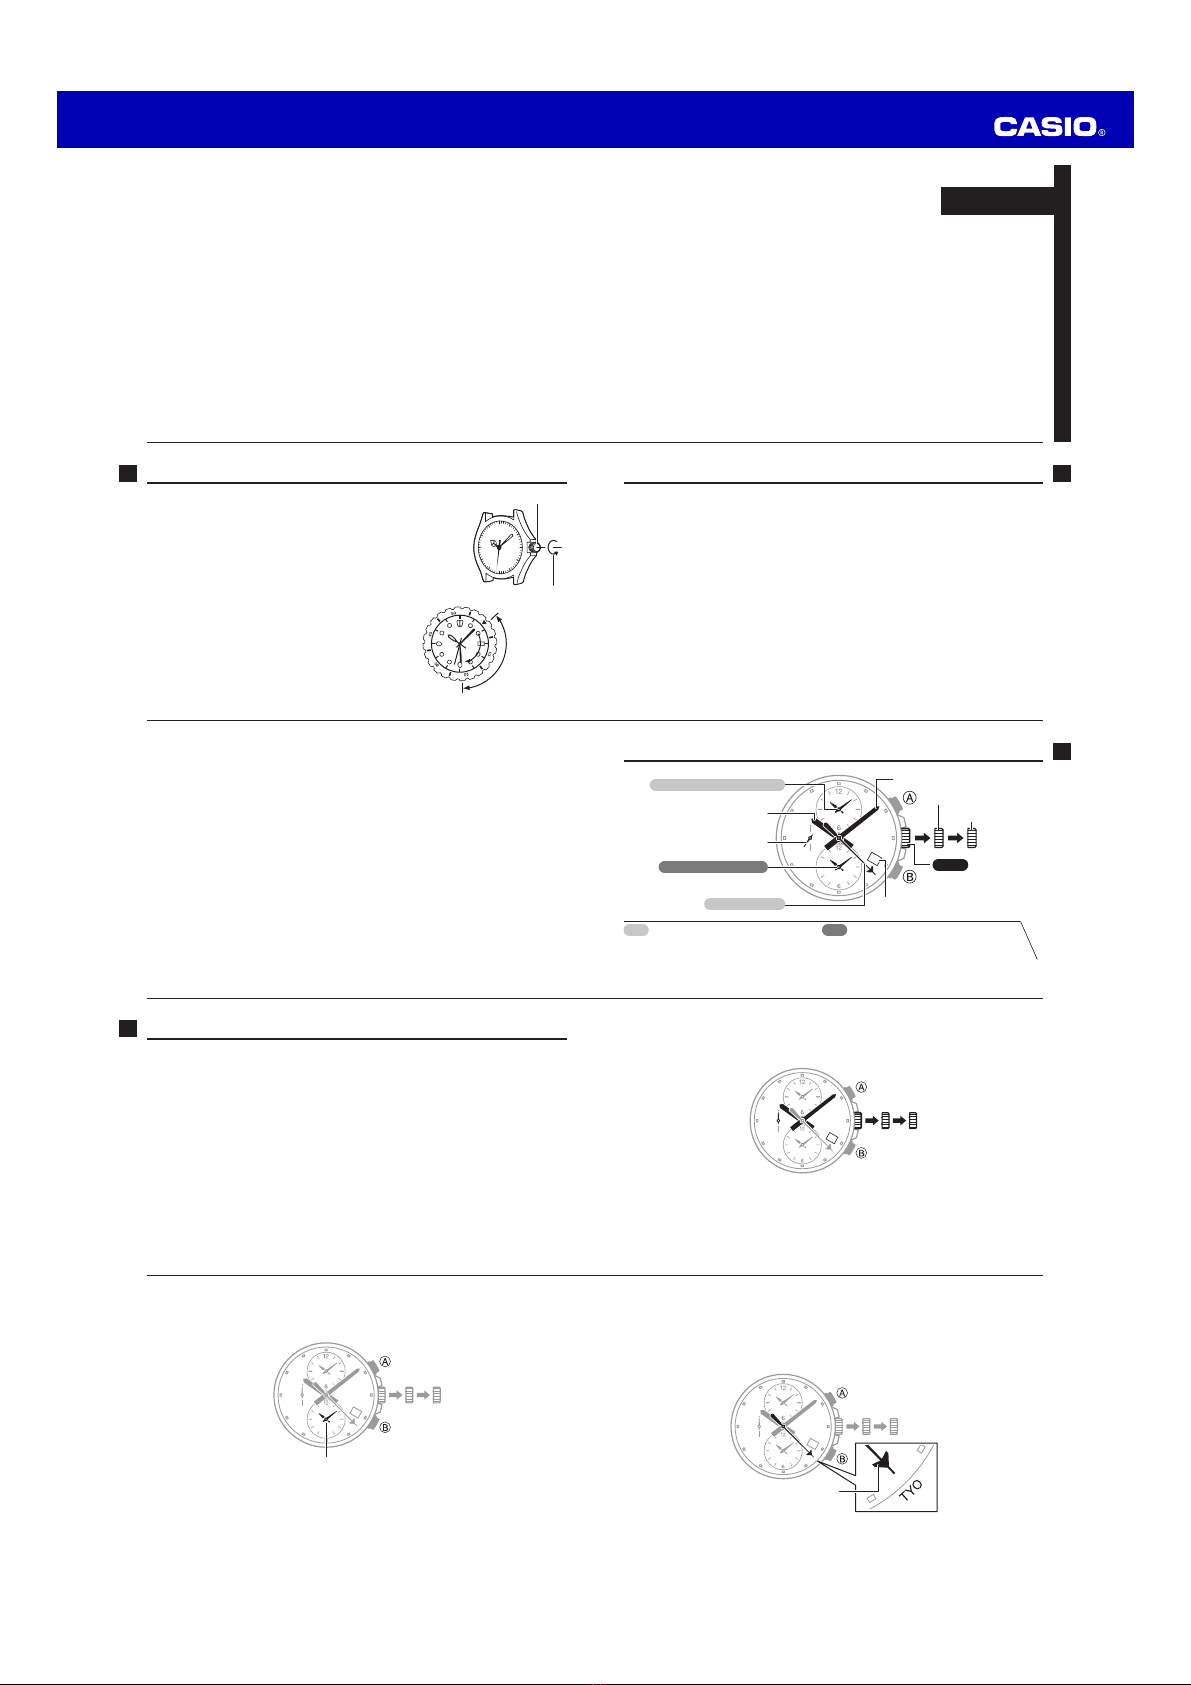
5. Use Bto move the World City hand to the city that matches your current
location (time zone).
xHolding down Bmoves the hand at high speed.
xFor information about time zones, see the City List on page E-15.
Example: TOKYO (TYO)
Align the hand with the
center of the city name.
E-8
3. Use Bto move the alarm hands to the same setting as the main hands.
xThe alarm time does not distinguish between a.m. and p.m.
xHolding down Bmoves the hands at high speed.
10:08
4. Hold down Afor about two seconds.
xThis will cause the World City hand to make one revolution.
E-7
xWhen setting the minute hand, move it four or five minutes past the desired
setting, and then back it up.
Example: To set a time of 10:08
E-6
Adjusting the Time Setting
Perform the procedure below whenever the position of any of the hands is incorrect.
Important!
xWhen setting the time, be sure to set the position of all of the hands. If you change
the position of only one hand, the other hands will still be incorrect.
1. Just as the second hand reaches 12 o’clock, pull out the crown to the
second click.
xThis will stop the second hand.
2. Rotate the crown to set the main hour and minute hands.
xTake care that you set the correct AM or PM time. Watch the day indicator when
the hour hand passes 12 o’clock. If the day indicator changes, it means you just
passed midnight.
xSet the hands to a time that is a few minutes past* the actual current time.
*Since you will re-start timekeeping in step 8 of this procedure, you should allow
a few minutes to perform the other steps before that.
E-5
Indicators and Crown Operation
Second hand
Day indicator
Click 2
Main hour hand
Main minute hand
Crown
Click 1
World City hand
Alarm hands (12-hour)
World Time hands (12-hour)
World Time
xShows the current time in the selected
World City.
Alarm
xShows alarm time setting when alarm is
on, current time when alarm is off.
E-4
Low Battery Alert ............................................................................. E-21
If watch operation is abnormal ... .................................................... E-22
Specifications................................................................................... E-23
Operating Precautions...................................................................... E-24
User Maintenance ............................................................................ E-34
E-3
Contents
Before Using the Watch for the First Time.......................................... E-2
Indicators and Crown Operation ......................................................... E-5
Adjusting the Time Setting ................................................................. E-6
To change the day indicator setting ............................................................E-12
World Time ....................................................................................... E-13
Using the Alarm................................................................................ E-17
To set an alarm time and turn on the alarm .................................................E-18
To cancel a previously set alarm .................................................................E-20
To test the alarm ........................................................................................E-20
E-2
Before Using the Watch for the First Time
Crown Operations
Some water-resistant models (100meters, 200meters)
have a screw-in crown. When you need to perform a crown
operation, rotate it towards you to unscrew it. Then pull
the crown out. Avoid applying undue force when pulling.
The watch loses its water resistance while the crown is
unscrewed. After performing a crown operation, fully screw
the crown back in.
Crown
Loosen
If your watch has a rotary bezel...
You can rotate the bezel to align its ▼mark with
the minute hand. Then you will be able to tell how
much time has elapsed since aligning the ▼mark.
Start
Elapsed time
Current
E-1
ENGLISH
xBe sure to keep all user documentation handy for future reference.
xYour watch may differ somewhat from the one shown in the illustration.
MA1604-EB © 2016 CASIO COMPUTER CO., LTD.


