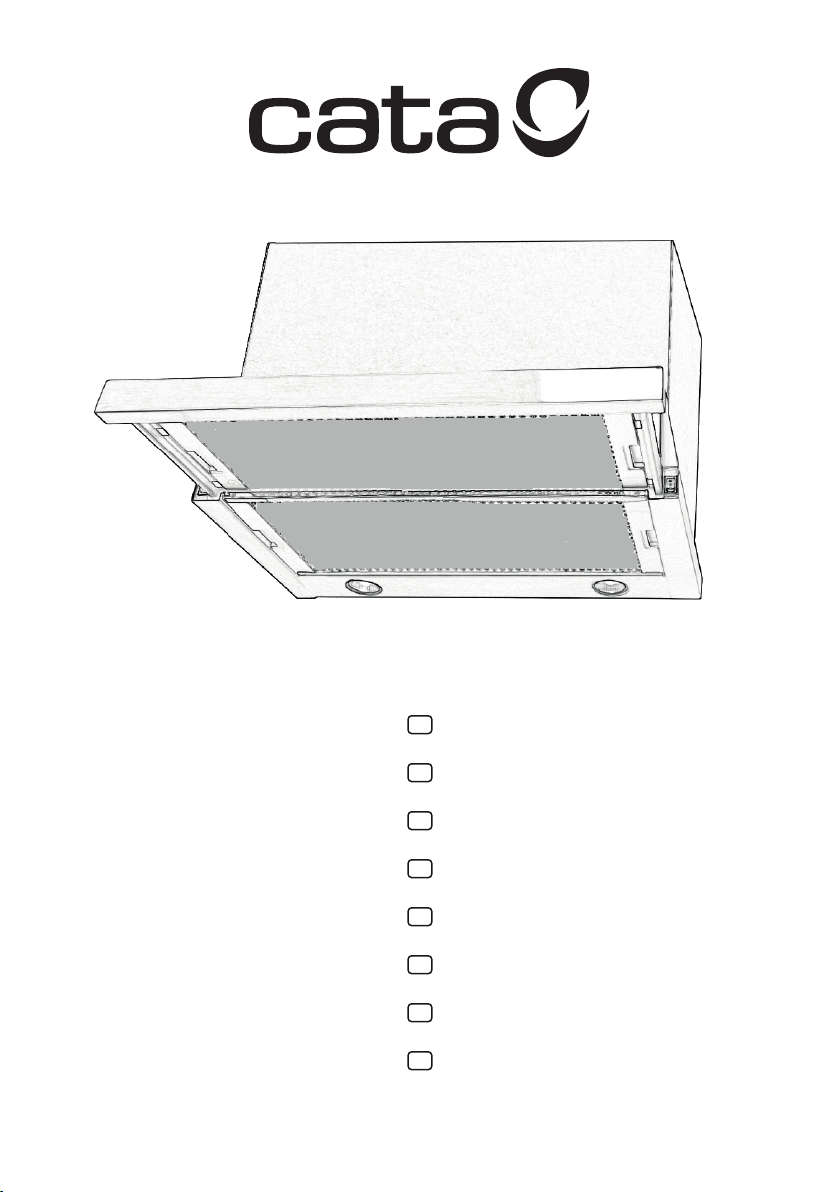
Cata TFH 6430 X User guide

ES
DE
FR
EN
IT
NL
PT
RU
INSTRUCCIONES PARA LA INSTALACIÓN. MANTENIMIENTO Y SU USO
EINBAUANLEITUNG WARTUNG UND GEBRAUCH
INSTRUCTIONS POUR L’INSTALLATION, L’ENTRETIEN et L’UTILISATION
INSTRUCTIONS FOR INSTALLATION, MAINTENANCE AND USE
ISTRUZIONI PER L’INSTALLAZIONE, MANUTENZIONE E USO
AANWIJZINGEN VOOR INSTALLATIE, ONDERHOUD EN GEBRUIK
INSTRUÇÕES DE INSTALAÇÃO MANUTENÇÃO E UTILIZAÇÃO
ИНСТРУКЦИИ ПО УСТАНОВКЕ, ОБСЛУЖИВАНИЮ И УХОДУ
IT
NL


4
4
123456

5
C
A
MP
A
N
A
EXTR
A
CTOR
A
Estimado cliente:
Agradecemos la compra de nuestra campana. Le rogamos lea atentamente
estas instrucciones para una óptima instalación, uso y mantenimiento de la
misma.
Notas: Las guras mencionadas en el presente manual están en las primeras
páginas.
Esta campana está diseñada para su montaje en un armario o en algún otro
soporte.
Atención: consulte las normas locales sobre salida de humos. No
conecte la campana a un conducto de humo, aireación o aire caliente.
Conrme con la autoridad local que la ventilación del ambiente es
apropiada. Asegúrese que el caudal máximo de extracción de aire de los
aparatos del ambiente no supera 4 Pa (0,04 mbar). Debe estar prevista una
ventilación conveniente de la habitación si se utilizan simultáneamente
una campana extractora de cocina y aparatos alimentados por gas u otro
combustible. El aire evacuado no debe ser enviado por conductos que se
utilicen para evacuar los humos de aparatos alimentados por gas u otro
combustible. Los reglamentos respecto a la evacuación de aire tienen que
ser respetados.
Este producto está pensado sólo para USO DOMÉSTICO.
Para la evacuación de humos al exterior usar un tubo de PVC rígido de mín.
Ø l20 mm.
Las restricciones anteriores no aplican a campanas sin salida de humos al
exterior (sistema de recirculación con ltro de carbón activo).
Instale la campana según las instrucciones de la plantilla provista y las
indicaciones de la g. 1 a la g. 2.
Respetar lo indicado por el fabricante del aparato de cocción si la altura
desde la supercie de cocción a la campana es superior a la indicada en la
plantilla provista.
Sólo para aparatos de cocción a gas: La distancia mínima hasta la campana
debe ser como mínimo 65 cms.
INSTALACIÓN
La campana de cocina se suministra con:
3 espaciadores (F, H)
4 tornillos (C)
2 bombillas
Para la jación, utilize los 4 tornillos (C) Ø6mm suministrados con la campana.
Cierre el espacio que quede entre la campana y la pared, ajustando el
espaciador (F).
Conexión de la campana a la red
Atención: antes de conectar la campana: corte el suministro eléctrico
y compruebe que la tensión y frecuencia suministrada coincide con la
indicada en la placa de características del equipo.
Si el aparato está provisto de un enchufe, conecte la campana a una base
de enchufes conforme a las normas vigentes situada en una zona accesible.
Si el aparato no está provisto de un enchufe, conecte el aparato directamente
a la red eléctrica, protegida por un dispositivo separador accesible para su
desconexión, omnipolar, acorde a la reglamentación local.
La conexión a la red eléctrica debe realizarse del modo siguiente:
AZUL……………………………..”N” NEUTRO
MARRON…………………………”L”LINEA DE CORRIENTE
VERDE Y AMARILLO…………..(simbolo tierra) PUESTA A TIERRA
Si los terminales del enchufe no están marcados o si tiene alguna duda,
consulte con un electricista cualicado.
Si no se suministra, acople un enchufe normalizado en el cable para la carga
indicada en la placa de características.
Uso de la campana – Seguridad
Atención: durante una descarga electroestática (p. ej. un rayo) la
campana puede dejar de funcionar. Esto no supone riesgo de daños.
Corte el suministro eléctrico de la campana y vuelva a conectar
transcurrido un minuto.
No permita que la campana sea usada por niños o personas con capacidades
(físicas, sensoriales o mentales) reducidas, o carezcan de experiencia y/o
conocimiento, salvo que hayan recibido instrucciones sobre el uso del
equipo por una persona responsable de su seguridad.
Los niños deben ser supervisados para asegurar que no jueguen con el
aparato.
Para evitar posibles incendios limpie periódicamente el ltro metálico,
controle permanentemente los recipientes con aceite caliente y no amee
alimentos bajo la campana.
No utilice la campana si presenta daños o desperfectos. Contacte a un
distribuidor ocial o un agente autorizado.
Las partes accesibles pueden calentarse cuando se utiliza con aparatos de
cocción.
Uso de la campana - Panel de mando (busque el símbolo en las
guras)
Panel Táctil 5V
Extienda el panel frontal hasta su máximo recorrido para optimizar su
capacidad de extracción.
1- Encendido y apagado del extractor.
2- Velocidad del extractor - pulsador: SILENT, 1ª, 2ª, 3ª y TURBO vel.
La velocidad TURBO solo trabajará durante 5 minutos i transcurrido este
tiempo bajará a velocidad 3.
3- Activar y desactivar la temporización del extractor.
4- Encendido y apagado de la iluminación.
5- Pulsador de decremento de intensidad de luz
6- Pulsador de incremento de intensidad de luz
Temporización: el extractor funciona 4 min. a la velocidad en curso y 4 min.
más en cada una de las velocidades inferiores hasta que se detiene.
VERSIÓN DE SUCCIÓN
Si la campana fuera utilizada en su versión “SUCCIÓN”, conectar la pieza de
plástico de salida (A), suministrada con la campana (diámetro 120mm) a un
conducto de evacuación conectado directamente con el exterior (Fig. 1)
VERSIÓN DE FILTRADO (RECICLADO INTERNO)
Cuando no existe un conducto de escape para la ventilación al exterior,
puede utilizar un ltro de carbono (D)
El aire se depura por medio del ltro y se expulsa de nuevo en el entorno.
El aire se libera en la estancia a través de una tubería de conexión que pasa
por el armario suspendido y se conecta al anillo de conexión suministrado
(A) Fig. 1.
Para utilizar el aparato en esta versión, proceda del modo siguiente:
Abra las rejillas (E)
Para proceder el cambio de ltro de carbon activo (D), se debe quitar el
tornillo (B).
Coloque de nuevo las rejillas.
Mantenimiento de la campana
Atención: corte siempre el suministro eléctrico antes de realizar el
mantenimiento de la campana. En caso de avería, contacte a un
distribuidor ocial o un agente autorizado.
Limpieza externa: use detergente líquido, no corrosivo y evite el uso de
productos de limpieza abrasivos.
Filtros de grasa: para evitar posibles incendios límpielos rigurosamente
una vez al mes. Para ello, desmonte los ltros y lávelos con agua caliente y
detergente. Si usa lavavajillas, disponga verticalmente los ltros para evitar
que se depositen restos sólidos.
Filtros de carbón activo: deben ser reemplazados cada 2 meses.
Importante: aumente la frecuencia de limpieza/sustitución de ltros
si la campana se usa más de 2 horas diarias. Utilice siempre ltros
originales del fabricante.
Reemplazo lámparas (busque el símbolo en las guras)
Atención: no manipule las lámparas hasta que se haya cortado el
suministro eléctrico y haya disminuido su temperatura.
Importante: utilice lámparas nuevas de acuerdo a lo indicado en la
placa de características de la campana.
Utilice lámparas con reector de aluminio para sustituir lámparas halógenas.
No utilice lámparas dicroicas - riesgo de sobrecalentamiento.
En campanas equipadas con lámparas incandescentes, éstas solamente se
deberían utilizar durante el funcionamiento del motor.
No deben dejarse encendidas de forma permanente usandolas como fuente
de iluminación.
Información legal
El fabricante:
- Declara que este equipo cumple los requisitos esenciales sobre material
eléctrico de baja tensión, prescritos en la directiva 2006/95/CEE del 12/12/06
y de compatibilidad electromagnética prescrita por la directiva 2004/108/
CEE del 15/12/04.
- No se hace responsable por la no observación de las indicaciones del
presente manual y las normas de seguridad vigentes para el correcto uso
del equipo.
- Se reserva el derecho de efectuar cualquier modicación sin previo aviso en
el equipo o el presente manual.
Contacte con nuestro distribuidor ocial en caso que necesite asistencia
técnica o información adicional sobre nuestros productos.
ES

6
DUNSTABZUGSHAUBE
Lieber Kunde:
Wir bedanken uns bei Ihnen für den Kauf unserer Abzugshaube. Wir
möchten Sie bitten, diese Anleitung sorgfältig zu lesen, um den optimalen
Einbau sowie die optimale Nutzung und Wartung zu gewährleisten.
Hinweis: Die im vorliegenden Handbuch genannten Abbildungen sind auf
den ersten Seiten zu nden.
Die Abzugshaube muß direkt an die Wand bzw, an die Unterseite eines
Hängeschranks montiert warden.
Achtung: Informieren Sie sich über die örtlichen Vorschriften zur
Rauchabführung. Schließen Sie die Abzugshaube nicht an einen
Rauch-, Lüftungs- oder Warmluftkanal an. Lassen Sie sich von der
Ortsbehörde bestätigen, dass die Umgebungsbelüftung angemessen ist.
Stellen Sie sicher, dass der durch Umgebungsgeräte erzeugte Unterdruck
4 Pa (0,04 mbar) nicht übersteigt. Bei gleichzeitiger Nutzung einer Küchen-
Dunstabzugshaube und Geräten, die mit Gas oder anderen Brennstoen
betrieben werden, muss eine angemessene Belüftung des Raumes
vorgesehen werden. Die abgeführte Luft darf nicht durch Abluftkanäle
geleitet werden, die für die Abführung von Rauch aus Geräten verwendet
werden, die mit Gas oder anderen Brennstoen betrieben werden. Es sind
die gesetzlichen Bestimmungen hinsichtlich der
Luftabführung zu beachten.
Für die Rauchabführung ins Freie sollte ein Hart-PVC-Rohr mit einem
Dieses Gerält Ist für den HAUSGEBRAUCH.
Durchmesser von min. Ø l20 mm verwendet werden.
Die vorgenannten Beschränkungen gelten nicht für Abzugshauben ohne
Abluftanschluss ins Freie (Umluftanlage mit Aktivkohlelter).
Der Einbau der Abzugshaube erfolgt gemäß den Anleitungen der Vorlage
und den Angaben auf den Abbildungen 1 bis 2.
Beachten Sie die Angaben des Kochgeräte-Herstellers, wenn der Abstand
zwischen der Kochäche und der Abzugshaube größer ist, als in der
Vorlage angegeben.
Gilt nur für Gas-Kochgeräte: Der Abstand zur Abzugshaube muss
mindestens
65 cm betragen.
EINBAU
Zum: Lieferumfang ver Haube gehbren
3 Abtanhalter (F, H)
4 Schrauben (C)
2 Glühbimen
Zur Befestigung sind die der Haube beiliegenden 4 Schrauben (C) Ø6mm
zu verwenden.
Der zwischen Haube und Wand verbleibende Freiraum kann mit dem
Abstandhalter (F) überbrückt warden.
Anschluss der Abzugshaube an das Stromnetz
Achtung: bevor Sie die Abzugshaube anschließen: Schalten Sie die
Stromversorgung ab und vergewissern Sie sich, dass die gelieferte
Spannung und Frequenz mit den auf dem Typenschild des Gerätes
angegebenen Daten übereinstimmen.
Wenn das Gerät mit einem Stecker versehen ist, schließen Sie es gemäß den
örtlichen Bestimmungen an eine zugängliche Steckdose an.
Sollte das Gerät nicht über einen Stecker verfügen, schließen Sie es direkt
an das Stromnetz an. Dabei muss gemäß den örtlichen Bestimmungen zum
Schutz ein omnipolarer Trennschalter zur Abschaltung vorhanden sein.
Der Netzanschluß ist wie folgt vorzunehment:
BLAUE……………………..”N” NULLEITER
BRAUN…………………….”L” STROM
GRÜN UND GELB………..(simbolo tierra) ERDE
Sind die Steckerklemmen nicho markiert oder haben Sie sonnstige
Schwierrigkeiten, sollten Siesich von einem Elecktriker beraten lassen.
Sollte dem Gerät kein Stecker beiliegen, muß das kabel an einen für die
auf dem
Typenschild genannte Belastung in Frage kommenden Stecker
angeschlossen warden.
Benutzung der Abzugshaube - Sicherheit
Achtung: Im Falle einer elektrostatischen Entladung (z. B.
Blitzeinschlag) kann es zu einem Ausfall der Abzugshaube kommen.
Dadurch besteht nicht die Gefahr einer Beschädigung. Schalten Sie
die Stromversorgung
der Abzugshaube ab und schalten Sie sie nach einigen Minuten wieder an.
Verhindern Sie die Benutzung der Abzugshaube durch Kinder oder Personen
mit verminderten physischen, sensorischen oder geistigen Fähigkeiten, oder
solchen, die nicht über ausreichende Erfahrung und/oder Kenntnis verfügen,
außer in dem Falle, dass sie über den Gebrauch des Gerätes durch eine für
ihre Sicherheit verantwortliche Person unterrichtet worden sind.
Kinder müssen beaufsichtigt werden, um sicherzustellen, dass sie nicht mit
dem Gerät spielen.
Um Funktionsstörungen zu vermeiden sollte der Metalllter regelmäßig
gereinigt werden. Behalten Sie Kochgefäße, die heißes Öl enthalten immer
im Auge und ambieren Sie keine Lebensmittel unter der Abzugshaube.
Benutzen Sie die Abzugshaube nicht, wenn Sie Schäden oder Mängel
aufweist. Nehmen Sie Kontakt mit Ihrem Vertreter vor Ort oder einem
autorisierten Fachhändler auf.
Die zugänglichen Geräteteile können bei gleichzeitiger Verwendung von
Kochgeräten heiß werden.
Benutzung der Abzugshaube - Bedienfeld (siehe Symbol in den Abbildungen)
Bedienfeld mit Sensortasten TC5V
1- Ein-/Ausschalten des Gebläses.
2- Taste für Gebläsestufe: SILENT, 1., 2., 3. und TURBO. Stufe
Die Turbostufe ist eingestellt auf 5min. Nach Ablauf dieser Zeit schaltet das Geraet
automatisch auf die 3.Geschwindigkeitsstufe herunter.
3- Timer des Gebläses aktivieren und deaktivieren.
4- Ein-/Ausschalten der Beleuchtung.
5- Drucktaste zur Verringerung der Lichtintensität
6- Drucktaste für die Erhöhung der Lichtintensität
Timer: Das Gebläse läuft 4 Minuten auf der gewählten Stufe und jeweils 4 Minuten in
den niedrigeren Gebläsestufen, bis es sich abschaltet.
SAUGBETRIEB
Wenn eine Abzugshaube mit ABSAUGSYSTEM verwendet wird, schleßen Sie
das mitgelieferte, trichterförmige Kunststoteil (A) (Durchmesser 120mm) an
einen Abluftschacht an, der direct nach außen führt. (Fig 1)
FILTERBETRIEB (INTERNE LUFTUMWÄLZUNG)
Ist kein Luftaustrag nach außen möglich, kann ein Aktivkohlelter (D) zum
Einsatz kommen.
Über den Filter wird die Luft gereinigt und dann wieder in den Raum geblasen.
Der Luftaustritt in den Raum erfolgt über eine durch den Hängeschrank verfaufende
Leitung, die über den der Haube beiliegenden Anschußring (A) am Gerät befestigt
warden muß (Fig 1)
Zum Einsatz des Geräts im Filterbetrieb ist wie folgt vorzugehen:
Schutzgitter (E) öftnen.
Um den Aktivkohlenlter zu wechseln (D) sollten Sie Sicherungsschraube
entfernen (B).
Schutzgitter wieder aufsetzen.
Wartung der Abzugshaube
Achtung: Schalten Sie die Stromversorgung stets aus, bevor Sie die Abzugshaube
warten. Nehmen Sie im Störungsfalle bitte mit ihrem Vertreter vor Ort oder
einem autorisierten Fachhändler Kontakt auf.
Reinigung außen: Verwenden Sie üssige Reinigungsmittel. Benutzen Sie keine
scharfen Reinigungsmittel oder Scheuermilch.
Fettlter: Um Brandgefahren zu vermeiden, müssen die Filter monatlich.
Bauen Sie dazu die Filter aus und reinigen Sie sie mit warmem Wasser und
einem Reinigungsmittel. Bei Benutzung des Geschirrspülers, legen Sie die
Filter senkrecht ein, um Ablagerungen fester Rückstände zu verhindern.
Aktivkohlelter: Die Filter müssen alle 2 Monate ersetzt werden.
Wichtig: Erhöhen Sie die Reinigungs-/Filterersatzhäugkeit, wenn die
Abzugshaube länger als 2 Stunden täglich in Betrieb ist. Benutzen Sie immer
Originallter des Herstellers.
Ersatz der Leuchten (siehe Symbol in den Abbildungen)
Achtung: Schalten Sie die Stromversorgung ab und lassen Sie die
Leuchten abkühlen, bevor Sie Arbeiten an diesen durchführen.
Wichtig: Benutzen Sie neue Leuchten gemäß den Angaben auf dem
Typenschild der Abzugshaube.
Für den Austausch von Halogenleuchten sollten Leuchten mit Aluminiumreektor
verwendet werden. Benutzen Sie keine Kaltlichtlampen - Überhitzungsgefahr.
Bei Dunsthauben mit Wolfram-Glühbirnen, sollte das Licht nur bei laufendem Motor
benutzt werden. Es sollte nicht ständig an bleiben und nicht als Lichtquelle genutzt
werden.
Rechtlicher Hinweis
Der Hersteller:
- Erklärt, dass dieses Gerät sowohl die Anforderungen der Richtlinie 2006/95/ EWG vom
12/12/06 über elektrische Geräte mit Niederspannung als auch die Anforderungen der
Richtlinie 2004/108/EWG vom 15/12/04 über elektromagnetische Verträglichkeit erfüllt.
- Übernimmt keine Haftung für Schäden, die durch die Nichtbeachtung der
Anweisungen des vorliegenden Handbuchs und der gültigen Sicherheitsvorschriften
für die ordnungsgemäße Handhabung des Geräts entstanden sind.
- Behält sich das Recht vor, das Gerät oder das vorliegende Handbuch ohne
vorherige Ankündigung abzuändern.
Setzen Sie sich mit unserem Vertreter vor Ort in Verbindung, wenn Sie technische
Unterstützung oder zusätzliche Informationen zu unseren Produkten benötigen.
DE

7
H
O
TT
E
ASPI
R
ANTE
Cher client,
Merci d’avoir choisi notre hotte. Veuillez lire attentivement ces
instructions qui vous assureront une installation, une utilisation et un
entretien optimum de cette hotte.
Remarques: Les illustrations mentionnées dans cette notice se trouvent
dans les premières pages.
Cette hotte est conçue pour être montée dans un élément de cuisine
spécialement adapté.
Attention: appliquez les normes locales relatives à l’évacuation
des fumées. Entre autres: ne reliez pas la hotte à un conduit de
fumée, d’aération ou d’air chaud déjà utilisé. Conrmez avec
l’autorité locale que votre raccordement est conforme. Assurez-vous
que le débit maximal d’extraction d’air des appareils environnants ne
dépasse pas 4 Pa (0,04 mbar). Une ventilation convenable de la pièce
doit être prévue lorsqu’une hotte de cuisine est utilisée simultanément
avec des appareils utilisant du gaz ou un autre combustible.
Ll’air ne doit pas être envoyé dans un conduit utilisé pour évacuer les
fumées d’appareils utilisant du gaz ou un autre combustible.
Ce produit est uniquement destiné à un USAGE DOMESTIQUE
Pour l’évacuation des fumées vers l’extérieur, utiliser un tuyau en PVC
rigide d’un diamètre idéal de 120 mm.
Les restrictions précédentes ne concernent pas les hottes dépourvues
d’évacuation vers l’extérieur (utilisation en recyclage avec ltre à
charbon actif).
Installez la hotte conformément aux instructions du schéma de
montage fourni et aux indications des illustrations 1 à 2.
- La distance minimale à respecter entre la surface support
des récipients de cuisson de la table de cuisson et la partie
la plus basse de la hotte de cuisine doit être d’au moins
65 cm. Si les instructions d’installation pour la table de cuisson à gaz
spécient une distance plus grande, celle-ci doit être prise en compte.
INSTALLATION
La hotte de cuisine est livrée avec:
3 Ecarteurs (F, H)
4 vis (C)
2 ampoules
Utiliser les 4 vis Ø6mm fournies (C), pour xer la hotte.
Fermer l’espace créé entre la hotte et le mur en ajustant les écarteurs (F).
Branchement électrique de la hotte
Attention: avant de brancher la hotte : coupez l’alimentation
électrique. Vériez que la tension et la fréquence existantes
correspondent à celles indiquées sur la plaque signalétique de
la hotte.
Si la hotte est équipée d’une prise, raccordez la hotte à une prise
homologuée facile d’accès, conformément aux normes en vigueur.
Si l’appareil n’est pas équipé de prise, raccordez-le directement
à l’installation électrique, sur un circuit protégé par un dispositif
omnipolaire de séparation facile d’accès pour pouvoir le déconnecter,
conformément à la réglementation locale.
Le raccordement au réseau électrique doit être réalisé ainsi :
BLEU……………….. N….. .NEUTRE
MARRON……………L……PHASE
VERT ET JAUNE…....... MISE À LA TERRE
Pour le branchement, faire intervenir une personne qualiée.
Si aucune prise n’est fournie, raccorder au câble une che normalisée
adaptée aux caractéristiques indiquées sur la plaque signalétique de
la hotte.
Utilisation de la hotte – Sécurité
Attention: en cas de décharge électrostatique (par ex. la foudre)
la hotte peut cesser de fonctionner. Cela ne suppose aucun
risque de dommages. Coupez l’alimentation électrique de la
hotte et rebranchez-
la une minute plus tard.
- Cet appareil n’est pas prévu pour être utilisé par des personnes (y
compris les enfants) dont les capacités physiques, sensorielles ou
mentales sont réduites, ou des personnes dénuées d’expérience ou
de connaissance, sauf si elles ont pu bénécier, par l’intermédiaire
d’une personne responsable de leur sécurité, d’une surveillance
ou d’instructions préalables concernant l’utilisation de l’appareil. Il
convient de surveiller les enfants pour s’assurer qu’ils ne jouent pas avec
l’appareil.
.
Les enfants doivent être surveillés pour s’assurer qu’ils ne jouent pas
avec l’appareil.
Il y a risque d’incendie si le nettoyage n’est pas eectué conformément
aux instructions; ne pas amber d’aliments sous la hotte de cuisine.
ATTENTION: Les parties accessibles de cet appareil peuvent devenir
chaudes lorsqu’il est utilisé avec des appareils de cuisson.
Si le câble d’alimentation électrique est endommagé, celui-ci devra
être impérativement changé par un service ociel ou par un agent
autorisé.
VERSION ASPIRANTE
Si la hotte est utilisée en mode évacuation, raccorder l’adaptateur de
sortie en plastique (A) livrée avec la hotte (diamètre 120mm) au conduit
d’évacuation vers l’extérieur (Fig 1)
VERSION FILTRANTE (RECYCLAGE INTERNE)
Lorsqu’il n’existe pas de conduit d’évacuation vers l’extérieur, un ltre á
charbon (D en option) est recommandé pour diminuer les odeurs.
Utilisation de la hotte - Pupitre de commande (recherchez le symbole sur les
illustrations)
Pupitre tactile TC5V
1-Marche / arrêt d’extraction.
2-Vitesse d’extraction - touche: SILENT, 1ère, 2ème, 3ème et TURBO vitesses. En
paneaux sur button TURBO (T), Turbo de vitesse ne fonctionne que pour 5 minutes
après cette heure bas àune vitesse 3.
Turbo de vitesse ne fonctionne que pour 5 minutes après cette heure bas à une
vitesse 3.
3- Activer et désactiver la minuterie de l’extracteur.
4-Marche / arrêt de l’éclairage.
5-Bouton-poussoir de diminution d’intensité de lumière
6-Bouton-poussoir (6 ) d’augmentation d’intensité de lumière
Minuterie: l’extracteurfonctionne 4 min. à la vitesse choisie et 4 min.supplémentaires
à chacune des vitesses inférieures jusqu’à ce qu’il s’arrête.
Entretien de la hotte
Attention: coupez toujours l’alimentation électrique avant d’intervenir sur la
hotte. En cas de défaut, contactez un distributeur ociel ou un agent agréé.
Nettoyage externe: utilisez un détergent liquide, non corrosif et n’utilisez pas
des produits de nettoyage abrasifs.
Filtres à graisse: Il y a risque d’incendie si le nettoyage n’est pas eectué
conformément aux instructions Pour cela, démontez les ltres et lavez-les à l’eau
chaude et avec du détergent neutre. Si vous utilisez un lave-vaisselle, placez les
ltres à la verticale an d’éviter le dépôt de restes solides.
Filtres à charbon actif : ils doivent être remplacés tous les trois mois.
Important: augmentez la fréquence de nettoyage / remplacement des ltres
si la hotte est utilisée plus de 2 heures par jour. Utilisez toujours des ltres
d’origine du fabricant.
Remplacement des ampoules (recherchez le symbole sur les
illustrations)
Attention: ne manipulez pas les ampoules avant d’avoir coupé l’alimentation
électrique et que leur température n’ait baissé.
Important: utilisez des ampoules neuves conformément à ce qui apparaît sur
la plaque signalétique de la hotte.
Utilisez des ampoules à réecteur en aluminium pour remplacer des ampoules
halogènes. N’utilisez pas d’ampoules dichroïques - risque de surchaue.
Sur les hottes équipées de lampes à lament de tungstène, l’éclairage doit être
uniquement utilisé lorsque le moteur est en fonctionnement. Ces lampes ne
peuvent fonctionner en permanence et doivent servir d’éclairage ponctuel.
Informations légales
Le fabricant:
- Déclare que cet équipement est conforme aux exigences essentielles
concernant le matériel électrique basse tension, indiquées dans la directive
2006/95/CEE du 12/12/06, et de compatibilité électromagnétique indiquées par la
directive 2004/108/CEE du 15/12/04.
- N’est pas responsable du non respect des indications de la présente notice et des
normes de sécurité en vigueur pour l’utilisation correcte de l’équipement.
- Se réserve le droit d’eectuer toute modication sur l’équipement ou dans la
présente notice sans avertissement préalable.
Contactez notre distributeur ociel si vous avez besoin d’assistance technique ou
d’informations supplémentaires concernant nos produits.
FR

8
E
X
TRAC
T
OR H
O
O
D
Dear Customer,
Thank you for buying our hood. Please read these instructions carefully
for its optimum installation, use and maintenance.
Notes: The gures mentioned in this manual are in the rst pages.
This hood is designed for tting in a cabinet or on some other support.
Warning: consult local regulations regarding fumes outlets. Do not connect
the hood to a fume, ventilation or hot air duct. Conrm that room ventilation
is appropriate with the local authorities. Make sure
the maximum air extraction ow rate for the appliances in the room
does not exceed 4 Pa (0.04 mbar).The room must have adequate
ventilation if an extractor hood is used simultaneously with appliances
that run on gas or other fuels. The evacuated air must be extracted
through ducts that are used for evacuating fumes from appliances that
run on gas or other fuels. Regulations regarding air extraction must be
complied with.
This product in intended for HOUSEHOLD USE only.
Use a rigid PVC pipe with a min. Ø l20 mm to evacuate fumes outside.
The above restrictions do not apply to hoods with no fumes outlet to outside
(recirculation system with activated charcoal lter).
Install the hood in line with the instructions on the template.
For gas cooking appliances only: the minimum distance to the hood
must be at least 65 cm.
Warning: Failure to install the screws or xing device in accordance
with these instructions may result in electrical hazards.
INSTALLATION
The cooker hood is supplied with
3 Spacer (F, H)
4 Screws (C)
2 Bulbs
To xing the Hood, use the 4 screws (C) Ø6mm supplied with the hood.
Close the space that remains between the hood and the wall,
adjunsting the spacer (F).
Before completing any connection, make sure the house voltage
corresponds with the voltage indicate on the data label.
Connecting the hood to the grid
Warning: before connecting the hood: switch o the electricity supply and
check that the supplied voltage and frequency coincide with that indicated
on the appliance nameplate.
If the extractor hood has a plug, connect it to a power socket in line with applicable
regulations, located in an accessible area.
If the hood does not have a plug, connect it directly to the electrical grid, protected
by a separator device accessible for disconnection, in line with local regulations.
The connection to the electrical mains must be made as follows:
BLUE………………………..”N”NEUTRAL
BROWN……………………..”L” LIVE
GREEN AND YELLOW……(simbolo tierra) EARTH
If the terminals of the plug are unmarked or if you are in any doubt consult a
qualied electrician.
If it is not supplied t a plug normalized in the cord for the load showed on the
rating plate.
USE OF THE HOOD – SAFETY
Warning: the hood may stop working during an electrostatic discharge (e. g.
lightning). This involves no risk of damage. Switch o the electricity supply to
the hood and reconnect after one minute.
This appliance can be used by children aged from 8 years and above and persons
with reduced physical, sensory or mental capabilities or lack of experience and
knowledge if they have been given supervision or instruction concerning use of the
appliance in a safe way and understand the hazards involved. Children shall not play
with the appliance. Cleaning and user maintenance shall not be made by children
without supervision.
To avoid the risk of re, clean the metal lter regularly, permanently control pans
containing hot oil and do not ambé food underneath the hood.
Do not use the hood if it shows signs of damage or imperfection. Contact an ocial
distributor or authorised dealer.
Accessible parts may heat up when using cooking appliances.
Use of the hood - Control panel (look for the symbol in the gures)
Touch panel TC5V
1- Extractor fan on and o.
2- Extractor fan speed - button: speed SILENT, 1, 2, 3 and TURBO. In panels with
TURBO (T) button, Turbo speed only will work during 5 minutes, once it runs out,
the speed will decrease to 3rd speed.
Turbo speed only will work during 5 minuts, once it runs out, the speed will decrease
to 3th speed.
3- Enable and disable extractor fan timer.
4- Lighting on and o.
5- Button to decrease the light intensity
6- Button to increase the light intensity
Timer: the extractor fan works for 4 min. at the current speed and another 4 min. at
each of the lower speeds until it stops and the lighting switches o.
SUCTION VERSION
If the hood is to be installed as a SUCTION hood, connect the plastic
outlet piece (A) supplied with the hood (120mm diameter pipe for
better performance and lower noise levels.
FILTERING VERSION (INTERNAL RE-CYCLING)
When there is no exhaust duct for venting out-door, you can use a carbon lter (D).
The air is depurate by the lter and put again in the surrounding.
The air is released in the room through a connecting pipe, which goes through the
hanging cupboard and us connected to the connecting ring supplied (A) Fig 1.
To use the appliance in this version, proceed as follows:
Open the grids (E)
To proceed to change the charcoal lter (D), the screw (B)
has to be removed.
Reinstall the grids.
HOOD MAINTENANCE
Warning: always switch o the electricity supply before carrying out
maintenance work on the hood. In the event of a fault, contact an ocial
distributor or authorised dealer.
Exterior cleaning: use non-corrosive, liquid detergent and avoid the use of abrasive
cleaning products.
Grease lters: to avoid res, clean thoroughly once a month. To do so, remove the
lters and wash with hot water and detergent. If using a dishwasher, position the
lters vertically to prevent solid remains from depositing on them.
Activated charcoal lters: replace the every 2 months.
Important: increase the lter cleaning/replacement frequency if the hood
is used for more than 2 hours a day. Always use genuine lters from the
manufacturer.
Bulb replacement (look for the s y m b o l in the gures)
Warning: do not handle the bulbs until the electricity supply has been
switched o and they have cooled.
Important: use new bulbs according to that indicated on the hood nameplate.
Use bulbs with an aluminium reector to replace halogen bulbs. Do not use
dichroic bulbs - risk of overheating.
On cooker hoods equipped with tungsten lamps, the lights should only be used
during operation of the motor. They should not be left on permanently and used
as a light source.
Legal information
The manufacturer:
- Declares that this product meets all basic requirements regarding low-voltage
electrical equipment established in Directive 2006/95/EC of 12 December 2006
and electro-magnetic compatibility established in Directive 2004/108/EC of 15
December 2004.
- Is not responsible for any failure to observe the instructions given in this manual
and current safety regulations for the correct use of the equipment.
- Reserves the right to make any modications to the equipment or this manual
without prior notice.
Contact our ocial distributor should you require technical assistance or additional
information on our products.
EN

9
CAPPADI ESTRAZIONE
Gentile Cliente:
La ringraziamo per aver acquistato la nostra cappa. La preghiamo di
leggere attentamente le presenti istruzioni per un’installazione, uso e
manutenzione ottimali.
Note: Le gure a cui si fa riferimento nel presente manuale sono presenti
nelle prime pagine.
Questo aspiratore è disegnato per essere montato in un armadio o in
un altro sopporto.
Attenzione: consultare le norme locali sullo scarico dei fumi. Non
collegare la cappa a una canna fumaria, a un condotto di
aerazione o di aria calda. Vericare con l’autorità locale che
l’aerazione
dell’ambiente sia adeguata. Assicurarsi che la portata massima di
estrazione dell’aria degli apparecchi dell’ambiente non superi 4 Pa
(0,04 mbar). Se si usano contemporaneamente una cappa aspirante
per cucine e altre apparecchiature alimentate a gas o con un
altro combustibile, deve essere prevista una suciente aerazione
dell’ambiente.Non si deve aspirare l’aria tramite canne che vengono
usate per i fumi di apparecchiature alimentate a gas o con un
altro combustibile. Si devono rispettare i regolamenti riguardanti
l’evacuazione dell’aria.
Questo prodotto è stato creato solo per USO DOMESTICO.
Per lo scarico dei fumi all’esterno usare un tubo in PVC rigido da min.
Ø l20 mm.
Le restrizioni precedenti non si applicano alle cappe senza scarico dei
fumi all’esterno (sistema di ricircolo con ltro a carboni attivi).
Installare la cappa seguendo le istruzioni della scheda fornita e le
indicazioni dalla g. 1 alla g. 2.
Rispettare quanto indicato dal produttore dell’apparecchiatura di
cottura se la distanza tra il piano di cottura e la cappa è superiore a
quella indicata nella scheda fornita.
Solo per apparecchiature di cottura a gas: la distanza minima no alla
cappa deve essere di 65 cm.
INSTALLAZIONE
L’aspiratore de la cucina viene con:
3 Distanziatores (F, H)
4 viti (C)
2 lampadine
Per ssarlo, usare le 4 vitri (C) Ø6mm fornite con l’estrattore.
Chiudere lo spazio che rimane tra l’estrattore e la parete, regolando
lo spaziatore (F)
Collegamento della cappa alla rete
Attenzione: prima di collegare la cappa: staccare
l’alimentazione elettrica e vericare che la tensione e frequenza
fornite coincidano con quelle indicate sulla targhetta delle
caratteristiche dell’apparecchio.
Se l’apparecchiatura dispone di una spina, collegare la cappa a una
presa di
corrente situata in una zona accessibile e che rispetta le norme vigenti.
Se l’apparecchiatura non dispone di una spina, collegare l’apparecchio
direttamente alla rete elettrica, proteggendolo con un dispositivo
separatore accessibile per lo scollegamento, onnipolare, in accordo
con le norme locali.
Il Collegamento alla rete alettríca si debe realizzare nel seguente
modo:
AZZURRO……………”N”NEUTRO
MARRONE……………”L” CON CORRENTE
VERDE E GIALLO……(simbolo tierra) MESSA A TERRA
Se i terminali della presa non sono indicati o se esiste qualche dubbio,
consultare un electtricista qualicato.
Se non è fornito, montare sul cavo una Spina standard secondo la
carica indicata nella targhetta delle caratteristiche.
Uso della cappa - Sicurezza
Attenzione: in caso di scarica elettrostatica (ad es. un fulmine) la
cappa potrebbe smettere di funzionare. Questo non comporta
alcun rischio di danni. Staccare la cappa dall’alimentazione
elettrica e ricollegarla dopo un minuto.
Non consentire l’uso della cappa a bambini e persone con limitate
capacità siche, psichiche o mentali o a persone prive della necessaria
esperienza e/o conoscenza salvo abbiano ricevuto istruzioni sull’uso
dell’apparecchio da una persona responsabile della sua sicurezza.
Evitare che i bambini possano giocare con l’apparecchiatura.
Per evitare possibili incendi pulire periodicamente il ltro metallico,
tenere sempre sotto controllo i recipienti con olio caldo e non
ammeggiare alimenti sotto la cappa.
Non utilizzare la cappa se presenta danni o imperfezioni. Contattare un
distributore uciale o un agente autorizzato.
Le parti accessibili possono riscaldarsi quando si usano con
apparecchiature di cottura.
Uso della cappa - Pannello di comando (cercare il simbolo nelle gure)
Pannello tattile TC5V
1- Accensione e spegnimento dell’estrattore.
2- Velocità dell’estrattore - pulsante: SILENT, 1º, 2º, 3º e TURBO vel.Nei pannello
con pulsante TURBO (T),Velocità Turbo lavorerà solo per 5 minuti, una volta che si
esaurisce, la velocità diminuisce a velocità 3 °
3- Attivare e disattivare la temporizzazione dell’estrattore.
4- Accensione e spegnimento dell’illuminazione.
5- Pulsante per ridurre l’intensità della luce
6- Pulsante per aumentare l’intensità della luce
Temporizzazione: l’estrattore funziona per 4 min alla velocità in corso e per altri 4
min in ognuna delle velocità inferiori no a che si ferma.
VERSIONE DI SUZIONE
Se l’aspiratore viene utilizzato in modo ASPIRANTE, collegare il raccordo
discarico (A) fornito con la cappa (diametro 120 mm) ad un condotto
di scarico collegato direttamente all’esterno (Fig. 1)
VERSIONE DI FILTRAGGIO (RICICLAGGIO INTERNO)
Quando non esiste una conduttura di uscita per la ventilazione
aal’esterno, si può usare un ltro di carbonio (D).
L’aria si depura mediante il ltro e viene espulsa di nuovo nell’ambiente.
L’aria si libera nell’ambiente mediante una tubatura di collegamento fornito (A) Fig 1
Per usare l’apparecchio con questa versione, procedere nel seguente
modo:
Aprire la grate (E)
Per procedere alla sostituzione del ltro del carbono attivo (D), occorre
togliere la vite (B)
Collocare di nuovo le grate
Manutenzione della cappa
Attenzione: staccare sempre l’alimentazione elettrica prima di eseguire la
manutenzione della cappa. In caso di guasto contattare un distributore
uciale o un agente autorizzato.
Pulizia esterna: usare un detergente liquido, non corrosivo ed evitare l’uso di
prodotti di pulizia abrasivi.
Filtri del grasso: per evitare possibili incendi, pulirli minuziosamente una volta
al mese. Smontare i ltri e pulirli con acqua calda e detersivo. Per il lavaggio in
lavastoviglie, disporre i ltri verticalmente per evitare che si depositino resti solidi.
Filtri ai carboni attivi: devono essere sostituiti ogni 2 mesi.
Importante: aumentare la frequenza di pulizia/sostituzione dei ltri se la
cappa è usata per più di 2 ore al giorno. Utilizzare sempre ltri originali del
produttore.
Sostituzione lampadine (cercare il simbolo nelle gure)
Attenzione: non toccare le lampadine se non è stata staccata l’alimentazione
elettrica e no a che non è diminuita la loro temperatura.
Importante: utilizzare lampadine nuove secondo quanto indicato nella
targhetta delle caratteristiche della cappa.
Utilizzare lampadine con riettore di alluminio per sostituire lampadine alogene.
Non utilizzare lampadine dicroiche - rischio di surriscaldamento.
Nelle cappe dotate di lampade al tungsteno, le luci dovrebbero essere utilizzate
soltanto durante il funzionamento del motore. Non dovrebbero essere lasciate
accese e utilizzate come luci normali.
Informativa legale
Il produttore:
- Dichiara che questo apparecchio soddisfa i requisiti essenziali sul materiale
elettrico a bassa tensione, prescritti dalla direttiva 2006/95/CEE del 12/12/06 e i
requisiti di compatibilità elettromagnetica prescritta dalla direttiva 2004/108/ CEE
del 15/12/04.
- Non può essere ritenuto responsabile per la mancata osservanza delle indicazioni
del presente manuale e delle norme di sicurezza vigenti per il corretto uso
dell’apparecchio.
- Si riserva il diritto di eseguire qualsiasi modica all’apparecchio o al presente
manuale senza preavviso.
Contattare il nostro distributore uciale in caso sia necessaria assistenza tecnica o
per ottenere informazioni aggiuntive sui nostri prodotti.
IT

10
C
A
MP
A
G
N
E SIE
R
AFZU
I
GKAP
Geachte klant,
Wij danken u voor de aankoop van onze afzuigkap. Wij verzoeken u
deze instructies voor een optimale installatie, gebruik en onderhoud
aandachtig te lezen.
Nota: de afbeeldingen waarnaar deze handleiding verwijst bevinden
zich op de eerste pagina’s.
Deze wasemkap is ontworpen om in een kast of een ander soort
houder gemonteerd te Worden.
Opgelet: raadpleeg de plaatselijke voorschriften voor de afvoer
van rook. Sluit de afzuigkap niet aan op een rook-, ventilatie-
of warmeluchtkanaal. Bevestig bij de plaatselijke autoriteiten
dat de ventilatie van de omgeving geschikt is. Controleer dat het
maximale debiet van de afgevoerde lucht 4 Pa (0,04 mbar) niet
overschrijdt. Als tegelijkertijd een afzuigkap en op gas of een andere
brandstof draaiende apparaten worden gebruikt, dan moet de ruimte
over voldoende ventilatie beschikken. De afgevoerde lucht mag niet
door leidingen stromen die gebruikt worden voor het afvoeren van de
rook die door op gas of een andere brandstof draaiende apparaten
wordt geproduceerd. De voorschriften met betrekking
tot luchtafvoer moeten worden nageleefd.
Dit product is uitsluitend voor HUISHOUDELIJK GEBRUIK.
Voor de rookafvoer naar buiten moet een stijve pvc-buis gebruikt
worden van min. Ø l20 mm.
De vorige beperkingen zijn niet van toepassing op afzuigkappen
zonder rookafvoer naar buiten (recirculatiesysteem met actief
koollter).
Installeer de afzuigkap volgens de instructies van de meegeleverde
sjabloon
en de aanwijzingen van 1 tot g. 2.
De aanwijzingen van de fabrikant van het kooktoestel in acht nemen
indien de hoogte vanaf het kookoppervlak tot de afzuigkap groter is
dan de waarde aangegeven in de meegeleverde sjabloon .
Enkel voor toestellen met koken op gas: De afstand tot de afzuigkap
moet minimaal 65 cm bedragen.
INSTALLATIE
De wasemkap wordt geleverd met:
3 Afstandhouder (F, H)
4 schoeven (C)
2 gloeilampjes
Gebriuk voor de bevestiging de vler schroeeeven die bij de wasemkap
(C) meegeleverd zijn. (Ø6mm)
Vul de ruimte die tussen de wasemkap en de wand overblijft op door
het afstellen van de afstandhouder (F).
Aansluiting van de afzuigkap op het lichtnet
Opgelet: voor het aansluiten van de afzuigkap: sluit de
stroomtoevoer af en controleer dat de geleverde spanning
en frequentie overeenkomen met de waarden aangegeven
op het gegevensplaatje
van de inrichting.
Als het apparaat uitgerust is met een stekker, sluit de afzuigkap dan
volgens de geldende voorschriften in een makkelijk toegankelijke
zone aan op een stekkerdoos.
Als het apparaat niet uitgerust is met een stekker, sluit het apparaat
dan rechtstreeks aan op een wandcontactdoos. Deze moet voorzien
zijn van een makkelijk toegankelijk scheidingselement om de stekker
te kunnen verwijderen, moet meerpolig zijn en aan de plaatselijke
voorschriften voldoen.
De aanstuiting op het lichtnet dient als volgt uitgevoerd te Worden:
BLAUW………………….”N” NULLEIDER
BLUI.N…………………..”L” FASE
GEEL/GROEN…………..(simbolo tierra) AARDDRAAD
Als de contactpunten van de steckker niet van merktekens voorzien
zijn of als u hierover twijfels hebt, neem dan contacto p het een
erkende elektricien.
Indien er geen steekker bijgeleverd is sluit dan een gestandaardiseerde
stekken op de kabel aan mel de op het typeplaatje aangegeven
spanning.
Gebruik van de afzuigkap – Veiligheid
Opgelet: bij een elektrostatische ontlading (b.v. een
blikseminslag) kan het zijn dat de afzuigkap buiten werking
wordt gesteld. Dit houdt geen risico op beschadiging in. Schakel
de stroomtoevoer van de afzuigkap
uit en zet het apparaat opnieuw aan na een minuut.
Sta in geen geval toe dat kinderen of personen met een fysieke,
zintuiglijke of mentale handicap of personen zonder de nodige
ervaring en/of kennis de afzuigkap bedienen, tenzij ze instructies
ontvangen hebben over het gebruik ervan door een persoon die
verantwoordelijk is voor hun veiligheid.
Om te voorkomen dat kinderen met het apparaat spelen, moeten
kinderen altijd onder toezicht staan.
Om brand te voorkomen, moet u het metalen lter regelmatig
reinigen, de opvangbakken met warme olie constant controleren en
geen levensmiddelen onder de afzuigkap amberen.
Gebruik de afzuigkap niet indien ze beschadigd of defect is.
Neem contact op met een ociële distributeur of een bevoegde
vertegenwoordiger.
De toegankelijke onderdelen kunnen heet worden wanneer deze met
kooktoestellen worden gebruikt.
Gebruik van de afzuigkap – Bedieningspaneel (zoek het symbool in de
afbeeldingen)
Aanraakpaneel TC5V
1- Aan- en uitzetten van de afzuigkap.
2- Snelheid van de afzuigkap - drukknop: SILENT 1e, 2e, 3e en TURBO snelh.
3- Tijdsinstelling van de afzuigkap activeren en deactiveren.
4- Aan- en uitzetten van de verlichting.
5- Drukknop vermindering van de lichtsterkte
6- Drukknop verhoging van de lichtsterkte
Tijdsinstelling: de afzuigkap werkt gedurende 4 min met de lopende snelheid en
daarna telkens 4 min met elk van de lagere snelheden tot ze stopt.
AFZUIGKAP
Indien de afzuigkap gebruikt wordt in de uitvoering AFZUIGEN, de
uitlaatkegel (A) (doorsnede 120mm) o peen luchtafvoerkanaal aansluiten
dat rechstreeks met de buitenlucht in verbinding staat (Afd 1)
CIRCULATIEKAP
Al ser geen mogelijkheid bestaat om de lucht naar buiten af te voeren, wordt het
actief koolstollter gebruikt (D).
De lucht wordt in de kap gelterd en terug de ruimte ingeblazen.
De lucht wordt naar de ruimte teruggevoerd via een buis die door
hel hangkastje loopt en die op de bijgeleverde aansluitring (A)
aangesloten wordt.
Om de kap als circulatiekap te gebruiken als volgt te werk gaan:
Om de actieve kool lter (D) te vervangen, moet de schroef (B) Worden
afgenomen.
De rooster terugplaasten.Onderhoud van de afzuigkap
Opgelet: sluit steeds de stroomtoevoer af alvorens de afzuigkap te
onderhouden. Neem in geval van storing contact op met een ociële
distributeur of een bevoegde vertegenwoordiger.
Externe reiniging: gebruik een vloeibaar, niet-bijtend reinigingsmiddel en vermijd
het gebruik van schurende producten.
Vetlters: om ontbranding te vermijden, moeten de lters een keer per maand,
grondig gereinigd worden. Daarvoor moeten de lters uitgenomen en gewassen
worden met warm water en een reinigingsmiddel. Indien u een vaatwasser
gebruikt, dient u de lters verticaal te plaatsen om de afzetting van vaste resten
te voorkomen.
Actieve kool lters: moet worden vervangen om de twee maanden.
Belangrijk: verhoog de frequentie van de reiniging/vervanging van de lters
indien de afzuigkap meer dan 2 uur per dag gebruikt wordt. Gebruik steeds
originele lters van de fabrikant.
Vervanging van de lampen (zoek het symbool in de afbeeldingen)
Opgelet: neem de lampen niet vast alvorens de stroomtoevoer afgesloten
is en de lampen voldoende afgekoeld zijn.
Belangrijk: gebruik nieuwe lampen in overeenkomst met de aanwijzingen
op het gegevensplaatje van de afzuigkap.
Gebruik lampen met aluminiumreector ter vervanging van halogeenlampen.
Gebruik geen koudlichtlampen - risico op oververhitting.
Bij afzuigkappen die uitgerust zijn met wolfraamlampen dienen de lichten uitsluitend
te worden gebruikt als de motor aanstaat. Ze mogen niet permanent aanblijven en als
een lichtbron worden gebruikt.
Wettelijke informatie
De fabrikant:
- Verklaart dat deze inrichting voldoet aan de wezenlijke vereistenbetreende
elektrisch materieel volgens de laagspanningsrichtlijn 2006/95/ EG van 12/12/06
en betreende de elektromagnetische compatibiliteit volgens de EMC-richtlijn
2004/108/EG van 15/12/04.
- Kan niet aansprakelijk gesteld worden voor de niet-naleving van de
aanwijzingen van deze handleiding en de geldende veiligheidsnormen voor het
correct gebruik van de inrichting.
- Behoudt zich het recht voor om eender welke wijziging door te voeren aan de
inrichting of deze handleiding zonder voorafgaande kennisgeving.
Neem contact op met onze ociële distributeur indien u technische assistentie
of bijkomende informatie wenst over onze producten.
NL

11
E
X
AU
S
T
O
R DEC
O
RATI
V
O
Estimado cliente:
Agradecemos o facto de ter adquirido o nosso exaustor. Pedimos que
leia atentamente estas instruções para conseguir uma instalação,
utilização e manutenção ideais do mesmo.
Notas : As guras mencionadas no presente manual encontra m - s e
nas primeiras páginas.
Esta campãnula está pensada para ser montada num armãrio ou em
qualquer outro suporte.
Atenção: consulte as normas locais relativas à saída de fumos.
Não ligue o exaustor a uma conduta de fumo, de ventilação
ou de ar quente. Conrme com as autoridades locais se
a ventilação do ambiente é adequada. Certique-se de que o
caudal máximo de extracção de ar dos dispositivos de ambiente
não ultrapassa os 4 Pa (0,04 mbar). Deve ter-se previamente em
consideração uma ventilação adequada para a divisão da casa,
se se utiliza simultaneamente um exaustor e aparelhos que sejam
alimentados a gás ou outro tipo de combustível. O ar evacuado não
deve ser enviado por condutas que sejam utilizadas para evacuar
os fumos de aparelhos alimentados a gás ou outro combustível. Os
regulamentos que dizem respeito à evacuação de ar têm de ser
respeitados.
Este produto está pensado apenas par aUSO DOMÉSTICO.
Para a evacuação de fumos para o exterior utilizar um tubo rígido de
PVC de pelo menos Ø l20 mm.
As restrições anteriores não se aplicam a exaustores sem saída de
fumos para o exterior (sistema de recirculação com ltro de carvão
activo).
Instale o exaustor segundo as instruções do esquema fornecido e as
indicações das guras. Da g.1 à g. 2.
Respeitar as indicações do fabricante do aparelho de cozedura se
a altura entre a superfície de cozedura e o exaustor for superior à
indicada no esquema fornecido.
Apenas para dispositivos de cozedura a gás: A distância mínima até
ao exaustor tem de ser, pelo menos, de 65 cms.
INSTALAÇÃO
A campãnula de cozinha é fornecida com:
3 Espadelador (F, H)
4 Parafusos (C)
2 Lãmpadas
Para a xação, utilize os 4 parafusos (C) Ø6mm fornecidos com a
campãnula.
Feche o espaço que car entre a campãnula e a parede, ajustando
o espadelador (F).
Ligação do exaustor à corrente
Atenção: antes de ligar o exaustor: desligue a corrente eléctrica e verique
se a tensão e a frequência fornecidas coincidem com as indicadas na placa
de características do equipamento.
Se o aparelho tem cha, ligue o exaustor a uma base de tomadas, de acordo com
as normas vigentes e situada numa zona acessível.
Se o aparelho não tem cha, ligue-o directamente à rede eléctrica, que deve estar
protegida por um dispositivo separador acessível, para que seja desligada e que
seja omnipolar, de acordo com a regulamentação local.
A ligação a rede eléctrica debe ser feita da seguinte maneira:
AZUL…………………………”N” NEUTRO
CASTANHO………………….”L” CORRIENTE
VERDE E AMARELO……….(simbolo tierra) TERRA
Si os terminais da cha não estão marcados ou se tem alguna duvida consulte um
electricista qualicado.
Se não e fornecido ponha una cha normalizada no cabo para carga indicada na
placa de caracteristicas.
Utilização do exaustor – Segurança
Atenção: durante uma descarga electrostática (p. ex. um relâmpago)
o exaustor pode deixar de funcionar. Isto não implica risco de danos.
Desligue a corrente eléctrica do exaustor e volte a ligar após um minuto.
Não permita que o exaustor seja utilizado por crianças ou pessoas cujas
capacidades (físicas, sensoriais ou mentais) sejam reduzidas, ou careçam de
experiência e/ou conhecimento, salvo se tiverem recebido instruções relativas
à utilização do equipamento por parte de uma pessoa responsável pela sua
segurança.
Devem-se vigiar as crianças para garantir que não brincam com o aparelho.
Para evitar possíveis incêndios limpe periodicamente o ltro metálico, controle
permanentemente os recipientes com óleo quente e não ameje alimentos por
baixo do exaustor.
Não utilize o exaustor caso este apresente danos ou imperfeições. Contacte um
distribuidor ocial ou um agente autorizado.
As zonas de acesso podem aquecer quando se utilizam com
aparelhos de cozedura.
Utilização do exaustor - Painel de comandos (procure o símbolo nas
guras)
Painel Táctil TC5V (Fig. P7)
1- Activação e desactivação do extractor.
2- Velocidade do extractor - botão de pressão: SILENT, 1ª, 2ª, 3ª e TURBO vel.
Em painéis com botão TURBO (T), a velocidade TURBO funcionará por 5 minutos.
Decorrido ese tempo, baixará para a velocidade 2.
3- Activar e desactivar a temporização do extractor.
4- Activação e desactivação da iluminação.
5- Botão de diminuição da intensidade da luz
6- Botão (6 ) de aumento de intensidade de luz
Temporização: o extractor funciona durante 4 min. à velocidade em curso e
durante mais 4 min. em cada uma das velocidades inferiores até que pára.
VERSÃO DE SUCÇÃO
Se a campana for utilizda a sua versão ASPIRANTE conectar a peça
plática cónica de saida (A), fornecida com a campana (diãmetro
120mm) a um conduto de evacuação conectado directamente com
o exterior (Fig.1)
VERSÃO DEFILTRAÇÃO (RECICLAGEM INTERNA)
Quando não existe um conduto de escape da a ventilação para o exterior, pode
utilizar um ltro de carbono (D).
O ar é depurado por meio do ltro e é expulso de novo no ambiente.
O ar liberta-se na sala a través de uma tubagem de ligação que passa
pelo armário suspenso e liga-se a anilha de ligação fornecida (A) Fig 1.
Para utilizar o aparéelo nesta versão, proceda da maneira seguinte:
Abra a rede (E)
Para proceder à mudanza do ltro de carvão activado (D), debe remover-se o
parafuso (B)
Coloque de novo as redes.
Manutenção do exaustor
Atenção: desligue sempre a corrente eléctrica antes de realizar a
manutenção do exaustor. Em caso de avaria, contacte um distribuidor
ocial ou um agente autorizado.
Limpeza externa: utilize detergente líquido, não corrosivo e evite a utilização de
produtos de limpeza abrasivos.
Filtros de gordura: para evitar possíveis incêndios, limpe-os rigorosamente
uma vez por mês. Para isso, desmonte os ltros e lave-os com água quente e
detergente. Se utiliza lava-loiça, coloque os ltros na posição vertical para evitar
o depósito de restos sólidos.
Filtros de carvão activo: devem ser substituídos de 2 em 2 meses.
Importante: aumente a frequência de limpeza/substituição dos ltros
se utiliza o exaustor mais do que 2 horas por dia. Utilize sempre os ltros
originais do fabricante.
Substituição de lâmpadas (procure o símbolo nas guras)
Atenção: não manipule as lâmpadas até que tenha desligado a corrente
eléctrica e a temperatura tenha diminuído.
Importante: utilize lâmpadas novas de acordo com a indicação da placa de
características do exaustor.
Utilize lâmpadas com reector de alumínio para substituir lâmpadas de
halogéneo. Não utilize lâmpadas dicróicas - risco de sobreaquecimento.
Nos exaustores equipados com lâmpadas de tungsténio, as luzes apenas devem
ser utilizadas durante o funcionamento do motor. Não devem ser deixadas
permanentemente ligadas e utilizadas como fonte de luz.
Informação legal
O fabricante:
- Declara que este equipamento cumpre os requisitos essenciais relativos
a material eléctrico de baixa tensão, indicados na directiva 2006/95/CEE
de 12/12/06 e de compatibilidade electromagnética indicados na directiva
2004/108/CEE de 15/12/04.
- Não é responsável pelo não cumprimento das indicações do presente manual
e das normas de segurança vigentes para a utilização correcta do equipamento.
- Reserva-se o direito de efectuar qualquer modicação no equipamento ou no
presente manual, sem aviso prévio.
Entre em contacto com o nosso distribuidor ocial caso necessite de assistência
técnica ou informação adicional relativamente aos nossos produtos.
PT

12
ВЫТЯЖКА
Уважаемый покупатель!
Спасибо за то, что купили нашу вытяжку. Пожалуйста, внимательно
прочтите инструкцию перед тем, как приступать к установке,
эксплуатации и уходу за вытяжкой.
Примечание: Вы можете найти рисунки и буквенно-цифровые
обозначения, указанные в этой инструкции, на первых страницах.
Эта вытяжка предназначена для установки в шкаф или на любую другую опору.
Внимание: ознакомьтесь с местными нормами, касающимися
дымоходов и воздуховодов. Не подсоединяйте вытяжку к
дымоходу, вентиляционной трубе или каналу подачи тёплого
воздуха. Уточните в местной администрации, соответствует ли
вентиляция помещения норме. Убедитесь, что максимальная скорость
потока воздуха от техники в помещении не превышает 4 Па (0,04
мб). Одновременная эксплуатация вытяжки и газовых приборов или
техники, работающей на других видах топлива, возможна только в
хорошо проветриваемом помещении. Воздух должен выводиться
по тем же воздухопроводам, что используются для отвода дыма и
паров, возникающих при эксплуатации газовых приборов или техники,
работающей на других видах топлива. Подключение вытяжки должно
производиться в соответствии с нормами удаления воздуха.
Это изделие предназначено только для ДОМАШНЕГО ПРИМЕНЕНИЯ.
Для вывода воздуха используйте жёсткую трубу из ПВХ диаметром
минимум 120 мм. Вышеуказанные требования не распространяются
на вытяжки без режима отвода воздуха (с системой рециркуляции и
угольным фильтром).
Монтируйте вытяжку в соответствии с инструкциями.
Расстояние от вытяжки до газовых приборов должно составлять
минимум 65 см.
УСТАНОВКА
Вытяжка поставляется в комплекте со следующими элементами:
3 распорки (F, H)
4 винта (C)
2 лампы
При установке закрепите вытяжку 4 болтами (С) Ø 6 мм (поставляются
в комплекте с вытяжкой).
Закройте пространство между вытяжкой и стеной с помощью распорки (F).
Перед подключением убедитесь, что напряжение Вашей домашней
электросети соответствует напряжению, указанному на табличке с
паспортными данными вытяжки.
Подключение к сети
Внимание! Перед подключением вытяжки выключите
электропитание и удостоверьтесь, что напряжение и частота тока
сети соответствуют указанным на паспортной табличке вытяжки.
Если у вытяжки есть вилка, вставьте её в доступную розетку в
соответствии с применимыми правилами.
Если у вытяжки нет вилки, подключите её к электросети напрямую,
в соответствии с применимыми правилами. При этом обеспечьте
возможность отключения устройства от сети.
Подключение к электросети должно осуществляться следующим
образом:
СИНИЙ ПРОВОД ......................................«N» НЕЙТРАЛЬ
КОРИЧНЕВЫЙ ПРОВОД ..........................«L» ФАЗА
ЗЕЛЁНЫЙ И ЖЁЛТЫЙ ПРОВОДА ...........(символ Земли) ЗАЗЕМЛЕНИЕ
Если на штепсельной вилке нет маркировки, или если у Вас возникают
сомнения, обратитесь к квалифицированному электрику.
Если же штепсельной вилки нет в комплекте, подсоедините к шнуру
обычную вилку, способную выдержать напряжение, указанное на
паспортной табличке.
ЭКСПЛУАТАЦИЯ ВЫТЯЖКИ — БЕЗОПАСНОСТЬ
Внимание! От электростатического разряда (например, молнии)
вытяжка может выключиться. Это не влечёт за собой риска
её повреждения. Отключите её от электросети и через минуту
подключите заново.
Не позволяйте детям или людям с ограниченными (физическими,
сенсорными или умственными) способностями или с недостаточным
опытом и знаниями пользоваться вытяжкой, пока ответственный за их
безопасность не разъяснит им правила эксплуатации.
Не позволяйте детям играть с вытяжкой.
Во избежание пожара регулярно очищайте металлический фильтр, не
оставляйте без присмотра посуду с горячим маслом и не поджигайте
блюда под вытяжкой.
Не включайте вытяжку, если она повреждена. Свяжитесь с официальным
дистрибьютором или авторизованным дилером.
При включённой плите вытяжка может нагреваться.
Эксплуатация вытяжного устройства – панель управления (см.
значок на рисунке)
Сенсорная панель TC5V
1- Включение и выключение вытяжного вентилятора.
2- Скорость вытяжного вентилятора: кнопки – скорости SILENT, 1, 2, 3
и TURBO. На панели с кнопкой ТУРБО (T), режим Турбо будет работать
в течении 5 минут после включения. По истечении 5 миниут скорость
уменьшится, и включится 3-я скорость.
3- Включение и выключение таймера вытяжного вентилятора.
4- Включение и выключение освещения.
5- Кнопка уменьшения интенсивности света
6- Кнопка увеличения интенсивности света
Таймер: вытяжной вентилятор работает 4 минут на текущей скорости,
затем по 4 минут на каждой из более низких скоростей, затем вентилятор
останавливается и.
РЕЖИМ ОТВОДА ВОЗДУХА
Для подключения вытяжки к воздуховоду (для отвода воздуха)
подсоедините выходной патрубок (А), входящий в комплектацию
вытяжки (труба диаметром 120 мм, увеличивающая производительность
и уменьшающая уровень шума).
ЭКСПЛУАТАЦИЯ ВЫТЯЖКИ С ФИЛЬТРОМ (ВНУТРЕННЯЯ
РЕЦИРКУЛЯЦИЯ)
При отсутствии воздуховода можно использовать угольный фильтр (D).
Фильтр очищает воздух, и через соединительный патрубок он снова
попадает в помещение уже без примесей и запахов.
Соединительный патрубок устанавливается внутри навесного шкафа
и подсоединяется к соединительному кольцу (А), входящему в
комплектацию вытяжки (Рис. 1).
Для эксплуатации вытяжки в режиме рециркуляции Вам необходимо:
открыть решётку (Е)
для замены угольного фильтра (D) необходимо удалить винт (B).
закрыть решётку.
УХОД ЗА ВЫТЯЖКОЙ
Внимание! Всегда отключайте вытяжку от электросети перед чисткой и
техническим обслуживанием. При обнаружении неполадок обратитесь к
официальному дистрибьютору или авторизованному дилеру.
Очищение внешней поверхности: используйте жидкие моющие
средства, не вызывающие коррозии. Избегайте использования
абразивных чистящих средств.
Жировые фильтры: во избежание пожаров раз в месяц или при
необходимости тщательно промывайте жировой фильтр. Для этого
снимите фильтры и промойте их горячей водой с добавлением
чистящего средства. Для очистки фильтров можно воспользоваться
посудомоечной машиной. Во избежание скопления грязи на поверхности
фильтров расположите их вертикально.
Угольные фильтры необходимо менять каждые 2 месяца.
Внимание! Необходимость в более частом очищении/замене фильтров
возрастает, если вытяжка работает больше 2 часов в день. Всегда
пользуйтесь оригинальными фильтрами от производителя.
Замена ламп (ищите на схеме символ )
Внимание! Перед заменой ламп обязательно отключите вытяжку
от электросети и дайте им остыть.
Внимание! Используйте лампы, соответствующие
указанным на паспортной табличке техническим требованиям.
Галогеновые лампы можно заменить лампами с алюминиевым
отражателем. Не используйте двухцветные лампы — они могут
перегреваться.
Включать подсветку вытяжек с лампами накаливания можно только
во время работы вытяжки. Такие лампы нельзя оставлять включёнными
на долгое время и нельзя использовать как источник света.
Юридическая информация
Производитель:
− гарантирует, что эта вытяжка соответствует всем основным
требованиям к низковольтному оборудованию согласно Директиве
2006/95/ЕС от 12 декабря 2006 года, а также требованиям к
электромагнитной совместимости согласно Директиве 2004/108/ЕС от
15 декабря 2004 года.
− Не несёт ответственности за несоблюдение этой инструкции и текущих
требований по безопасности электрооборудования.
− Оставляет за собой право вносить изменения в оборудование или эту
инструкцию без предварительного уведомления.
За технической поддержкой и дополнительной информацией о нашей
продукции обратитесь к официальному дистрибьютору.
RU

13

14

15

CATA ELECTRODOMÉSTICOS, S.L.
C. del Ter, 2 - 08570 TORELLÓ (Barcelona) SPAIN
Tel. +34 938 594 100 - Fax +34 938 594 101
60814995.01.04.2015
This manual suits for next models
4
Table of contents
Languages:
Other Cata Ventilation Hood manuals

Cata
Cata Isla Gamma Reference manual

Cata
Cata C Glass 600 Reference manual

Cata
Cata PRO SILENCE Operating and maintenance manual

Cata
Cata CPX10 Instruction Manual

Cata
Cata CG110SS User manual

Cata
Cata F-2060 User manual

Cata
Cata VHB60SS User manual

Cata
Cata omega Reference manual

Cata
Cata F-2060 User manual

Cata
Cata VALTO Quick start guide
Popular Ventilation Hood manuals by other brands

AEG
AEG DU 3150 Operating and installation instructions

Wolf
Wolf DD30I installation instructions

Electrolux
Electrolux EFC 9440 user manual

ELICA
ELICA Elibloc Grigio 60 Instruction on mounting and use

FALMEC
FALMEC gruppo incasso Series Instruction booklet

ROBINHOOD
ROBINHOOD RWH3CH6SS Installation and operation instructions