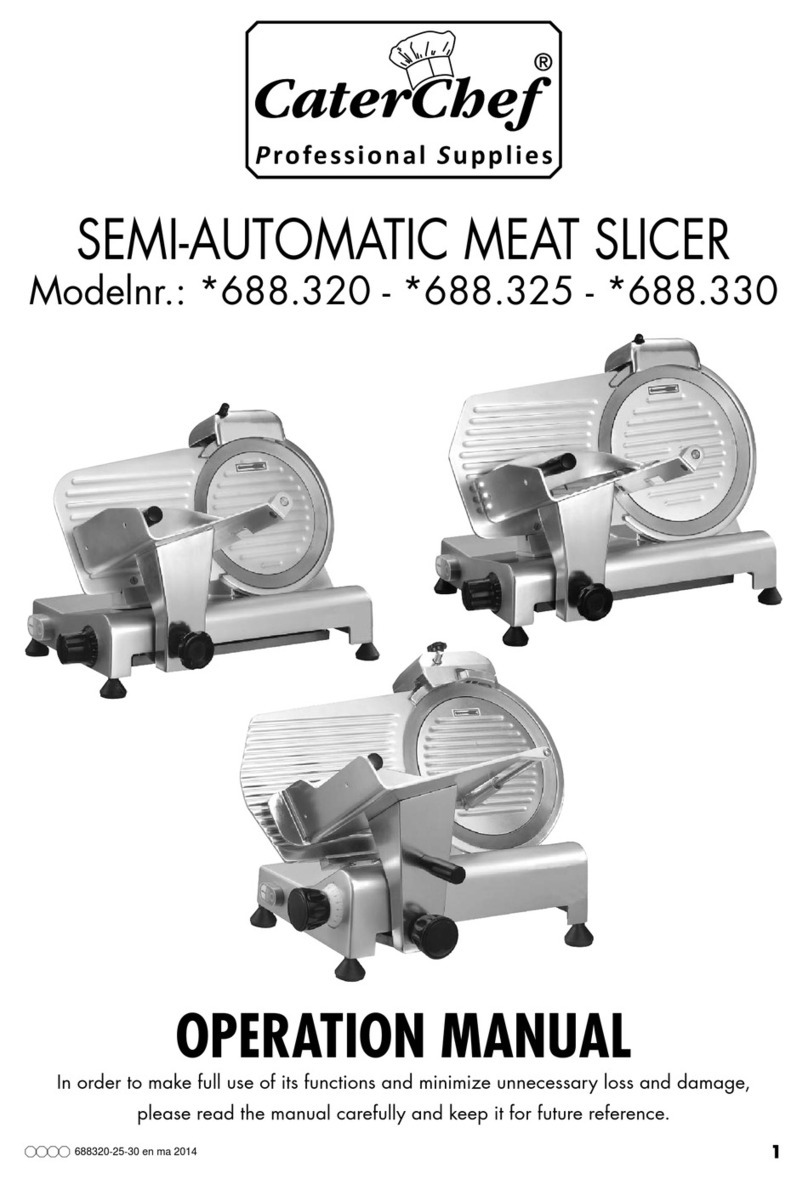
Cater Chef PROFI line TOP 220 Specification sheet

403100-10-20_en-fr-de ma2018 1
TOP 220 TOP 250 TOP 275
INSTALLATION - USE - MAINTENANCE
INSTALLATION - UTILISATION - ENTRETIEN
AUFSTELLUNG - ANWENDUNG - WARTUNG
Modelnr.: *403.100 - *403.110 - *403.120
SLICER PAG. 2
MACHINE A TRANCHER PAG. 8
AUFSCHNITTMASCHINE PAG. 14
Professional Supplies

403100-10-20_en-fr-de ma2018 2
INDEX
Page
1 INFORMATION ON SAFETIES
3
1.1 General precautions
3
1.2 Mechanical safeties
3
1.3 Elettrical safeties
3
2 TECHNICAL FEATURES
4
2.1 Table of weights and measures - noise
4
2.2 Supply conditions and disposal of packings
4
3 INSTALLATION
5
3.1 Setting the machine
5
3.2 Electric connections
5
3.3 Safety measures and training the final user
5
4 USE OF THE EQUIPMENT
5
4.1 Controls
5
4.2 Setting the goods on the slicer saddle
5
5CLEANING AND MAINTENANCE
6
5.1 Generalities and products for cleaning
6
5.2 Removing the food – saddle
6
5.3 Removing the blade cover
6
5.4 Cleaning the blade, ring and stop slices
6
5.5 Power cord change
6
6 SHARPENING AND LUBRIFICATION
7
6.1 Sharpener
7
6.2 Lubrication
7
6.3 Machine idle for a long time
7
7 ENCLOSURES
Figure
Elettric diagram
20-21-22-23
23
DESIGN AND TECHNICAL DETAILS CAN BE CHANGED ALSO WITHOUT NOTICE.

403100-10-20_en-fr-de ma2018 3
1) INFORMATION ON SAFETIES
1.1 GENERAL PRECAUTIONS
•The slicer must be managed by skilled personnel, familiar with the instructions for use and safety
contained in this manual.
•In the case of rotation of the personnel, vocational training is necessary.
•Even if the machine comes with several safety systems, avoid setting the hands near the blade and
moving parts.
•Before the cleaning and maintenance operations, check to make sure the machine is disconnected from
the mains.
•Periodicaly check cable and electric elements conditions.
•Never use the slicer for cutting freezed food, meat and fish with bones, or for non-food products.
•Whenever the blade diameter is reduced of more than 6 mm., apply to the assistance service for
replacement.
•Never carry out repearing operations personnally, but apply always to skilled personnel.
1.2 MECHANICAL SAFETIES
The slicers we produce and which are described in this manual meet, as far as safeties are concerned, the
prescriptions on the risks of mechanical type issued by E.E.C. as : 2006/42/CEE. for the sanitary regulations
they comply with the rule 1935/2004/CEE.
All securities are obtained with:
•Fixed ring around the blade
•Releasing device for the removal of the saddle
•Different protections on the saddle
1.3 ELECTRICAL SAFETIES
The safeties against electrical risks comply with the rule 2006/95/CEE and regulations cenelec
EN 60335-2-64.
•All our slicers type TOP include a security switch for restarting the machine whenever a fortuitous lack of
current occurs .
•The motor includes a thermal overload protection.
•All top slicers have all electric parts protected by hand contact.
Due to the perfect insulation of all the electric elements and the remarkable resistance of all the materials
used, our machines can be installed to work inside moist premises.
ATTENTION: do not use water to clean the slicer, only a humid cloth.
WARNING: In conformity with point 1.7.2. "instructions on further risks" contained in the regulation
2006/42/CEE, these protections and safeties strictly comply with these regulations.
We point out however that the above mentioned protections, even if they sensibly reduce both the possibility
and extent of the damage, do not eliminate fully the risk of cutting.

403100-10-20_en-fr-de ma2018 4
2) TECHNICAL FEATURES
Technical features of the series of slicers "TOP":
•Gear motor transmission
•Patented slicer saddle sliding on stainless steel ball bearings
•Steel chromed blade (with patented grooves)
•Device for sharpening
•Wide surface for preparation
•Security in the use, cleaning and maintenance
•Maximun hygiene, with a project and realisation of all parts without edges in stainless steel and aluminium
with anodic oxidation.
2.1 TABLE OF WEIGHTS AND MEASURES
TOP 220 250 275 275XXL 300
MAX OVERALL
DIMENSIONS mm 450x370x355 510x410x365 530x410x410 560x460x430 560x460x450
NET WEIGHT Kg 11,8 13,2 14,3 18 20
POWER Watt 140 155 200 320 320
ELECTRIC
CONNECTION Volt-Hz. 230/1/50 230/1/50 230/1/50 230/1/50 230/1/50
BLADE Rpm. Giri/min. 250 250 250 250 250
Ø BLADE Ø mm 220 250 275 275 300
USEFUL CUT mm 200x150 215x173 215x185 215x185 260x210
NOISE Db (A) < 63 <63 < 63 < 63 < 63
WARNING: The electrical features of each equipment are printed on the motor data plate. A check of the
electric connection is necessary before installing the equipment. Fig.1
2.2 SUPPLY CONDITIONS AND DISPOSAL OF PACKINGS
All the slicers are packed in a sturdy cardboard box with internal shaped edges which guarantee the perfect
integrity of the machine during transport.
each equipment include:
•Declaration of conformity E.E.C.
•Instructions for use and maintenance
ALL THE PACKING COMPONENTS (CARTON, FOAM, STRAPS, AND SO ON) CAN
EASILY BE DISPOSED OF AS HOUSEHOLD RUBBISH.
WHENEVER THE MACHINE IS INSTALLED IN COUNTRIES HAVING SPECIAL
REGULATIONS ON PACKING DISPOSAL, THE FINAL USER MUST COMPLY WITH THE
REGULATIONS IN FORCE.
THE USE OF THE WEEE SYMBOL INDICATES THAT THIS PRODUCT MAY NOT BE
TREATED AS HOUSEHOLD WASTE. BY ENSURING THIS PRODUCT IS DISPOSED OF
CORRECTLY, YOU WILL HELP PROTECT THE ENVIRONMENT. FOR MORE DETAILED
INFORMATION ABOUT THE RECYCLING OF THIS PRODUCT, PLEASE CONTACT YOUR
LOCAL AUTHORITY, YOUR HOUSEHOLD WASTE DISPOSAL SERVICE PROVIDER OR
THE SHOP WHERE YOU PURCHASED THE PRODUCT.

403100-10-20_en-fr-de ma2018 5
3) INSTALLATION
3.1 SETTING THE MACHINE
The machine connection and the setting at work must be made by skilled personnel.
WARNING: Both the system and location where the equipment has to be set must comply with the
regulations for the accident prevention and electrical regulations "CEI" in force.
The manufacturer declines any and all responsibility for direct or indirect damages which may ensue
for non-compliance with the above mentioned regulations.
Set the equipment on a wide, levelled, dry and fixed face, far from heat sources and water sprays, and with
80 cm. ground clearance.
3.2 ELECTRIC CONNECTIONS
The equipment is supplied with an electric cable to be connected to a magneto-thermic main switch which
stops the machine when the operator comes in fortuitous contacts.
It is imperative that the equipment is well grounded according to the regulations in force
The manufacturer declines any and all responsibility for direct and indirect damages which may
ensue for non-compliance with the regulations in force.
All the slicers of the series "gravity top" are manufactured single-phase V.230/1/50 Hz. Whenever the
voltage differs fron the above mentioned one, please apply to the manufacturer, or the authorized distributor.
3.3 SAFETY MEASURES AND TRAINING THE FINAL USER
The skilled personnel in charge of the installation and electric connections is responsible of the training of the
final user, which must also be informed on the safety measures to comply with.
This instruction manual comes with each equipment.
4) USE OF THE EQUIPMENT
4.1 CONTROLS FOR SLICERS
The controls are set on the right side of the base when the machine is placed in front of the operator. Fig.3-4
1. Start-Stop switch with relais
2. White pilot light
3. Knob for adjusting slice thickness
4. Knob for the releasing device.
4.2 SETTING THE FOOD ON THE SLICER SADDLE
1. Set the food on the saddle when the thickness adjusting knobis set to zero and with motor off to avoid
damaging the equipment.
2. Set the food on the saddle and block it with the food-press. Fig.5
3. Set a hand on the food-press and start the cutting.
4. When the food is fully sliced use the front part of the food-press to keep the food against the blade. Fig.6
5. When the cutting is over, put off the motor and stop the slice thickness on zero position, then remove the
food from the saddle.
ATTENTION: The blade rotation must be COUNTER CLOCKWISE Fig.2

403100-10-20_en-fr-de ma2018 6
5) CLEANING AND MAINTENANCE OPERATIONS
5.1 GENERALITIES AND PRODUCTS FOR CLEANING
Before carrying out any cleaning or maintenance operations, check to make sure that the mains
switch be off and the supply plug disconnected from the mains.
Accurately clean the equipment every day for a correct operation and life of the equipment.
Despite the several safeties, take great care to avoid cutting risks when using the blade.
Clean the equipment with the usual neutral detergents which must not contain soda or alcool.
When cleaning removed elements, do not use a dish washer for not damaging anodized parts.
5.2 REMOVAL OF THE FOOD SADDLE WITH RELEASING DEVICE).
1. Set the knob on "0" position for slice thickness adjustment
2. Set the saddle opposite to the blade as shown in figure fig.8
3. Turn the knob of the unblocking device fig.9
4. Loosen the knob fixing the saddle and remove the saddle.fig.10
Clean the saddle with a water jet. Reverse these operations for reassembling the saddle.
5.3 REMOVAL OF THE BLADE-COVER
1. Loosen the knob opposite to the blade
2. Push the knob towards the blade and release the blade cover from its housing. Fig.11
3. Remove the blade-cover from the slicer. Fig.12
Clean the blade-cover with a water jet.
5.4 CLEANING THE BLADE AND RING – STOP SLICES
Cleaning the blade and ring is a dangerous operation, hence, take great care to prevent any
possibility of cutting.
For their cleaning never use a water jet, but use a damp cloth and detergents, then rinse and dry with a cloth.
For the cleaning, use non-toxic products which guarantee the perfect hygiene.
Clean carefully the blade edge and the inside of the ring.
1. Use a damp cloth to clean the opening between the blade and ring. fig.13
2. Rotate manually the blade and clean using the damp cloth. fig.14
3. If necessary turn off the two screw to take off the stop slices for the cleaning of the part and the bottom of
the blade. fig.15
For the machine reassembly, reverse all the above mentioned operations.
5.5 POWER CORD CHANGE
For the power cord change it is necessary to apply to technical assistance.

403100-10-20_en-fr-de ma2018 7
6) SHARPENING AND LUBRICATION
6.1 SHARPENING
This is a very important operation to carry out every time the cutting is not clean, or when the blade drags the
slice.
The use and the type of products that have been sliced determine the periodicity of this operation.
1. Plug the machine
2. Open with the handle the maximun slice size (15 mm.)
3. Lift the sharpener on the carriage in the correct position. fig.16
6.1.1 SHARPENING
(FOR MOD TOP 220-250-275-275XXL WITH SHARPENER AS DEVICE)
Before shappening the blade, clean the machine and degrease the blade accurately.
1. Plug the machine
2. Open with the handle the maximin slice size (15mm)
3. Lift the sharpener on the carriage. (Fig.16)
4. Put the sharpener to take the blade between the two grinding wheels.
5. Keep button "A" pressed for 5/10 seconds to sharpen. (Fig.17)
6. Keep button "B" pressed for a few seconds tu deburr. (Fig.18)
7. Stop the machine and return the shrpener in its initial position.
6.1.2 SHARPENING WITH MOD TOP 300 (WITH FIXED SHARPENER)
Before shappening the blade, clean the machine and degrease the blade accurately.
1. Plug the machine
2. Lift the sharpener and turn it by 180°to take t he blade between the two grinding wheels. (Fig.19)
3. Keep button "A" pressed for 5/10 seconds to sharpen.
4. Keep button "B" pressed for a few seconds tu deburr.
5. Stop the machine and return the shrpener in its initial position.(Fig.20-21-22)
WARNING: use the button “A” to sharpen and the button “B” to dribble the cutting edge of the blade.
During the sharpening process keep to the original drawing of the blade level. Replace the blade when the
clearance between the ring and blade exceeds 6mm
6.2 LUBRICATION
Periodically lubricate the sliding elements with white vaseline oil.
For not damaging the slicer, never use seed oil or olive-oil. lubricate all elements using the oilers as shown in
fig.7
6.3 MACHINE IDLE FOR A LONG TIME
Should the machine be idle for a long time, disconnect the wall main switch and clean the machine and its
accessories accurately.
Use white vaseline oil (or similar products) to protect all the machine elements. We advise covering the
machine with a nylon (or similar) cloth.

403100-10-20_en-fr-de ma2018 8
INDEX
Page
1 INFORMATIONS SUR LES SECURITES
9
1.1 Précautions générales
9
1.2 Sécurités mécaniques
9
1.3 Sécurités électriques
9
2 CARACTERISTIQUES TECHNIQUES
10
2.1 Tableau des poids et des mesures
10
2.2 Conditions de fourniture et élimination des emballages
10
3 INSTALLATION
11
3.1 Placement de la machine
11
3.2 Connexion électrique
11
3.3 Mesures de sécurité et formation de l'utilisateur
11
4 UTILISATION DE L'APPAREIL
11
4.1 Commandes
11
4.2 Placement de la marchandise sur le chariot du trancheur pour
la coupe
11
5 NETTOYAGE ET ENTRETIEN
12
5.1 Généralités et produits pour le nettoyage
12
5.2 Enlèvement du chariot porte-marchandise
(dispositif de décrochage)
12
5.3 Enlèvement du cache-lame
12
5.4
Nettoyage de la lame et bague cache-lame – ferme tranches
5.5 Remplacement du câble d’alimentation
12
6 AFFUTAGE ET GRAISSAGE
13
6.1 Affûtage
13
6.2 Graissage
13
6.3 Arrêt de la machine pour un long temps
13
7 LISTE DE PIECES JOINTES
Figure
Schéma électrique
20-21-22-23
23
LES CARACTÉRISTIQUES TECNIQUES POURRONT ÊTRE MODIFIEÉS SANS PRÉAVIS.
12

403100-10-20_en-fr-de ma2018 9
1) INFORMATIONS SUR LES SECURITES
1.1. PRECAUTIONS GENERALES
•Le trancheur doit être utilisé par du personnel qualifié et bien informé sur les règles de sécurité décrites
dans ce manuel.
•En cas de remplacement du personnel proposé à l'utilisation de la machine, veillez à ce qu'il soit formé.
•Le trancheur est d’origine doté de différents systèmes de sécurité, veuillez cependant de ne pas mettre
les doigts sur le tranchant de la lame ou proche des éléments tournants.
•Avant toutes opérations mécaniques, s’assurer que la machine soit débranche.
•Contrôlez périodiquement l’état des câbles et connexions électriques.
•Ne jamais utiliser le trancheur pour couper des produits non-alimentaires ou surgelés ou avec os.
•Du fait des affûtages successifs, si le diamètre de la lame est réduit de 6 mm, adressez-vous à votre
revendeur pour la remplacer.
•Toutes les interventions techniques doivent obligatoirement être réalisées par des personnes qualifiées.
1.2. SECURITES MECANIQUES
Les trancheurs décrits dans ce manuel répondent, pour ce qui concerne les sécurités contre les risques
mécaniques, aux normes 2006/42/CEE pour les normes d'hygiène a la norme 1935/2004/CEE.
Description des sécurités:
•Application d'une bague fixe cache-lame.
•Dispositif de décrochage du plat porte marchandise, lorsque la poignée de réglage tranche est fixée à une
épaisseur = 0.
•Plusieurs protections sur le plat porte marchandise.
1.3. SECURITES ELECTRIQUES
Les sécurités contre les risques électriques sont réalises en suivant les règles 2006/95/CEE
cenelec EN 60335-2-64
•Les trancheurs Top ont un interrupteur de sécurité marche et arrêt avec relais pour le démarrage
(réarmement) de l’appareil au cas ou le courant ferait défaut.
•Le moteur est protégé par un dispositif thermique.
•Les trancheurs sont réalisés avec des protections pour empêcher tout contact des mains avec les
composants électriques ou en mouvement.
L'excellente isolation de tous les éléments électriques et la remarquable résistance des matériaux utilisés
pour la construction de ces machines permettent de les utiliser même dans des endroits humides.
ATTENTION: laver les trancheurs seulement avec un drap humide.
ATTENTION: Conformément au point 1.7.2. "avis pour les risques ultérieurs" suivant les normes
2006/42/CEE, veuillez prendre bonne note que les protections appliquées ne sont pas en mesure d'éliminer
totalement les risques de coupure, même si elles réduisent soit la possibilité, soit l'entendue des possibles
dommages. Les protections et les sécurités ont été réalises conformément aux règles susdites.

403100-10-20_en-fr-de ma2018 10
2) CARACTERISTIQUES TECHNIQUES
La série des trancheurs "TOP" a été relise selon les caractéristiques suivantes:
•Transmission avec moteur à engrenages
•Chariot porte viande glissant sur coussinets en acier inoxydable (breveté)
•Lame spéciale en acier trempé et chromé ave gravures brevetées
•Aiguiseur séparé
•Grand plan d’appuie
•Sécurité d'usage, de nettoyage, et d'entretien
•Hygiène maximum, garantie par un projet et une réalisation spéciale de tous les éléments en acier inox,
sans arêtes, en alliage d'aluminium traite par oxydation anodique, pour un nettoyage aise
2.1. TABLEAU DES POIDS ET DES MESURES
TOP 220 250 275 275XXL 300
DIMENSIONS
D’ENCOMBREMENT
MAX
mm 450x370x355 510x410x365 530x410x410 560x460x430 560x460x450
NET POIDS Kg 11,8 13,2 14,3 18 20
PUISSANCE WATT Watt 140 155 200 320 320
CONNEXION
ELECTRIQUE Volt-Hz. 230/1/50 230/1/50 230/1/50 230/1/50 230/1/50
N°TOURS DE LA
LAME Giri/min. 250 250 250 250 250
Ø DE LA LAME Ø mm 220 250 275 275 300
TRANCHE UTILE mm 200x150 215x173 215x185 215x185 260x210
BRUIT Db (A) < 63 < 63 < 63 < 63 < 63
ATTENTION: Les caractéristiques électriques de chaque appareil sont graves sur la plaque des données
moteur. Avant l'installation, contrôlez la connexion électrique. (voir fig.1)
2.2. CONDITIONS DE FOURNITURE ET ELIMINATION DES EMBALLAGES
Tous les trancheurs ont été emballés dans une robuste boîte en carton ayant les parties internes bombés
pour garantir l'intégrité de la machine pendant le transport.
Les trancheurs comportent:
•Déclaration de conformité ce
•Instructions d'emploi et d'entretien
LES ELEMENTS D'EMBALLAGE (CARTON-MOUSSE-BANDE-ETC) SONT DES PRODUITS
ASSIMILABLES AUX ORDURES SOLIDES POUVANT ETRE ENLEVEES AISEMENT.
AU CAS OU LA MACHINE EST INSTALLEE DANS DES PAYS AYANT DES REGLES
SPECIALES, L'EMBALLAGE SERA ENLEVE SUIVANT LES REGLES EN VIGUEUR.
L’UTILISATION DU SYMBOLE WEEE INDIQUE QUE CE PRODUIT NE PEUT PAS ETRE
TRAITE COMME DECHET DOMESTIQUE. ASSUREZ VOUS DE VOUS DEBARASSER DE CE
PRODUIT SELON LES LOIS EN VIGUEUR. VOUS AIDEREZ AINSI A PROTEGER
L’ENVIRONNEMENT. POUR PLUS D’INFORMATIONS DETAILLEES SUR LE RECYCLAGE
DE CE PRODUIT, VEUILLEZ CONTACTER LES AUTORITES LOCALES, LE FOURNISSEUR
DE SERVICE DE MISE AU REBUT DE DECHETS DOMESTIQUES OU LE MAGASIN OU
VOUS AVEZ ACHETE LE PRODUIT.

403100-10-20_en-fr-de ma2018 11
3) INSTALLATION
3.1. PLACEMENT DE LA MACHINE
Les connexions et la mise en marche de l'appareil doivent être effectués par du personnel qualifié.
ATTENTION ! la pièce ou l'appareil est installé doit être conforme aux règles de la prévention des accidents
du travail et aux règles électriques
Le constructeur décline toute responsabilité pour les dommages éventuels, directs ou indirects, due
aux non-observance des règles susdites.
Placez l'appareil sur un plan d'appui assez ample, plan bien sec et stable, loin de sources de chaleur et
d'eau, et a une hauteur d'environ 80 cm.
3.2. CONNEXION ELECTRIQUE
L'appareil est muni d'un câble électrique à brancher à un interrupteur général ayant un dispositif différentiel
100 ma pour prévenir les contacts accidentels de l'opérateur.
Respectez les règles en vigueur en matière de connexion a la terre.
Le constructeur décline toute responsabilité pour les dommages éventuels, directs ou indirects, dus
à non-observance de ces règles
Tous les trancheurs de la série gravitée "TOP" sont construits avec fonctionnement monophasé v.230/1/50
HZ. Dans le cas ou la tension devrait être changée, contactez le constructeur ou le revendeur autorisé.
3.3. MESURES DE SECURITE ET FORMATION DE L'UTILISATEUR
Le personnel spécialisé chargé de l'installation et de la connexion électrique de la machine doit veiller à la
formation de l'utilisateur et le mettre au courant des mesures de sécurité à respecter.
La machine doit être toujours dotée du manuel d'instructions.
4) UTILISATION DE L'APPAREIL
4.1 COMMANDES
Les commandes et le voyant de fonctionnement sont groupés du coté droite du soubassement lorsque
l'opérateur est en face de la machine. fig.3-4
1. Interrupteur marche – arrêt
2. Lumière blanche de fonctionnement
3. Poignée réglage épaisseur des tranches
4. Poignée déblocage chariot
4.2. PLACEMENT DE LA MARCHANDISE SUR LE PLAT DU TRANCHEUR POUR LA COUPE
1. Placez la marchandise sur le chariot quand la poignée de réglage de l'épaisseur est située sur le zéro.
Veuillez à ce que le moteur soit arrêté pour ne pas endommager la lame.
2. La marchandise placée sur le chariot doit être bloquée par la presse-marchandise. fig.5
3. Posez la main sur la presse-marchandise et démarrez la coupe.
4. Lorsque la marchandise est coupée, utilisez la partie avant de la presse-marchandise pour garder la pièce
contre la lame. fig.6
5. Une fois que la coupe est terminée, arrêtez le moteur et fermez l'épaisseur tranche sur la position de
zéro. Ensuite, ôtez la pièce du plat.
Attention: la rotation de la lame doit être antihoraire fig.2

403100-10-20_en-fr-de ma2018 12
5) NETTOYAGE ET ENTRETIEN
5.1. GENERALITES ET PRODUITS POUR LE NETTOYAGE
Avant chaque opération d'entretien ou de nettoyage, veillez a ce que l'interrupteur général et la fiche
d'alimentation soient débranches.
Pour un fonctionnement correct et pour garder la machine efficace pour longtemps, nettoyez soigneusement
l'appareil tous les jours.
Malgré les protections pour la prévention des accidents du travail, veillez à ce que les dangers de coupage
dus à la manutention de la lame soient réduits au minimum. Nettoyez la machine avec des détergents
neutres sans soude ou avec de l'alcool. Pour ne pas endommager l'anodisation, ne jamais utiliser des lave-
vaisselle pour le nettoyage des éléments détachables.
5.2. ENLEVEMENT DU CHARIOT PORTE MARCHANDISE ( DISPOSITIF DE DECROCHAGE)
1. Placez la poignée de réglage épaisseur tranches sur la position 0.
2. Placez le chariot du coté oppose à la lame (comme indique dans la fig.8)
3. Turner la poignée comme indiquée sur l’illustration jusqu’au les deux pivots de sûreté ont disparu. Fig.9
4. Levez le chariot comme indique sur l’illustration. fig.10
Le nettoyage du chariot peut être effectué avec un jet d'eau. Pour le remontage, renversez les opérations
susdites.
5.3 ENLEVEMENT DU CACHE-LAME
1. Desserrez la poignée située du coté opposé à la lame.
2. Poussez la poignée vers la lame de façon fig.11
3. Décrocher le cache-lame de son siège, fig.12
Et ôtez le cache-lame pour le laver avec un jet d'eau.
5.4. NETTOYAGE DE LA LAME ET DE LA BAGUE CACHE-LAME – FERME TRANCHES
Le nettoyage de la lame est une opération dangereuse. Elle doit donc être effectuée soigneusement
pour éviter de se couper.
Pour le nettoyage, utiliser un chiffon humide et du détergent, ensuite, rincer avec un chiffon humide et sécher
soigneusement.
Il est avis d'utiliser des produits non-toxiques, pouvant garantir l'hygiène maximum.
Veiller a ce que le fil de la lame et la coté intérieur de la bague soient nettoyées soigneusement.
1. Utiliser un chiffon humide pour nettoyer la zone entre la lame et la bague. fig.13
2. Frotter la bague avec un chiffon en tournant à la main la lame. fig.14
3. Quand il est nécessaire tourner les deux vis et lever la ferme tranches. fig.15
Pour ré assembler la machine, répétez dans l'ordre inverse les opérations susdites.
5.5. REMPLACEMENT DU CÂBLE D’ALIMENTATION
Pour le remplacement du câble d’alimentation il est nécessaire s’adresser chez un centre d’assistance
autorisé.

403100-10-20_en-fr-de ma2018 13
6) AFFUTAGE ET GRAISSAGE
6.1 AFFUTAGE
L'affûtage est une opération très importante pour l'utilisation de la machine et doit être effectuée chaque fois
que la coupe n'est pas correcte ou quand la lame emporte la tranche.
La périodicité de cette opération à trait aux temps d'utilisation et au type de produit coupe en tranches.
Avant l'affûtage, nettoyez et dégraissez soigneusement soit la machine, soit la lame.
6.1.1 AFFUTAGE MOD TOP 220-250-275-275XXL AVEC AGUISEUR SE’ PARE’
AVANT L'AFFUTAGE, NETTOYEZ ET DEGRAISSEZ SOIGNEUSEMENT SOIT LA MACHINE, SOIT LA LAME.
1. INSEREZ LA FICHE DE COURANT
2. FIXEE L’AFFUTEUSE COMME INDIQUEE SUR LA FIG 16
3. POUR EFFECTUER L'OPERATION D’AFFUTAGE, APPUYEZ SUR LE BOUTON "A" POUR 5/10 SECONDES AU
MOINS. (FIG.17) LES DEUX MEULES ABRASIVES DOIVENT TOURNER.
4. POUR ELIMINER LES BAVURES , APPUYEZ SUR LE BOUTON "B" PENDANT QUELQUES SECONDES.
(FIG.18)
5. ARRETEZ LA MACHINE ET PLACEZ LE GROUPE D'AFFUTAGE DANS LA POSITION INITIALE.
6.1.2 AFFUTAGE MOD TOP 300 AVEC AGUISEUR FIXE
1. INSEREZ LA FICHE DE COURANT.
2. SOULEVEZ L'AFFUTEUSE ET LE TOURNEZ DE 180° DE FACON QUE LA LAME SE PL ACE ENTRE LES DEUX
MEULES ABRASIVES. (FIG. 19)
3. POUR EFFECTUER L'OPERATION D’AFFUTAGE, APPUYEZ SUR LE BOUTON "A" POUR 5/10 SECONDES AU
MOINS. (FIG. 20)
4. POUR ELIMINER LES BAVURES, APPUYEZ SUR LE BOUTON "B" PENDANT QUELQUES SECONDES.
(FIG.21-22)
5. ARRETEZ LA MACHINE ET PLACEZ LE GROUPE D'AFFUTAGE DANS LA POSITION INITIALE.
ATTENTION: LE BOUTON "A" EFFECTUE L'AFFUTAGE; LE BOUTON "B" SERT A ELIMINER LES
BAVURES SUR LE FIL DE COUPE.
DURANT L'AFFUTAGE, IL FAUDRA GARDER LE BISEAU ORIGINEL DU TAILLANT DE LA LAME.
QUAND LA DISTANCE ENTRE LA BAGUE ET LA LAME DEPASSE 6mm., REMPLACEZ LA LAME.
6.2 GRAISSAGE
Graisser périodiquement les éléments coulissants avec huile de vaseline blanche.
Ne jamais utiliser huile végétale ou d'olive, car ils pourraient endommager la machine.
Graissez les éléments au moyen des graisseurs spéciaux (comme indique dans la figure 7).
6.3 ARRET DE LA MACHINE POUR UN LONG TEMPS
Lors d'un arrêt prolonge de la machine, débranchez l'interrupteur général à mural et nettoyez soigneusement
la machine et ses accessoires.
Il est avis de protéger tous les éléments avec huile de vaseline blanche ou avec des produits similaires se
trouvant sur le marché.
Protégée la machine de la poussière avec une bâche de nylon ou d'autres matériels identiques.

403100-10-20_en-fr-de ma2018 14
INHALTSVERZEICHNIS
Seite
1 SICHERHEITSMASSNAHMEN
15
1.1 Allgemeine Vorsichtsmassregeln
15
1.2 Mechanische Sicherheiten
15
1.3 Elektrische Sicherheiten
15
2 TECHNISCHE MERKMALE
16
2.1 Gewichte-und Masse_Tabelle-Geraueschpegel
16
2.2 Lieferzustand und Beseitigung der Verpackung
16
3 AUFSTELLUNG
17
3.1 Aufstellung der Maschine
17
3.2 Elektrischer Anschluss
17
3.3 Sicherheitsmassnahmen und Anwerderausbildung
17
4 ANWENDUNG DES GERAETES
4.1 Befehle
17
4.2 Positionierung des Schnittguts
17
5REINIGUNG UND WARTUNG
18
5.1 Allgemeines und Produkte fuer die Reinigung zu verwenden
18
5.2 Entfernung des Schnittgut-Gleitwagens
18
5.3 Entfernung des Messerschutzes
18
5.4 Reinigung der Klinge-des Ringes – des Sperre-Schnitt
18
5.5 Auswechselung des kabels
18
6 SCHLEIFEN UND SCHMIEREN
19
6.1 Schleifen
19
6.2 Schmierung
19
6.3 Langere Unterbrechung der Maschinenbenutzung
19
7 ANLAGEN
Bilder
Elektrische Schaltplan
20-21-22-23
23
WIR KÖNNEN DESIGN UND TECHNISCHE ANGABEN OHNE VORHERIGE VERSTÄNDIGUNG ÄNDERN.

403100-10-20_en-fr-de ma2018 15
1) SICHERHEITSMASSNAHMEN
1.1 ALLGEMEINE VORSICHTSMASSREGELN
•die Aufschnittmaschine muss von ausgebildetem Personal benutzt werden, das die in den
Bedienungsanleitungen enthaltenen Anwendungs- und Sicherheitsvorschriften beherrschen muss.
•bei Personalabwechselung für die Ausbildung sorgen.
•auch wenn die Maschine mit verschiedenen Sicherheitssystemen versehen ist, ist unbedingt zu
vermeiden, die Hände der Klinge oder den in Bewegung befindlichen teilen zu nähern.
•vor Beginn der Reinigung oder jeglicher Wartungsarten, ist die Maschine vom elektrischen
Versorgungsnetz abzutrennen bei dem Kabel + dem Stecker oder bei dem Hauptschalter I-0 auf
dem Speiser
•in zeitabständen die Beschaffenheit der Kabel und der elektrische Teilen ueberprufen
•die Aufschnittmaschine nicht fuer Tiefgefrorenes oder fuer Fleisch und Fisch mit Knochen oder
Produkte, die keine Lebensmittel sind, verwenden
•falls die Klinge nach mehrmaligen Schleifen um mehr als 10 mm verringert ist, wenden Sie sich bitte
zur Auswechlslung an den technischen Kundendienst
•niemals selbst Reparaturen vornehmen, sondern sich an Fachpersonal wenden.
1.2 MECHANISCHE SICHERHEITEN
Die von uns hergestellten, in diesem handbuch beschriebenen Aufschnittmaschinen entsprechen, was die
Sicherheiten bezüglich gefahren mechanischer Natur betrifft, den Ewg-Vorschriften 2006/42/CEE und in
Bezug auf die hygienischen Normen den Ewg-Vorschriften 1935/2004/CEE.
Die Sicherheiten wurden erreicht durch:
•Anbringung eines festen Klingenschutzringes
•optionale Auslösevorrichtung für Warenauflageteller (wenn der Schnittstärken-Einstellknopf auf Stärke 0
steht)
•verschiedene Schutzvorrichtungen auf Warenauflageteller
1.3 ELEKTRISCHE SICHERHEITEN
Die elektrische Aufschnittmaschinen wurden gemaess die Sicherheitsrichtlinie entsprechend den CENELEC
– VORSCHRIFTEN 2006/95/CEE EN 60335-2-64 hergestellten
•Fuer die Aufschnittmaschinen serie TOP im Steuerungskreis in Niederspannung ist ein Relais
vorgesehen, das das absichtliche Wiedereinschalten (Wiederaufladen) des Geräts bei zufälligem
Stromausfall bewirkt.
•Auf dem Motor ist eine Schutzvorrichtung vorgesehen
•Die Maschinen werden hergestellt, um die Behruerung der Haende bei elektrische Teilen zu verhindern
Aufgrund der perfekten Isolierung aller elektrischen Teile und der optimalen Widerstandskraft aller
verwendeten Materialien, können die von uns hergestellten Maschinen ohne Bedenken auch in feuchten
Umgebungen aufgestellt werden und arbeiten.
Achtung waschen nicht mit Wasserstrahl nur mit feuchtem Tuch
ACHTUNG in Bezug auf den Punkt 1.7.2 "Hinweise bezüglich Uebriger-Gefahren" der EWG-Vorschriften
2006/42/CEE wird darauf hingewiesen, dass die angewendeten Schutze nicht vollkommen das Schneidrisiko
beseitigen, obwohl die Möglichkeit sowie der Schadensumfang verringert wird. Die Schutze und Sicherheiten
wurden in strenger Uebereinstimmung mit der Vorschrift realisiert.

403100-10-20_en-fr-de ma2018 16
2) TECHNISCHE MERKMALE
Die Aufschnittmaschinen-serie TOP wurden mit diesen Merkmalen erschaffen:
•Antrieb bei Reduktionsgetriebe
•Die Schlitten laueft auf Lagern aus rostfreiem Stahl
•besondere Messer aus gehaehrtetem –und- verchromtem Stahl ( mit patentierten Rillen)
•Vorrichtungsschleifsapparat einzusetzten
•breite Austellflaeche
•Verwendung- Reinigung und-Wartung Sicherheit
•höchste Hygiene, garantiert durch einen Sonderentwurf und Erstellung aller Teile ohne Kanten zur
leichten Reinigung, aus inox-Stahl und eloxierter Aluminiumlegierung.
2.1 GEWICHTE- UND MASSE-TABELLE
TOP 220 250 275 275XXL 300
MAX AUSSEN
SCHNITT MASSE mm 450x370x355 510x410x365 530x410x410 560x460x430 560x460x450
NETTO GEWICHT Kg 11,8 13,2 14,3 18 20
LEISTUNG WATT Watt 140 155 200 320 320
ELEKTRISCHER
ANSCHLUSS Volt-Hz. 230/1/50 230/1/50 230/1/50 230/1/50 230/1/50
DREHZAHL DER
SCHEIBE Giri/min. 250 250 250 250 250
Ø SCHEIBE Ø mm 220 250 275 275 300
NUTZ – SCHNITT mm 200x150 215x173 215x185 215x185 260x210
GERÄUSCHPEGEL Db (A) < 63 < 63 < 63 < 63 < 63
ACHTUNG die elektrischen Merkmale jedes Gerätes sind auf dem Motordatenschild angezeigt - vor der
Aufstellung siehe elektrischer Anschluss. (siehe Ab.1 )
2.2 LIEFERUNGSZUSTAND UND BESEITUNG DER VERPACKUNGEN
Alle Aufschnittmaschinen sind in einer starken Kartonschachtel mit geformtem iInenraum verpackt, um die
vollständige Unversehrtheit der Maschine während des Tansportes zu gewährleisten und werden mit:
•EWG-UEbereinstimmungs-erklärungen
•Anwendungs- und Wartungs-Anweisungen
geliefert.
DIE VERPACKUNGSELEMENTE (KARTON - SCHAUM - VERPACKUNGSBANDEISEN
USW.) SIND MIT DEM STÄDTISCHEN FESTMÜLL VERGLEICHBAR UND KÖNNEN OHNE
SCHWIERIGKEIT BESEITIGT WERDEN. FALLS DIE MASCHINE IN LÄNDERN
AUFGESTELLT WERDEN SOLLTE, IN DENEN BESONDERE VORSCHRIFTEN BESTEHEN,
SIND DIE VERPACKUNGEN ENTSPRECHEND DEN GÜLTIGEN VORSCHRIFTEN ZU
BESEITIGEN.
DURCH VERWERDUNG DES WEEE-SYMBOLS WEISEN WIR DARAUF HIN, DASS
DIESES PRODUKT NICHT ALS NORMALER HAUSHALTSMUELL BEHANDELT WERDEN
DARF. SIE TRAGEN ZUM SCHUTZE DER UMWELT BEI, INDEM SIE DIESES PRODUKT
KORREKT ENTSORGEN. GENAUERE INFORMATIONEN ZUM RECYCLING DIESES
PRODUKTS ERHALTEN SIE VON IHRER STADTVERWALTUNG, VON IHREM
MUELLABFUHRUNTERNEHMEN ODER IM LADEN, IN DEM SIE DAS PRODUKT
ERWORBEN HABEN.

403100-10-20_en-fr-de ma2018 17
3) AUFSTELLUNG
3.1 AUFSTELLUNG DER MASCHINE
Der Anschluss, die Inbetriebnahme der Geräte muss von befähigtem Personal erfolgen.
ACHTUNG ! Die Anlage und der Ort, in dem das Gerät aufgestellt werden soll, muss den Unfallverhütungs-
und elektrischen CEI-Vorschriften entsprechen.
Die Herstellerfirma lehnt jede Haftung für eventuelle direkte oder indirekte Schäden ab, wenn diese
Vorschriften nicht beachtet werden sollten.
Das Gerät auf eine ausreichend breite, gut nivellierte, trockene und stabile Aufstellfläche, möglichst weit von
Wärmequellen und Wasserhähnen, in einer Höhe von ca. 80 cm positionieren und neben der Steckdose.
3.2 ELEKTRISCHER ANSCHLUSS
Das Gerät ist mit Kabel zum Anschluss an einen Hauptschalter, der mit einem Thermomagnet versehen ist,
ausgestattet, der den Bediener vor eventuellen zufälligen Kontakten oder jene, die
durch Beschädigungen verursacht wurden, schützt.
Es ist pflicht, einen ordnungsgemässen Erdanschluss gemäss der gültigen Vorschrift herzustellen.
Die Herstellerfirma lehnt jede Haftung für eventuelle direkte oder indirekte Schäden ab, falls diese
Vorschriften nicht beachtet werden sollten.
Alle Aufschnittmaschinen der gravitätsserie TOP wurden in der Bestribsweise v.230/1/50 Hz
einphasig hergestellt.
Im falle der Notwendigkeit des Spannungswechsels bitten wir sie, die
Herstellerfirma oder den genehmigten Händler zu rate zu ziehen.
3.3 SICHERHEITSMASSNAHMEN UND ANWENDERAUSBILDUNG
Das Fachpersonal, welches die Aufstellung und den elektrischen Anschluss durchführt, ist gehalten, den
Anwender für den richtigen Betrieb der Maschine sachgemäss auszubilden. Dieser sollte auch über die
eventuell einzuhaltenden Sicherheitsmassnahmen in Kenntnis gesetzt werden und ausserdem sind ihm die
vorliegenden Bedienungsanleitungen zu überlassen.
4) ANWENDUNG DES GERÄTES
4.1 BEFEHLE
Die Befehlstasten und die Betriebskontrolleuchte sind auf der rechten Seite des Untergestells gruppiert, wenn
sich die Maschine vor dem Bediener befindet. (Ab.3-4)
1. start-und stop- Drucktaste
2. weisse Leuchetende
3. Einstellknopf des Schnittstärkenreglers
4. Sperre-segel Knopf- Gleitwagen-Freigabe
4.2 POSITIONIERUNG DES SCHNITTGUTS AUF DEM AUFSCHNITTMASCHINENTELLER
FÜR DEN SCHNITT
1. Das Schnittgut muss auf den Teller gelegt werden, wenn der Schnittstärkenregler auf der Position null
steht und der Motor ausgeschaltet ist, um zu verhindern, dass die Klinge durch eventuelle Stösse
beschädigt wird.
2. Das auf dem Gleitwagen gelegte Schnittgut muss mit dem sShnittgutandrücker blockiert sein. (Ab.5)
3. Die Hand auf den Schnittgutandrücker legen und mit der Schnittbewegung beginnen.
4. Falls das Schnittgut fast vollkommen geschnitten ist, benutzen Sie die Vorderseite des Andrückers um
das Stück gegen die Klinge zu halten. (Ab.6)
5. Nach Beendigung des Schneidens den Motor abschalten und den Schnittstärkenregler auf die Position
null stellen. das Schnittgut vom Teller nehmen.
ACHTUNG: die Drehrichtungmesser muss gegen den Uhrzeigersinn sein. (Ab.2)

403100-10-20_en-fr-de ma2018 18
5) REINIGUNG UND WARTUNG
5.1 ALLGEMEINES UND PRODUKTE FÜR DIE REINIGUNG ZU VERWENDEN
Vor jeder Wartung oder Reinigung sich vergewissern, dass der Hauptschalter ausgeschaltet und der
Versogungsstecker vom Versogungsnetz getrennt ist.
Eine tägliche sorgfältige Reinigung des Gerätes ist zum einwandfreien Betrieb erforderlich und hält die
Maschine für lange Zeit betriebsfähig.
Trotz der verschiedenen Sicherheiten ist mit grosser Vorsicht vorzugehen und die Gefahr der
Schnittverletzungen bei Handhabung der Klinge zu vermeiden.
Die Maschine kann mit normalen neutralen Reinigungsmitteln, die kein Soda enthalten, oder mit Alkohol
gereinigt werden.
Eine Reinigung der abnehmbaren Teile in der Geschirrspülmaschine ist nicht möglich, da die eloxierung
Beschädigt werden würde.
5.2 ENTFERNUNG DES SCHNITTGUT-GLEITWAGENS (BENUETZUNG DER
AUSLÖSERVORRICHTUNG )
1. Den Einstellknopf des Schnittstärkenreglers auf die Position 0 stellen.
2. Den Gleitwagen auf die, der Klinge entgegengesetzten Seite positionieren, wie in der Abbildung
angegeben.(Ab.8)
3. Den Sperre-Segel –Gleitwagenausloeservorrichtungs-Knopf gegen den Uhrzeigersinn drehen, bis
dem voellsigem Wiedereintritt der zwei Sicherheitzapfen (Ab.9)
4. Den Gleitwagen von die Fuehrusngsbahn ziehen heraus (Ab.10)
Der Wagen kann unter einem Wasserstrahl gereinigt werden. Alle Vorgänge in der entgegengesetzten
Reihenfolge zum Wiedereinbau des Gleitwagens wiederholen.
5.3 ENTFERNUNG DES KLINGENSCHUTZES
1. Den Drehknopf, der auf , der Klinge entgegengesetzten Seite montiert ist, gegen den Uhrzeigersinn
ausschrauben.
2. Den Drehknopf in Richtung Klinge drücken, um den Klingenschutzes aus seinem Sitz zu lösen. (Ab.11)
3. Den Klingenschutz von der Aufschnittmaschine abnehmen. (Ab.12)
Der Klingenschutz kann unter einem Wasserstrahl gereinigt werden.
5.4 REINIGUNG DER KLINGE – DES SPERRE-SCHNITTES UND DES
KLINGENSCHUTZRINGES
Die Reinigung der Klinge ist ein Vorgang, der mit grösster Vorsicht zu erfolgen hat, da
Schnittverletzungsgefahr besteht.
Man kann die Reinigung unter Benutzung eines feuchten Tuches und eventuell eines Reinigungsmittels, um
die Klinge gut zu entfetten, durchführen. Von Wichtigkeit ist eine gute Spülung (nicht mit Wasserstrahl)
sondern immer mit einem feuchten Tuch. Anschliessend gründlich abtrocknen.
Es ist von grosser Bedeutung, dass die angewendeten Produkte die höchste Hygiene und die
absolute Nicht-toxizität garantieren können.
Es ist notwendig, dass die Klingenschneide und das Ringinnere gründlich gereinigt sind.
1. Ein feuchtes Tuch oder Reinigungspapier in den Raum zwischen der Klinge und dem Ring führen. (Ab.13)
2. Die klinge manuell drehen und den ganzen Ring abreiben. (Ab.14)
3. Wenn noetig die zwei Schrauben spannen ab, um die Sperre-Schnitte auszuziehen. (Ab.15)
Zum Wiedereinbau der Maschine alle Vorgaenge in der entgegensetzer Rheinfolge zu wiederholen.
5.5 AUSWECHSELUNG DES KABELS
Um der auswechselung des kabels, wenden sich an einer kundendienststelle.

403100-10-20_en-fr-de ma2018 19
6) SCHLEIFEN UND SCHMIEREN
6.1 SCHLEIFEN
Das Schleifen ist ein sehr wichtiger Vorgang beim Einsatz der Maschine. Es muss jedesmal durchgeführt
werden, wenn der Schnitt sich nicht als Glatt erweist oder, wenn die Klinge dazu neigt, die Schnitte
nachzuziehen.
Der zeitabstand dieses Vorganges hängt von der Benutzung und der Art der zu schneidenden Produkte ab.
Vor dem Beginn des Shleifens ist eine gründliche Reinigung der vollständigen Maschine und ein
sorgfältiges Entfetten der Klinge notwendig.
6.1.1 SCHLEIFEN (mod. TOP 220-250-275-275XXL) SCHLEIFSTEIN AUFZULEGEN
1. STECKER AN DAS STROMNETZ ANSCHLIESSEN.
2. DEN DREHHKNOPF DREHEN UND DIE GROSSTE DICKE -15MM AUFSTELLEN. DIE SCHLEIFVORRICHTUNG
IM LOCH AUF DEM MASCHINENTELLER ANLEGEN UND DEN KNOPF ANSCHRAUBEN, UM ZU BEFESTIGEN
(SEHEN ABBILDUNG)0 (Abb.16)
3. DIE DRUECKTASTE A DRUECKEN UND DEN SCHMIRGEL NAHERN BIS DIE KLINGE UEBERZUSCHREITEN,
DANN DIE DRUECKTASTE LASSEN
4. DIE MASCHINE ANSTECKEN.
5. DEN TELLER NAHER BRINGEN UND DRUCKEN UM DEN SCHMIRGEL AN DER KLINGE IM NIEDRIGER TEIL
DER SCHLEIFVORRICHTUNG FÜR 5-10 SEKUNDEN ANZUFASEN, UND MIT DER KLINGE ZUDREHEN.
(Abb.17)
6. DIE DRÜCKTASTE B DRÜCKEN UND SIE BEIDE SCHMIRGEL FÜR EINIGE SEKUNDEN DREHEN LASSEN ZUR
ENTFERNUNG EVENTUELLER GRATE. (Abb.18)
7. DIE DRÜCKTASTE FÜR GRAT LASSEN UND DIE SCHLEIFVORRICHTUNG UND DEN MASCHINENTELLER VOR
KLINGE ENTFERNEN DIE MASCHINE AUSSCHALTEN.
6.1.2 SCHLEIFEN (TOP 300) SCHLEIFSTEIN FEST
1. STECKER AN DAS STROMNETZ ANSCHLIESSEN.
2. DEN KNOPF ZUR SEITE DER SCHLEIFVORRICHTUNG LOESEN.(Abb.19)
3. DIE SCHLEIFVORRICHTUNG ANHEBEN UND UM 180° IN DER ART DREHEN , DASS SICH DIE KLINGE
ZWISCHEN DEN BEIDEN SCHMIRGELN BEFINDET. (Abb.20-21)
4. DEN KNOPF WIEDERSCHRAUBEN BIS DIE SCHLEIFVORRICHTUNG FEST IST UND FERTIG FUER DIE
SCHLEIFUNG
5. DIE DRUCKTASTE “A“ FÜR WENIGSTENS 5 - 10 SEKUNDEN ZUR SCHMIRRGELNDURCHFÜRUNG DRÜCKEN.
(Abb.22)
6. DIE DRUCKTASTE “B“ FÜR EINIGE SEKUNDEN ZUR ENTFERNUNG EVENTUELLER GRATE DRÜCKEN.
(Abb.22)
7. DIEE MASCHINE AUSSCHALTEN UND DIE SCHLEIFVORRICHTUNG WIEDER IN ANFANGSPOSITION
BRINGEN.
ACHTUNG: der Schmirgel “A” das Schleifen fuehrt aus, der Schmirgel “B” enfernt ausschliesslich die
Gratbildung auf der Klingenscheide
Waehrend des Schleifvorgangs muss die Originalzeichnung der Klingenkerbe bleibehalten werden.
Wenn der Abstand zwischen dem Ring und der Klinge 6 mm ueberschreitet, muss die Klinge
ausgewechselt werden.
6.2 SCHMIERUNG
Es ist wichtig, die beweglichen Teile der Presseware in zeitabständen mit weissem Vaselineöl zu schmieren.
Niemals Samen- oder Olivenöl benutzen, da dadurch der einwandfreie Betrieb der
Aufschnittmaschine beeinträchtigt wird.
Die teile, wie in der abbildung angegeben, durch die locher der dazu vorgesehenen oler schmieren.
6.3 LÄNGERE UNTERBRECHUNG DER MASCHINENBENUTZUNG
Soll die Maschine inaktiv bleiben, muss der Wandhauptschalter ausgeschaltetund eine vollständige
Reinigung der Maschine sowie der verschiedenen Zubehöre durchgeführt werden. Es ist ratsam, alle Teile
der Maschine mit weissem Vaselineöl zu schützen oder mit gleichwertigen auf dem Markt vorhandenen
Produkten. Es ist weiterhin anzuraten, die Maschine mit einem Nylontuch oder anderem Material vor Staub
zu schützen.

403100-10-20_en-fr-de ma2018 20
7) FIGURE
Fig.1
FAX-SIMILE
Fig.2
Fig.3 Fig.4
Fig.5 Fig.6
1
2
3
4
This manual suits for next models
4
Table of contents
Languages:
Other Cater Chef Kitchen Appliance manuals

Cater Chef
Cater Chef *688.170 User manual

Cater Chef
Cater Chef *688.170 User manual

Cater Chef
Cater Chef 688.320 series User manual

Cater Chef
Cater Chef 680.025 User manual

Cater Chef
Cater Chef 688.082 User manual

Cater Chef
Cater Chef PC-G1500 User manual

Cater Chef
Cater Chef 680.315 Series User manual

Cater Chef
Cater Chef 688.175 User manual

Cater Chef
Cater Chef 688.105 User manual

Cater Chef
Cater Chef 680.025 User manual