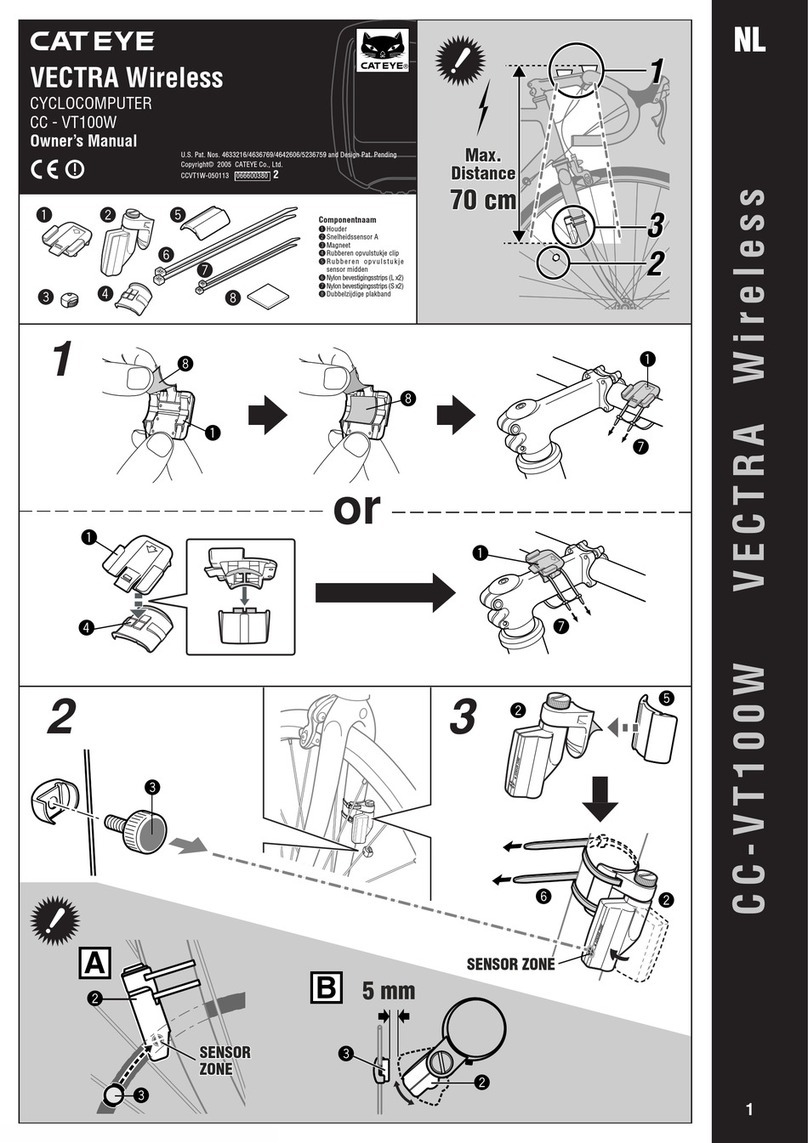
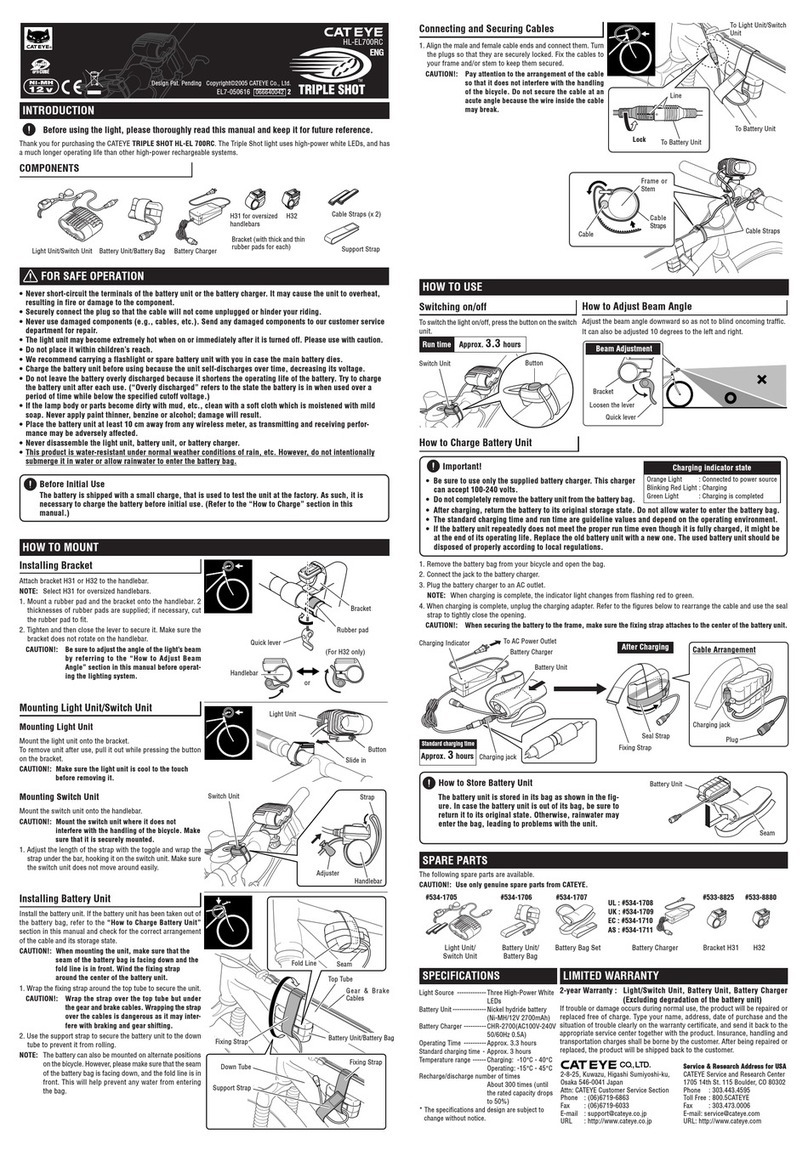
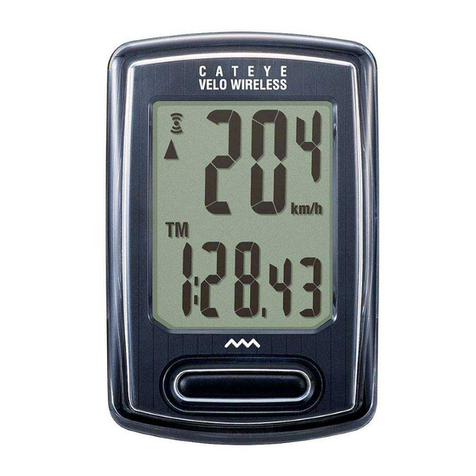
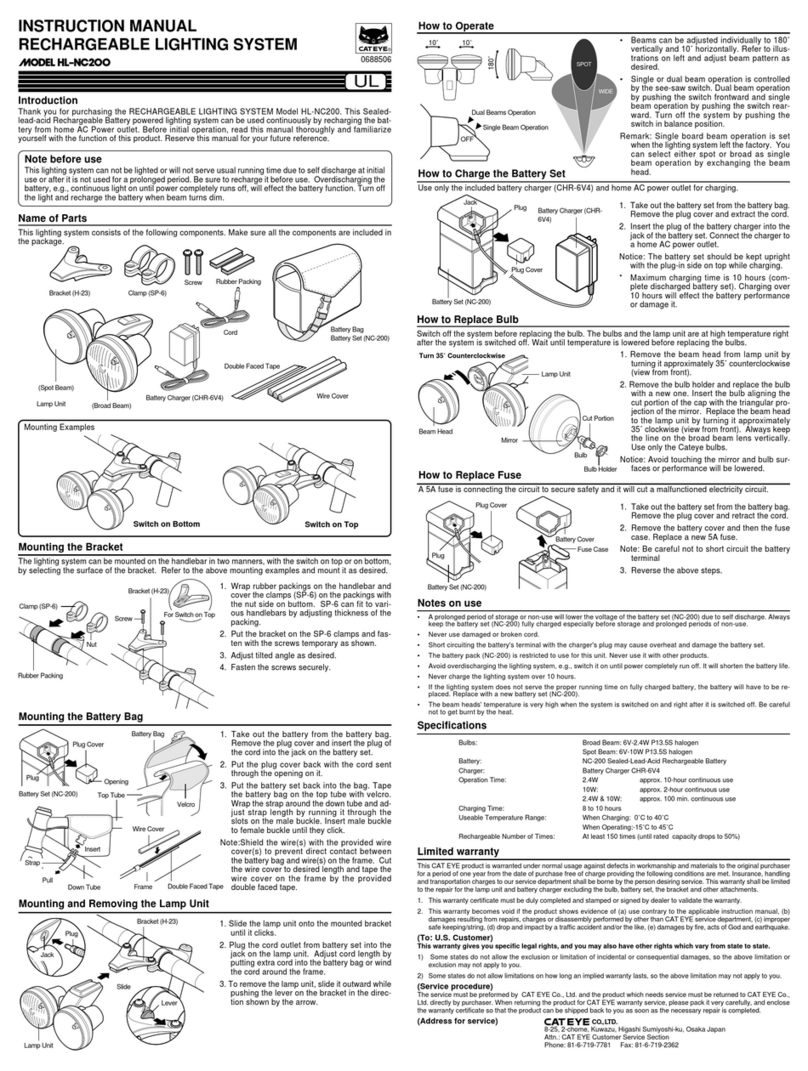
manuals.online logo
Brands
  1. Home
  2. •
  3. Brands
  4. •
  5. Cateye
  6. •
  7. Bicycle Accessories
  8. •
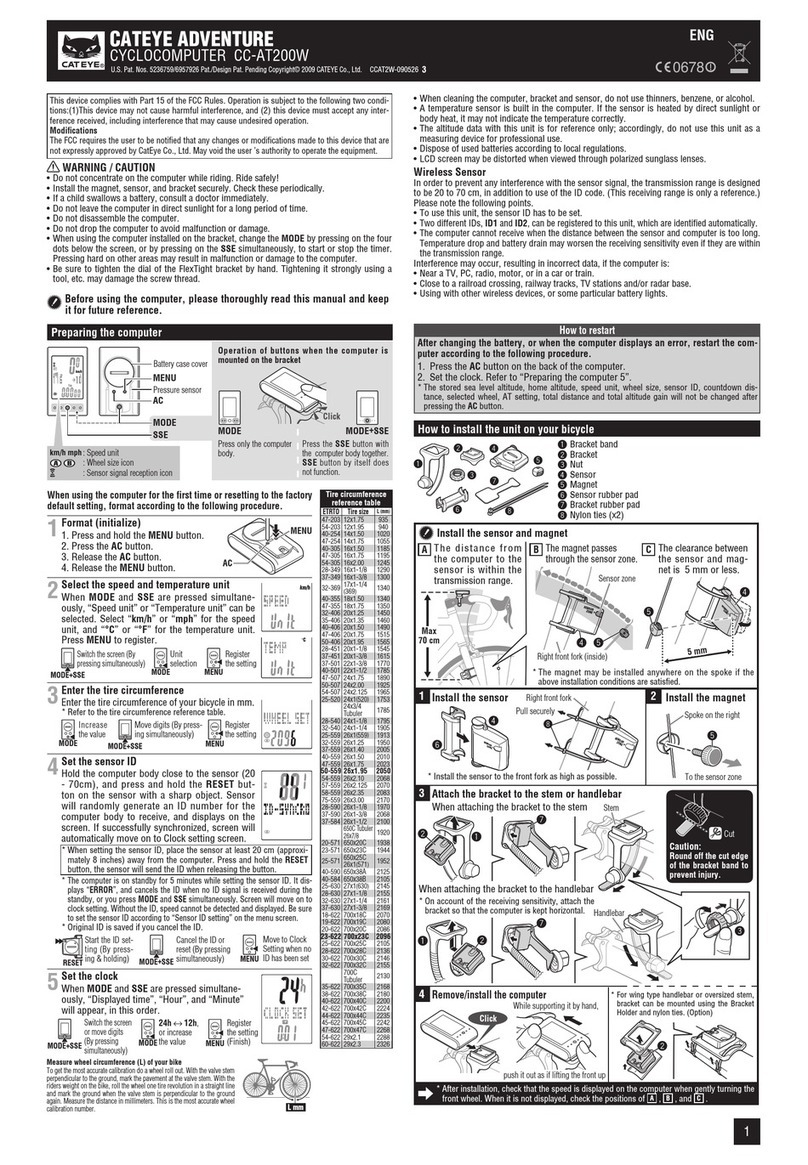
  9. Cateye CC-TR100 User manual

Cateye CC-TR100 User manual

Add.TR100 061221
JP FR
ENG
注意
自動車内や炎天下など、高温の場所にメインユ
ニットを放置しないでください。
CC-TR100 / PW-TR100
接点部
メインユニット
・ 周長切り替え
・ タイヤ周長入力
・ 日付設定
・ 時刻設定
・ 積算距離手入力
・ 計測単位
・ ケイデンスゾーン
HR レシーバー
・ 心拍ゾーン
・ 心拍センサー ID
・ データファイル
・ メモリ計測
・ PC リンク
・ パワーセレクト
自転車への取付け
・ メインユニット、ブラケットなどの接点部に
水が付着している場合、水をふき取ってから
装着してください。
心拍センサー ID 照合
・ 心拍センサー ID 照合の前に、必ずメイ
ンユニットを HR レシーバーに装着し
てください。
メインユニット単体では、心拍センサー
信号を受信できません。
・ 心拍センサーのリセットボタンを押す
際は、身体に装着していない状態で
行ってください。
心拍センサーを身体に装着した状態で
は ID 照合が行えません。 リセットボタン
メインユニットの設定
メニュー画面から各種設定を変更する際、メインユニットが計測中
(第 2 計測を含む)の場合、以下の設定を変更できません。
重要
設定を変更できない場合は、第 2 計測を確認します。
計測画面から MODE-2 ボタンを長押しし、第 2 計測に
切替え START/STOP/ENTER ボタンで計測を停止し
てください。
本器の保管方法
・ 本器を長期間使用しないときは、
電池側面が接点と触れないように
紙などの絶縁物を挟んで保管して
ください。
JP : 本紙は、取扱説明書と合わせてご覧ください。
ENG : Use this information with the instruction manual.
FR : Utilisez ces informations avec le mode d’emploi.
DE : Verwenden Sie diese Informationen zusammen mit der
Bedienungsanleitung.
IT : Utilizzare le presenti informazioni con il manuale di istruzioni.
ES : Utilice esta información con el manual de instrucciones.
NL : Gebruik deze informatie samen met de gebruiksaanwijzing.
開ける
閉める
絶縁物
CAUTION!: Avoid leaving the main unit in hot environment for
extended periods of time, such as inside the car or
under direct sunlight on a hot day.
Contact
Main unit
• Wheel selection
• Tire circumference input
• Date
• Setting clock
• Manual odometer input
• Speed unit
• Cadence zone
• Heart rate zone
HR receiver
• Heart rate sensor ID
• Data file
• Data storage
• PC Link
• Power select
Installing the unit on the bicycle
• Before installing the main unit onto the
bracket, make sure that any excess moisture
is wiped off dry.
Checking the heart rate sensor ID
• Install the main unit onto the bracket
when synchronizing the ID.
The main unit does not receive HR signal
by itself, as the HR receiver is inside the
bracket.
• Take off the heart rate sensor from your
body when you press the RESET button.
When you wear the heart rate sensor, the
sensor ID cannot be checked
appropriately. RESET button
Setting the main unit
If the main unit's stopwatch (TM) is counting (including the second
measurement), the following settings cannot be changed from the
menu screen.
NOTE: When you cannot change the setting, check the second
measurement (TM2). Press and hold the MODE-2 button
from the measuring screen to switch to the second
measurement, and then stop measurement using the
START/STOP/ENTER button.
How to store the unit
• When you will not use the unit for
a considerable period of time,
insert an insulator such as paper
between two batteries, so they do
not make electrical contact.
Open
Close
Insulator
ATTENTION!: Evitez de laisser l’appareil principal dans un environ-
nement chaud pendant une longue période de temps
comme par exemple à l’intérieur d’une voiture ou di-
rectement au soleil lors d’une journée chaude.
Contact
• Sélection de la roue
• Saisie de la circonférence des
pneus
• Date
• Réglage de l’horloge
• Saisie manuelle du compteur
kilométrique
• Unité de vitesse
• Zone de cadence
• Zone de rythme cardiaque
• ID du capteur de rythme
cardiaque
• Fichier données
• Stockage des données
• Lien PC
• Sélection de la puissance
Installation de l’appareil principal sur la bicyclette
• Avant l’installation de l’appareil principal
sur le support, assurez-vous que tout ex-
cès d’humidité soit essuyé proprement.
Vérification de l’ID du capteur de rythme cardiaque
• Installer l’appareil principal sur le support
lors de la synchronisation de l’ID.
L’appareil principal ne reçoit pas de
signal HR par lui-même, car le récepteur
HR est à l’intérieur du support.
• Retirez le capteur de rythme cardiaque
de votre corps lorsque vous appuyez sur
la touche de réinitialisation.
Lorsque vous portez le capteur de
rythme cardiaque, l’ID du capteur ne
peut être vérifié correctement.
Réglage de l’appareil
Si le chronomètre de l’appareil (TM) en en train de faire un calcul
(incluant la seconde mesure), les réglages suivants ne peuvent pas
changés de l’écran de menu.
REMARQUE: Lorsque vous changez de réglage, vérifiez la
seconde mesure (TM2). Appuyez et maintenez la
touche MODE-2 de l’écran de mesure pour passer à
la seconde mesure, et arrêter la prise de mesure en
utilisant la touche START/STOP/ENTER.
Stockage de l’appareil
• Lorsque vous n’utilisez pas l’appareil
pendant une longue période de temps,
insérez un isolant tel qu’une feuille de
papier entre les deux piles, afin d’évi-
ter tout contact électrique.
Ouvrir Isolant
Appareil principal
Récepteur de rythme cardiaque
Touche de
réinitialisation
Fermez
IT
DE
NL
ES
Comprobación del Id. del sensor de ritmo cardíaco
•Instale la unidad principal en el soporte
al sincronizar el Id.
La unidad principal no recibe señales de
ritmo cardíaco por símisma, ya que el
receptor de ritmo cardíaco se encuentra
dentro del soporte.
VORSICHT!: Sorgen Sie dafür, dass die Haupteinheit nicht über
längere Zeit intensiver Wärme ausgesetzt wird, bei-
spielsweise im Auto oder in direktem Sonnenlicht.
Kontakt
Computer
•Radwahl
•Eingabe des Reifenumfangs
•Datum
•Uhr Stellen
•Manuelle Tachometereingabe
•Geschwindigkeitseinheit
•Trittfrequenzbereich
•Herzfrequenzbereich
HR-Empfänger
•Herzfrequenzsensor-ID
•Datensbestand
•Datenspeicherung
•PC-Verbindung
•Leistungsmodus
Anbringen des Gerätes am Fahrrad
•Bevor Sie die Haupteinheit in die Halterung
einbauen, reiben Sie die Halterung ggf. mit
einem Tuch trocken.
Prüfen der Herzfrequenzsensor-ID
•Die Haupteinheit muss in der Halterung
sitzen, wenn die ID synchronisiert wird.
Die Haupteinheit selbst empfängt keine
Herzfrequenzsignale, da sich der
Empfänger in der Halterung befindet.
•Nehmen Sie den Herzfrequenzsensor
von Ihrem Körper ab, wenn Sie die
RESET-Taste drücken.
Wenn Sie dabei den Herzfrequenzsensor
tragen, kann die ID nicht ordnungsge-
mäß geprüft werden.
RESET-Taste
Einstellen der Haupteinheit
Wenn die Stoppuhr (TM) der Haupteinheit läuft (einschließlich zwei-
ter Messung), können die folgenden Einstellungen nicht im Menü-
bildschirm geändert werden.
ACHTUNG: Wenn Sie die Einstellung nicht ändern können, prüfen
Sie die zweite Messung (TM2). Halten Sie die Taste
MODE-2 des zweiten Messbildschirms gedrückt, um
zur zweiten Messung zu wechseln, und stoppen Sie
die Messung anschließend mit der START/STOP/
ENTER-Taste.
Lagerung des Geräts
•Wenn Sie das Gerät für längere Zeit
nicht benutzen, legen Sie ein
Isolierblatt (Papierstreifen) zwischen
die beiden Batterien, so dass kein elek-
trischer Kontakt entstehen kann.
Öffnen
Schließen
Isolierblatt
ATTENZIONE!: Evitare di lasciare l’unitàin ambienti con tempera-
ture molto elevate per periodi di tempo prolungati,
ad esempio all’interno di un’auto o esposta alla luce
diretta del sole in una giornata molto calda.
Contatto
UnitàPrincipale
•Selezione ruota
•Inserimento della circonferenza
della ruota
•Data
•Impostazione dell’orologio
•Inserimento manuale
contachilometri
•Unitàdi misurazione della velocità
Ricevitore del battito cardiaco
•Zona cadenza
•Zona frequenza cardiaca
•ID sensore di misurazione della
frequenza cardiaca
•File dati
•Memorizzazione dati
•Collegamento al PC
•Selezione potenza
Installazione dell’unitàsulla bicicletta
•Prima di installare l’unitàprincipale sull’at-
tacco, assicurarsi di eliminare completa-
mente l’eventuale umidità.
Controllo dell’ID sensore di misurazio-
ne della frequenza cardiaca
•Installare l’unitàprincipale sull’attacco
quando si esegue la sincronizzazione
dell’ID.
L’unitàprincipale non riceve il segnale della
frequenza cardiaca da sola, poichéil
ricevitore della frequenza cardiaca è
collocato all'interno dell'attacco.
•Scollegare il sensore della frequenza
cardiaca dal corpo quando si preme il
tasto RESET.
Quando si indossa il sensore della
frequenza cardiaca, non èpossibile
controllare correttamente l'ID sensore.
Tasto RESET
Impostazione dell’unitàprincipale
Se il cronometro (TM) dell’unitàprincipale sta effettuando una mi-
surazione (compresa la seconda misurazione), non èpossibile mo-
dificare le seguenti impostazioni dalla schermata menu.
NOTA: Se non èpossibile modificare l’impostazione, controllare
la seconda misurazione (TM2). Tenere premuto il tasto
MODE-2 dallo schermo di misurazione per commutare alla
seconda misurazione, quindi interrompere la misurazione
utilizzando il tasto START/STOP/ENTER.
Come riporre l’unità
•Se si prevede di non utilizzare l’uni-
tàper un periodo di tempo prolun-
gato, inserire un isolante, quale
della carta, tra le due batterie, per
evitare che ci sia contatto elettrico
tra di esse.
Apertura
Chiusura
Isolante
¡PRECAUCIÓN!: Evite dejar la unidad principal durante periodos
prolongados de tiempo en entornos a altas tem-
peraturas, como por ejemplo el interior de un co-
che o bajo la luz del sol directa en un día de calor.
Contacto
Unidad pincipal
•Selección de rueda
•Introducción de la circunferencia
del neumático
•Fecha
•Ajuste del reloj
•Introducción manual del cuenta-
kilómetros
•Unidad de velocidad
Receptor de RC
•Zona de cadencia
•Zona de ritmo cardiaco
•Identificador del sensor de ritmo
cardiaco
•Archivo de datos
•Almacenamiento de datos
•Vínculo PC
•Seleccione potencia
Instalación de la unidad en la bicicleta
•Antes de instalar la unidad principal en el
soporte, asegúrese de secar el exceso de
humedad.
•Quite el sensor de frecuencia cardiaca
de su cuerpo al pulsar el botón RESET
(reiniciar).
Mientras lleva puesto el sensor de
frecuencia cardiaca, no es posible
comprobar el Id. del sensor de forma
correcta. Botón RESET
(reiniciar)
Configuración de la unidad principal
Si el cronómetro (TM) de la unidad principal estácontando (inclu-
yendo la medición de segundos) no es posible modificar los si-
guientes ajustes desde la pantalla de menú.
NOTA: Cuando no pueda cambiar el ajuste, consulte la medición
de segundos (TM2). Mantenga pulsado el botón MODE-2
desde la pantalla de medición para cambiar a la medición
de segundos, utilizando el botón START/STOP/ENTER.
Cómo guardar la unidad
•Si no va a usar la unidad durante un
periodo de tiempo considerable, inser-
te un aislante, como por ejemplo un
papel, entre las dos baterías, de forma
que no tengan contacto eléctrico.
Abrir
Cerrar
Aislante
VOORZICHTIG!: Het is aan te raden het apparaat niet gedurende
langere tijd in een warme omgeving te laten liggen
zoals in een auto of in direct zonlicht op een hete
dag.
Contact
De computer
•Wielselectie
•Bandomtrekinvoer
•Datum
•Instellen van de klok
•Manuele invoer van kilometertelling
•Snelheidseenheid
•Kadanszone
•Hartslagzone
Hartslagontvanger
•Hartslagsensor ID
•Databestand
•Dataopslag
•PC Link
•Power select
Het apparaat installeren op de fiets
•Zorg ervoor dat overtollig vocht eerst wordt
afgedroogd alvorens het apparaat op de
bracket te installeren.
Hartslagsensor ID controleren
•Installeer het apparaat op de bracket
wanneer u de ID synchroniseert.
Het apparaat zelf ontvangt geen
hartslagsignaal omdat de
hartslagontvanger zich in de bracket
bevindt.
•Verwijder de hartslagsensor van uw
lichaam wanneer u de resetknop indrukt.
Wanneer u de hartslagsensor draagt, kan
de hartslagsensor ID niet op de juiste
wijze worden gecontroleerd. Resetknop
Het apparaat instellen
Wanneer de stopwatch (TM) van het apparaat loopt (inclusief de
tweede meting) kunnen de volgende instellingen niet worden
gewijzigd vanuit het menuscherm.
VERWIJZING: Wanneer u de instelling niet kunt wijzigen,
controleer dan de tweede meting (TM2). Druk op
de MODE-2 knop vanuit het metingscherm en
houd deze ingedrukt om over te schakelen naar de
tweede meting en stop de meting door middel van
de START/STOP/ENTER knop.
Het apparaat bewaren
•Wanneer u het apparaat
gedurende langere tijd niet
gebruikt, schuif dan een
isolatiemiddel, bijvoorbeeld
papier, tussen twee batterijen
zodat ze geen elektrisch contact
maken.
Openen
Sluiten
Isolatiemiddel
Other manuals for CC-TR100

2

This manual suits for next models

1

Other Cateye Bicycle Accessories manuals

Cateye OS 1.1 User manual

Cateye

Cateye OS 1.1 User manual

Cateye V3 - User manual

Cateye

Cateye V3 - User manual

Cateye OS 1.1 User manual

Cateye

Cateye OS 1.1 User manual

Cateye PADRONE DIGITAL CC-PA400B User manual

Cateye

Cateye PADRONE DIGITAL CC-PA400B User manual

Cateye TL-LD800B User manual

Cateye

Cateye TL-LD800B User manual

Cateye Bicycle Accessories User manual

Cateye

Cateye Bicycle Accessories User manual

Cateye SINGLE SHOT HL-EL600RC User manual

Cateye

Cateye SINGLE SHOT HL-EL600RC User manual

Cateye TRIPLE SHOT HL-EL700RC User manual

Cateye

Cateye TRIPLE SHOT HL-EL700RC User manual

Cateye RAPID X2 User manual

Cateye

Cateye RAPID X2 User manual

Cateye V3 - Instruction manual

Cateye

Cateye V3 - Instruction manual

Cateye Padrone Smart + CC-SC100B Guide

Cateye

Cateye Padrone Smart + CC-SC100B Guide

Cateye Tomo CC ST-200 User manual

Cateye

Cateye Tomo CC ST-200 User manual

Cateye CC-AT200W User manual

Cateye

Cateye CC-AT200W User manual

Cateye CC-MT400 User manual

Cateye

Cateye CC-MT400 User manual

Cateye VIZ100 User manual

Cateye

Cateye VIZ100 User manual

Cateye TL-LD1100 User manual

Cateye

Cateye TL-LD1100 User manual

Cateye Padrone Smart + CC-SC100B User manual

Cateye

Cateye Padrone Smart + CC-SC100B User manual

Cateye STRADA User manual

Cateye

Cateye STRADA User manual

Cateye TL-LD150-R User manual

Cateye

Cateye TL-LD150-R User manual

Cateye GVolt70.1 HL-EL552G-RC User manual

Cateye

Cateye GVolt70.1 HL-EL552G-RC User manual

Cateye CC-FR7CL User manual

Cateye

Cateye CC-FR7CL User manual

Cateye Opticube HL-EL010 User manual

Cateye

Cateye Opticube HL-EL010 User manual

Cateye HL-EL500 POWER OPTICUBE User manual

Cateye

Cateye HL-EL500 POWER OPTICUBE User manual

Cateye Velo5 CC-VL510 User manual

Cateye

Cateye Velo5 CC-VL510 User manual

Popular Bicycle Accessories manuals by other brands

Holux FUNTREK 130 PRO manual

Holux

Holux FUNTREK 130 PRO manual

SRAM eTap AXS user manual

SRAM

SRAM eTap AXS user manual

CycleOps PowerTap owner's manual

CycleOps

CycleOps PowerTap owner's manual

SRAM RockShox DebonAir Upgrade manual

SRAM

SRAM RockShox DebonAir Upgrade manual

Bell TotalFit Nstruction manual

Bell

Bell TotalFit Nstruction manual

Wasp Cycle Cadence Sensor user manual

Wasp

Wasp Cycle Cadence Sensor user manual

Garmin Varia HL owner's manual

Garmin

Garmin Varia HL owner's manual

BIGSTONE C600E-LCD user manual

BIGSTONE

BIGSTONE C600E-LCD user manual

SRAM Zipp 77/177 Service manual

SRAM

SRAM Zipp 77/177 Service manual

VDO A4+ instruction manual

VDO

VDO A4+ instruction manual

Marzocchi Bomber Super Fly z.2 instruction manual

Marzocchi

Marzocchi Bomber Super Fly z.2 instruction manual

VDO Cyclecomputing C4 instruction manual

VDO Cyclecomputing

VDO Cyclecomputing C4 instruction manual

Burley DASH FM Owner's instruction & safety manual

Burley

Burley DASH FM Owner's instruction & safety manual

Kogan KACREHLKITA quick start guide

Kogan

Kogan KACREHLKITA quick start guide

Look TRAIL ROC manual

Look

Look TRAIL ROC manual

Shimano RD-M810 Service instructions

Shimano

Shimano RD-M810 Service instructions

OKBABY SIRIUS Instructions for use

OKBABY

OKBABY SIRIUS Instructions for use

FastTt Universal Mounting System installation guide

FastTt

FastTt Universal Mounting System installation guide

manuals.online logo
manuals.online logoBrands
  • About & Mission
  • Contact us
  • Privacy Policy
  • Terms and Conditions

Copyright 2025 Manuals.Online. All Rights Reserved.