SPARE PARTS
SPECIFICATIONS
Bulb: 6V-2.4W Halogen Bulb
Battery:Ni-Cd / Ni-MH
Charger: CAT EYE Battery Charger CHR-105 / 145
Operation time: Ni-Cd: ........... 2.5 hours
Ni-MH:.........4hours
Alkaline: ........ 4 hours
Charging time: 8 - 10 hours
Temperature Range: Charging: ...... 0˚C ~ 40˚C
Operating: ....–15˚C ~ 45˚C
Recharge/Discharge Number of Times:
More than 500 times (until rated capacity drops to 50%)
*The specifications and design are subject to change without notice.
LIMITED WARRANTY
1- Year Warranty:
Only Lamp Unit And Battery Charger (Excluding bulb and battery)
If trouble or damage occurs during normal use, the product will be repaired or replaced
free of charge. Type your name, address, date of purchase and the situation of trouble
clearly, and send it back to the appropriate service center together with the product.
Insurance, handling and transportation charges shall be borne by the customer. After
being repaired or replaced, the product will be shipped back to the customer.
Address for the service:
2-8-25 Kuwazu, Higashi sumiyoshi-ku, Osaka 546-0041 JAPAN
Attention: CAT EYE CO., LTD. Customer Service Section
Phone: 81-6-6719-7781 Fax: 81-6-6719-2362
Service & Research Center
1705 14th St. #115 Boulder, CO 80302
Phone: 303-443-4595 Toll Free: 800-5CATEYE(800-522-8393)
Web site: http://www.cateye.com
Design Pat. Pending
Copyright© 1999 CATEYE Co.,Ltd.
Printed in Japan HLM16K-990507 0688361 2web
FOR SAFE OPERATIONS (IMPORTANT)
• The lamp body becomes extremely hot when turned on. Never touch
the lamp body or lens until thoroughly cooled. Injury may result.
• This lamp kit is not intended for use by young children or infirm
persons without supervision; young children should be supervised
to ensure that they do not play with this appliance.
• Never short-circuit the plug of the battery charger. It may cause the
battery to overheat, resulting in fire or damage of the components.
• Use only the included battery charger for charging.
• Safely dispose of the old battery when it comes to the end of its
useful life.
• Never mix different types of batteries or old / new batteries together.
• Although dry batteries can be used, never recharge them.
• Overcharge may cause the battery trouble.
• Avoid leaving the battery under direct sunlight. It may cause the
battery leak.
• A long period of non-use will lower the voltage of the battery due to
natural self discharge. Always charge the battery before using.
• If the cord of the battery charger or other parts are damaged, it
must only be replaced by the shop where this lamp kit was pur-
chased, because special purpose tools are required.
• The charger may become hot during recharging.
• The charging time may vary depending on the use environment.
•
If the battery does not serve the proper run time even after it is fully
charged, it may be at the end of it's useful life. Replace it with a new one.
HOW TO CHARGE
If the batteries are not inserted, please see "How To
Replace The Battery".)
When the indicator of the lamp body turns
red, it means the battery voltage is lowered;
recharge the battery.
The factory-loaded battery is not charged.
Open the jack cover on the bottom of the lamp body and connect it with
the plug of the charger. Plug the charger with the home power outlet.
Use only the provided battery charger.
Never recharge dry batteries.
Make sure to close the jack cover after charging.
Using CHR-105 Charger
This charger is only for Ni-Cd batteries. It takes 8-10 hours to be full-
charged. Unplug the charger after charging.
Using CHR-145 Charger
This charger is for Ni-Cd and Ni-MH batteries.The indicator is on during charg-
ing. When the battery is full-charged, it will start flashing.(It takes 8-10 hours.)
HOW TO REPLACE THE BATTERY AND THE BULB
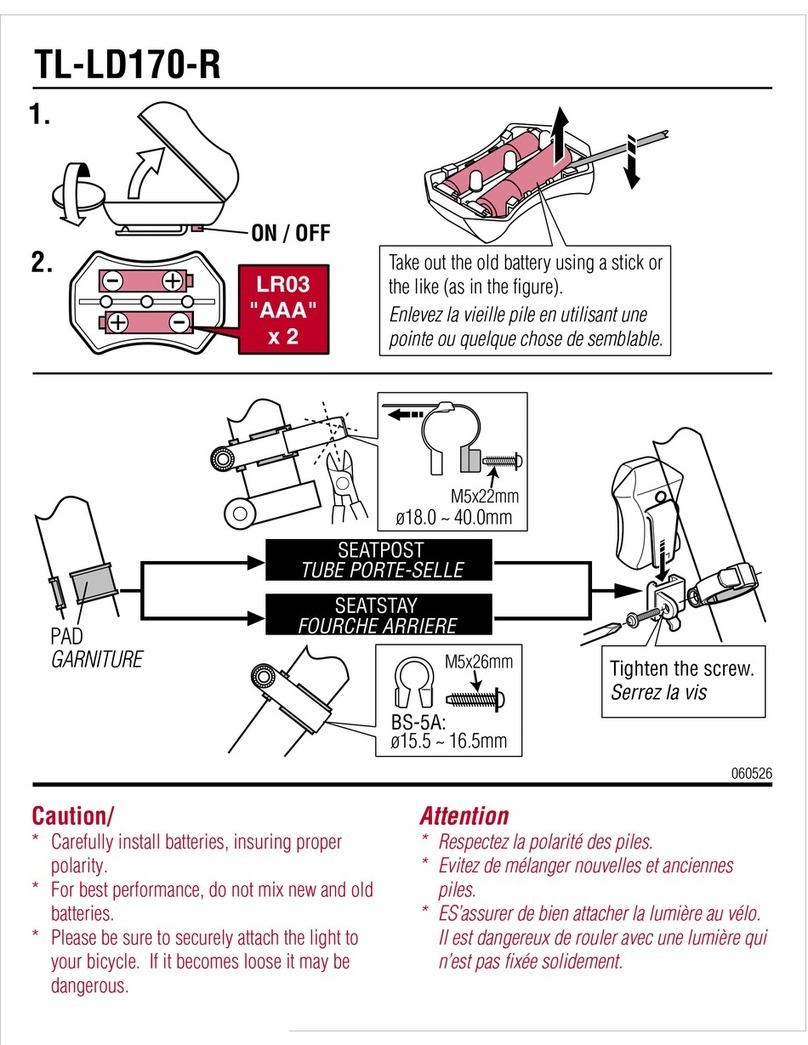
Loosen the screw on the bottom of the lamp body and remove the upper body.
ABattery
Insert the batteries as the picture shows.
Make sure of the correct
polarity.
Never mix different types of
batteries or old / new
batteries together.
BBulb
Takeout thelenscomponent. Removethe bulb
holder and replace the bulb with a new one.
Insert the bulb aligning the gap of the clasp
with the projection of the lens component.
Do not touch the bulb and the
reflective mirror with bare
fingers.
Use only the CAT EYE
halogen bulb.
Rechargeable Headlamp
HL-1600KIT
INSTRUCTION MANUAL
CHR-105 Charger
(Only for Ni-Cd batteries)
CHR-145 Charger
(Both for Ni-Cd
and Ni-MH batteries)
Indicator
Flashing of the indicator means
full-charged.
HOW TO ATTACH THE BRACKET AND THE LAMP BODY
TO MOUNT:
Adjust the bracket using the rubber pad and fix it with the screw.
TO REMOVE:
Pull off the lamp body while pushing the lever as the arrow shows.
Pull
Screw
Bottom of the lamp body
+
+–
+
–
+
–
–
+
–
Bulb
Bulb Holder
Bracket
Rubber Pad
Slide Lever
Gap
CAUTION WARNING!!
To power outlet Jack Cover
8
to
10 hours
Slide
NiMH Battery
#533-8477
Ni-Cd Battery
#533-8478
CHR-145
Battery Charger
#533-8496
CHR-105
Battery Charger
#533-8491
6V-2.4A
Halogen Bulb
#533-8060
H-24 Bracket
#533-8597 H-24 Bracket & Spacer
#533-8598
CO.,LTD.
NEVER
OVERCHARGE
