CATHEXIS KBD-3000 User manual

005-20170322-123 March 22, 2017 R Solomon
Cathexis KBD-3000 Operation
Manual

005-20170322-123 March 22, 2017 Page 1
Contents
1 Introduction .....................................................................................................................................................2
a. Requirements ...............................................................................................................................................2
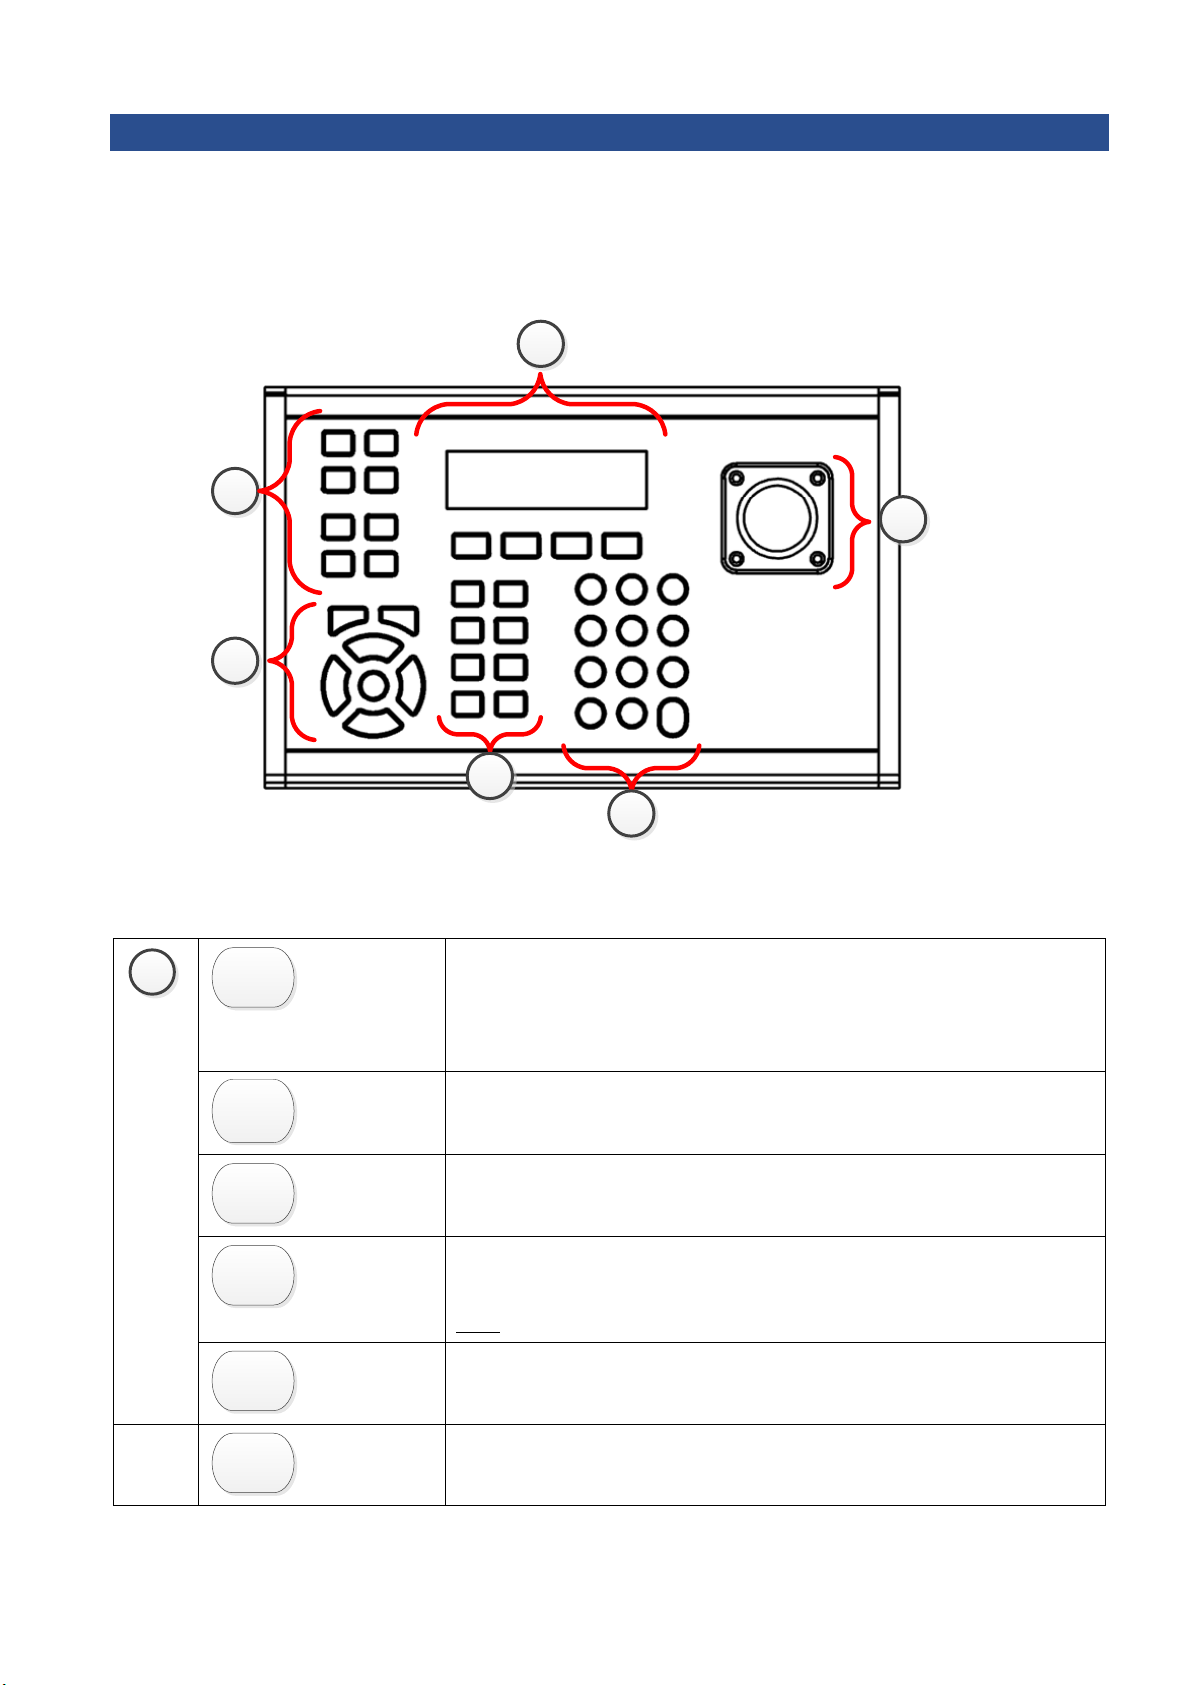
2 Keyboard ..........................................................................................................................................................3
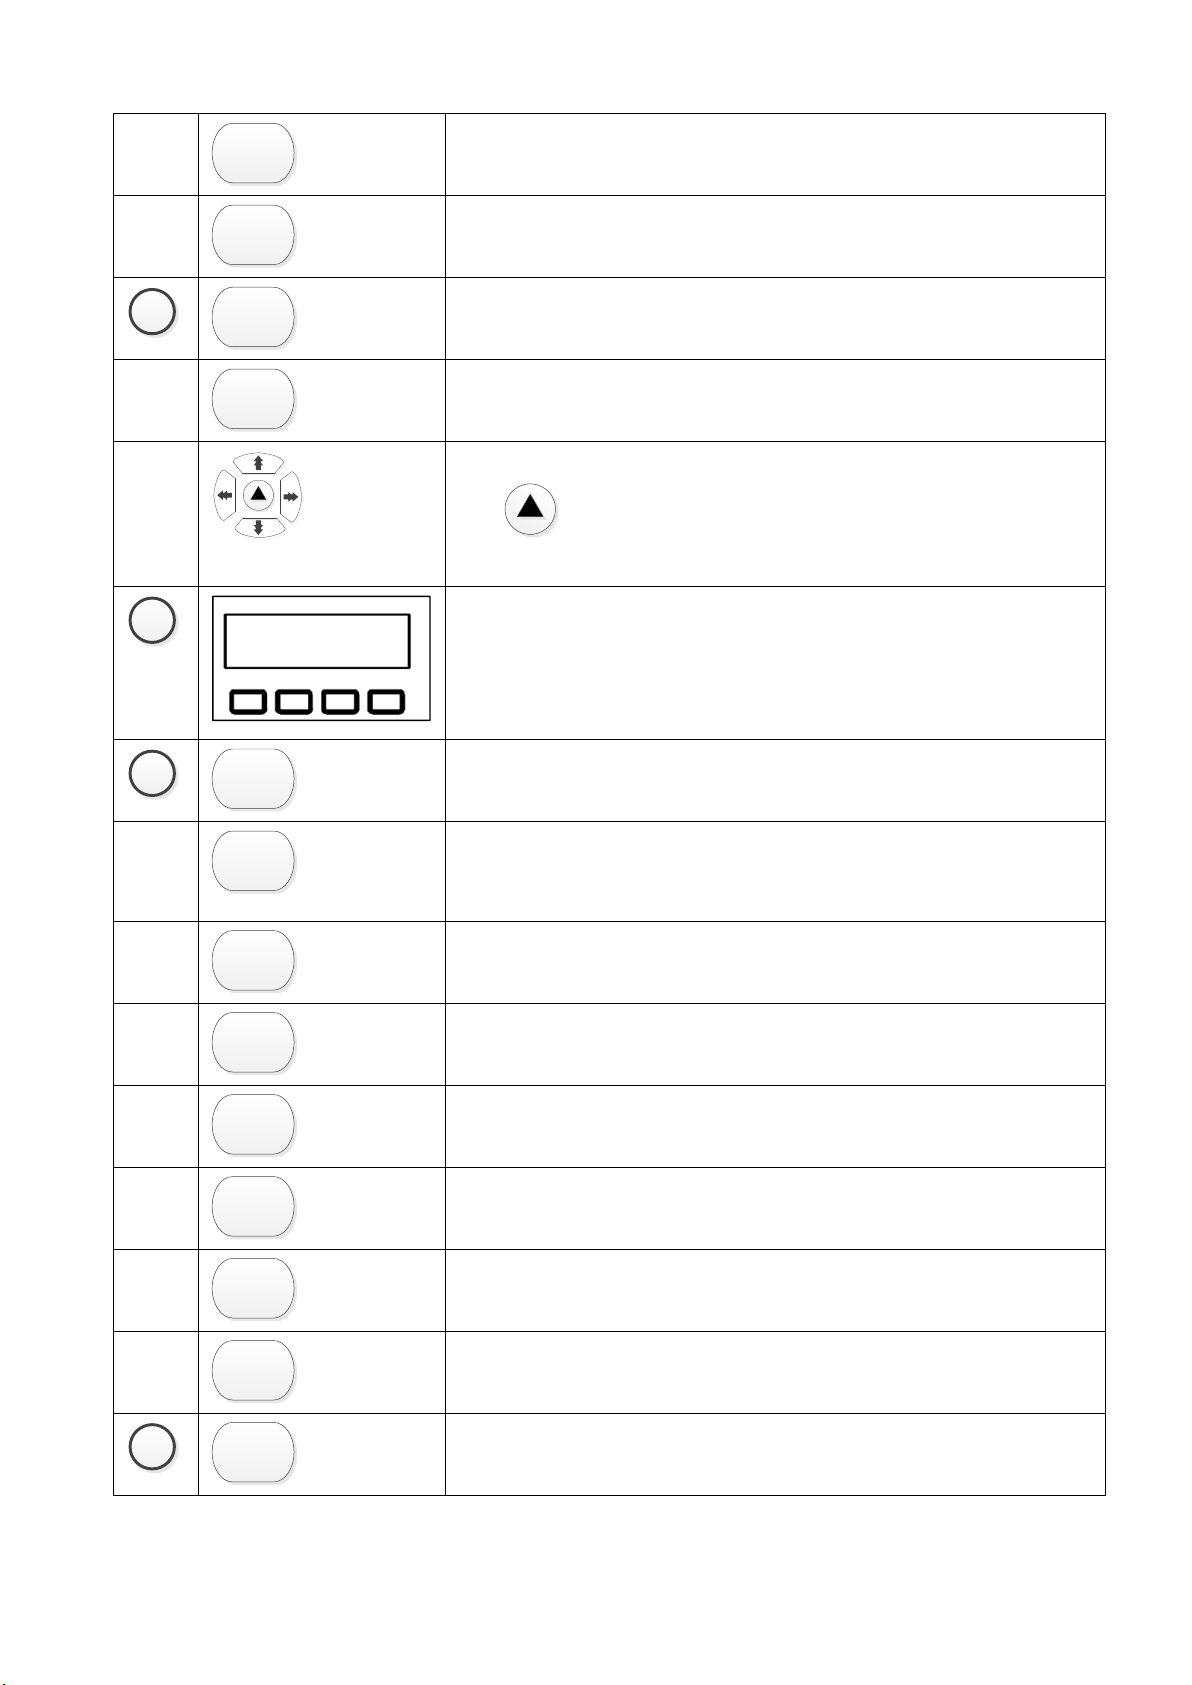
a. Buttons .........................................................................................................................................................3
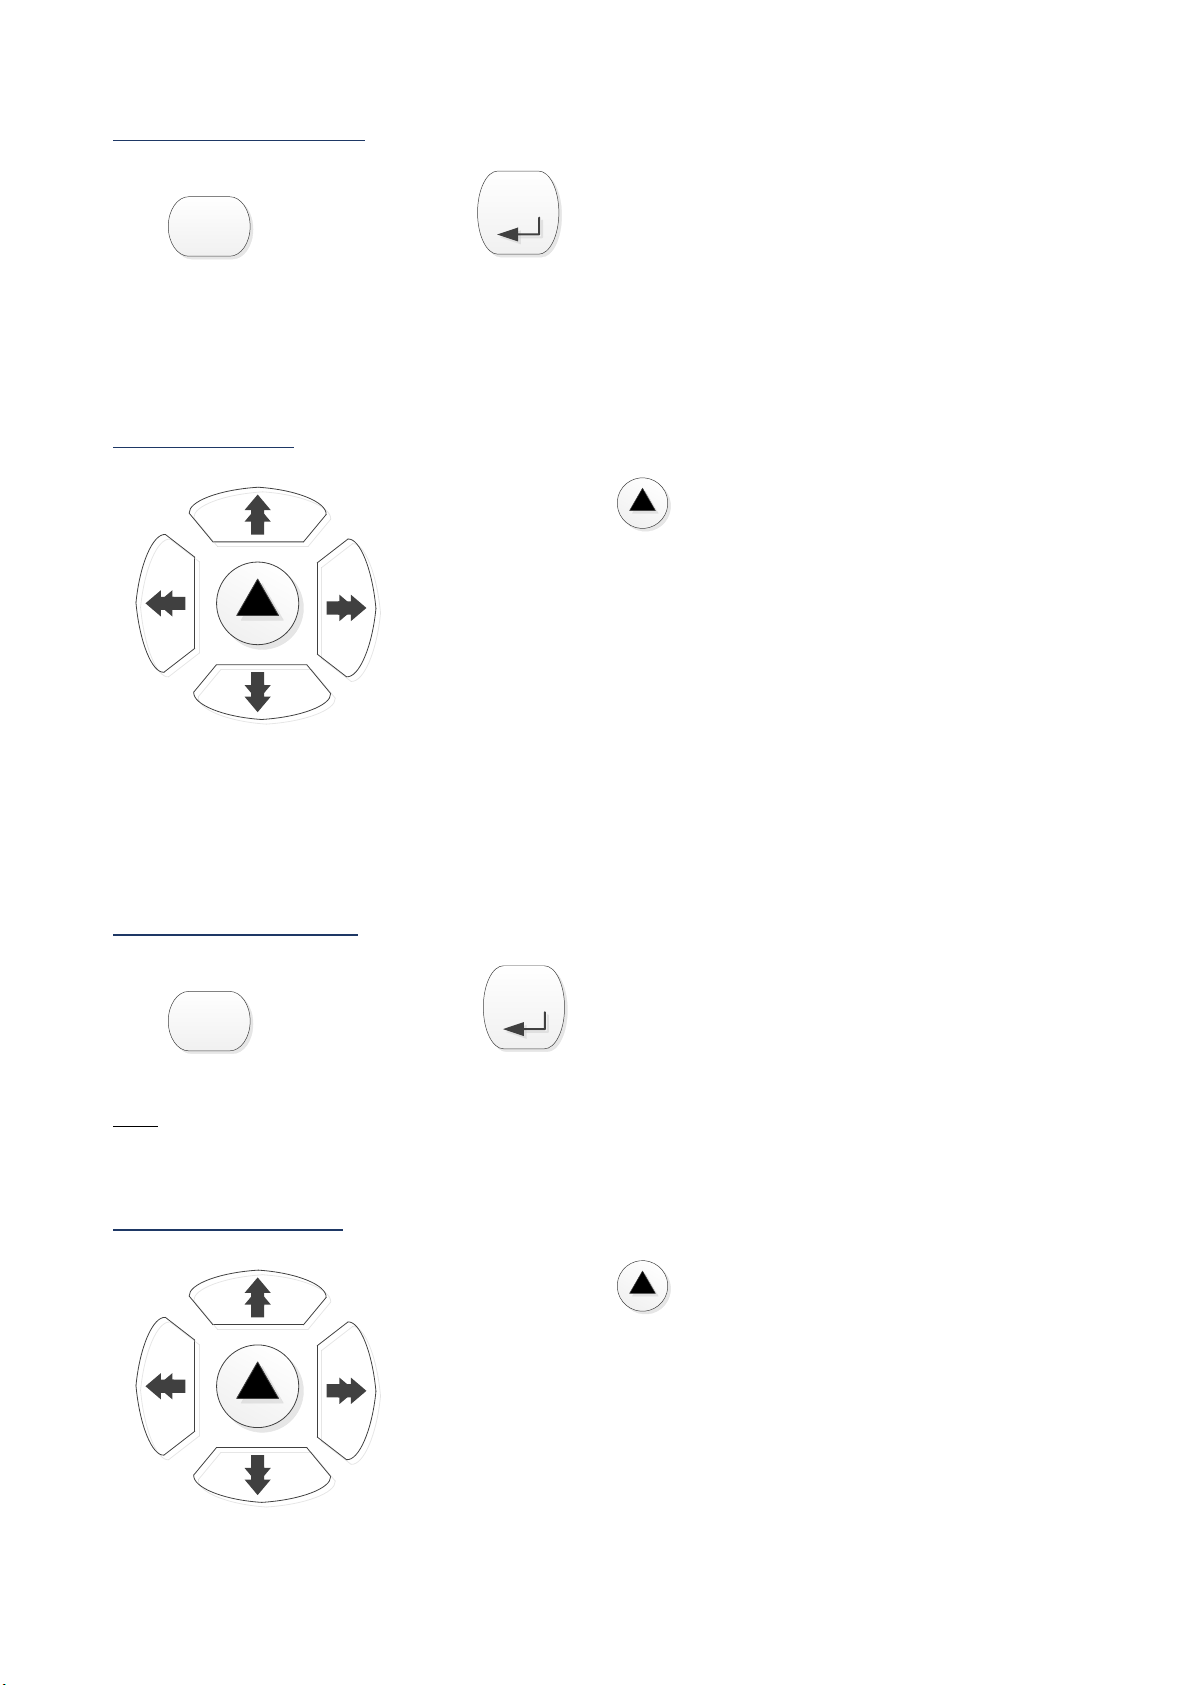
b. Arrow Key Modes .........................................................................................................................................5
3 General Operations ..........................................................................................................................................6
a. Logging In......................................................................................................................................................6
b. Access GUI ....................................................................................................................................................6
c. Select/Browse Cameras................................................................................................................................6
d. Select/Browse Monitors...............................................................................................................................7
e. Resize Camera Panel.....................................................................................................................................8
f. Pulse/Toggle Output.....................................................................................................................................8
4 Keyboard Setup ................................................................................................................................................9
a. Backlight Control ..........................................................................................................................................9
b. Tilt Gain.........................................................................................................................................................9
c. Pan Gain........................................................................................................................................................9
d. Key beep .......................................................................................................................................................9
e. Tilt Sensitivity..............................................................................................................................................10
f. Pan Sensitivity.............................................................................................................................................10
g. Zoom Dead Zone.........................................................................................................................................10
h. Tilt Dead Zone.............................................................................................................................................10
i. Pan Dead Zone............................................................................................................................................10
5 PTZ Camera Controls......................................................................................................................................11
a. Move, Zoom and Focus...............................................................................................................................11
b. Wash/Wipe.................................................................................................................................................11
c. Go to Preset................................................................................................................................................12
d. Configure Preset from Keyboard................................................................................................................12
e. Run Preset Pattern......................................................................................................................................13
f. PTZ Menu Control.......................................................................................................................................13
6 Conclusion......................................................................................................................................................14

005-20170322-123 March 22, 2017 Page 2
1Introduction
This document details the operation of the Cathexis KBD-3000 Keyboard.
1
For information regarding the setup
of the keyboard, please consult the KBD-3000 Installation and Setup Manual.
a. Requirements
•CathexisVision software version 5041f1 and newer.
•RS232 cable [not supplied]. Must be straight through, with male and female DB9 connectors. One on
each end. [maximum length of 15m].
•RS422 cable [not supplied]. Must be twisted pair with male RJ45 connector at one end, and female DB9
connector at the other end. [maximum length 1200m].
•Compatible PTZ camera. See www.cathexisvideo.com for list of compatible cameras.
1
While Cathexis has made every effort to ensure the accuracy of this document, there is no guarantee of accuracy,
neither explicit, nor implied. Specifications are subject to change without notice.

005-20170322-123 March 22, 2017 Page 3
2Keyboard
a. Buttons
1
2
3
4
5
6
1
ALT
Alt function key.
Press and hold while pressing another key to activate action indicated
in blue text.
LOG
In/Out
Log in/out of the keyboard.
F1
Setup
F1 Self-set function.
Alt + Setup Open keyboard setup menu on LCD screen.
F2
Panic
F2 Self-set function.
Alt + Panic Initiate user panic trigger.
Note: Panic button not supported in CathexisVision 2016 and later.
Open
Wash
Open Open iris.
Alt + Wash Starts wash function (sprays water).
Close
Wipe
Close Close iris.
Alt + Wipe Starts wiping function of lens.

005-20170322-123 March 22, 2017 Page 4
Near
Stop Wash
Near Manually focus nearer.
Alt + Stop Wash Stops wash.
Far
Stop Wipe
Far Manually focus further away.
Alt + Stop Wipe Stops wipe function.
2
CAM
Camera control.
CAM + camera ID + enter switch to camera.
MON
Monitor control.
MON + monitor ID + enter switch to monitor.
Arrow keys.
Click to change mode of arrow keys.
Navigate using arrow keys.
3
LCD Screen and Soft Keys.
Displays messages, status, login field and softkey options. Refer to this
display frequently, as it provides useful guidance. The softkeys are
unlabelled because their functions vary depending on the mode. Labels
appear for each softkey on the LCD screen directly above the softkey.
4
Pattern
Menu
Pattern + pattern number run set pattern.
Alt + Menu opens PTZ overlay menu.
Preset
Save
Preset + preset number go to set preset.
Alt + Save + number + enter saves current camera position as
preset.
Seq
Runs a configured sequence.
Seq + sequence number +enter runs set camera sequence.
Salvo
Runs a configured salvo.
Salvo + salvo number +enter runs set salvo.
Layout
Selects a configured monitor layout.
Layout + layout number +enter selects layout.
Output
Toggle
Output + output resource ID + enter pulse output.
Alt + Toggle + output resource ID + enter toggle output.
Action
Controls site action.
Allows site actions to be triggered using the action’s user ID.
*
Asks the Video Wall monitors to identify themselves by displaying their
ID numbers on the screen.
5
1
ABC
A single press selects the numeral.
Quick successive presses select the remaining options for the key.

005-20170322-123 March 22, 2017 Page 5
<
Backspace in LCD screen.
Enter
Enter.
Press to activate other key selections e.g.
CAM + camera ID + enter switch to camera.
6
Joystick.
Use for dome camera control, mouse simulation cursor movement,
and to move the selector in menus.
b. Arrow Key Modes
Arrow keys can be used to navigate up/down and left/right within certain modes.
Press the center key repeatedly to change modes.
The LCD screen will indicate the mode and how to use the arrow keys.
See below for more.
Modes
Press the center key repeatedly to change modes.
Mode
Arrow Keys
Arrow Key Controls
Arrows control CAM/MON
Up/Down
Move up and down the cameras in the Resources list of the
cameras tab.
Left/Right
Move left/right between video wall monitors available to the
keyboard.
Arrows control panels
All
Move between camera panels in monitor layout.
Arrows map to PTZ keys
All
Move between analogue PTZ menu options. (See PTZ section)

005-20170322-123 March 22, 2017 Page 6
3General Operations
a. Logging In
Operations differ when using the keyboard on a Client unit and a Server Unit. See below
Client
If logging in on a Client unit, the user does not have to log in on the keyboard as the keyboard receives the
login details and access rights of the user currently logged into the CathexisVision Client.
Log in to a Server
If logging into a Server, the user will have to log in on the keyboard as well as the software.
1.
On the keyboard, select the
LOG
In/Out
button to display Username and Password fields on the LCD
screen.
2.
Using the number pad, type the username and then press Enter.
Enter
3.
Type the password, and then press Enter.
Enter
b. Access GUI
The GUI must be connected to as a monitor every time the keyboard is connected. GUI monitor number is
zero.
Press
MON
+ 0 (zero).
c. Select/Browse Cameras
Specific cameras may be selected for view, or site cameras may be browsed.
Note: Selecting cameras requires knowing the Resource IDs of the various cameras connected to the site.
Consult administrator for Resource IDs, or the KBD-3000 Setup Manual for instructions on setting Resource
IDs.

005-20170322-123 March 22, 2017 Page 7
Select Specific Cameras
Press
CAM
+ camera resource ID +
Enter
Browse Cameras
Press the center key repeatedly to change mode to Arrows control
CAM/MON.
Use the up/down arrow keys to browse the cameras in the Resource List.
d. Select/Browse Monitors
Select Specific Monitor
Press
MON
+ monitor resource ID +
Enter
Note: The GUI must be connected to as a monitor every time the keyboard is connected. GUI monitor number
is zero.
Browse Site Monitors
Press the center key repeatedly to change mode to Arrows control
CAM/MON.
Use the left-right arrow keys to scroll through site monitors.

005-20170322-123 March 22, 2017 Page 8
e. Resize Camera Panel
ALT
+ up/down arrow key increase/decrease number of camera panels across screen.
f. Pulse/Toggle Output
In output mode, the softkeys activate: refer to the LCD screen for instructions.
Pulse Output
Output
Toggle
+ output resource ID +
Enter
Toggle Output
ALT
+
Output
Toggle
+ output resource ID +
Enter

005-20170322-123 March 22, 2017 Page 9
4Keyboard Setup
Press Alt + F1 to enter Setup Menu on LCD Screen.
Use up/down arrow keys to navigate between menu items.
a. Backlight Control
Backlight control
Off : On : OK : Cancel
Use softkeys to select backlight options.
b. Tilt Gain
Set the sensitivity of the joystick tilt. The higher the tilt gain, the more sensitive the PTZ camera’s tilt upwards
or downwards will be.
Tilt gain: 1.0
- : + : OK : Cancel
Use softkeys to set tilt gain.
c. Pan Gain
Set the sensitivity of the joystick pan. The higher the tilt gain, the more sensitive the PTZ camera’s pan from left
to right will be.
Pan gain: 1.0
- : + : OK : Cancel
Use softkeys to set pan gain.
d. Key beep
Set the keyboard keys to beep or to be silent when pressed.
Key beep
Off : On : OK : Cancel
Use softkeys to key beep/silence.

005-20170322-123 March 22, 2017 Page 10
e. Tilt Sensitivity
Set the sensitivity of the joystick tilt.
Tilt Sensitivity
More : Less : OK : Cancel
Use softkeys to set tilt sensitivity.
f. Pan Sensitivity
Set the sensitivity of the joystick pan.
Pan sensitivity
More : Less : OK : Cancel
Use softkeys to set pan sensitivity.
g. Zoom Dead Zone
Set the zoom dead zone.
Zoom dead zone: 40
- : + : OK : Cancel
Use softkeys to set zoom dead zone.
h. Tilt Dead Zone
Set the tilt dead zone.
Tilt dead zone: 20
- : + : OK : Cancel
Use softkeys to set tilt dead zone.
i. Pan Dead Zone
Set the pan dead zone.
Pan dead zone: 20
- : + : OK : Cancel
Use softkeys to set pan dead zone.

005-20170322-123 March 22, 2017 Page 11
5PTZ Camera Controls
Make sure the PTZ camera is selected.
a. Move, Zoom and Focus
Move PTZ
1. Select the PTZ camera. (See above)
2. Move the joystick to aim the camera in the correct direction.
Zoom In/Out
1. Select the PTZ camera.
2. Twist the top of the joy stick right to Zoom In, or left to Zoom Out.
Manual Focus
Note: Some cameras will auto-focus.
Manually focus nearer by pressing
Near
.
Manually focus further away by pressing
Far
.
b. Wash/Wipe
Note: Auxiliary relays must have been wired for correct functions.
Wash Camera
•Start Wash
Press
ALT
+
Open
Wash
to start wash.
•Stop Wash
Press
ALT
+
Near
Stop Wash
to stop wash.

005-20170322-123 March 22, 2017 Page 12
Wipe Camera
•Start Wipe
Press
ALT
+
Close
Wipe
to start wipe.
•Stop Wipe
Press
ALT
+
Far
Stop Wipe
to stop wipe.
c. Go to Preset
This requires knowing the preset number.
1. Press
Preset
Save
+ Preset Number.
2. Press
Enter
.
d. Configure Preset from Keyboard
1. Use the joystick and buttons to move the dome camera to the required position, zoom-distance and
focus.
2. Press
ALT
+
Preset
Save
and enter a preset number on the number pad.
3. Press
Enter
.
The preset is now saved.

005-20170322-123 March 22, 2017 Page 13
e. Run Preset Pattern
This requires knowing the preset pattern number.
1. Press
Pattern
Menu
+ Preset Pattern number.
2. Press
Enter
.
f. PTZ Menu Control
If the camera supports it, a PTZ menu can be opened as an overlay over the PTZ feed in CathexisVision.
Press
ALT
+
Pattern
Menu
to open PTZ menu.
The menu will appear as an overlay in CathexisVision, but the keyboard’s LCD screen and softkey buttons offer
navigation options.
PTZ menu control
Menu : Enter : ESC : Cancel
Press the corresponding softkey buttons to select either Menu,
Enter, ESC or Cancel.
To navigate menu, change arrow key mode to Arrows map to PTZ
keys using button.
Navigate in menu:
Arrow keys up/down.
Select in menu:
Right arrow key.
Other manuals for KBD-3000
1
Table of contents
Other CATHEXIS Recording Equipment manuals