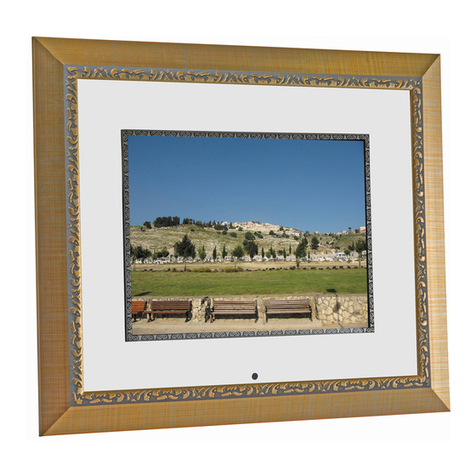
Ceiva LF4007 User manual


ATTENTION
Your CEIVA is currently displaying the
demonstration slideshow.
To enjoy your own personal slideshow, please follow these three easy
steps:
Power on your CEIVA.
1.
Confirm that the slideshow is displaying.2.
Hold both the Menu and Select buttons down for one3.
second until the Congratulations screen appears.
This process is only necessary once.
For more information about how to display and receive photos
on your CEIVA, see page 6.
Displaying and Receiving Photos
Exiting the Demonstration Slideshow
2

CEIVA Digital Photo Frames™ are the world’s only connected digital picture
frames, renowned for their ease of use and unique patented technology. With
CEIVA®, you have extensive options to see, share, and store the photos that
mean the most to you.
Display Photos Directly from a Camera Memory Card
Instantly display a full color slideshow of photos stored on a memory card•
using the built-in card reader.
Use simple on-screen menus to control display modes, photo rotation and•
deletion, slideshow transitions and timing, brightness, and more.
Set your CEIVA to turn on and off automatically.•
Add a CEIVA PicturePlan® and Receive New Photo Updates Automatically
Receive and display new photos from friends and family around the world
automatically, every day. All you need is a subscription to the CEIVA Picture-
Plan service and a phone line or broadband internet connection. A PicturePlan
enables you to store an unlimited number of photos securely online and share
photos with anyone you choose. Setting up a PicturePlan is easy. For more
information, see page 5 of this Quickstart Guide.
In the Box
ShowcaseYour Photos and Stay Connected
3
CEIVA Digital Photo Frame1.
Quickstart Guide2.
Telephone Cord3.
Dual Phone Splitter4.
AC Power Supply5.
Warranty Card6.

Components Setting UpYour CEIVA Is Easy
4
Is Something Missing or Damaged?
If something is missing or damaged, call CEIVA® Customer Care at 1-877-MYCEIVA
(1-877-692-3482). Please have your serial number available when calling. The serial
number is located on the bottom of your CEIVA.
NOTE: Please keep the original product packaging in case you need to return your CEIVA for repairs.
Menu Button1.
Left Arrow Button2.
Right Arrow Button3.
Down Arrow Button4.
Up Arrow Button5.
Select Button6.
New Photo Indicator7.
Power Light8.
CF I/CF II Slot9.
(for Compact Flash®or
Microdrive™ memory card)
SD/MMC/MS Slot10.
(for Secure Digital™, MultiMedia Card™, Memory
Stick®, Memory Stick PRO®, Memory Stick
Duo™, Memory Stick PRO Duo™, SmartMedia™,
xD-Picture Card™, miniSD™
(Some memory cards may require adapter;
please visit http://help.ceiva.com)
C-Port 111.
C-Port 212.
Phone Port13.
Power Port14.
Picture Button15.
Brightness Button16.

Your CEIVA displays a continuous slideshow of pictures. Your source for these pictures
can be a memory card plugged directly into the back of your CEIVA. You can also
receive new photo slideshows automatically every day from your family and friends
around the world. All you need is a CEIVA PicturePlan and a phone line or broadband
Internet connection (see Page 5).
CreateYour Free CEIVA Account and RegisterYour CEIVA
You must create a free online CEIVA account and register your CEIVA in order to get
complimentary CEIVA Customer Care support and receive free software updates, spe-
cial member discounts, and services. Creating your CEIVA account also enables you to
activate your optional PicturePlan service (see page 5).
To create your account and register, go to http://gettingstarted.ceiva.com and follow
the easy step-by-step instructions. Or, call CEIVA Customer Care at 1-877-MYCEIVA
(1-877-692-3482). Please have your serial number available when registering. The se-
rial number is located on the bottom of your CEIVA.
NOTE: If you try to connect your CEIVA to the CEIVA Network™ before registering it, your CEIVA will display an error
message.
Choose a Location forYour CEIVA
When choosing a location for your CEIVA, make sure:
Your CEIVA will be easy to see.1.
Away from direct sunlight, water, moisture or extreme temperatures.2.
A power outlet is nearby.3.
A telephone jack or a router for a broadband connection is nearby. If you are4.
connecting your CEIVA to a wireless network, you can place it virtually anywhere
in your home or office. For a broadband or wireless connection, you need an
adapter (sold separately).
Set upYour CEIVA to Display Pictures
Plug one end of the power cord into the round power access port (labeled1.
Power) located on the back of your CEIVA. Plug the other end of the power
cord into an electrical outlet that is not controlled by a light switch. We recom-
mend that you use a surge protector power strip to prevent surges of electrical
current from damaging your CEIVA.
Press the white Picture button on the back of your CEIVA once.2.
NOTE: After completing this initial setup, do not unplug your CEIVA power cord to turn the frame on or off, unless a
CEIVA Customer Care team member asks you to do so for troubleshooting purposes. For information on how to turn
the screen off during routine use, please see page 7.
Components Setting UpYour CEIVA Is Easy
5

Get Connected OperatingYour CEIVA
6
Insert your memory card into the appropriate slot in your CEIVA*.3.
Press the Up or Down Arrow button to choose how you would like to view4.
your photos and confirm your choice with the Select button. For information on
using your CEIVA menus, see page 6.
NOTE: Please see page 2 for a list of compatible memory cards.
Get Connected with PicturePlan!
Receive and display new photos from friends and family around the world.•
Invite anyone you choose to share photos with you for free.•
Send photos directly from your camera phone or your online CEIVA account.•
Store and organize an unlimited number of photos in your secure personal albums.•
Connect your CEIVA via an existing phone line or to a home network using a•
CEIVA Broadband™ or CEIVA Wireless™ adapter (both sold separately).
Upload photos automatically from a memory card over wireless and broadband•
connections to your personal albums on the CEIVA Network.
Order prints directly from your CEIVA for delivery via U.S. mail.•
View your choice of CEIVA Channels™ for daily news, horoscopes, local weather,•
and more.
Turn photos into one-of-a-kind greeting cards with personal messages.•
Three Easy Steps to Get Connected
Activate your PicturePlan service. Log into your CEIVA account online, or call1.
the CEIVA Customer Care team at 1-877-MYCEIVA (1-877-692-3482) to acti-
vate the subscription.
Set up your connection. If you are using an analog telephone line, insert one end2.
of the phone cord into the square phone access port (labeled Phone) located on
the back of the CEIVA. Plug the other end of the cord into a phone outlet. If
you need to share the outlet with an answering machine, fax machine, or another
phone, use the dual phone splitter (included).
If you are using a broadband or wireless connection, you will need to purchase
an adapter separately. Please refer to http://ceivabroadband.ceiva.com or http://
ceivawireless.ceiva.com for more information.
Connect your CEIVA to the CEIVA Network. Just push and hold the white3.
Picture button located on the back of your CEIVA until you see the message,
“You can let go now, I’m dialing in.” Then, relax while your CEIVA connects to
the CEIVA Network. A status screen will indicate the connection progress. Once
completed, your CEIVA is ready to receive and display photos—automatically!

How do I use the menus?
You can use menus to rotate photos, add and remove photos from the slideshow, con-
trol slideshow transitions and timing, set on and off times, adjust brightness, and more.
To start Menu Mode on your CEIVA, press the Menu button.•
Use the Up, Down, Left, and Right Arrow buttons to scroll between menu options.•
Also, use the Left and Right buttons to change numeric settings for certain features.
Press the Select button to choose a highlighted menu option.•
Press the Menu button, or choose the Back option in the lower left corner of the•
menu screen, to return to the previous menu page.
Choose the Exit option in the lower right corner of the menu screen to exit the•
menu at any time.
For more detailed information on menus, please visit http://menus.ceiva.com.
How do I get photos onto my CEIVA?
There are many ways to get your photos on your CEIVA.The simplest way is to insert
your camera memory card into the back of your CEIVA for an instant slideshow. If you
have a PicturePlan, you can also send photos to your CEIVA from your online CEIVA
account, your desktop using free photo editing software or from your camera phone.
For more detailed information on sending photos, please visit http://help.ceiva.com.
How do I browse my pictures?
Press the Select button to display thumbnail previews
of all the photos in your slideshow. Use the arrow but-
tons to scroll until you see the photo you are searching
for. Press the Select button to choose that photo or
simply select Exit to return to your slideshow.
How do I rotate a photo?
With thumbnail previews displayed (see above), scroll to the photo that you wish to
rotate. Press the Select button to choose that photo and then press the Menu button.
Choose Rotate and press the Select button. Choose the degree of rotation for the
photo and then press the Select button. The default is None. Press the Select button
when Save is highlighted to confirm your changes.
How do I adjust the brightness on my screen?
When your CEIVA is in Slideshow Mode, you can press the Up and Down Arrow but-
tons to adjust the display brightness of the frame. Press and release the Up button to
increase the brightness one level. Press and release the Down button to decrease the
brightness one level.
Get Connected OperatingYour CEIVA
7

How do I delete a photo from the slideshow?
With thumbnail previews displayed (see above), scroll to the photo that you wish to
delete. Press the Select button to choose that photo and then press the Menu button.
Choose Delete, and press the Select button. When you mark a photo for deletion that
was sent from the CEIVA Network, a trash can icon will appear on the Info Bar. The
photo will be removed the next time your CEIVA connects to the CEIVA Network.
To cancel your delete request and keep the photo in your slideshow rotation, repeat
the steps for this feature, choosing Undelete instead of Delete.
When you delete a slideshow photo that is stored on a memory card, you will not
remove the photo from your memory card, only from the slideshow. You can manually
browse through photos on the memory card to reinsert a photo into the slideshow.
How do I turn off my screen? How do I turn it back on?
Press the Down Arrow button several times to turn off the CEIVA screen. To turn the
screen back on, simply press any of the buttons on the front of the frame. You can also
set your CEIVA to turn on and off automatically, using the Set Times menu function. If
you are not a PicturePlan member, please set the time for your CEIVA manually on this
screen to enable this function. PicturePlan members and those connected to a wire-
less network have the time automatically set for them.
How do I customize my slideshow?
Whenever you press a button in Slideshow mode—to scan previews, for example—
the slideshow automatically pauses. It will automatically resume within a preset
amount of time, depending on your slideshow settings. The default is 30 seconds. To
restart the slideshow immediately, hold down the Right Arrow button until you see
the message,“Let go now to start the slideshow, or keep holding to connect.” You can
configure your slideshow based on your personal preferences using the Slideshow Set-
tings menu function.
How do I make my CEIVA connect to the CEIVA Network?
If you have a PicturePlan, your CEIVA will automatically connect to the CEIVA Net-
work to retrieve new photos as often as you like, depending on how you configure it.
You can set this feature online or by using the Connection Frequency menu function.
The default is once per day.
When your CEIVA is not scheduled to connect to the CEIVA Network, you can hold
down the Right Arrow button to make a manual connection.
How do I care for my CEIVA?
Dust your CEIVA regularly with a clean, soft, dry cloth. Do not spray liquids directly
onto your CEIVA. Do not immerse your CEIVA in water or otherwise get it wet.
OperatingYour CEIVA
8

Need More Assistance?
Troubleshooting
My CEIVA isn’t displaying photos from my memory card.
Make sure your CEIVA is in Slideshow mode. Remove the memory card, and reinsert
it. If your CEIVA does not display photos after you insert your memory card into
the card reader, make sure that photos are stored on the card by testing it on your
computer or digital camera. Make sure the photos on the card are in JPEG format, and
that they are smaller than 12 megapixels in size.
My CEIVA displays an error message.
If your CEIVA is having difficulties connecting to the CEIVA Network, the screen will
display a variety of error messages. Here are a few things you’ll want to check:
Make sure that all connections between your CEIVA and power outlets and phone lines are•
securely plugged in.
If you are using a CEIVA PicturePlan, verify that you have registered your CEIVA and have•
activated or purchased a subscription. If you received a PicturePlan Gift Card, make sure you
have entered the gift code number in your CEIVA account online. Your CEIVA will not con-
nect to the CEIVA Network unless you have an active subscription.
If you are using DSL, make sure that your CEIVA is connected to a DSL filter.•
If you are connecting through an analog phone line and need a prefix (e.g. 9, 7, etc.), please•
make sure to add your Dialing Prefix using the Telephone Settings menu function. If you do
not need a prefix, make sure to set your CEIVA to No Prefix.
Your CEIVA will not connect to a digital phone system.•
NOTE: For detailed information on how to address these and other network problems, please visit http://help.ceiva.
com. For detailed information on how to address broadband or wireless network issues, please visit http://ceivabroad-
band.ceiva.com or http://ceivawireless.ceiva.com.
My slideshow isn’t running.
Make sure that you have at least two photos in your CEIVA slideshow. Then, press the
Right button on your CEIVA until you see the message,“You can let go now to start
the slide show, or keep holding to connect.”
My CEIVA screen is dark.
Press the Up or Down Arrow button on your CEIVA a few times to ensure that your
CEIVA is not in “lights-out” mode.
Please visit http://help.ceiva.com, or call CEIVA Customer Care at 1-877-MYCEIVA
(1-877-692-3482). Please have your serial number available when calling. The serial
number is located on the bottom of your CEIVA.
9

WARRANTY
Product Information FCC Statement
WARNING STATEMENT
( C F R 4 7 , § 1 5 . 1 0 5 , § 1 5 . 2 1 , a n d § 1 5 . 2 7 )
This equipment has been tested and found to comply with the limits for a Class B digital device, pursuant to part 15 of
the FCC Rules. These limits are designed to provide reasonable protection against harmful interference in a residential
installation. This equipment generates, uses and can radiate radio frequency energy and, if not installed and used in ac-
cordance with the instructions, may cause harmful interference to radio communications. However, there is no guaran-
tee that interference will not occur in a particular installation. If the equipment does cause harmful interference to radio
or television reception, which can be determined by turning the equipment off and on, the user is encouraged to try to
correct the interference by one of the following measures with respect to radios or televisions: Reorient or relocate the
receiving antenna. Increase the separation between the equipment and frame. Connect the equipment into an outlet on
a circuit different from that to which the frame is connected. Ensure that card mounting screws, connector attachment
screws and all ground wires are secured and tight. Consult the dealer or an experienced radio/TV technician for help.
Changes or modifications not expressly approved by CEIVA Logic, Inc. could void the user’s authority to operate the
equipment. This product was FCC certified under test conditions that included the use of shielded I/O cables and con-
nectors between system components. To be in compliance with FCC regulations, the user must use shielded cables and
connectors and install them properly.
Limited Warranty
THIS IS TO CERTIFY that the CEIVA Digital Photo Frame products, CEIVA Broadband™ adapter and CEIVA Wireless™
adapter (hereafter referred to as the “CEIVA Product”) are warranted to be free of all defects in material and workman-
ship for one year (365 days) from the date of purchase if proof of purchase is presented within the warranty period to
the place of purchase or the manufacturer, CEIVA Logic, Inc. (“manufacturer”).
Manufacturer’s sole obligation under this express warranty shall be, at manufacturer’s option and expense, to repair the
defective product or part, deliver to buyer an equivalent product or part to replace the defective item, or if neither of
the two foregoing options is reasonably available, manufacturer may, in its sole discretion, refund to buyer the purchase
price paid for the defective product.
The repaired or replaced item will be shipped to buyer, at manufacturer’s expense, not later than ninety (90) days after
seller or manufacturer receives the defective product. All products that are replaced will become the property of manu-
facturer. Replacement parts may be new or reconditioned. Manufacturer warrants any replaced or repaired product
or part(s) for one year (365 days) from shipment, or the remainder of the initial warranty period, whichever is longer.
This warranty is valid for purchases within the United States only. Manufacturer shall not be responsible for software,
firmware, information, or memory data of buyer contained in, stored on, or integrated with any products returned to
manufacturer for repair, whether under warranty or not.
OBTAINING WARRANTY REPAIR SERVICE
The CEIVA Product must be returned to the place of purchase according to the individual store’s return policy. If the
store’s policy no longer applies and the CEIVA Product has been purchased within one year (365 days), the buyer may
ship the CEIVA Product back to CEIVA Logic, Inc. for repair. In order to do so, the buyer must contact the CEIVA Cus-
tomer Care Department at 1-877-692-3482 to receive an RMA (Return Merchandise Authorization). Returned CEIVA
products should be sent, by the buyer, prepaid and packaged appropriately for safe shipment. It is recommended that
returned products be insured or sent by a method that provides for tracking of the package. Responsibility for loss or
damage does not transfer to manufacturer until the returned item is received.
WHAT THIS WARRANTY DOES NOT COVER
This warranty does not apply to any defects caused by negligence, misuse, accidents, acts of God, commercial use, modi-
fication to any part of the CEIVA Product, including AC adapter, glass or telephone cable, or accessories.This warranty
does not apply to improper operation or maintenance, connection to improper electrical supply, or attempted repair
by anyone other than a facility authorized by manufacturer to service the CEIVA Product.This warranty is invalid if the
factory applied serial number has been altered or removed from the CEIVA Product.This warranty does not apply to
CEIVA Products after the first purchase. Units purchased second hand on trading web sites (like eBay) are NOT covered
by this warranty. Such products are subsequently sold “as is” or “with all faults.” We reserve the right to make changes or
improvements in our products without incurring any obligation to similarly alter products previously purchased.
DISCLAIMER OF WARRANTIES
EXCEPT AS EXPRESSLY PROVIDED HEREIN AND TO THE MAXIMUM EXTENT PERMITTED BY APPLICABLE LAW,
CEIVA DISCLAIMS ALL OTHER WARRANTIES WITH RESPECT TO THE PRODUCT,WHETHER EXPRESS, IMPLIED,
STATUTORY OR OTHERWISE, INCLUDING WITHOUT LIMITATION, SATISFACTORY QUALITY, COURSE OF DEAL-
10

ING,TRADE USAGE OR PRACTICE OR THE WARRANTIES OF MERCHANTABILITY, FITNESS FOR A PARTICULAR
PURPOSE,TITLE, OR NON-INFRINGEMENT OF THIRD PARTY RIGHTS.
LIMITATION OF REMEDIES
TO THE FULL EXTENT ALLOWED BY LAW, MANUFACTURER ALSO EXCLUDES FOR ITSELF AND ITS SUPPLIERS
ANY LIABILITY,WHETHER BASED IN CONTRACT OR TORT (INCLUDING NEGLIGENCE), FOR INCIDENTAL,
CONSEQUENTIAL, INDIRECT, SPECIAL, OR PUNITIVE DAMAGES OF ANY KIND, OR FOR LOSS OF REVENUE OF
PROFITS, LOSS OF BUSINESS, LOSS OF INFORMATION OR DATA, OR OTHER FINANCIAL LOSS ARISING OUT
OF OR IN CONNECTION WITH THE SALE, INSTALLATION, MAINTENANCE, USE, PERFORMANCE, FAILURE,
OR INTERRUPTION OF ITS PRODUCTS, EVEN IF MANUFACTURER OR ITS AUTHORIZED RESELLER HAS BEEN
ADVISED OF THE POSSIBILITY OF SUCH DAMAGES,AND LIMITS ITS LIABILITY TO REPAIR, REPLACEMENT, OR
REFUND OF THE PURCHASE PRICE PAID,AT MANUFACTURER’S OPTION.THIS DISCLAIMER OF LIABILITY
FOR DAMAGES WILL NOT BE AFFECTED IF ANY REMEDY PROVIDED HEREIN SHALL FAIL OF ITS ESSENTIAL
PURPOSE.
LIMITATION OF DISCLAIMER
SOME STATES DO NOT ALLOW THE EXCLUSION OR LIMITATION OF INCIDENTAL OR CONSEQUENTIAL
DAMAGES, OR ALLOW LIMITATIONS ON HOW LONG AN IMPLIED WARRANTY LASTS SO THE ABOVE LIMITA-
TIONS OR EXCLUSIONS MAY NOT APPLY TO YOU.THIS WARRANTY GIVES YOU SPECIFIC LEGAL RIGHTS,AND
YOU MAY ALSO HAVE OTHER RIGHTS,WHICH VARY FROM STATE TO STATE.
EXHIBIT J ( F C C PA R T 6 8 )
CUSTOMER INFORMATION
This equipment complies with Part 68 of the FCC rules. On the back, in the lower left hand corner of this equipment is a
label that contains, among other information, the FCC registration number and ringer equivalence number (REN) for this
equipment. You must, upon request, provide this information to your Telephone Company. This equipment uses the fol-
lowing USOC jacks: one RJ11 jack.An FCC compliant telephone cord and modular plug is provided with this equipment.
This equipment is designed to be connected to the telephone network or premises wiring using a compatible modular
jack which is Part 68 compliant. See Installation Instructions for details. The REN is useful to determine the quantity of
devices, you may be connected to the telephone line and still have all those devices ring when your telephone number is
called. In most, but not all areas, the sum of RENs should not exceed five (5.0). To be certain of the number of devices
you may connect to your line, as determined by the total RENs, you should contact your local Telephone Company to
determine the maximum REN for your calling area. If the terminal equipment, LF4000, causes harm to the telephone
network, the Telephone Company may discontinue your service temporarily. If possible, they will notify you in advance.
But if advance notice isn’t practical, the Telephone Company will notify you as soon as possible. You will be informed
of your right to file a complaint with the FCC. The telephone company may make changes in it’s facilities, equipment,
operations or procedures that could affect the operation of the equipment, if this happens the telephone company will
provide advance notice in order for you to make necessary modifications to maintain uninterrupted service. If you
experience trouble with this telephone equipment, please contact CEIVA Logic, Inc. at 1-877-MYCEIVA (1-877-692-3482)
for information on obtaining service or repair. If the equipment is causing harm to the telephone network, the Telephone
Company may request you to disconnect the equipment until the problem is resolved. There are no user serviceable
parts in this equipment.This equipment is not hearing aid compatible.This equipment may not be used on public coin
phone service provided by the Telephone Company. Connection to party line service is subject to state tariffs.
MANUFACTURER,WARRANTOR
CEIVA Logic, Inc.
12455 Branford Street, Unit #24
Arleta, CA 91331
IMPORTANT SAFEGUARDS
When using an electrical appliance basic safety precautions should be followed, including the following:
To prevent against the risk of electrical shock, do not put your CEIVA Digital Photo Frame in water or other liquid.1 .
Do not use this product where it could fall into water.2.
Do not operate any appliance wit a damaged cord or plug, or after it malfunctions, or becomes damaged in any man-3.
ner. Contact CEIVA Customer Care at 1-877-MYCEIVA (1-877-692-3482) for proper return and repair or replace-
ment of the CEIVA frame.
WARNING:TO REDUCE THE RISK OF ELECTRICAL SHOCK OR FIRE, DO NOT REMOVE THE BACK PANEL.4.
NO USER SERVICEABLE PARTS ARE INSIDE. REPAIR SHOULD BE DONE BY AUTHORIZED PERSONNEL.
11

© 2007 CEIVA Logic, Inc., Burbank, CA 91502.All Rights Reserved. Protected by United States
Patent No. 6,442,573. Other Patents Pending. QSG090107
Other manuals for LF4007
2
This manual suits for next models
1
Table of contents
Other Ceiva Digital Photo Frame manuals

Ceiva
Ceiva PRO80408A User manual

Ceiva
Ceiva LF4007 User manual

Ceiva
Ceiva LF-2003 User manual

Ceiva
Ceiva LF4007 User manual

Ceiva
Ceiva CEIVAlife LIF408A User manual

Ceiva
Ceiva CEIVAshare SHR508A-US User manual

Ceiva
Ceiva Ceiva 2 User manual

Ceiva
Ceiva CEIVAshare SHR508A User manual

Ceiva
Ceiva LF-3000 User manual

Ceiva
Ceiva WQG081807 User manual