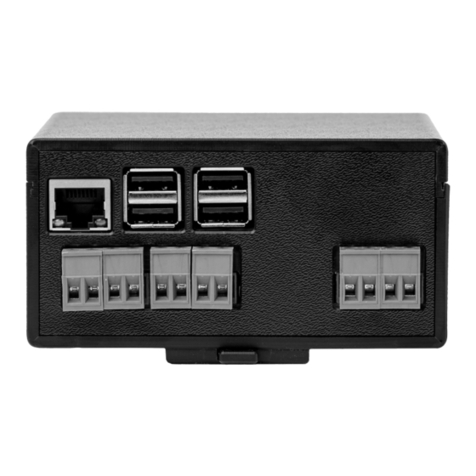
Charge Amps Amp Guard User manual

chargeamps.com
Charge Amps Amp Guard
Installation
Manual
English

2
English
Table of content
1 Safety 4
2 Technical data 5
3 Product overview 7
3.1 Parts 7
3.2 Package contents 9
3.3 Status indicators 9
3.4 Reset 11
4 Before Installation 11
4.1 Recommended tools 11
4.2 Internet access 12
5 Installation 12
5.1 Mount Charge Amps Amp Guard 12
5.2 Connect the current sensors 13
5.3 Connect voltage measurement 14
5.4 Mount and connect the Power Supply 15
5.5 Connect the Wi-Fi antenna 16
5.6 Connect the LAN cable 17
5.7 Overview of the electrical installation 17
6 Configuration 18
6.1 Connecting to the Charge Amps Amp Guard Wi-Fi hotspot 18
6.2 Wi-Fi configuration 19
6.3 Electrical settings 20
6.4 Verify Charge Amps Amp Guard configuration 21
6.5 Cloud configuartion 22

3
English
Neglecting to follow and carry out the directions, instructions and safety precautions in this Installation
Manual implies that any warranty provisions will be cancelled and that Charge Amps AB can reject any
and all claims for compensation in connection with any injuries/damage or incidents – direct or indirect
– that are a result of such negligence.
The manufacturer does not give any warranties as to the accuracy or completeness of this document
and shall have no liability for the consequences of using such information. The manufacturer reserves
the right to make changes to information published in this document without notice.
Visit www.chargeamps.com for the latest document releases.
© Copyright Charge Amps AB. All rights reserved. Copying, amending and translating are strictly
forbidden without prior written approval from Charge Amps AB.
Respect the environment! Must not be discarded with household
waste! This product contains electrical or electronic components.
Leave the product for separate collection and proper treatment at
a designated location e.g. the local authority’s recycling station.
Disposal of the product must comply with the local environmental
laws and guidelines. The product consists of recycled aluminium,
plastic and electronics, and should be recycled as specified for
these materials.
Approved in accordance with the relevant EU directives and UK law.

4
English
• Improper use may create a risk of personal injury.
• The product must only be installed by a qualified electrician in
accordance with this Installation Manual.
• National installation requirements and restrictions apply.
• Inspect the product for visible damage before use.
• Never attempt to repair or use the product if it is damaged.
• Do not immerse the product in water, subject it to physical
abuse or insert foreign objects in any part of the product.
• Never attempt to disassemble the product in any way.
• Charge Amps Amp Guard is a power monitor. Only use the
product for its intended use.
WARNING! Read all instructions before use
1 Safety

5
English
2 Technical data
Measuring range (current) ± 0-63 A
Measuring range secondary side In: 30 mA, Imax: 36 mA
Measuring range (voltage) 85-256 VAC, 1 to 3-phase, 50 Hz
Network LAN, Wi-Fi 802.11b/g/n 2.4 GHz
Freq range: 2400-2500 MHz
Max power output: 20 dBm
Power Supply Rated voltage: 12 VDC 0,5 A, provided
by the included 230 VAC (+/- 15%)
50 Hz Power Supply
Installation DIN Rail mounting in a cabinet:
1M Charge Amps Amp Guard
1M Power Supply
Dimensions (W x D x H) Charge Amps Amp Guard:
17,5 x 73 x 100 mm
Power Supply:
17,5 x 58 x 90 mm
Current Sensor cable length
Must not be tampered with to maintain
measurement accuracy.
80 cm
Maximum cable diameter for current
sensors
10 mm
Classification of PMD PMD-x, I and U, SD
Safety rating CAT III 300 V
Climatic conditions Operating temperature: Kx, -35 °C to
+55 °C
Maximum humidity: 90%
Maximum altitude: 2000 meter over
sea level
Degree of pollution: 2
Dust/water protection: IP2X
Indoor meter: Yes

6
English
Characteristics of functions according to IEC 61557-12
Function symbols Function
performance class
Measuring range Other
complementary
characteristics
I 2 0-63 A
V 2 85-256 VAC
har

7
English
3 Product overview
3.1 Parts
WARNING! Note the marking on the Power Supply.
A
B
F
C
E
D
G
H
L3
L2
L1

8
English
J
I
A Monitoring Module
with current sensors
B Charge Amps Amp
Guard
C Wi-Fi antenna
D Serial number and
PIN
E Terminal block for
voltage measurement
F 12 V power cable
G 230 VAC Power
Supply
H Power Supply AC
input
I Status indicators
J Reset button (top of
Charge Amps logo)

9
English
3.2 Package contents
• Charge Amps Amp Guard
• 230 VAC Power Supply, which powers the Charge Amps Amp
Guard
• Monitoring Module, consisting of a Sensor Cartridge and three
connected Current Sensors including cables
• Terminal block for voltage measurement
• Wi-Fi antenna
• 12V power cable
• Quick Guide Installation
3.3 Status indicators

10
English
Communication status:
Green light – Connected to cloud
Blue light – Connected to network
No light – No network connection
Voltage measurement status:
Green light – Ok
Red light – Error, incorrect phase order
No light – Voltage measurement not connected
Current measurement status:
Green light – Ok
Red light – Error, incorrect phase order
No light – Current measurement not connected
Charge Amps logotype:
Lights On – Power On
Lights Off – Power Off

11
English
3.4 Reset
If necessary, it is possible to restart Charge Amps Amp Guard using
the reset button. Data stored in Charge Amps Cloud will not be
affected.
1. Press gently the reset button, the top of the Charge Amps logo.
2. All lights will briefly turn off when the reset has been initiated.
4 Before Installation
4.1 Recommended tools
• Smart phone, tablet or computer with Wi-Fi support
• Flat head screwdriver, max width 3 mm
• Multimeter, wire stripper

12
English
4.2 Internet access
IMPORTANT!
Charge Amps Amp Guard must be connected to the internet to
supply data to the Load Balancer Function which communicates
with the charging station(s).
The customer must thus provide an internet connection via a
network cable (LAN) or Wi-Fi (802.11b/g/n 2.4 GHz).
• LAN connection, if available, is preferred for a more secure
connection to the internet. The network cable shall be at least
CAT6-classified.
• Normally, no firewall changes are needed.
• Wi-Fi signal strength need to be -80dBm or better (-30dBm
equals very good signal, -90dBm equals very poor signal).
• The network needs to have DHCP activated to ensure an IP
address is automatically assigned to the Charge Amps Amp
Guard.
5 Installation
Install the Charge Amps Amp Guard directly after the main
switch of the building to monitor all power usage. For one-phase
installations, L2 and L3 shall not be used.
5.1 Mount Charge Amps Amp Guard
1. Pull the DIN-rail lock downwards and rotate the Charge Amps
Amp Guard onto the DIN-rail.
2. Secure in place by pushing the DIN-rail lock back in place.

13
English
Please note that an additional slot will be needed for the Power
Supply.
5.2 Connect the current sensors
Charge Amps Amp Guard comes with three current sensors, one
for each phase.
1. Clamp the current sensor around the incoming phase.
The direction of mounting is marked on the current sensor.
The arrow must point in the current direction.
IMPORTANT!
It is extremely important that the current sensors are connected
to the right phase and are positioned correctly around the main
power cables according to the direction indicators on the clamps.

14
English
2. Connect the sensor cartridge to the top of the Charge Amps
Amp Guard.
5.3 Connect voltage measurement
For installations with power generating equipment
Solar panels, wind power, or plans to introduce such equipment
require connection of the voltage measurement.
For installations without power generating equipment
Connection of the voltage measurement is optional.
Do not remove the terminal block in the bottom of the Charge
Amps Amp Guard, it will be needed in case voltage measurement
is connected in the future.
IT type networks
Supply networks of IT type is used in parts of Norway, Belgium
and Albania.
In IT network installations, L2 must be connected to both L2
and N. The network type must also be configured, see chapter
Electrical Settings.
L3
L2
L1

15
English
IMPORTANT!
• The connection point for the cables should be restricted to an
I²t (let through energy) of a maximum of 10 000 A²s.
• Each phase must be connected to the correct terminal
connector for voltage measurement to function correctly.
1. Turn the power off at the main switch.
2. Connect phases and neutral to the included terminal block.
3. Connect the terminal block to the bottom of the Charge Amps
Amp Guard.
5.4 Mount and connect the Power
Supply
The Power Supply provide 12V to the Charge Amps Amp Guard.
The Power Supply is pre-configured to 12V. If needed, voltage can
be adjusted using the adjustment screw on the front of the power
supply.
1. Connect the Power Supply mains (L, N) according to the labels

16
English
at the Power Supply, i.e. N to AC(N) (left side) and L1 to AC(L)
(right side).
2. Mount the included 12V power cable to the Power Supply
according to the label at the Power Supply, i.e. marked cable to
+Vo (left side) and black cable to -Vo (right side).
3. Mount the Power Supply onto the DIN-rail.
4. Connect the 12V power cable to the Sensor Cartridge.
5. Turn the power on at the main switch.
5.5 Connect the Wi-Fi antenna
1. Mount the included Wi-Fi antenna to the Charge Amps Amp
Guard.
2. Note that depending on the type of cabinet, an external Wi-Fi
antenna could be needed. The external antenna must be of
non-grounded type.
WARNING! Note the marking on the Power Supply.

17
English
5.6 Connect the LAN cable
If applicable, connect the network cable to the LAN port.
The cable shall be CAT6-classified.
5.7 Overview of the electrical installation
WARNING! Note the marking on the Power Supply.
Optional, see chapter Connect voltage
measurement.

18
English
6 Configuration
After the electrical installation, Charge Amps Amp Guard need to
be properly configured.
6.1 Connecting to the Charge Amps
Amp Guard Wi-Fi hotspot
IMPORTANT!
Only 2,4GHz Wi-Fi is supported.
The Wi-Fi hotspot is only active within 10 minutes after power up.
To restart Charge Amps Amp Guard, see chapter Reset.
1. Connect to the Charge Amps Amp Guard Wi-Fi hotspot using
a smartphone, tablet or a computer. To avoid conflicting Wi-
Fi, set to airplane mode, turn on Wi-Fi, then connect to the
hotspot.
2. The network name, i.e. the SSID, is AG_******* (* = The last 7
digits/letter of the Charge Amps Amp Guard’s serial number).
The serial number can be found on the front label of the
Charge Amps Amp Guard (the one with a QR-code).
3. Enter the Charge Amps Amp Guard PIN as Wi-Fi password to
sign in to the Wi-Fi hotspot.
The PIN is an 8 digit code that can be found on the Charge
Amps Amp Guard front label.

19
English
4. When connected to the Wi-Fi hotspot, start a web browser and
type in 192.168.251.1 as URL.
5. Enter the Charge Amps Amp Guard PIN to sign in.
6. Click Login.
6.2 Wi-Fi configuration
Charge Amps Amp Guard need access to the customer/facility
network in order to connect to the Charge Amps Cloud Load
balancing function, using LAN or Wi-Fi.
The sign-in details must be configured if Wi-Fi shall be used.
1. Select the Wi-Fi tab.
2. Enter the sign in details of the customer/facility Wi-Fi network.

20
English
3. Click Update.
Charge Amps Amp Guard will connect to the customer/facility
Wi-Fi network.
4. Sign in to the Wi-Fi hotspot again.
5. Make sure the communication status symbol lights up
green (within about a minute).
6.3 Electrical settings
Charge Amps Amp Guard must be configured with correct
information about main fuses and network type in order to work
correctly and in an optimized way.
The supply voltage and current mapping settings is a way to fix
installation issues and shall normally not be changed.
1. Select the Installation tab.
2. Adjust the settings if needed.
Other manuals for Amp Guard
6
Table of contents
Other Charge Amps Automobile Accessories manuals
Popular Automobile Accessories manuals by other brands

Insta-Chain
Insta-Chain Insta-Chain Maintenance & Troubleshooting guide

Mahindra
Mahindra SCORPIO MAN-00277 Diagnostic manual

MayPole
MayPole MP9539 user guide

TST
TST TST-770 Series Installation & operation manual

DICE
DICE Silverline DUO installation guide

egton
egton Sunvisor Bluetooth Handsfree Car Kit user manual