Charge XC User manual

Quick sta guide
XC

2
Ready to ride in 10 minutes
Not only are Charge Bikes easy to store and
maintain, they’re also incredibly fast and easy to
assemble, so you’re of and riding as quickly as
possible. We’ve specially designed the packaging
to minimize the assembly steps. With basic skills,
you should be able to confidently assemble your
new bike in ten minutes or less!
While we’ve designed the assembly process
to make it possible to assemble on your own,
it’s much easier with a friend!
This guide will walk you through the steps. If you’d
rather follow along with a video as you build your
bike, visit: help.chargebikes.com
Still have questions?
Don’t hesitate to call us at 833-482-3822.
This is a Quick Start Guide, not an Owner’s manual.
Bicycling is an active sport with inherent risk. A wide range of injuries are
possible. Due to the nature of bicycle riding, the situations you encounter
while riding, you will be exposed to the risk of serious injury, paralysis or
death. This risk cannot be eliminated. You can minimize the risk in many
ways. Begin by reading the complete Charge Bicycle Owner’s manual
accompanying this bike and available online at .chargebikes.com,
particularly Section “IMPORTANT SAFETY INFORMATION”.

3
The 4 major steps to geing
your bike ready to ride:
1. Adjust Handlebars 2. Install Front Wheel 3. Flip Down Pedals 4. Adjust Seat Height

4
1. Remove the protective cardboard
packaging that is on top of the bike
and any that may be on the frame.
2. Remove the front wheel and set
aside.
3. Leave bike in tray for now.
4. Remove the red tie that holds the
chain to the chainwheel.
5. Open the parts box.
Leave in the tray
❶ Batery Charger
❷ Charging Cord
❸ Tire Pressure Sensors
❹ Batery Keys
❺ Torque Wrench
Geing your bike ready for assembly.
Remove Red Tie
3
4
5

5
6. Ensure that the power is OFF
before continuing assembly by
checking the handlebar display is
blank. If power is on, press and
hold the power buton on the bike
until the display shuts of.
Power Buton
ON
OFF (ready for Assembly)
6

6
Seat
Stem
Handlebars
Pedal
Batery
Front Light
Front Fork
Front AxleBrake Disc Rotor
Rear Rack
Seatpost
Kickstand
Pedal Assist Selectors Display
Gear Shit
Power Buton
Horn
Key pas of the bike referenced
in this guide
Fender Stays
Fender

7
This step is particularly important to
your safety. Please see the assembly
video at help.chargebikes.com as
well as ADJUSTMENT INSTRUCTIONS:
Adjustable Stem Instructions, in your
Charge Bicycle Owner’s Manual.
1. Locate the safety release buton
atop the handlebar stem. Using
your thumb, slide the safety
release buton FORWARD.
2. While holding the safety release
forward, pull the stem release lever
up until it stops.
Step 1: Adjust the handlebars
1
2

8
3. Standing alongside the bike, put
one foot against the bike box tray
to help keep the box (and bike
fork) stationary as you turn the
handlebars.
4. Rotate the handlebar 90 degrees
clockwise until the handlebars are
perpendicular to the bike frame.
5. Push the stem release lever back
down to lock the handlebars into
place.
NOTE: Make sure to keep the fork
stationary—with the front light
pointing forward—while turning
the handlebars.
Step 1: Continued
3
4
5

9
This step is particularly important to
your safety. Please see the assembly
video at help.chargebikes.com as well
as this Quick Start Guide.
1. Lay the cardboard block that says
“Temporary Wheel Stand” flat on
the ground with the printed side
facing up.
2. Insert the front wheel into the
cutout marked “Insert Front
Wheel”. Verify the disc brake rotor
is on the side marked “Brake Disc
This Side”.
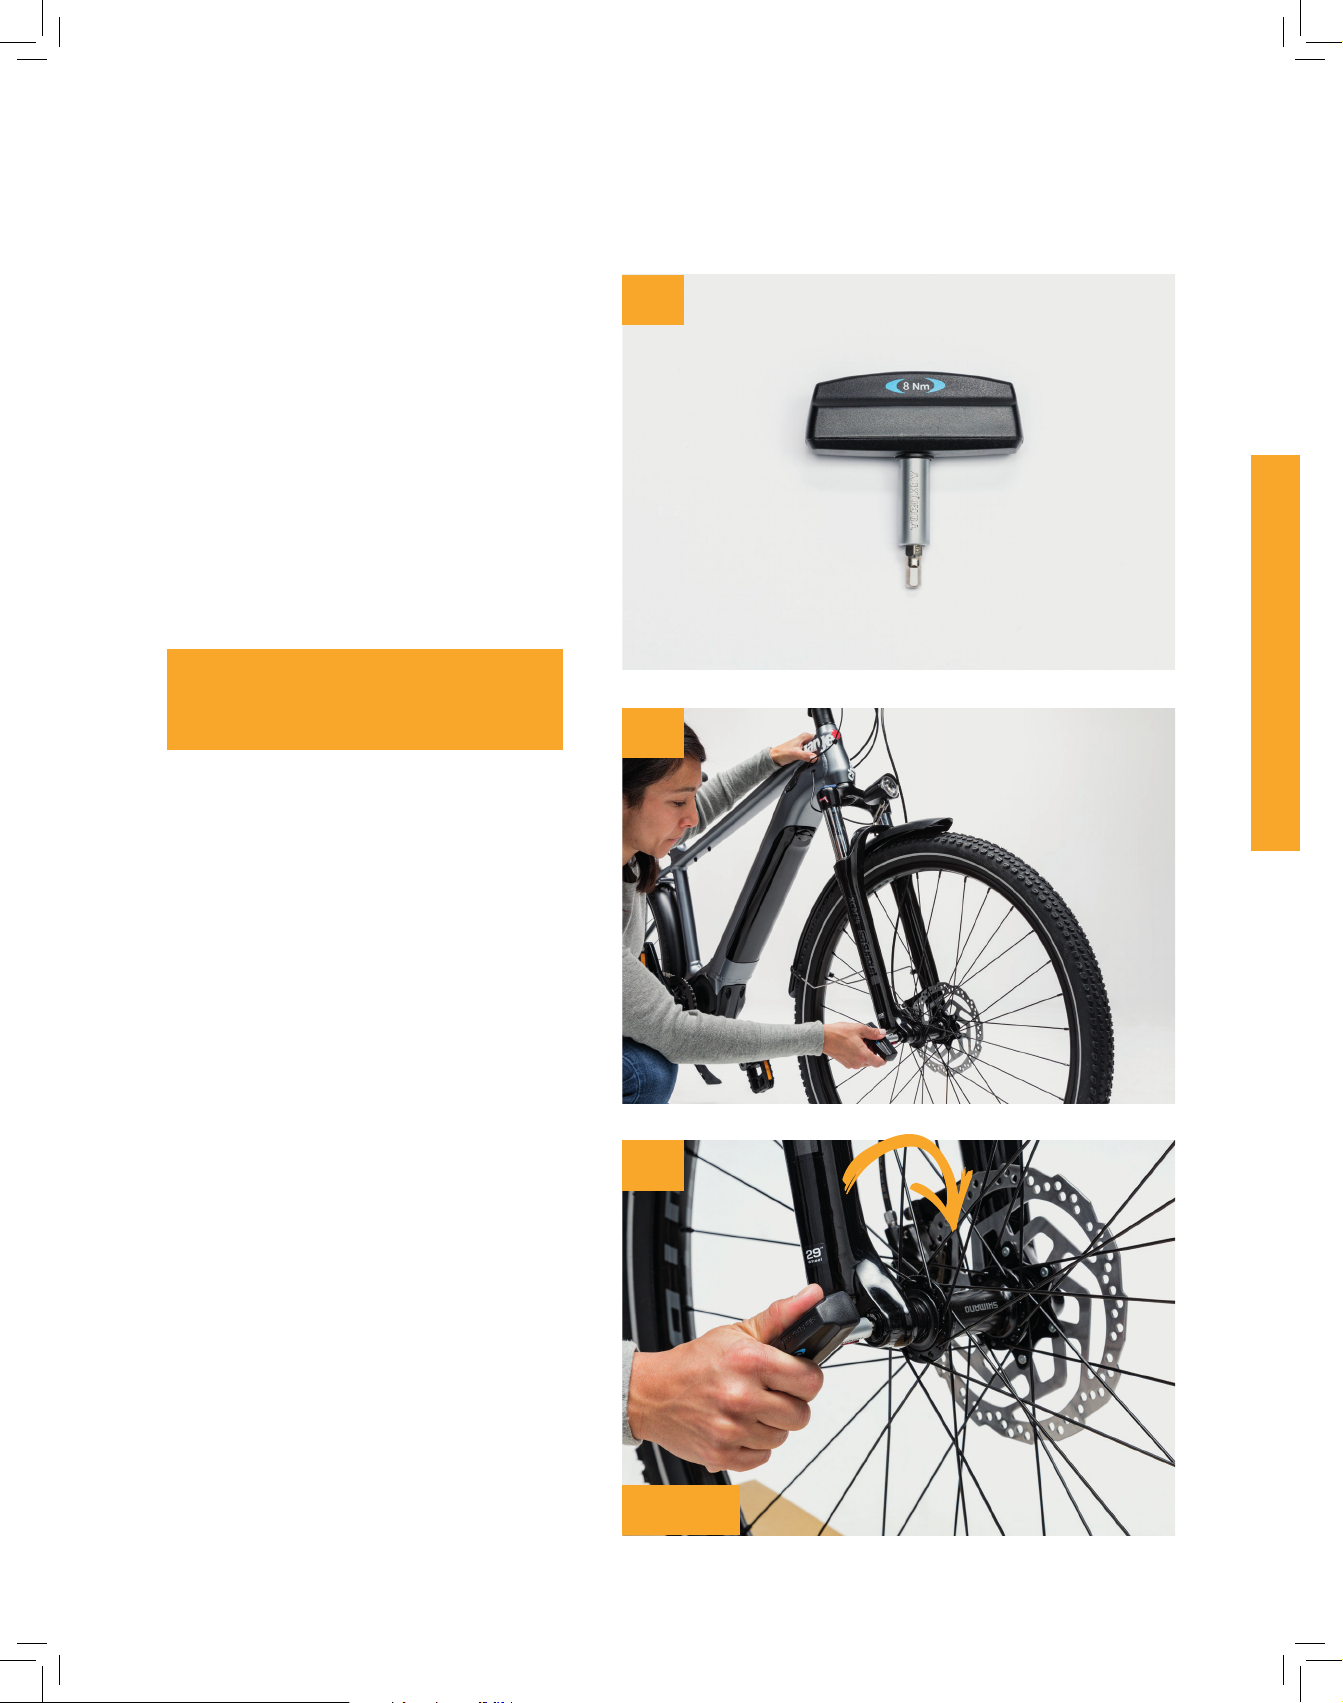
3. Locate the Torque Wrench (from
the parts box).
4. Lit bike out of the tray and place
with the front forks gently on the
ground, making sure the bike is
stable.
Step 2: Install the front wheel
NOTE: The front wheel should
now stay upright on its own in the
temporary stand.
2
3

10
5. Holding the handlebars with one
hand, lean the bike slightly away
from you. With your free hand,
insert the Torque Wrench and turn
counter-clockwise until the axle
becomes free.
6. Slide the axle all the way out and
place on a clean surface.
7. Slide out red spacer.
Step 2: Continued
Once the spacer is removed, be
careful not to squeeze the brake
levers until the front wheel is
installed.
NOTE: Ooops, I squeezed the
brakes before installing the
wheel, now what?
If you accidentally squeezed the
brakes before installing the wheel,
the brakes will lock up.
To unlock the brakes see the “How
to separate brake pads on XC”
article at help.chargebikes.com.
5
6
7

11
8. Move the wheel and the wheel
stand in front of the front bike.
Check the disc brake rotor is on
the same side as the kickstand.
9. Roll the bike over to the
front wheel.
10. Lower the fork onto the front
wheel until the axle is fully
engaged in the fork end.
11. While holding the bike upright,
put the kickstand down with your
foot. The bike will now safely
rest on the kickstand.
NOTE: When forks are correctly
seated you can see straight
through the axle.
8
9
10
CORRECT

12
12. Locate the metal axle rod you
removed earlier.
13. While holding the bike upright with
one hand, use your free hand to
insert the metal rod through the
axle from the side opposite the
brake disc.
14. Push the axle rod all the way in until
it stops. (There should be about a
½ inch still showing).
Step 2: Continued
NOTE: Holding the bike
completely upright while pushing
the axle may help. You might also
need to wiggle the axle to get it
through the wheel.
12
13-14
13
15. Locate the Torque Wrench.
16. With one hand, hold the
bike upright and centered
(perpendicular to the floor).
1 7. With your free hand, insert the
Torque Wrench into the axle (the
side opposite from the brake disc)
and turn clockwise until you hear
and feel a click. Click indicates the
correct torque has been achieved.
CLICK!
NOTE: You may need to apply a
lot of pressure to hear and feel
the click 16
17
15
14
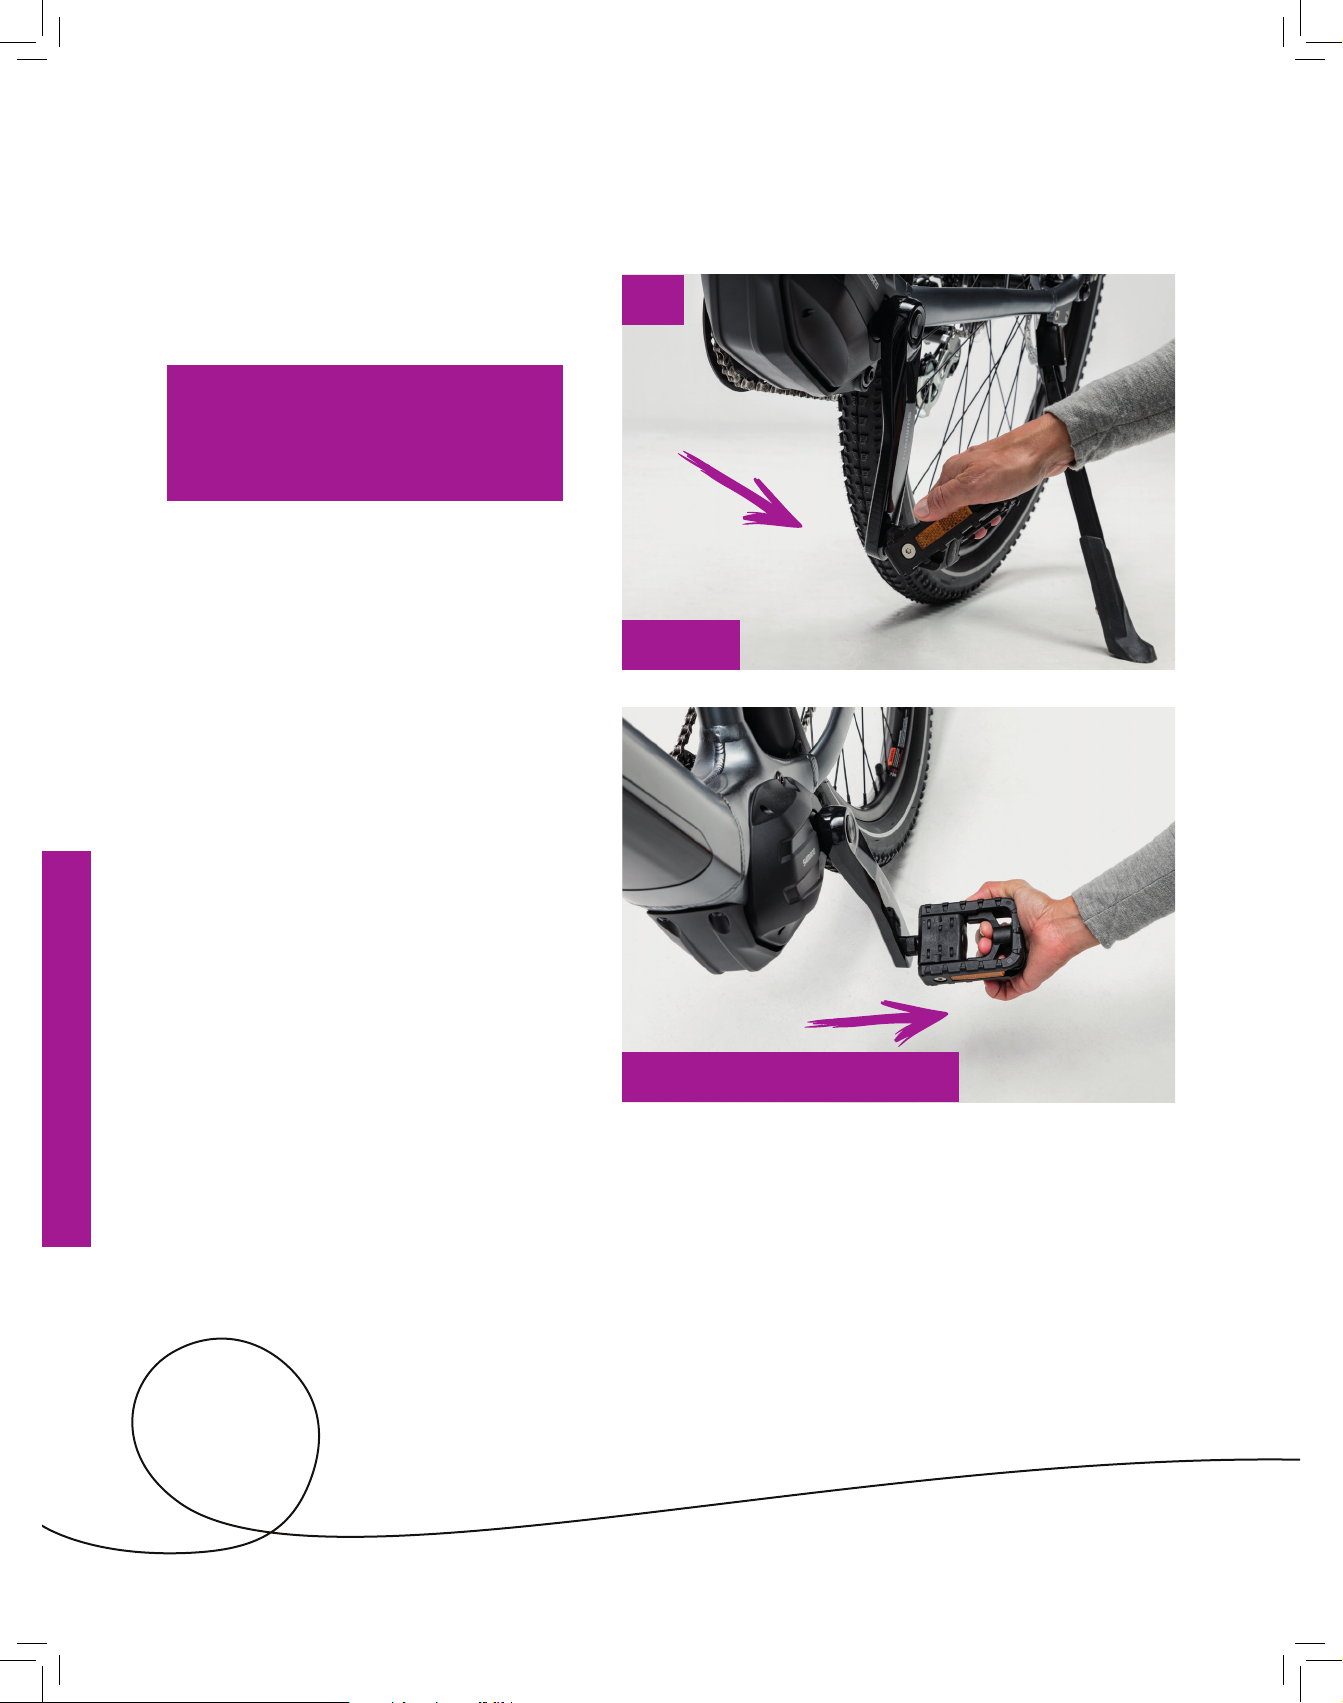
1. Flip each pedal down (or up) until
it clicks.
Step 3: Flip down the pedals
NOTE: You can always flip up the
pedals by pulling on the lever
with your fingers as you move the
pedal to the upright position.
CLICK!
1
Pull lever to flip closed

15
Step 4: Adjust the seat height
WARNING: Do not raise the seat
above minimum insertion line
marked on the seat post.
1. Using the torque wrench, loosen
the seat post clamp bolt (turning
counterclockwise) until the seat
post can move.
2. Slide the seat to your desired
position. See Diagram A for
guidance on finding the right
seat height.
Diagram A – Find the
right seat height
To find a comfortable seat height:
While siting on the bike, move
one of the pedals to the 6 o’clock
position, place your heel on the
pedal.
Adjust the seat higher or lower
until your knee is just slightly bent
without having to shit around on the
seat.
WATCH VIDEO.
help.chargebikes.com
NOTE: Do not leave kickstand
down when siting on the bike.
The kickstand is not designed to
hold up the weight of a rider.
NOTE: You do not need to remove
the bolt from the clamp.
Diagram A
1
2

16
3. Ensure the seat nose is in-line
with the bike frame.
4. Secure the seat by turning the
bolt clockwise until you hear and
feel the torque wrench click.
Step 4: Continued
CLICK!
3
4
Charge Bikes feature a valve cap
sensor, so you always know when
it’s time to add air. The sensors are
included in your parts box. Simply
screw the sensors onto the valve
stems to quickly verify air pressure.
Green is good to go
Red means add some air
The finishing touch
GO! STOP!

17
Congratulations!
Your new Charge Bike is now assembled.
Before going for your first ride, review this Assembly Checklist
and the PRE-RIDE CHECKLIST in your Charge Bicycle Owner’s
Manual
• Remove any remaining packaging material
• Check tire pressure – Tires must be inflated to the recommended pressure (See Section
TECHNICAL INFORMATION: Tires and Tubes in your Charge Bicycle Owner’s Manual).
• Check brakes are working properly – Check that the lever feels firm and does not move
too close to the handlebar grip. With any disc brakes, the brake pads must make firm
contact with the rotor without the brake levers hiting the handlebar grip (See Section
TECHNICAL INFORMATION:Brakes in your Charge Bicycle Owner’s Manual).
• Is your stem securely fastened? Twist the handlebars firmly from side to side while
holding the front wheel between your knees. The handlebars and stem must not move
around the steering tube (See Section ADJUSTMENT INSTRUCTIONS: Adjustable Stem
Instructions in your Charge Bicycle Owner’s Manual).
• Is your seatpost securely fastened? Using the seat for leverage, twist the seatpost.
The seatpost must not move in the seat tube (See Section ADJUSTMENT INSTRUCTIONS:
Saddle/Seatpost in your Charge Bicycle Owner’s Manual).
• Are your wheels properly fastened? Be sure to read the section on proper wheel
installation (See SectionTECHNICAL INFORMATION: Wheelsin your Charge Bicycle
Owner’s Manual).
• Ensure the fender stays are atached and fenders are not rubbing on tires.
• Make sure your headlight is upright and pointing forward
• Power up the bike – Press and hold the power buton on the display or the batery pack
(marked with the [power symbol]) to power on the bike. The LCD display will come to life.
• Verify batery charge – The Charge display will not only tell you how much batery power
is let as a percentage, but will also estimate range in miles/km, so you can always be sure
you have enough power to get you where you’re going… and back again!

18
• The XC comes equipped with 3
pedal assist levels, ECO, TRAIL
and BOOST. Set the level of
pedal assist with your thumb by
using the ergonomic 2 buton
controller located near the let
grip on your handlebars.
• The display will register the level
of assist: ECO means a small
amount of assist, BOOST means
you barely have to pedal.
• In addition to Assist Mode, the
display shows Batery Charge
Level, Speed, Distance, Total
Mileage, Riding Time and
Estimated Range. For more
guidance on the display, view the
manual included with your bike or
visit help.chargebikes.com.
• Shiting Gears: The XC also
comes with an 8-speed manual
shiter so that you can shit the
gears as you would a regular bike.
Use your thumb and index finger
to shit gears. The lower the
number, the easier it is to pedal.
Shiing gears and controlling
the pedal assist:
NOTE: The XC has a maximum
assisted speed of 20 mph.

19
Charge Bikes have a range of
30-50+ miles on a single charge.
The actual range depends on
a number of factors, including
assist level (more assist uses
more batery), terrain (hills uses
more batery) and rider weight.
• The lower end of the range
assumes high assist, with some
hills. Keep in mind: the more you
pedal, the farther you can go.
• And to help make sure you
always have enough power to get
where you need to go and back
again, the display estimates your
remaining range in miles (or km).
Baery range
30-
50+

20
Charging the baery
Charging port when on the bike
1. Connect the batery charger’s
power plug to the electrical
outlet.
2. Insert the charging plug into the
charging port on the batery or
on the bike.
3. When the batery is fully
charged, the light on the charger
will turn of. The five LED lights on
the batery will also appear solid
green.
4. Ater charging, firmly close the
charging port cap.
NOTE: It is possible to charge
your batery of the bike.
However, to do so you will need
to purchase the Shimano SM-
BTE adaptor which is available
in the Accessories section of
chargebikes.com.
Table of contents
Other Charge Scooter manuals


