Chauvin Arnoux PEL 51 User manual

GUIDE DE DÉMARRAGE RAPIDE DES PEL51 ET PEL52 (FR)
PEL 52
POWER & ENERGY LOGGER
Bornes de mesure.
Acheur LCD rétroéclairé.
Touches de navigation.
Touche Marche / Arrêt.
Pour mettre l’appareil en marche, branchez-le sur le réseau
entre les bornes V1 et N. Ou appuyez sur la touche Marche/
Arrêt jusqu’à ce que l’appareil s’allume.
Pour éteindre l’appareil, appuyez sur la touche Marche/Arrêt
jusqu’à ce que l’appareil s’éteigne.
Vous ne pouvez pas éteindre le PEL tant qu’il est branché sur une
source d’alimentation ou tant qu’un enregistrement est en cours
ou en attente.
Touche Sélection.
Elle permet de démarrer ou d’arrêter un enregistrement, et de
choisir le mode de wi.
Logement de la carte SD.

PEL 52
POWER& ENERGY LOGGER
90 ... 690 V
50 ... 60 Hz
Avant la première utilisation, commencez par charger complètement la
batterie à une température comprise entre 0 et 40°C.
Branchez l’adaptateur C8 / banane entre les bornes V1 et N
Branchez le cordon d’alimentation sur l’adaptateur et sur le secteur.
L’appareil s’allume.
Le symbole indique l’état de charge de la batterie.
La charge d’une batterie déchargée dure environ 5 heures.
Appuyez sur la carte SD qui est dans l’appareil puis retirez-la.
Ne retirez pas la carte SD s’il y a un enregistrement en cours.
Vériez que la nouvelle carte SD n’est pas verrouillée.
Il est préférable de formater la carte SD dans l’appareil à l’aide du logiciel PEL Transfer, sinon formatez-la à l’aide
d’un PC.
Insérez la nouvelle carte et poussez-la à fond.
Replacez le capuchon élastomère de protection.
Le PEL ne doit pas être utilisé lorsque la logement de la carte SD est ouvert.
CHARGE DE LA BATTERIE
CARTE SD
Le PEL accepte des cartes SD, SDHC et SDXC formatées en FAT32, jusqu’à 32 Go de capacité.
Le PEL est livré avec une carte SD formatée. Si vous voulez installer une nouvelle carte SD :
Déverrouiller le capuchon en élastomère marqué en tournant la vis d’un quart de tour.

INSTALLATION DE PEL TRANSFER®
Téléchargez la dernière version de PEL Transfer sur notre site web : www.chauvin-arnoux.com.
Lancez setup.exe.
Puis suivez les instructions d’installation.
Pour des instructions d’installation complètes, reportez-vous à la notice de fonctionnement.
CONNEXION DE L’APPAREIL AU PC
Branchez les entrées tension du PEL sur le secteur. L’appareil se met en marche.
Activez le wi point d’accès WIFI AP de l’appareil dans le menu conguration .
Pour que le wi puisse fonctionner, la batterie doit être susamment chargée ( ou ).
Connectez le PEL à votre PC via le wi.
Double-cliquez sur l’icône du PEL sur le bureau pour ouvrir PEL Transfer.
Sélectionnez l’icône Ajout appareil dans la barre d’outil, puis PEL51 ou PEL52, puis wifi en point d’accès.
Lorsque la connexion avec l’appareil est établie, le nom de ce dernier doit s’acher sur le côté gauche de la fenêtre
dans l’arborescence du Réseau PEL.
Pour une connexion en wi routeur WIFI ST, reportez-vous à la notice de fonctionnement.

11-2021
696353A00 - Ed. 1
CONFIGURATION DE L’APPAREIL
Pour congurer votre PEL, sélectionnez l’appareil dans le réseau PEL.
Ouvrez la boîte de dialogue Configurer l’appareil en cliquant sur l’icône Configurer dans la barre d’outils,
dans le menu Appareil ou dans la zone État.
Cette boîte de dialogue comporte plusieurs onglets :
Général : pour donner un nom à l’appareil, choisir la durée d’extinction automatique, choisir le rafraîchissement
des valeurs maximales, bloquer la touche Sélection de l’appareil, empêcher la charge de la batterie sur la mesure,
mettre un mot de passe sur la conguration de l’appareil, régler la date et l’heure, formater la carte SD, etc.
Communication : options relatives à la liaison wi.
Mesure : pour choisir le système de distribution.
Capteur de courant : pour choisir le rapport de transformation des capteurs de courant et le nombre tour s’il y a lieu.
Enregistrement : pour choisir des paramètres d’enregistrement.
Compteurs : pour remettre à zéro les compteurs d’énergie.
Cliquez sur OK pour transférer la nouvelle conguration dans l’appareil.
LANCEMENT D’UN ENREGISTREMENT (MARCHE / ARRÊT)
Pour lancer un enregistrement, procédez de l’une des manières suivantes :
Dans PEL Transfer : Sélectionnez l’option appropriée dans l’onglet Enregistrement de la boîte de dialogue Con-
guration. L’appareil peut être conguré pour déclencher un enregistrement soit à une date et une heure future, soit
immédiatement après la n de la conguration sur l’appareil.
Sur l’appareil : Appuyez sur la touche Sélection L’appareil ache START. Validez avec la touche . Le
symbole clignote.
Pour arrêter un enregistrement, procédez de l’une des manières suivantes :
Dans PEL Transfer : Dans le menu, sélectionnez Appareil > Arrêter l’enregistrement .
Sur l’appareil : Appuyez sur la touche Sélection L’appareil ache STOP. Validez avec la touche . Le sym-
bole disparaît.
AFFICHAGE DE L’ENREGISTREMENT
Les données enregistrées peuvent être transférées de deux manières sur le PC pour y être achées et pour générer
des rapports :
La carte SD peut être retirée de l’appareil et branchée sur le PC via le lecteur de carte SD fourni. Lancez PEL
Transfer, sélectionnez la commande Ouvrir dans le menu Fichier, pointez le chier ICP portant le numéro de
session souhaité sur la carte SD et sélectionnez Ouvrir.
Connexion directe entre le PC et le PEL (wi). Lancez PEL Transfer, ouvrez une connexion vers l’appareil, sélec-
tionnez-le (veillez à ce qu’il le wi soit activé) dans l’arborescence, puis sélectionnez Sessions enregistrées.
Double-cliquez sur la session d’enregistrement souhaitée. Le téléchargement terminé, sélectionnez le test téléchargé
et cliquez sur Ouvrir dans la boîte de dialogue Téléchargement.
Dans les deux cas, la session s’ajoute à Mes sessions ouvertes dans l’arborescence. Les données peuvent alors
être achées.
NOTICE DE FONCTIONNEMENT
Rendez-vous sur notre site Internet pour télécharger la notice de fonctionnement de votre appareil :
www.chauvin-arnoux.com
Eectuez une recherche avec le nom de votre appareil. Une fois l’appareil trouvé, allez sur sa page. La notice de
fonctionnement se trouve sur la droite. Téléchargez-la.
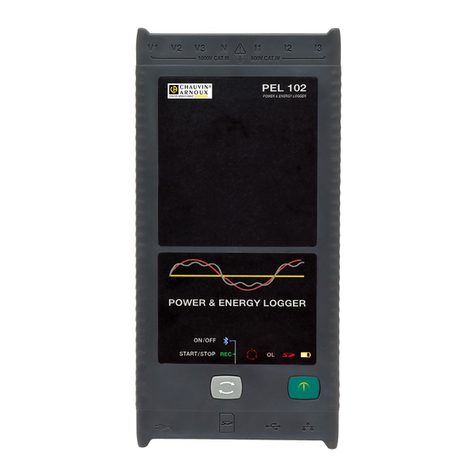
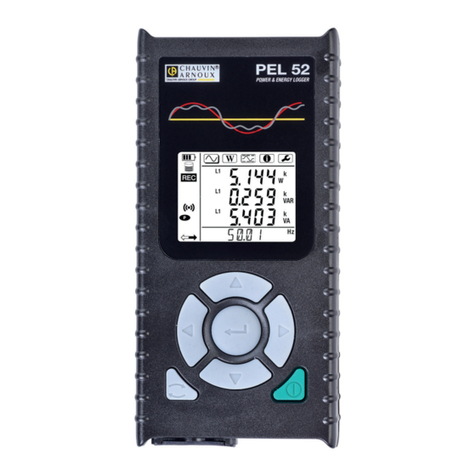
QUICK START GUIDE TO THE PEL51 AND PEL52 (EN)
PEL 52
POWER & ENERGY LOGGER
Measuring terminals.
Backlit LCD display.
Navigation keys.
On / Off button.
To turn on the device, connect it to the network at terminals V1
and N. Or press on the On/Off button until the device turns on.
To turn the device o, press on the On/Off button until the
device turns o.
You cannot turn the PEL o while it is connected to a power source
or while a recording is in progress or pending.
Select button.
It starts or stops a recording and allows wi mode to be chosen.
SD card slot.

PEL 52
POWER& ENERGY LOGGER
90 ... 690 V
50 ... 60 Hz
Before rst use, rst fully charge the battery at a temperature between
0 and 40°C.
Connect the C8 / banana adapter between the V1 and N terminals
Plug the power cord into the adapter and mains power.
The device turns on.
The symbol indicates the battery state of charge.
It takes about 5 hours to charge a discharged battery.
Press the SD card that is in the device then remove it.
Do not remove the SD card if there is a recording in progress.
Check that the new SD card is not locked.
It is preferable to format the SD card in the device using PEL Transfer software, otherwise format it using a PC.
Insert the new card and press it in all the way.
Replace the elastomeric protective cap.
The PEL must not be used when the SD card slot is open.
CHARGING THE BATTERY
SD CARD
The PEL accepts SD, SDHC and SDXC cards formatted FAT32, up to 32 GB capacity.
The PEL is delivered with a formatted SD card. If you want to install a new SD card:
Unlock the elastomeric cap marked by turning the screw a quarter turn.

INSTALLING PEL TRANSFER®
Download the latest version of PEL Transfer from our website: www.chauvin-arnoux.com.
Launch setup.exe.
Then follow the installation instructions.
Refer to the operating instructions for full installation details.
CONNECTING THE DEVICE TO THE PC
Connect the PEL's voltage inputs to the mains supply. The device turns on.
Enable the wi access point WIFI AP of the device in the conguration menu .
For the wi to operate, the battery must be suciently charged ( or ).
Connect the PEL to your PC via wi.
Double click the PEL icon on the desktop to open PEL Transfer.
Select the Add device icon on the toolbar, then PEL51 or PEL52, then wifi in access point.
When the connection with the device is established, its name should be displayed on the left side of the window
in the PEL Network folder tree.
Refer to the operating instructions for a WIFI ST connection.

11-2021
696353A00 - Ed. 1
DEVICE CONFIGURATION
To congure your PEL, select the device in the PEL network.
Open the Configure Device dialogue box by clicking the Configure icon in the toolbar, in the Device menu
or in the Status area.
This dialogue box has several tabs:
General: to give the device a name, set the automatic turn o delay, choose the refreshing of maximum values,
lock the device Select key, prevent battery charging on measurement, set a device conguration password,
set date and time, format the SD card, etc.
Communication: options relating to the wi connection.
Measurement: to select the distribution system.
Current sensor: to select the transformation ratio of the current sensors and the number of turns, if necessary.
Recording: to select recording parameters.
Meters: to reset the energy meters to zero.
Click OK to load the new conguration into the device.
START A RECORDING (ON / OFF)
To start a recording, do one of the following:
In PEL Transfer: Select the appropriate option in the Recording tab of the Conguration dialogue box.
The device can be congured to trigger a recording either at a future date and time, or immediately after completing
the device conguration.
On the device: Press the Select key. The device displays START. Conrm with the key. The symbol
blinks.
To stop a recording, do one of the following:
In PEL Transfer: In the menu, select Device > Stop recording .
On the device: Press the Select key. The device displays STOP. Conrm with the key. The symbol
disappears.
VIEWING THE RECORDING
Recorded data can be transferred to the PC in two ways for viewing and for generating reports:
The SD card can be removed from the device and connected to the PC using the supplied SD card reader.
Start PEL Transfer, select the Open command in the File menu, point to the ICP le with the desired session
number on the SD card and select Open.
Direct link between the PC and the PEL (wi). Start PEL Transfer, open a connection to the device, select it (make
sure wi is enabled) in the navigation tree, then select Recorded Sessions.Double click the desired recording
session. Once the download has nished, select the downloaded test and click Open in the Download dialogue box.
In both cases, the session is added to My Open Sessions in the navigation tree. The data can then be displayed.
USER MANUAL
Go to our website to download the user manual for your device:
www.chauvin-arnoux.com
Search with the name of your device. Once the device is found, go to its page. The user manual is on the right. Download it.

SCHNELLSTART-ANLEITUNG PEL51 UND PEL52 (DE)
PEL 52
POWER & ENERGY LOGGER
Messbuchsen
LCD-Anzeige mit Displaybeleuchtung
Navigationstasten
Ein/Aus-Taste
Zum Einschalten schließen Sie PEL zwischen V1und Nan das
Stromnetz an, er schaltet sich automatisch ein, oder drücken
Sie die Ein-/Aus-Taste solange, bis das Gerät startet.
Um das Gerät auszuschalten, drücken Sie die Ein-/Aus-Taste
solange, bis sich das Gerät ausschaltet.
Der PEL kann nicht ausgeschaltet werden, solange er an eine
Stromversorgung angeschlossen ist oder eine Aufzeichnung läuft
bzw. programmiert ist.
Wahltaste
Drückt man auf diese Taste wird ein Speichervorgang ein- bzw.
ausgeschaltet und der WLAN-Modus gewählt.
SD-Kartenschlitz

PEL 52
POWER& ENERGY LOGGER
90 ... 690 V
50 ... 60 Hz
Vor der ersten Verwendung muss der Akku bei Temperaturen zwischen
0 und 40°C vollständig aufgeladen werden.
Schließen Sie den C8/Bananenadapter an die Buchsen V1 und N an.
Dann schließen Sie das Stromkabel an Adapter und Stromnetz an.
Das Gerät startet.
Das Symbol zeigt den Ladezustand des Akkus.
Bei einem ganz entladenen Akku dauert das Laden etwa 5 Stunden.
Die SD-Karte im Gerät drücken und herausnehmen.
Achtung: SD-Karte nicht herausnehmen solange eine Aufzeichnung läuft.
Sicherstellen, dass die neue SD-Karte nicht gesperrt ist.
Die SD-Karte vorzugsweise mit PEL-Transfer oder mit einem PC formatieren.
Neue Karte bis zum Anschlag einschieben.
Elastomerabdeckung wieder anbringen.
Der PEL darf nicht bei oenem SD-Kartenschlitz verwendet werden.
AKKU AUFLADEN
SD-KARTE
Der PEL funktioniert mit FAT32-formatierten SD, SDHC oder SDXC-Karten und mit bis zu 32 Gb Kapazität.
Gerät wird mit einer formatierten SD-Karte geliefert. Wenn Sie eine neue SD-Karte einlegen möchten:
Mit gekennzeichnete Elastomerabdeckung önen, dazu drehen Sie die Schraube eine Vierteldrehung.

PEL TRANSFER® INSTALLIEREN
Die neueste Version von PEL Transfer von unserer Website herunterladen.
www.chauvin-arnoux.com.
Führen Sie setup.exe aus.
Folgen Sie dann den Installationsanweisungen.
Eine ausführliche Installationsanweisung nden Sie in der Bedienungsanleitung
GERÄT AN DEN PC ANSCHLIESSEN
Schließen Sie die Spannungseingänge des PEL an das Netz an. Das Gerät schaltet sich ein.
Aktivieren Sie den Zugangspunkt WIFI AP des Geräts im Kongurationsmenü .
Damit WLAN funktioniert, muss der Akku ausreichend geladen sein ( oder ).
Verbinden Sie den PEL über WLAN mit Ihrem PC.
Doppelklicken Sie auf das PEL-Symbol auf dem Desktop, um PEL Transfer zu starten.
Wählen Sie das Symbol Gerät hinzufügen in der Symbolleiste, dann PEL51 oder PEL52, dann WLAN als
Zugangspunkt.
Wenn die Verbindung zum Gerät hergestellt ist, sollte der Gerätename auf der linken Seite des Fensters in der
PEL-Netzwerkstruktur erscheinen.
Informationen zum Anschluss eines WIFI-Routers WIFI ST nden Sie in der Bedienungsanleitung.

11-2021
696353A00 - Ed. 1
GERÄTEKONFIGURATION
Das Gerät im PEL-Netzwerk wählen, um die Konguration durchzuführen.
In der Symbolleiste das Symbol Konfigurieren anklicken und das Dialogfeld Gerätekonfiguration önen bzw.
im Hauptmenü Gerät oder im Status-Bereich.
In diesem Dialogfeld gibt es mehrere Registerkarten:
Allgemeines: einen Namen geben, die Abschaltautomatik einstellen, die Aurischung der Maximalwerte wählen,
die Wahltaste am Gerät sperren, das Auaden des Akkus während der Messung verhindern, ein Passwort für die
Gerätekonguration festlegen, Datum und Uhrzeit einstellen, die SD-Karte formatieren, usw.
Datenübertragung: Optionen für WLAN festlegen.
Messen: Verteilernetz, Spannungsverhältnis und Frequenz festlegen.
Stromwandler: Übersetzungsverhältnis und gegebenenfalls Windungsanzahl der Stromwandler auswählen.
Aufzeichnung: Optionen für Aufzeichnungswerte festlegen.
Zähler: Energiezähler auf Null zurücksetzen.
Klicken Sie auf OK, um die neue Konguration in das Gerät zu übernehmen.
START EINER AUFZEICHNUNG (EIN/AUS)
Es gibt mehrere Möglichkeiten, eine Aufzeichnung zu starten:
Über PEL Transfer: Im Dialogfeld Konguration, Registerkarte Aufzeichnung, die entsprechende Option wählen.
Das Gerät kann so konguriert werden, dass die Aufzeichnung entweder zu einem bestimmten späteren Zeitpunkt
startet oder sofort bei Übernahme der neuen Konguration in das Gerät.
Am Gerät: Die Taste Wahl Das Gerät zeigt START an. Mit der Taste bestätigen. Das Symbol blinkt.
Es gibt mehrere Möglichkeiten, eine Aufzeichnung zu beenden:
Über PEL Transfer: Im Menü unter Gerät > Aufzeichnung beenden .
Am Gerät: Die Taste Wahl. Das Gerät zeigt STOPP an. Mit der Taste bestätigen. Das Symbol
verschwindet.
AUFZEICHNUNG ANZEIGEN
Auf dem PC können die Daten angezeigt und Berichte erstellt werden. Es gibt zwei verschiedene Arten, die aufgezeich-
neten Daten auf den PC herunterzuladen:
Die SD-Karte aus dem Gerät herausnehmen und mit dem gelieferten SD-Karten-Laufwerk an den PC anschlie-
ßen. PEL-Transfer aufrufen, im Datei-Menü den Befehl Öffnenwählen. Auf der SD-Karte die ICP-Datei mit dem
gewünschten Speichervorgang anwählen und Öffnen wählen.
Direkte Verbindung zwischen PC und PEL via WLAN. PEL-Transfer aufrufen, Verbindung mit dem Gerät önen
darauf achten, dass WLAN aktiv ist. Verbindung im Baumdiagramm auswählen und dann Aufgezeichnete
Vorgänge wählen. Die gewünschte Aufzeichnung doppelt anklicken. Wenn der Ladevorgang abgeschlossen ist,
kann der geladene Test geönet werden. Dazu wählt man ihn im Download-Dialogfeld aus und klickt auf Öffnen.
In beiden Fällen erscheint die Aufzeichnungsdatei unter Eigene aktuelle Vorgänge im Baumdiagramm. Jetzt stehen
die Daten zur Anzeige bereit.
BETRIEBSANLEITUNG
Besuchen Sie unsere Website, um die Betriebsanleitung für Ihr Gerät herunterzuladen:
www.chauvin-arnoux.com
Suchen Sie mit dem Namen Ihres Geräts und wählen Sie die entsprechende Seite aus. Die Betriebsanleitung bendet
sich auf der rechten Seite. Nun können Sie die Betriebsanleitung herunterladen.

GUIDA DI AVVIO RAPIDO DEI PEL51 E PEL52 (IT)
PEL 52
POWER & ENERGY LOGGER
Terminali di misura
Display LCD retroilluminato
Tasti di navigazione
Tasto Marcia/Arresto.
Per mettere lo strumento in marcia, allacciatelo alla rete fra
i terminali V1 e N. Oppure premete il tasto Marcia/Arresto no
all’accensione dello strumento.
Per spegnere lo strumento premete il tasto Marcia/Arresto no
allo spegnimento dello strumento.
Non potete spegnere il PEL nché è allacciato a una sorgente
di alimentazione o nché una registrazione è in corso o in attesa.
Tasto Selezione.
Esso permette di avviare o fermare una registrazione, e di scegliere
la modalità di wi.
Alloggiamento della scheda SD.

PEL 52
POWER& ENERGY LOGGER
90 ... 690 V
50 ... 60 Hz
In caso di primo utilizzo, dapprima caricate completamente la batteria
a una temperatura compresa fra 0 e 40°C.
Allacciate l’adattatore C8 / banana fra i terminali V1 e N
Allacciate il cavo di alimentazione all’adattatore e alla rete.
Lo strumento si accende.
Il simbolo indica il livello di carica della batteria.
Il tempo di carica di una batteria scarica è di 5 ore circa.
Premete la scheda SD che è nello strumento e rimuovetela.
Non rimuovete la scheda SD se una registrazione è in corso.
Vericate che la nuova scheda SD non sia bloccata.
È preferibile formattare la scheda SD nello strumento mediante il software PEL Transfer, altrimenti formattatela
mediante un PC.
Inserite la nuova scheda e spingetela a fondo.
Rimettete la protezione (cappuccio di elastomero).
Il PEL non va utilizzato quando l’alloggiamento della scheda SD è aperto.
CARICA DELLA BATTERIA
SCHEDA SD
Il PEL accetta schede SD, SDHC e SDXC formattate in FAT32, no a 32 Gb di capacità.
Il PEL è fornito con una scheda SD formattata. Se volete installare una nuova scheda SD:
Sbloccate il cappuccio di elastomero contrassegnato ruotando la vite di un quarto di giro.

INSTALLAZIONE DEL PEL TRANSFER®
Scaricate l’ultima versione del PEL Transfer sul nostro sito web: www.chauvin-arnoux.com.
Lanciate setup.exe.
Poi seguite le istruzioni di installazione.
Per tutte le istruzioni di installazione, riferitevi al manuale d’uso.
CONNESSIONE DELLO STRUMENTO AL PC
Allacciate gli ingressi di tensione del PEL alla rete. Lo strumento si mette in marcia.
Attivate la wi punto di accesso WIFI AP dello strumento nel menu congurazione .
Anché la wi possa funzionare, la batteria dovrà essere sucientemente carica( o ).
Collegate il PEL al vostro PC mediante la wi.
Con un doppio clic sull’icona del PEL sul desktop aprirete PEL Transfer.
Selezionate l’icona Aggiunta strumento nella barra degli strumenti, poi PEL51 oppure PEL52, poi wifi in
punto di accesso.
Quando è ottenuta la connessione con lo strumento, il nome di quest’ultimo deve visualizzarsi sul lato sinistro della
nestra nell’albero della Rete PEL.
Per una connessione in wi router WIFI ST, riferitevi al manuale d’uso.

11.2021
696353A00 - Ed. 1
CONFIGURAZIONE DELLO STRUMENTO
Per congurare il vostro PEL, selezionate lo strumento nella rete PEL.
Aprite la casella di dialogo Configurare lo strument con un clic sull’icona onfigurare nella barra degli
strumenti, nel menu Strumento o nella zona Stato.
Questa casella di dialogo comporta vari tab:
Generale: per attribuire un nome allo strumento, scegliere la durata di spegnimento automatico, scegliere
il refresh dei valori massimi, bloccare il tasto Selezione dello strumento, impedire la carica della batteria sulla misura,
mettere una password sulla congurazione dello strumento, impostare la data e l’ora, formattare la scheda SD, ecc.
Comunicazione: opzioni relative al collegamento wi.
Misura: per scegliere il sistema di distribuzione.
Sensore di corrente: per scegliere il rapporto di trasformazione dei sensori di corrente e il numero di giri se del caso.
Registrazione: per scegliere i parametri di registrazione.
Contatori: per azzerare i contatori di energia.
Cliccate su OK per trasferire la nuova congurazione nello strumento.
LANCIO DI UNA REGISTRAZIONE (MARCIA / ARRESTO)
Per lanciare una registrazione, procedete in una delle seguenti maniere:
In PEL Transfer: Selezionate l’opzione appropriata nel tab Registrazione della casella di dialogo Congurazione.
È possibile congurare lo strumento per attivare una registrazione a una data e un’ora future, oppure immediata-
mente dopo la ne della congurazione sullo strumento.
Sullo strumento: Premete il tasto Selezione Lo strumento visualizza START. Convalidate con il tasto .
Il simbolo lampeggia.
Per fermare una registrazione, procedete in una delle seguenti maniere:
In PEL Transfer: Nel menu, selezionate Strumento > Fermare la registrazione .
Sullo strumento: Premete il tasto Selezione Lo strumento visualizza STOP. Convalidate con il tasto .
Il simbolo sparisce.
LA REGISTRAZIONE SI VISUALIZZA
Esistono due maniere di trasferire i dati registrati sul PC per visualizzazione e per generare i report:
È possibile rimuovere la scheda SD dallo strumento e allacciarla al PC mediante il fornito lettore di scheda SD.
Lanciate PEL Transfer, selezionate il comando Aprire nel menu File, puntate il le ICP che porta il numero
di sessione voluto sulla scheda SD e selezionate Aprire.
Connessione diretta fra il PC e il PEL (wi). Lanciate PEL Transfer, aprite una connessione verso lo strumento,
selezionatelo (vericate che la wi sia attivata) nell’albero, poi selezionate Sessioni registrate. Doppio clic sulla
sessione di registrazione voluta. Terminato il download, selezionate il test scaricato e cliccate su Aprire nella
casella di dialogo Download.
Nei due casi, la sessione si aggiunge a Le mie sessioni aperte nell’albero. I dati possono allora visualizzarsi.
MANUALE D’USO
Appuntamento sul nostro sito Internet per scaricare il manuale d’uso del vostro strumento:
www.chauvin-arnoux.com
Eettuate una ricerca con il nome del vostro strumento. Una volta trovato lo strumento, andate sulla pagina
corrispondente. Il manuale d’uso si trova sulla destra. Scaricatelo.

GUÍA DE INICIO RÁPIDO DE LOS PEL51 Y PEL52 (ES)
PEL 52
POWER & ENERGY LOGGER
Bornes de medida.
Display LCD retroiluminado.
Teclas de navegación.
Tecla de Encendido/Apagado.
Para encender el instrumento, conéctelo a la red entre los
bornes V1 y N. O pulse la tecla de Encendido/Apagado hasta
que el instrumento se encienda.
Para apagar el instrumento, pulse la tecla de Encendido/
Apagado hasta que el instrumento se apague.
No puede apagar el PEL mientras siga conectado a una fuente
de alimentación o siga registrando o en modo en espera.
Tecla Selección.
Permite iniciar o detener un registro, y elegir el modo WiFi.
Ranura de la tarjeta SD.

PEL 52
POWER& ENERGY LOGGER
90 ... 690 V
50 ... 60 Hz
Antes del primer uso, cargue completamente la batería a una temperatura
entre 0 y 40 °C.
Conecte el adaptador C8/banana entre los bornes V1 y N
Conecte el cable de alimentación al adaptador y a la red eléctrica.
El instrumento se enciende.
El símbolo indica el estado de carga de la batería.
La carga de una batería descargada tarda unas 5 horas.
Presione la tarjeta SD que se encuentra en el instrumento y sáquela.
No extraiga la tarjeta SD si se está registrando.
Compruebe que la nueva tarjeta SD no está bloqueada.
Es preferible formatear la tarjeta SD en el instrumento con el software PEL Transfer, o si no puede formatéela
con un PC.
Inserte la nueva tarjeta y empújela hasta el tope.
Vuelva a colocar la tapa protectora de elastómero.
El PEL no debe utilizarse cuando la ranura de la tarjeta SD está abierta.
CARGA DE LA BATERÍA
TARJETA SD
El PEL acepta tarjetas SD, SDHC y SDXC formateadas en FAT32, hasta 32 GB de capacidad.
El PEL se suministra con una tarjeta SD formateada. Si desea instalar una nueva tarjeta SD:
Desbloquee la tapa de elastómero marcado girando el tornillo un cuarto de vuelta.

INSTALACIÓN DE PEL TRANSFER®
Descargue la última versión de PEL Transfer desde nuestro sitio web: www.chauvin-arnoux.com.
Inicie setup.exe.
A continuación, siga las instrucciones de instalación.
Para ver las instrucciones de instalación completas, remítase al manual de instrucciones.
CONEXIÓN DEL INSTRUMENTO AL PC
Conecte las entradas de tensión del PEL a la red eléctrica. El instrumento se enciende.
Active el WiFi en punto de acceso WIFI AP del instrumento en el menú conguración .
Para que el WiFi pueda funcionar, la batería debe estar sucientemente cargada ( o ).
Conecte el PEL a su PC mediante WiFi.
Haga doble clic en el icono del PEL en el escritorio para abrir PEL Transfer.
Seleccione el icono Agregar instrumento en la barra de herramientas, luego PEL51 o PEL52 y WiFi en
punto de acceso.
Cuando se haya establecido la conexión con el instrumento, el nombre de éste debe aparecer en la parte izquierda
de la ventana en el árbol de directorios de la Red PEL.
Para una conexión en WiFi rúter WIFI ST, remítase al manual de instrucciones.

11-2021
696353A00 – Ed. 1
CONFIGURACIÓN DEL INSTRUMENTO
Para congurar su PEL, seleccione el instrumento en la red PEL.
Abra el cuadro de diálogo Configurar el instrumento haciendo clic en el icono Configurar en la barra
de herramientas, en el menú Instrumento o en la zona Estado.
Este cuadro de diálogo consta de varias pestañas:
General: para dar un nombre al instrumento, seleccionar el tiempo hasta el auto apagado, seleccionar
la actualización de los valores máximos, bloquear la tecla Selección del instrumento, impedir la carga de batería
cuando se realiza una medida, establecer una contraseña en la conguración del instrumento, ajustar la fecha
y la hora, formatear la tarjeta SD, etc.
Comunicación : opciones relativas a la conexión WiFi.
Medida: para seleccionar el sistema de distribución.
Sensor de corriente: para seleccionar la relación de transformación de los sensores de corriente y el número
de vueltas en su caso.
Registro: para seleccionar parámetros de registro.
Contadores: para resetear los contadores de energía.
Haga clic en Aceptar para transferir la nueva conguración al instrumento.
INICIO DE UN REGISTRO (ENCENDIDO/APAGADO)
Para iniciar un registro, realice una de las siguientes acciones:
En PEL Transfer: Seleccione la opción apropiada en la pestaña Registro del cuadro de diálogo Conguración.
El instrumento puede congurarse para iniciar un registro o bien a una fecha y hora futura, o bien inmediatamente
después de terminar la conguración del instrumento.
En el instrumento: Pulse la tecla Selección El instrumento muestra START. Acepte con la tecla . El símbolo
parpadeará.
Para detener un registro, realice una de las siguientes acciones:
En PEL Transfer: En el menú, seleccione Instrumento > Detener el registro .
En el instrumento: Pulse la tecla Selección El instrumento muestra STOP. Acepte con la tecla . El símbolo
desaparecerá.
VISUALIZACIÓN DEL REGISTRO
Los datos registrados pueden transferirse de dos maneras al PC para visualizarlos y generar informes:
La tarjeta SD se puede sacar del instrumento e insertar en el PC en el lector de tarjeta SD suministrado.
Inicie PEL Transfer, seleccione el comando Abrir en el menú Archivo, haga clic derecho en el archivo ICP que
lleva el número de sesión deseado en la tarjeta SD y seleccione Abrir.
Conexión directa entre el PC y el PEL (WiFi). Inicie PEL Transfer, abra una conexión con el instrumento, selecciónelo
(compruebe que el WiFi está conectado) en el árbol de directorios, y luego seleccione Sesiones guardadas.
Haga doble clic en la sesión de registro deseada. Una vez nalizada la descarga, seleccione la prueba descargada
y haga clic en Abrir en el cuadro de diálogo Descarga.
En ambos casos, la sesión se agrega a Mis sesiones abiertas en el árbol de directorios. Se pueden visualizar
entonces los datos.
MANUAL DE INSTRUCCIONES
Visite nuestro sitio web para descargar el manual de instrucciones de su instrumento:
www.chauvin-arnoux.com
Realice una búsqueda con el nombre de su instrumento. Una vez encontrado el instrumento, vaya a su página.
El manual de instrucciones se encuentra a la derecha. Descárguelo.
Other manuals for PEL 51
1
This manual suits for next models
1
Table of contents
Languages:
Other Chauvin Arnoux Data Logger manuals

Chauvin Arnoux
Chauvin Arnoux PEL 51 User manual

Chauvin Arnoux
Chauvin Arnoux PEL 106 User manual

Chauvin Arnoux
Chauvin Arnoux C.A 10101 User manual

Chauvin Arnoux
Chauvin Arnoux PEL 52 User manual

Chauvin Arnoux
Chauvin Arnoux L452 User manual

Chauvin Arnoux
Chauvin Arnoux AEMC DL913 User manual

Chauvin Arnoux
Chauvin Arnoux pel 102 User manual

Chauvin Arnoux
Chauvin Arnoux AEMC DL913 User manual

Chauvin Arnoux
Chauvin Arnoux pel 102 User manual