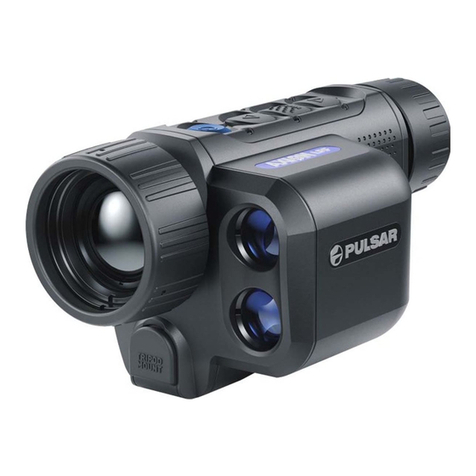
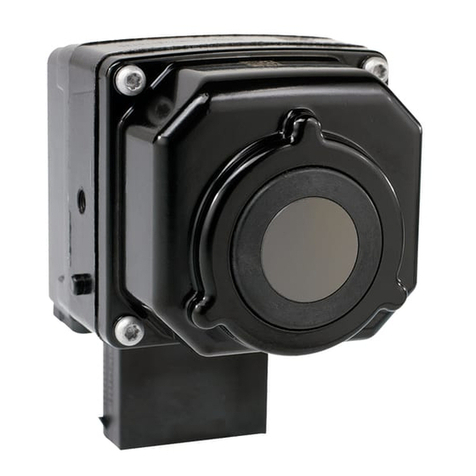
Chauvin Arnox C.A 1878 User manual

C.A 1877
C.A 1878
IR Thermography Camera
User Manual
ENGLISH

English
2 C.A 1877 – C.A 1878
You have just purchased an IR thermography camera and we thank you for your
confidence.
For best results from your device:
•read this user manual attentively,
•comply with the precautions for its use.
MEANING OF THE SYMBOLS USED
Selective sorting of wastes for the recycling of
electrical and electronic equipment within the
European Union.
In conformity with directive DEEE 2002/96/EC: this
equipment must not be treated as household waste.
Risk of danger. See explanations in this user manual:
Problems that may affect the operation of the I.R.
camera.
Notes completing the essential operating procedures.
Laser radiation, do not look directly into the LASER
beam.
This marking certifies compliance with the European
"Low Voltage" and "Electromagnetic Compatibility"
directives (2006/95/CE and 2004/108/CE).

English
C.A 1877 – C.A 1878 3
Specifications of the laser: Class 2, < 1 mW, wavelength 635 nm
WARNING
LASER RADIATION
DO NOT LOOK DIRECTLY INTO THE
BEAM
CLASS 2 LASER DEVICE

English
4 C.A 1877 – C.A 1878
CONTENTS
1. PRECAUTIONS FOR USE......................................................................................6
2. DESCRIPTION........................................................................................................7
2.1 FRONT PANEL....................................................................................................7
2.2 VIEW OF BACK AND BOTTOM.........................................................................8
2.3 CONTROLS.........................................................................................................9
2.4 BOTTOM/CONNECTORS...................................................................................9
3. PREPARING THE IR CAMERA..........................................................................10
3.1 CHARGING THE BATTERY.............................................................................10
3.2 INSTALLING THE BATTERY /SD CARD........................................................11
3.3 POWERING UP THE CAMERA.........................................................................12
3.4 CHECKING THE INFORMATION ON THE LCD SCREEN...............................13
3.5 SETTINGTHE DATE AND TIME......................................................................15
3.6 LOCALPARAMETERS.....................................................................................16
4. BASIC FUNCTIONS..............................................................................................18
4.1 USING THE LCD SCREEN................................................................................18
4.2 SELECTION OF THE MENUS AND PARAMETERS ........................................19
4.3 RESTORING THE DEFAULT PARAMETERS ..................................................21
5. TAKING SHOTS ...................................................................................................22
5.1 ADJUSTING THE CAMERA.............................................................................22
5.1.1 MANUAL FOCUSING...........................................................................22
5.2 ADHUSTING THE IR CAMERA .......................................................................23
5.2.1 ADJUSTING THE IMAGE.....................................................................23
5.2.2 ADJUSTMENT OF THE PALETTE........................................................23
5.2.3 FREEZE/ACTIVATE AN IMAGE ...........................................................23
5.3 PRESENTATION OF THE ANALYSIS FUNCTIONS ........................................24
5.3.1 ADJUSTMENT OF THE OBJECT/GLOBAL PARAMETERS ..................24
5.3.2 ADJUSTMENT OF THE ANALYSIS TOOLS ..........................................25
5.3.3 CURSOR ANALYSIS..............................................................................25
5.4 OPEN AND RECORDING THE IMAGE ............................................................26
6. READING AND ERASING ...................................................................................26
6.1 OPENING THE IMAGES ...................................................................................26
7. DOWNLOADING IMAGES..................................................................................29
7.1 DOWNLOADING IMAGES USING THE SD CARD..........................................29

English
C.A 1877 – C.A 1878 5
8. ACCESSORIES......................................................................................................30
8.1 USING THE SUN SHADE..................................................................................30
9. TROUBLESHOOTING .........................................................................................31
10. MAINTENANCE .................................................................................................32
10.1 SERVICING AND MAINTAINING THE CAMERA.........................................32
10.2METROLOGICALCHECK..............................................................................32
10.3 REPAIR ...........................................................................................................32
11. WARRANTY........................................................................................................33
12. APPENDIX...........................................................................................................34
12.1 TABLE OF EMISSIVITIES ..............................................................................34
13. TECHNICAL SPECIFICATIONS.......................................................................36
14. STATE AT DELIVERY.......................................................................................38

English
6 C.A 1877 – C.A 1878
1. PRECAUTIONS FOR USE
Before using the camera, make sure that you have read and understood the
safety precautions described below. Make sure that the camera is used correctly.
Please refer to this manual each time you encounter a hazard symbol. To avoid
exposure to laser radiation, injury, or damage to the device, and be sure that you
use the camera in a risk-free way, observe the safety recommendations given
below:
Do not look directly into the laser beam. Do not point the laser beam at
people.
Do not use the instrument other than for its intended purpose; keep it out
of reach of children and make sure that it is never treated as a toy.
Do not aim the device towards the sun or other source of intense heat.
Use only the recommended batteries and accessories. Do not leave the
device connected to mains when not necessary.
Avoid problems due to condensation.
Moving the I.R. camera rapidly from a cold to a warm place can cause
condensation (droplets of water) to form on its outside and inside surfaces.
You can avoid this problem by placing the camera in the plastic case and letting it
warm slowly to the ambient temperature before removing it from the case.
•When you switch on the camera, wait 10 to 15 minutes before recording
your first thermograms, to be certain that the camera's temperature has
stabilized and that your measurements are correct.
•Focus the lens correctly according to the distance to the target to be
inspected.
•In certain specific conditions only, this device may be sensitive to
electrostatic discharges (ESD).

English
C.A 1877 – C.A 1878 7
2. DESCRIPTION
2.1 FRONT PANEL
Focusing
ring
Laser pointer
Lens locking
ring
IR lens
Trigger

English
8 C.A 1877 – C.A 1878
2.2 VIEW OF BACK AND BOTTOM
Keypad
LCD screen

English
C.A 1877 – C.A 1878 9
2.3 CONTROLS
2.4 BOTTOM/CONNECTORS
Automatic adjustment key
Switch
Indicator
Freeze/Activate
Cancel key
Menu/Enter key
Cursor key
Battery latch
Multiple connector
Slot for SD card
Battery compartment

English
10 C.A 1877 – C.A 1878
3. PREPARING THE IR CAMERA
3.1 CHARGING THE BATTERY
Proceed as follows to charge the battery for the first time, and thereafter when the
"battery low" icon appears on the screen.
1
Align the edge of the battery pack
with the line marked on the
battery, then insert it in the
direction shown by the arrow.
2
Connect the mains cord to
the battery charger and the
plug at the other end to a
wall outlet.
The charging indicator lights up
red during charging of the battery
and turns green when the battery
is fully charged.
After recharging, disconnect the
battery charger and remove the
battery pack.
•The battery is a lithium ion battery, and so does not have to be
completely discharged before it is recharged. It can be recharged
at any time. However, since the life span of the battery is
approximately 300 charging cycles, we recommend charging the
battery only when it has been completely discharged, so that it will
last longer.
•The recharging time varies with the ambient relative humidity
and the battery charge condition.

English
C.A 1877 – C.A 1878 11
3.2 INSTALLING THE BATTERY / SD CARD
Install the battery in the camera as follows.
•Charge the battery before using it for the first time.
1
Check that the power is off and
slide the battery compartment
cover in the direction shown by
the arrow.
2
Insert the battery.
Insert the battery in the
direction shown by the arrow.
3
Insert the SD card.
Insert the SD card in the
direction shown by the arrow.
4 Close the cover of the battery/SD card compartment.
•Remove the battery when the camera is not in use.
•The SD card must be formatted for FAT 32; otherwise the IR
camera will not recognize it.

English
12 C.A 1877 – C.A 1878
Symbols representing the battery charge condition
The following icons on the LCD screen indicate the condition of the battery.
Battery adequately charged
Battery low
Battery needs to be replaced or recharged
3.3 POWERING UP THE CAMERA
The indicator comes on when the camera is powered up.
1
Holding the camera correctly in
your right hand, place your
thumb above the keypad and
your index finger alongside the
trigger.
2
Press the switch for 3 seconds.
The indicator lights up green.
3 After a moment, the startup screen is displayed.
4
Switching the camera off:
Press the switch for 3 seconds.
The indicator goes off.

English
C.A 1877 – C.A 1878 13
3.4 CHECKING THE INFORMATION ON THE LCD SCREEN
The LCD screen has a field of view covering 100% of the real image sighted.
The following information is displayed on the screen.
Upper limit of colour
scale
Operating
indicator
Battery charge
Time
Colour
scale
Lower limit of
colour scale
Activate/Freeze
Current
emissivity
Temperature
Min. temperature

English
14 C.A 1877 – C.A 1878
About the operating indicator
•The operating indicator indicates the current operating status
of the camera.
Status
of the
camera
Menu Displays the menu mode.
Null Displays the non-menu mode
with no analysis tool selected.
*SP1
Displays the current analysis
tool
Cursor 1
CAP.
Displays the current analysis
tool mode of the cursor in
automatic tracking.
E Current emissivity value.
An SD card has been inserted.
* The status varies according to the camera model.
Before doing anything more, please switch to [Null] mode.
How do I switch to [Null] mode?
•Press the cancel key several times until the null message
appears on the operating indicator.
Status of the camera

English
C.A 1877 – C.A 1878 15
3.5 SETTING THE DATE AND TIME
You must set the date and time when the camera is used for the first time.
1 Check that the IR camera is in null mode.
2 Press the MENU/ENTER key
then the
UP or DOWN arrow of the selector to
choose [System Setup].
<Spot >
File ►
< Iron >
Object para. ►
System Setup ►
3 Press the UP or DOWN arrow of the
selector to choose [Date & Time],
then press the MENU/ENTER key.
Date & Time ►
File setup ►
<Standard>
Local Setup ►
System Info. ►
4
Setting the date and time:
•Press the UP or DOWN arrow
of the selector to choose an
item to modify;
•Press the LEFT or RIGHT
arrow of the selector to set the
value.
Date & time
Year:
Month:
Day:
Hour:
Minute:
5 After setting the parameters, press the MENU/ENTER key to
save the changes or the C key to return to the main menu
without saving.

English
16 C.A 1877 – C.A 1878
3.6 LOCAL PARAMETERS
In this menu, you can select the style of the integrated menu system.
1 Check that the IR camera is in Null mode.
2 Press the MENU/ENTER key then the
UP or DOWN arrow of the selector to
choose [System Setup].
<Spot >
File ►
< Iron >
Object para. ►
System Setup ►
3 Press the UP or DOWN arrow of the
selector to choose [Local Setup],
then press the MENU/ENTER key.
Date & Time ►
File setup ►
<Standard>
Local Setup ►
System Info. ►
4
Local Setup:
•Press the UP or DOWN arrow
of the selector to choose a
field to modify;
•Press the LEFT or RIGHT
arrow of the selector to set the
values.
Local Setup
Language :
Video output :
Temp. Unit :
Dist. Unit :
5 After setting the parameters, press the MENU/ENTER key to save
the changes or the C key to return to the main menu without
saving.

English
C.A 1877 – C.A 1878 17
About the local parameters
Language Selects the language of the menus and messages.
Video output Determines the format of the video output of the
camera: PAL or NTSC.
Temp. unit Chooses the scale for display of the temperature by
the camera: °C or °F.
Dist. unit Determines the unit of distance displayed by the
camera: Metres or Feet.

English
18 C.A 1877 – C.A 1878
4. BASIC FUNCTIONS
4.1 USING THE LCD SCREEN
If you want to use the LCD screen to film, play back the thermal
images, and set the parameters of the menus, proceed as follows.
1 Open the LCD screen in the
direction shown by the
arrow.
2 Aim the IR camera at a
subject.
•For a better temperature measurement, place the subject
at the centre of the image displayed on the LCD screen.
•The LCD screen is switched off when it is closed.

English
C.A 1877 – C.A 1878 19
4.2 SELECTION OF THE MENUS AND PARAMETERS
You can select the parameters by pressing the MENU/ENTER key.
1
Press the MENU/ENTER key.
2
Press the LEFT or RIGHT arrow
of the selector.
3
Press the UP or DOWN arrow of
the selector.
4
Press the MENU/ENTER key.
1
Menu
2
Select a function using
File menu
Object parameters
menu
System setup
<Spot >
File ►
< Iron >
Object para. ►
System Setup ►
<Spot >
File ►
< Iron >
Object para. ►
System Setup ►
<Spot >
File ►
< Iron >
Object para. ►
System Setup ►

English
20 C.A 1877 – C.A 1878
Object para.
Emiss. : 0.95
Distance : 5m
Env. Temp. : 25.0°C
Humidity : 50%
Alert Temp. : 25.0°C
Alert : Off
The choice of menus displayed will depend on the use and on the
content of the parameters.
The choice of menus depends on the type of camera.
00001/00002/001/001
< Dir > DIACA006
Open CA000001.MIR
4 Change the parameters using
3
Select the values of the parameters using
Exit
Date & Time ►
File setup ►
<Standard>
Local Setup ►
System Info. ►
Table of contents
