TO SHARPEN
DOUBLE-FACETED BLADES
AND 20° EURO/AMERICAN
KNIVES
SHARPENING (USE STAGE 1)
(See Figure 1)
Clean the knife well before sharpening. Place the
sharpener on a secure level surface about waist
high. Hold the sharpener handle with left hand
(if right-handed) keeping index finger and thumb
behindthepartitioningwallof sharpening section.
Position knife blade with other hand in the First
Stage slot (marked 1) center the blade (left and
right) in the slot so that the face of the blade does
nottoucheithersidewallof theslot. Slidetheblade
repeatedly forward and back toward you along its
fulllength inStage 1.Apply onlymodest downward
pressure as it is sharpened. (Avoid excessive
downwardpressureonbladethatmightexcessively
wear the sharpening elements.) Unless the blade
is very dull or never sharpened before, fifteen
(15) to twenty-five (25) back and forth full strokes
will suffice. Otherwise continue sharpening
(back and forth strokes) until the knife is sharp
enough to cut paper well or slice easily thru a
tomato. If the knife is very dull or the factory
edge is larger than 20°, fifty or more full strokes
may be needed the first time to fully reset the
angle and sharpen in Stage 1. This completes the
sharpening step in Stage 1. Proceed to the next
step, honing.
Both sides of the knife edge are simultaneously
shaped and sharpened. This construction ensures
that the edges are well formed and sharp every
time. The abrasives in the first two stages consist
of 100% diamond crystals embedded on unique
interlocking steel support plates. Stage 3 uses a
fine ceramic abrasive to polish the edge. The
ModelD4360consistentlyoutperformsconventional
sharpeners that use less efficient abrasives and
lack any control of the sharpening angle.
Thissharpenercreatesadouble-beveledlonger-
lasting arch-shaped edge which is stronger than
conventional “V-shaped” or hollow ground edges.
This unique arch structure ensures a sharper edge
that will stay sharp longer.
SerratedknivessharpenquicklyinModelD4360
usingonlythesecondstage.Thespecialdiamonds
in that stage create razor sharp “micro-blades”
along the dominant teeth enhancing the cutting
actionandreducingthesawingandtearingaction
otherwise typical of serrated blades. Even newly
purchased serrated knives commonly have weak
serrated teeth that can benefit from sharpening
in Stage 2 of the Model D4360. The Model
D4360 restores dull teeth to better-than-new
condition. The cutting effectiveness of the
serrationsdependsalmostentirelyonthesharpness
ofthepoints(edges)oftheteeth.Itisnotnecessary
to sharpen the sides and bottoms of the scallops
between the teeth, since in general, they are not
doing the cutting.
ENGLISH
Congratulations! By selecting this innovative
Chef’sChoice sharpener, you will have sharp knives
that stay sharp longer.
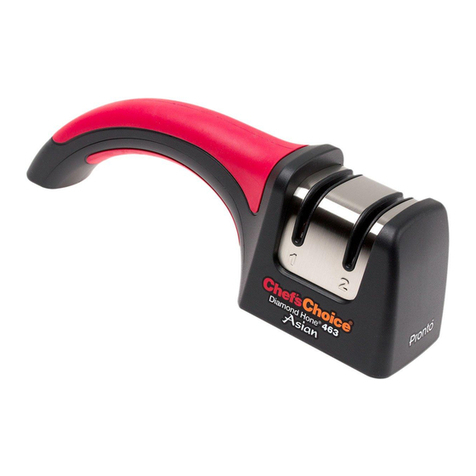
The Chef’sChoice Model D4360 is a unique three
stage diamond sharpener that is ideal for creating
a razor-sharp edge on double-faceted blades and
all popular European or American style 20° knives.
It can also be used for sporting, pocket, and
serratedblades.Thisnovelthreestagedesign,using
diamondandultrafineceramicabrasives,featuresa
twostepsharpeningandhoningprocessfollowedby
a ceramic polishing stage for placing a razor-sharp
longerlastingedge onyourknives.Double-faceted
knives and 20° Euro/American style blades, are
sharpened first in Stage 1 and then honed in stage
2 and micro polished in Stage 3. The sharpener is
ambidextrousand can beused either right-handed
or left-handed.
Model D4360
For 20° Euro/American Blades
Sharpening Instructions
Figure 1. Figure 2. Figure 3. Figure 4.
TO HONE DOUBLE-FACETED
BLADES AND 20° EURO/
AMERICAN KNIVES
HONING (USE STAGE 2)
(See Figure 2)
To hone the sharpened edge to razor sharpness,
move the blade to slot 2 (marked 2). This stage
hones by creating a second “micro-bevel” at a
slightly larger angle along the edge. Position the
blade in the Second Stage slot (marked 2.) Center
theblade(leftand right) in the slot so that the face
of the blade does not touch either sidewall of the
slot. Slide the blade repeatedly forward and back
toward you along its full length in Stage 2. Apply
onlymodestdownwardpressureasit issharpened.
(Avoid excessive downward pressure on blade that
might excessively wear the sharpening elements.)
Only five (5) to ten (10) back and forth full strokes
will suffice. Otherwise continue sharpening (back
and forth strokes) until the knife is sharp enough
to cut paper well or slice easily thru a tomato. This
completes the second sharpening step. Proceed to
polishing in Stage 3.
POLISHING (USE STAGE 3)
(See Figure 3)
To polish the edge, move the knife to Stage 3 and
perform two (2) back and forth strokes using just
enough downward pressure to insure steady and
consistentcontactwiththesharpeningelements.Keep
the blade centered left and right, avoiding contact
with the sides of the slot. After two light full strokes
in Stage 3, again test the blade sharpness using a
sheet of paper or a tomato. When fully finished the
knife should cut paper easily and smoothly. Make
a few additional pairs of strokes if necessary, but
keep in mind honing with the ceramic abrasives
requires far fewer strokes than in the previous
stage. You should now have a very sharp and
durable edge.
To re-sharpen, repeat the above honing and
polishing steps. This process can be repeated 4-5
times before it is necessary to start with stage 1
sharpening. Note: this sharpener is not designed
to sharpen single sided (single faceted) traditional
Japanese blades or scissors of any style.
TO SHARPEN
SERRATED BLADES
Serrated knives should be
sharpened in Stage 2 only.
(see Figure 4)
Makeabout15-25fullbackandforthstrokesinStage
2, then examine the edge to confirm that metal is
being removed on at least one side of the edge of
the cutting teeth. Continue with additional strokes
as needed to sharpen the teeth. Because serrated
knives perform much like a saw, the cut will never
be as smooth as that of a plain blade.
MAINTENANCE
• The exterior can be cleaned with a damp,
soft cloth.
• No oils or other lubricating liquids are
necessary with this sharpener.
• This sharpener is not designed for scissors.
TheLegacyCompaniesalsooffersawiderangeof
popularlypricedpoweredChef’sChoice®Professional
Sharpeners for those who have many knives or a
wide variety of knives, and for those who wish to
sharpen faster and with less effort to obtain the
ultimate in edge sharpness and durability.
Limited Warranty: Used with normal care, this EdgeCraft product,
designedforhanduse only,isguaranteedagainstdefectivematerial
and workmanship for a period of 1 year from the date of purchase
(“Warranty Period”). We will repair or replace, at our option, any
productor partthatis defectivein materialorworkmanship without
charge if the product is returned to us postage prepaid, with dated
proofofpurchase,withintheWarrantyPeriod.ThisLimitedWarranty
does not cover replacement or abrasive pads necessitated by use of
the product or product damage resulting from misuse. ALL IMPLIED
WARRANTIES,INCLUDINGIMPLIED WARRANTIESOFMERCHANT-ABILITY
AND FITNESS FOR A PARTICULAR PURPOSE, ARE LIMITED TO THE WAR-
RANTYPERIOD.EDGECRAFTCORPORATIONSHALLNOTBELIABLEFORANY
INCIDENTAL OR CONSEQUENTIAL DAMAGES. Some States do not allow
limitations on how long an implied warranty lasts and some States
donotallowtheexclusionorlimitationofincidentalorconsequential
damages,sotheabovelimitationsorexclusionsmaynotapplytoyou.
This Limited Warranty gives you specific legal rights, and you may
also have other rights which vary from state to state. This warranty
applies only to normal household use of this sharpener and is void
for industrial or commercial use.
MADE IN THE U.S.A. WITH U.S. AND
GLOBALLY SOURCED MATERIALS.
By the makers of the professional
Chef’sChoice® Diamond Hone®
Knife Sharpeners, sold worldwide.
The Legacy Companies
149 Cleveland Drive, Paris, KY 40361
Chef’sChoice® and EdgeCraft® are registered trademarks of
the EdgeCraft Corporation.
This product may be covered by one or more EdgeCraft
patents and/or patents pending as marked on the product.
© The Legacy Companies 2021 K21 E/F/S M361902
chefschoice.com
Aiguiseur manuel
Modèle D4360
Pour les lames
européennes/américaines de 20°
Instructions d’aûtage
FRANÇAIS
Félicitations! Votre choix de l’aiguiseur manuel
innovant de Chef’sChoice® vous permet de profiter
de couteaux plus tranchants et qui le restent plus
longtemps que ceux que vous auriez pu aûter à
l’aide d’aiguiseurs manuels traditionnels.
Le modèle D4360 d’aiguiseur manuel de
Chef’sChoice est un aiguiseur diamant unique
à trois modules qui est idéal pour produire des
bords tranchants comme une lame de rasoir pour
les lames à double facette et toutes les lames de
couteauxeuropéennesouaméricainespopulairesde
20°. Il peut être utilisé pour les couteaux de sport,
de poche et les lames dentelées. Cette conception
innovante à trois modules qui utilise des abrasifs
en diamant et céramique ultrafine, présente un
processusd’aiguisageetd’affûtageendeuxétapes
suivi d’un module de polissage de céramique pour
donneràvoscouteauxunbordtranchantcommeune
lame de rasoir plus durable. Les couteaux à double
facetteetleslameseuropéennesouaméricainesde
20°sonttoutd’abordaiguisésdanslemodule1,puis
affûtédanslemodule 2etenfinmicro-polisdansle
module 3. L’aiguiseur est ambidextre et peut donc
être utilisé à main droite ou gauche.
Les deux côtés du fil du couteau sont formés
et aiguisés simultanément. Cette construction
assurequelesfilssontbienformésetextrêmement
tranchants à chaque fois. Les abrasifs pour les
deux premiers modules sont composés à 100 % de
cristaux de diamant incrustés sur des plaques de
support en acier interdigitées uniques. Le module
3 de polissage utilise un abrasif en céramique
fine. Le modèle D4360 surpasse constamment le
rendementdesaiguiseurstraditionnelsquiutilisent
des abrasifs moins efficaces et n’offrent aucun
contrôle de l’angle d’aiguisage.
Les couteaux à fil droit aiguisés sur le modèle
D4360 seront « tranchants comme une lame de
rasoir » avec un léger « mordant » qui les aident à
couper sans effort les tomates, les autres légumes
et les fruits. Couper et couper en tranche devient
un plaisir et finie la corvée de travailler avec les
couteaux émoussés. Cet aiguiseur produit un profil
arqué à double biseau plus durable, qui est plus
résistant que les profils « en forme de V » ou creux
traditionnels. Cette structure en arc unique assure
un fil plus tranchant qui le restera plus longtemps.
Les couteaux dentelés s’aiguisent rapidement
dans le modèle D4360 à l’aide du second module
uniquement. Les diamants spéciaux de ce module
produisent des « micro-lames » tranchantes comme
une lame de rasoir le long des dents dominantes, ce
quiaméliorelacoupeetréduitlesciageetladéchirure
qui sont sinon typiques des lames dentelées. Même
les nouveaux couteaux dentelés « sortant d’usine »
ont souvent des dents de scie aux formes médiocres
et émoussées qui peuvent bénéficier d’un aiguisage
dansle module 2 dumodèle D4360.Le modèleD4360
redonneauxdentsémousséesuntranchantsupérieur
à celui des nouvelles dents. L’ecacité de coupe des
dentelures dépend pratiquement entièrement du
tranchant des pointes (fils) des dents. Il n’est pas
nécessaire d’aiguiser les côtés et bas des festons qui
se trouvent entre les dents, puisqu’en général, ils ne
participent pas à la coupe.
POUR AIGUISER LES
COUTEAUX À DOUBLE
FACETTE ET LES COUTEAUX
EUROPÉENS OU
AMÉRICAINS DE 20°
AIGUISAGE (UTILISER LE MODULE 1)
(voir la Figure 1)
Nettoyez soigneusement le couteau avant de
l’aiguiser. Placez l’aiguiseur sur une surface ferme
de niveau à environ hauteur de votre taille. Tenez
la poignée de l’aiguiseur de la main gauche (si
vous êtes droitier[ère]) en gardant l’index et le
poucederrièrelacloisondeséparationdelasection
d’aiguisage. Placez la lame du couteau de l’autre
maindansla fentedu premiermodule(marquée1),
centrez la lame (à gauche et à droite) dans la fente
defaçonàcequelalamenetoucheaucunedesdeux
parois latérales de la fente. Faites glisser la lame
plusieurs fois d’avant en arrière vers vous sur toute
salongueurdanslemodule1.Appliquezuniquement
une légère pression vers le bas pendant l’affûtage.
(Évitez d’appliquer une pression excessive sur la
lame, puisque cela pourrait trop user les éléments
d’affûtage.)Àmoinsquelalamesoittrèsémoussée
ou n’ait jamais été aiguisée auparavant, vingt-cinq
(25) à cinquante (50) mouvements complets de
va-et-vientdevraientsuffire.Autrement,continuez
d’aiguiser(mouvementsdeva-et-vient)jusqu’à ce
que le couteau soit suffisamment tranchant pour
bien couper le papier ou trancher facilement une
tomate. Si le couteau est très émoussé ou que
l’angledetranchantd’usineestsupérieurà20°,ilse
peutqu’aumoins centmouvementsde va-et-vient
s’avèrentnécessaireslapremièrefoispourrecalibrer
complètement l’angle et affûter dans le module 1.
Ceciachèvel’étaped’aiguisagedumodule 1.Passez
à l’étape suivante, l’affûtage.
POUR AFFÛTER LES
COUTEAUX À DOUBLE
FACETTE ET LES COUTEAUX
EUROPÉENS OU
AMÉRICAINS DE 20°
AFFÛTAGE (UTILISER LE MODULE 2)
(voir la Figure 2)
Pour affûter le fil aiguisé, de façon à ce qu’il soit
aussi tranchant qu’une lame de rasoir, déplacez la
lame à la fente 2 (marquée 2). Ce module affûte en
produisant un second « micro-biseau » selon un
angle légèrement plus grand le long du fil. Placez


