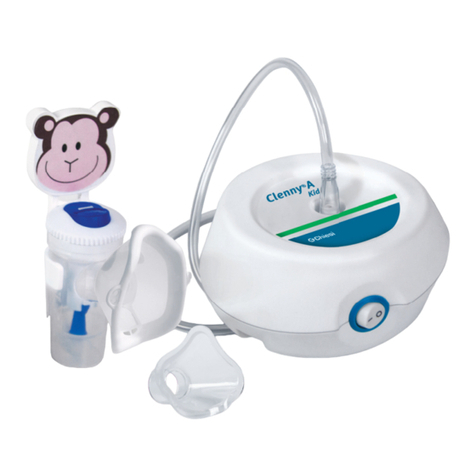
Chiesi Clenny A Family Care Manual


Assembly diagram
C1.1
C1.1b
C1.1c
C1.2
C1.3
C1.4
C1
C1.1
C
C6.1
C6.2
C6.3
C6.4
C6.4.1C6.4.2
C6.5
C7
A
C1
C2
C3
C4
C5
B
C2.1
B
C6
D
A1
A2
A3
A4
A5
A6
A7
C1.1a

1
Professional compressor aerosol for household use
Congratulations on your purchase and thank you for choosing our unit. Our goal is
to fully satisfy consumers by oering them cutting-edge systems for the treatment of
respiratory tract ailments.
Please read these instructions carefully and retain them for
future reference. Only use the device as described in this manual. This a medical device
for domestic use to nebulise and administer medical devices or medicine prescribed or
recommended by your doctor who has evaluated the patient’s general conditions.
THE STANDARD COMPONENTS AND ACCESSORIES OF THE UNIT INCLUDE:
A - Aerosoltherapy unit (main unit)
A1 - On/o switch
A2 - Air outlet port
A3 - Air lter
A4 - Nebulizer holder
A5 - Carrying handle
A6 - Cable storage compartment
A7 - Power cord
B - Connection tube
(main unit / nebulizer)
C- Accessories
C1 - Clenny®A nebulizer
C1.1 - Complete particle size
regulator
C1.1a - Regulator
C1.1b - Valve
C1.1c - Selector
IMPORTANT SAFEGUARDS
• This device is also intended for direct use by the patient.
• Before using the product for the rst time, and periodically during its lifetime, check
the integrity of the device structure and of the power cable to make sure there is no
damage. In the event of damage, do not plug in the cable and immediately take the
product to an authorised service centre or to your trusted dealer.
• Should your device fail to provide the expected performance, contact the authorised
service centre for clarications.
• The expected medical life of the accessories is 1 year. It is, however, advisable to
replace the nebulizer cup every 6 months in the event of intense use (or earlier if the
cup is obstructed) to always guarantee maximum therapeutic ecacy.
• Children and people who are not self-sucient must use the device under the close
supervision of an adult who has read this manual.
• Some parts of the device are small enough to be swallowed, inhaled or introduced
in other orices by children; therefore, keep the device out of the reach of children.
• Do not use the supplied tubing and cables for anything other than their intended
C1.2 - Upper part
C1.3 - Nozzle
C1.4 - Lower part
C2 - Mouthpiece with valve
C2.1 - Exhalation valve
C3 - Non-invasive nosepiece
C4 - Adult mask
C5 - Pediatric mask
C6 - Clenny®A Nasal Irrigator
C6.1 - Nasal adapter
C6.2 - Separator
C6.3 - Atomiser
C6.4 -
Wash system body with ergonomic handle
C6.4.1 - 10 ml nebulisation chamber
C6.4.2 - Collection chamber
C6.5 - Delivery hole
C7 - Tubing connection tting -NASAL WASH
SYSTEM
D- Accessories bag

2
use. These parts could cause a strangling hazard: pay close attention to children
and persons with particular diculties as they are oen unable to accurately evalu-
ate danger.
• The apparatus is unsuitable for use in presence of flammable anaesthetic mixture
with air, oxygen or nitrous oxide.
• Always keep the power supply cable away from hot surfaces.
• Keep the power cable away from animals (for example, rodents) which could
damage the insulation.
• Do not handle the device with wet hands. Do not use the device in damp
environments (for example, while taking a bath or shower). Do not immerse the
device in water; in the event of immersion immediately disconnect the plug. Do not
remove or touch the immersed device; unplug the power cable rst. Immediately
bring the device to an authorised service centre or to your trusted dealer.
• Do not wash the device under running water or by immersion and keep it safe from
being sprayed by water or other liquids.
• Do not expose the device to particularly extreme temperatures.
• Do not place the device near sources of heat, in direct sunlight or in excessively hot
rooms.
• Do not obstruct or put objects into the lter or its related housing in the device.
• Never obstruct the air vents located on both sides of the device.
• Always use it on a rigid surface that is clear of obstacles.
• Make sure there is no material obstructing the air vents before each use.
• Do not put any objects in the air vents.
• Repairs, including the replacement of the supply cord, are to be carried out by
authorised personnel only, by complying with the information provided by the
manufacturer. Unauthorized repairs will void the warranty and may represent a
danger to the user.
• The average expected duration for the compressor is 700 hours.
• WARNING: Do not modify this device without authorisation from the manufacturer.
• The manufacturer is held responsible for safety, reliability and performance only if:
a) the device is used in compliance with the instructions for use b) the wiring where
the device is being used is in compliance with safety regulations and current laws.
• Interactions: the materials used in contact with medication have been tested
with a vast range of medications. However, in view of the variety and continuous
evolution of pharmaceuticals, interactions cannot be ruled out. We recommend
using the medication as soon as possible once it has been opened and preventing
prolonged exposure in the nebulizer cup. The materials used in the medical
device are biocompatible in accordance with the provisions of Directive 93/42 EC
and subsequent amendments. However, the possibility of occurrence of allergic
reactions cannot be entirely excluded.
• The manufacturer must be contacted about any problems and/or unexpected events
concerning operation and for any clarications on use, maintenance/cleaning.
• If the device is stored for a long time at temperatures other than those indicated in
the paragraph TECHNICAL SPECIFICATIONS, you must wait at least 2 hours before
using it.

3
ASSEMBLING THE NEBULIZER
Follow the assembly instructions below.
1. Assemble the nozzle (C1.3) on the up-
per part (C1.2).
2. Place the valve (C1.1b) with the flat
side down onto the particle size regulator
(C1.1a) by aligning the hole with the posi-
tion ribs, then screw the selector (C1.1c)
onto the threaded pin of the regulator
all the way down. Rotate the assembled
regulator to make sure that it turns freely
and that the selector moves up and down
between positions.
C1.3
C1.2
C1.2
C1.3
a
b
C1.1a
C1.1b
C1.1c
C1.1
C1.1a + C1.1b
3. Insert and press the previously assem-
bled particle size regulator (C1.1) all the
way down, keeping it in a horizontal posi-
tion, in the upper part (C1.2), and match-
ing the partitions of the selector (C1.1c)
with the groove in the upper part (C1.2).
4. Insert the assembled upper part (C1.1
+ C1.2 + C.1.3) into the lower part (C1.4)
and hook it by turning it clockwise.
C1.2
C1.1
C1.1c
a
b
C1.1+C1.2+C1.3
C1.4
Watch the video
tutorial on how to as-
semble the nebulizer

4
HOW TO USE THE “CLENNY
®
A” NEBULIZER WITH PARTICLE SIZE REGULATOR AND
VALVE SYSTEM
It is professional, quick, recommended for administering all types of medicinal prod-
ucts, even in patients with chronic diseases. The valve system optimises the dispens-
ing of the nebulised medicinal product to the patient and limits its dispersion in the
environment. Moreover, thanks to the particle size regulator, the size of nebulised
particles can be selected based on the respiratory system area where the medication
is to be delivered. Indeed, with the 4 available modes, the bowl can dispense parti-
cles of dierent sizes:
-
+
Select the desired position by means of the particle size
regulator C1.1.
By turning the regulator clockwise, the selector (C1.1c)
moves and closes the opening, while it opens if the regula-
tor is turned anti-clockwise.
C1.1
RESPIRATORY
SYSTEM
UPPER
AIRWAYS
LOWER AIRWAYS
Ear, nose and
throat tract
Trachea and
primary bronchi
Secondary
bronchi Bronchioles
CONFIGURA
TION
BOWL
Without
Selector
Selector in
position 1
Selector in
position 2
Selector in
position 3
MMAD
(m) . (3) . (1) . (1) . (1)
Output rate
(ml/min’) . (2) . (2) . (2) . (2)
Breathable
fraction < 5 m
(FPF) 31.3%(3) 54.5%(1) 62.0%(1) 80.0%(1)
1) In vitro testing performed by TÜV Rheinland Italia S.r.l. in collaboration with the University of Parma and in
compliance with the EN 13544-1: 2007 + A1 European Standard for aerosol therapy devices Standard. More details
are available on request.
(2) Data measured according to Flaem I29-P07.5 internal procedure Dispensing speed values may vary according
to the patient’s respiratory capacity. More details are available on request.
(3) Data calculated on the basis of the values obtained with Malvern Spraytec, and compared with the values of
the tests performed at the University of Parma.

5
To use the bowl without selector, rmly grasp the bowl
body and use your other hand to rotate the particle size
regulator (C1.1) clockwise until it is ejected from the up-
per part (C1.2)
C1.1
C1.2
INSTRUCTIONS FOR USE
Before each use, clean hands thoroughly and clean the device as described in the
section on “CLEANING SANITISATION DISINFECTION”. During use, it is advisable to
protect yourself from any dripping.
The nebulizer cup and accessories are for personal
use only to avoid potential risks of transmitting infections.
This device is suitable for
the administration of medical substances and not, for which the administration via
aerosol is foreseen; these substances are to be in any case prescribed by the Doctor.
With viscous substances, dilution with a suitable physiological solution could be nee-
ded, according to the medical prescription.
1.Plug the power cord (A7) into a power socket cor-
responding to the voltage of the unit. This must
be positioned so that it is not dicult to make the
disconnection from the mains.
2. Pour the liquid to be nebulised (medical device and/or
the medicine prescribed by the doctor) in the lower part
(C1.4) of the open cup. Insert the upper part (C1.2) of
the cup into the lower part (C1.4), then close the cup by
turning the upper part (C1.2) clockwise.
3. Connect accessories as indicated in the “Connection diagram” on the cover.
4. Set the nebulizer selector to the desired particle size as described under “How to use
the Clenny
®
A nebulizer”.
5.
Sit comfortably holding the nebulizer in your hand, place the mouthpiece onto your
mouth or alternatively use the nose piece or mask.
Should you opt for the mask ac-
cessory, place it on your face as shown in the picture (with or without using the elasti-
cated strap), so that the sides adhere well to the face.
6.
Start the unit by means of switch (A1) and Inhale gently and deeply; aer inspiration
we recommend to hold your breath for a moment in order to allow inhaled aerosol
droplets to deposit. Then, exhale slowly.
7.
When the treatment is nished, turn o and unplug the unit.
Wash your face and
rinse your mouth.
WARNING: If aer the therapy session moisture accumulates in the tube (B), remove
the tube from the nebulizer and dry it using the compressor air flow; this operation
will prevent mold from forming inside the tube.
RESPIRATORY
SYSTEM
UPPER
AIRWAYS
LOWER AIRWAYS
Ear, nose and
throat tract
Trachea and
primary bronchi
Secondary
bronchi Bronchioles
CONFIGURA
TION
BOWL
Without
Selector
Selector in
position 1
Selector in
position 2
Selector in
position 3
MMAD
(m) . (3) . (1) . (1) . (1)
Output rate
(ml/min’) . (2) . (2) . (2) . (2)
Breathable
fraction < 5 m
(FPF) 31.3%(3) 54.5%(1) 62.0%(1) 80.0%(1)
1) In vitro testing performed by TÜV Rheinland Italia S.r.l. in collaboration with the University of Parma and in
compliance with the EN 13544-1: 2007 + A1 European Standard for aerosol therapy devices Standard. More details
are available on request.
(2) Data measured according to Flaem I29-P07.5 internal procedure Dispensing speed values may vary according
to the patient’s respiratory capacity. More details are available on request.
(3) Data calculated on the basis of the values obtained with Malvern Spraytec, and compared with the values of
the tests performed at the University of Parma.

6
During application, it is advisable to suitably protect yourself
from any dripping.
1. 1. Insert the atomiser (C6.3) into the nebulisation chamber
(C6.4.1). See the connection diagram.
2. 2. Put the solution (max 10 ml) into the nebulisation cham-
ber (C6.4.1)(g. A).
3. Attach the separator (C6.2). Insert the nasal adapter (C6.1).
See the connection diagram.
4. Connect the nasal douche system to the device using the
tubing (B) and the tting (C7).
See the connection diagram.
5. Switch on the device.
6. Bring it to your nose, placing the hole of the adapter
against one nostril.
7. During treatment, it isbetter to close with a nger the nostril
where the NASAL WASH SYSTEM is not applied.
8. Operate the NASAL WASH by closing the delivery hole
(C6.5) (g. B) while inhaling and release it before exhaling
(g. B); in this stage, to help expel the mucus, blow gently
through the nostril being treated directly into the NASAL
WASH.
9. Repeat steps 6. through 8. for the other nostril, trying to
distribute the solution evenly between the two nostrils.
10.For children or anyone unable to correctly coordinate the
various parts from step 6. to step 8., we recommend al-
ternating the application between the nostrils every 20 seconds, leaving suitable
pauses to allow the mucous to be expelled.
11. The steps described above are useful for nasal irrigation using saline solutions. It
is advisable to carry out medicated treatments aer an initial irrigation with saline
SoTouch face masks
SoTouch masks have an outer edge made of so
biocompatible material that ensures excellent ad-
herence to the face, and is also equipped with an
innovative Dispersion Limiting Device.These distin-
guishing characteristic features allow better adhe-
sion of the mask to the face and, thus, proper intake
of the liquid to be nebulised (medical device and/or
the medicine prescribed by the doctor).
During the inspiratory phase, the
tab, acting as a Dispersion Lim-
iting Device, bends inwards to-
wards the mask.
During the expiratory phase,
the tab, acting as a Disper-
sion Limiting Device, bends
outwards from the mask.
So
biocompatible
material
Dispersion
Limiting Vent
A
C6.3
B
C6.5
C6.4.1
Watch the video tuto-
rial on how to assemble
the nasal irrigator
Before each utilisation, wash your hands accurately and clean
the NASAL WASH SYSTEM and the accessories as described in
the paragraph “CLEANING, SANITISATION AND DISINFECTION”.
The NASAL WASH SYSTEM and accessories are for personal use
only to avoid potential risks of transmitting infection.
CLENNY®A NASAL IRRIGATOR

7
CLEANING SANITISATION DISINFECTION
Switch o the device before any cleaning procedure and unplug the power cable from
the socket.
DEVICE AND TUBING EXTERIOR
Use only a damp cloth with antibacterial soap (non-abrasive and with no solvents of
any sort).
ACCESSORI
To disassemble the bowl, rmly grasp the bowl body
and then use your other hand to rotate the particle size
regulator (C1.1) clockwise until it is ejected from the up-
per part (C1.2) as a result of unscrewing.
The selector
(C1.1c), valve (C1.1b), regulator (C1.1a) and upper
part (C1.2) can then be disassembled to be cleaned.
The nozzle (C1.3) is interference tted in the upper part
(C1.2) and can be extracted by simply pulling it out-
wards.
DisassembletheNASALWASHasillustratedinthe connection
diagram. As the separator (C6.2) is tted in the body (C6.4),
it is necessary to exert some force to separate them.
Then proceed according to the following instructions.
SANITISATION
Before and aer each use, sanitise the nebulizer cup and the
accessories, choosing one of the methods described below.
method A: sanitise accessories C1.1- C1.1a-C1.1b-C1.1c-C1.2-
C1.3-C1.4-C2-C3-C4-C5-C6.1-C6.2-C6.3-C6.4 under potable
hot water (approximately 40 °C) with a gentle, non abrasive
dish detergent.
method B: sanitise accessories C1.1- C1.1a-C1.1b-C1.1c-C1.2-C1.3-C1.4-C2-C3-C4-C5-
C6.1-C6.2-C6.3-C6.4 in the dishwasher with a hot cycle.
method C: sanitise accessories C1.1- C1.1a-C1.1b-C1.1c-C1.2-C1.3-C1.4-C2-C3-C4-C5-
C6.1-C6.2-C6.3-C6.4 by immersing them in a solution of 50% water and 50% white
vinegar, then rinse thoroughly under potable hot water (approximately 40 °C).
If you want to also perform the cleaning for DISINFECTION, jump to the DISINFECTION
paragraph.
Aer sanitising the accessories, shake them well without scrubbing them with clean
cloths and place them on a paper towel. Alternatively, dry them with a jet of hot air (for
example a hair dryer).
DISINFECTION
Aer sanitising the nebulizer cup and the accessories, disinfect them choosing one of
the methods described below.
method A: Accessories can be disinfected are C1.1- C1.1a-C1.1b-C1.1c-C1.2-C1.3-C1.4-
C2-C3-C4-C5-C6.1-C6.2-C6.3-C6.4 .
The disinfectant must be an electrolytic chloroxidizer (active principle: sodium hypochlo-
rite) specic for disinfecting, which is available in any pharmacy.
solution for a more ecient distribution of the medication on the nasal mucous
membranes.
12. TOnce the application is complete, switch o the device and clean it, following the
instructions provided in the “CLEANING, SANITISATION, DISINFECTION” paragraph.
C1.1
C1.2

8
AIR FILTERING
The unit is equipped with an air lter (A3) which should
be replaced when dirty or when its colour changes. Do not
wash or re-use the used lter. The lter must be regularly
replaced to help ensure ecient compressor performance.
The lter should be regularly checked. For spare lters
contact your dealer or an authorised service centre.
To replace the lter:
Pull out the dirty lter with common tweezers and push
the new one all the way in its seat. Do not replace the lter
during use.
Only use original accessories and spare parts, we disclaim any liability in the event
of using non original spare parts or accessories.
Implementation:
- Fill a container of suitable size to hold all the parts to be disinfected (we recommend
the use of the suitable Clenny® A Clean Box container, available as an accessory)
with a solution of drinking water and disinfectant, according to the proportions
indicated on the packaging of the disinfectant.
- Completely immerse each part in the solution, taking care to avoid the formation of
air bubbles on the parts. Leave the parts immersed for the amount of time indicated
on the packaging of the disinfectant associated with the concentration chosen for
the solution.
- Remove the disinfected parts and rinse abundantly with warm potable water.
- Dispose of the solution following the instructions provided by the disinfectant man-
ufacturer.
method B: sanitise the accessories C1.1- C1.1a-C1.1b-C1.1c-C1.2-C1.3-C1.4-C2-C3-C4-
C5-C6.1-C6.2-C6.3-C6.4 by boiling them in water for 10 minutes; use demineralised or
distilled water to prevent calcium deposits.
method C: sanitise the accessories C1.1- C1.1a-C1.1b-C1.1c-C1.2-C1.3-C1.4-C2-C3-C4-
C5-C6.1-C6.2-C6.3-C6.4 with a hot steam steriliser for baby-bottle (not the microwave
type). Perform the process faithfully following the instructions of the steriliser. To
ensure that the disinfection is eective, choose a steriliser with an operating cycle of
at least 6 minutes.
method D: disinfect the accessories C1.1- C1.1a-C1.1b-C1.1c-C1.2-C1.3-C1.4-C2-C3-C4-
C5-C6.1-C6.2-C6.3-C6.4 in the microwave oven using the suitable Clenny® A Clean
Box container, available as an accessory, following the instructions contained therein.
Aer disinfecting the accessories, shake them well without scrubbing them with clean
cloths and place them on a paper towel. Alternatively, dry them with a jet of hot air (for
example a hair dryer).
Aer disinfecting the accessories, shake them well without scrubbing them with clean
cloths and place them on a paper towel. Alternatively, dry them with a jet of hot air (for
example a hair dryer).
At the end of each use store the device complete with accessories in a dry place away
from dust.

9
TROUBLE-SHOOTING
Switch o the device before any procedure and unplug the power cable from the
socket.
PROBLEM CAUSE RESOLUTION
The device does not
work
The power cable has not
been correctly inserted into
the power socket
Correctly insert the power cable in
sockets
The device does not
nebulize or
nebulizes insu-
ciently
The medication has not been
inserted in the nebulizer
Pour the right amount of medica-
tion in the nebulizer
The nebulizer has not been
properly tted
Disassemble the nebulizer and
reassemble it correctly as shown
in the connection diagram on the
cover
The nebulizer nozzle is
clogged
Disassemble the nebulizer, remove
the nozzle and perform cleaning
operations. Failure to remove medi-
cation deposits from the nebulizer
aects its eciency and operation.
Strictly comply with the instructions
contained in the “
CLEANING, SANI-
TISATION, DISINFECTION”
chapter
The air pipe is not correctly
connected to the device
Ensure the device’s accessories
are properly connected to the air
intake (see connection diagram on
the cover)
IThe air pipe is bent, dama-
ged or twisted
Unwind the pipe and ensure it is
not crushed or punctured. If neces-
sary replace it
The air lter is dirty Replace the lter
The apparatus is noi-
sier than usual
The lter is not correctly in-
serted in its housing
Fully and properly insert the lter in
its housing
If aer verifying the above mentioned conditions the device should not operate properly,
contact your trusted retailer or the nearest authorized service center.

10
SYMBOLS
CE Medical Marking ref.
Dir. 93/42 EEC and subsequent
amendments Serial number of device
Class II device Manufacturer
Important: check the operating
instructions Type BF applied part
Switch
“ON” When you shut o the
device, the switch will
interrupt the compressor
function only on one of the
two power phases
Alternating current
Switch
“OFF”
Minimum and maximum room
temperature
Minimum and maximum
atmospheric pressure Minimum and maximum air moisture
Complies with: European standard
EN 10993-1 “Biological Evaluation
of Medical Devices” and European
Directive 93/42/EEC “Medical
Devices”. Phthalates free. In
conformity with Reg. (EC) no.
1907/2006
IP21
Enclosure protection rating: IP21.
(Protected against solid bodies over
12 mm. Protected against access with
a nger. Protected against vertically
falling water drops).
DISPOSAL OF DEVICE:
In conformity with Directive 2012/19/EC, the symbol shown on the device to be
disposed of indicates that it is considered as waste and is therefore subject to
“sorted waste collection”. The user must therefore take (or have taken) the above
waste to a pre-sorted waste collection centre set up by the local authorities, or else
give it back to the dealer when purchasing a new appliance of the same type. Pre-sorted
waste collection and the subsequent treatment, recovery and disposal operations favor
the production of appliances made of recycled materials and Iimit the negative eects
of any incorrect waste management on the environment and public health. The unlawful
disposal of the product by the user could result in administrative nes as provided
by the laws transposing Directive 2012/19/EC of the European member state or of the
Country in which the product is disposed of.
ELECTROMAGNETIC COMPATIBILITY
Thisdevicewasdesignedtosatisfythecurrentlyrequiredrequisitesforelectromagnetic
compatibility (EN 60601-1-2). Electro-medical devices require particular care during
installation and use relative to EMC requirements. Users are therefore requested to
install and/or use these devices following the manufacturer’s specications. There
is a risk of potential electromagnetic interference with other devices. RF mobile or
portable radio and telecommunications devices (mobile telephones or wireless
connections) can interfere with the functioning of electro-medical devices. For further
information, visit the manufacturer’s website. The Medical Device may be subject
to electromagnetic interference if other devices are used for specic diagnosis or
treatments. The manufacturer reserves the right to make technical and functional
modications to the product with no prior warning.

11
Mod. Clenny®A Family Care 4Evolution
Power supply: 230V ~ 50Hz 140VA
Max pressure:
2,6 ± 0,4 bar
Compressor air output:
10 l/min approx
Sound level (at 1 m):
55 dB (A) approx
Operation:
Continuous
Operating conditions:
Temperature: min 10°C; max 40°C
RH Air humidity: min 10%; max 95%
Atmospheric pressure: min 69KPa; max 106KPa
S
torage conditions:
Temperature: min -25°C; max 70°C
RH Air humidity: min 10%; max 95%
Atmospheric pressure: min 69KPa; max 106KPa
Compliant with Directive 93/42 EEC-
Dimensions:
17,5 (L) x 20 (D) x 10,6 (H) cm
Weight:
1,450 Kg
APPLIED PARTS
Type BF applied parts are:
patient accessories
(C2, C3, C4, C5)
Clenny®A nebulizer
Medication minimum capacity:
2 ml
Medication maximum capacity:
8 ml
Operating pressure (with neb.):
1,00 bar approx.
TECHNICAL SPECIFICATIONS
NASAL WASH TECHNICAL FEATURES
Mod.: Clenny®A Doccia Nasale
Maximum drug capacity: 10 ml
Delivery(1)
(saline solution NaCl 0.9%): 5 ml/min (10 ml delivered in 2 min)
MMD (2): 48 m
% <10 m (2): 3,2%
(1) Tests performed with 0.9% NaCl saline solution, according to the Flaem internal procedure
(2) Values measured with the Malvern Mastersizer Laser system (at an external certied laboratory)
Type BF applied parts are:
patient accessories
(C6.1)
Compliant with Directive 93/42 EEC-
Operating Conditions:
Temperature: min 10°C; max 40°C
RH Air humidity:
min 10%; max 95%
Atmospheric pressure: min 69KPa; max 106KPa
Storage conditions:
Temperature: min -25°C; max 70°C
RH Air humidity: min 10%; max 95%
Atmospheric pressure: min 69KPa; max 106 KPa
For more information on the products of the Clenny®A line, please visit the website
www.curadelrespiro.it
For user manual in foreign languages, please go to Chiesi website
www.curadelrespiro.it

Schéma de connexion
C1.1
C1.1b
C1.1c
C1.2
C1.3
C1.4
C1
C1.1
C
C6.1
C6.2
C6.3
C6.4
C6.4.1C6.4.2
C6.5
C7
A
C1
C2
C3
C4
C5
B
C2.1
B
C6
D
A1
A2
A3
A4
A5
A6
A7
C1.1a

13
Aérosol à compresseur professionnel pour utilisation à domicile
Nous nous réjouissons de votre achat et nous vous remercions pour votre conance.
Notre objectif est de satisfaire pleinement nos clients en leur orant des produits
à l’avant-garde dans le traitement des maladies des voies respiratoires.
Veuillez
lire attentivement ces instructions et les conserver pour de futures consultations.
Veuillez utiliser l’appareil uniquement comme décrit dans le présent manuel. Il s’agit
d’un dispositif médical à usage domestique prévu pour nébuliser et administrer des
dispositifs médicaux ou des médicaments prescrits/recommandés par votre médecin
qui a évalué les conditions générales du patient.
L’APPAREIL EST FOURNI AVEC:
A - Appareil pour aérosol (unité
principale)
A1 - Interrupteur
A2 - Prise d’air
A3 - Filtre à air
A4 - Porte-nébuliseur
A5 - Poignée pour le transport
A6 - Compartiment du câble
A7 - Câble d’alimentation
B -
Tube de raccordement
(unité principale/nébuliseur)
C- Accessoires
C1 - Nébuliseur Clenny®A
C1.1 - Régulateur de granulométrie
complet
C1.1a - Régulateur
C1.1b - Valve
C1.1c - Sélecteur
AVERTISSEMENTS IMPORTANTS
• Ce dispositif est destiné à être utilisé directement par le patient.
• Avant la première utilisation et périodiquement pendant le cycle de vie du produit,
contrôler l’intégrité de la structure de l’appareil et du câble d’alimentation an de
vous assurer de son bon état ; le cas échéant, ne pas brancher l’appareil et reporter
immédiatement le produit auprès d’un centre d’assistance agréé FLAEM ou auprès de
votre revendeur de conance.
• Si votre dispositif ne fournit pas les performances escomptées, contacter le centre
d’assistance agréé pour obtenir des éclaircissements.
• La durée de vie moyenne prévue des accessoires est de 1 an ; il est tout de même
conseillé de remplacer le nébuliseur tous les 6 mois en cas d’usages intensifs (ou
avant si le nébuliseur est obstruée) an de garantir en permanence le maximum de
l’ecacité thérapeutique.
• En présence d’enfants et de personnes non autonomes, l’appareil doit être utilisé
sous le contrôle strict d’un adulte ayant pris connaissance du présent manuel.
• Certains composants de l’appareil sont si petits qu’ils peuvent être avalés, inhalés ou
C1.2 - Partie supérieure
C1.3 - Buse
C1.4 - Partie inférieure
C2 - Embout buccal avec valve
C2.1 - Valve expiratoire
C3 - Distributeur nasal non invasif
C4 - Masque adulte
C5 - Masque pédiatrique
C6 - Clenny ® A Douche Nasale
C6.1 - Adaptateur nasal
C6.2 - Séparateur
C6.3 - Vaporisateur
C6.4 -
Corps de la douche avec préhension ergo-
nomique
C6.4.1 -
Compartiment de nébulisation de 10 ml
C6.4.2 - Compartiment de récupération
C6.5 - Orice de distribution
C7 - Raccord pour relier tube - DOUCHE NASALE
D- Pochette per accessori

14
introduits par des enfants en bas âge dans d’autres orices, par conséquent, il faut
conserver l’appareil hors de portée des enfants.
• Ne pas utiliser les tuyaux et les câbles fournis pour un usage autre que celui prévu;
ceux-ci pourraient provoquer des dangers d’étranglement. Faire particulièrement at-
tention aux enfants et aux personnes ayant certaines dicultés car, très souvent, ces
personnes ne sont pas en mesure de bien évaluer les risques.
• Cet appareil n’est pas adapté à un usage en présence de mélanges anesthésiques
inflammables avec l’air, l’oxygène ou le protoxyde d’azote.
• Garder toujours le câble d’alimentation loin des surfaces chaudes.
• Garder le câble d’alimentation loin des animaux (par exemple, des rongeurs),
puisqu’ils pourraient endommager l’isolation du câble d’alimentation.
• Ne pas manipuler l’appareil en ayant les mains mouillées. Ne pas utiliser l’appareil
dans des pièces humides, lorsque vous prenez un bain ou une douche par exemple.
Ne pas immerger l’appareil dans l’eau ; si cela devait se produire, débrancher im-
médiatement la prise. Ne pas essayer de retirer l’appareil de l’eau ou de le toucher,
débrancher avant tout la prise. Apporter l’appareil tout de suite dans un centre d’as-
sistance agréé ou chez votre revendeur de conance.
• Ne pas laver l’appareil à l’eau courante ou par immersion et garder l’appareil à l’abri
des éclaboussures d’eau ou de tout autre liquide.
• Ne pas exposer l’appareil à des températures extrêmes.
• Ne pas placer l’appareil près des sources de chaleur, à la lumière du soleil ou dans
des pièces trop chaudes.
• Ne pas obstruer et ne pas introduire d’objets dans le ltre ni dans son logement
prévu dans l’appareil.
• Ne jamais obstruer les trous d’aération positionnés des deux côtés de l’appareil.
• Toujours le faire fonctionner sur une surface rigide et sans obstacle.
• Contrôler qu’il n’y ait pas de matériel qui bouche les fentes d’aération avant chaque
utilisation.
• Ne pas insérer d’objet à l’intérieur des trous d’aération.
• Les réparations, y compris le remplacement du câble d’alimentation, doivent être
eectuées uniquement par le personnel, en suivant les informations fournies par
le fabricant. Les réparations non autorisées annuleront la garantie et pourraient
représenter un danger pour l’utilisateur.
• La durée de vie moyenne prévue pour le compresseur est de 700 heures.
• ATTENTION : Ne pas modier cet appareil sans l’autorisation du fabricant.
• Le Fabricant se considère responsables quant aux eets de la sécurité, abilité et
prestations seulement si : a) l’appareil est utilisé conformément aux instructions
d’utilisation b) l’installation électrique du milieu dans lequel l’appareil est utilisé est
aux normes et est conforme aux lois en vigueur.
• Interactions: les matériaux utilisés en contact avec les médicaments ont été testés
avec une large gamme de médicaments. Cependant, il n’est pas possible d’exclure
d’éventuelles interactions, vu la variété et l’évolution continuelle des médicaments.
Il est conseillé de prendre le médicament le plus rapidement possible une fois qu’il
est ouvert et d’éviter les expositions prolongées avec le nébuliseur.Les matériaux
utilisés dans l’appareil sont des matériaux biocompatibles qui respectent les
règlementations impératives de la Directive 93/42 CE et mod. suiv., toutefois, il est
impossible d’exclure complètement des réactions allergiques possibles.
• Contacter le Fabricant an de lui communiquer tout problème ou événement
inattendu lié au fonctionnement de l’appareil, et si des éclaircissements étaient
nécessaires quant à l’utilisation, à l’entretien ou au nettoyage.
• Si l’appareil est stocké pendant une longue période à des températures autres que
celles indiquées dans le paragraphe CARACTÉRISTIQUES TECHNIQUES, il faut alors
attendre au moins 2 heures avant de l’utiliser.

15
ASSEMBLAGE DU NÉBULISEUR
Suivre les instructions d’assemblage ci-dessous.
1. Assembler la buse (C1.3) sur la partie
supérieure (C1.2).
2
. Positionner la vanne (C1.1b) sur le ré-
gulateur de granulométrie (C1.1a) avec le
côté plat orienté vers le bas et aligner le
trou sur les nervures de positionnement,
puis visser à fond le sélecteur (C1.1c) sur
la tige letée du régulateur. Tourner le
régulateur assemblé pour s’assurer qu’il
tourne librement et que le sélecteur se
lève et descend d’une position à l’autre.
C1.3
C1.2
C1.2
C1.3
a
b
C1.1a
C1.1b
C1.1c
C1.1
C1.1a + C1.1b
3
. Insérer et appuyer à fond sur le régula-
teur de granulométrie précédemment as-
semblé (C1.1), en le maintenant en posi-
tion horizontale, dans la partie supérieure
(C1.2), en faisant correspondre les grilles
du sélecteur (C1.1c) avec la rainure de la
partie supérieure (C1.2).
4. Insérer la partie supérieure assemblée
(C1.1+C1.2+C.1.3) dans la partie inférieure
(C1.4) et l’accrocher en la tournant dans le
sens des aiguilles d’une montre.
C1.2
C1.1
C1.1c
a
b
C1.1+C1.2+C1.3
C1.4
Découvrez la vidéo de
démonstration pour
pour l’assemblage de
nébuliseur

16
MODES D’UTILISATION DU NÉBULISEUR CLENNY
®
A AVEC RÉGULATEUR DE GRANU
LOMÉTRIE ET SYSTÈME À VALVE
Professionnel, rapide, indiqué pour l’administration de tous les types de médicaments
même chez les patients atteints de pathologies chroniques. Le système à valve opti-
mise la distribution du médicament nébulisé vers le patient et limite sa dispersion dans
l’environnement. Grâce au régulateur de granulométrie, il est également possible de sé-
lectionner la dimension des particules nébulisées en fonction de la zone de l’appareil
respiratoire à laquelle le traitement s’adresse. En fait, avec les 4 modes possibles, le
nébuliseur peut distribuer des particules de diérentes dimensions:
-
+
Sélectionner la position souhaitée à l’aide du régulateur de
granulométrie C1.1.
En tournant le régulateur dans le sens des aiguilles d’une
montre, le sélecteur (C1.1c) se déplace en fermant l’ouverture
qui s’ouvre en tournant le régulateur dans le sens contraire
des aiguilles d’une montre.
C1.1
APPAREIL
RESPIRATOIRE
VOIES
RESPIRATOIRES
SUPÉRIEURES
VOIES RESPIRATOIRES INFÉRIEURES
Section oro-
rhino-pharyngée
Trachée et bron-
ches primaires
Bronches secon-
daires Bronchioles
CONFIGURATION
NÉBULISEUR
Sans
Sélecteur
Sélecteur en
position 1
Sélecteur en
position 2
Sélecteur en
position 3
MMAD
(m) . (3) . (1) . (1) . (1)
Vitesse
(ml/min’) . (2) . (2) . (2) . (2)
Fraction
respirable < 5
m (FPF) 31.3%(3) 54.5%(1) 62.0%(1) 80.0%(1)
(1) In-vitro-Charakterisierung durch TÜV Rheinland Italia S.r.l., in Zusammenarbeit mit der Universität Parma und
in Übereinstimmung mit der Europäischen Norm für Aerosoltherapie-Geräte Norm EN 13544-1:2007 + A1. Weitere
Details auf Anfrage.
(2) Daten, die nach dem unternehmensinternen Verfahren Flaem I29-P07.5 erhoben werden. Die Werte der
Geschwindigkeit der Verabreichung können je nach Atemkapazität des Patienten variieren. Weitere Details auf
Anfrage.
(3) Daten, die auf der Grundlage der mit Malvern Spraytec ermittelten Werte berechnet und mit den Werten der
an der Universität Parma durchgeführten Tests verglichen wurden.

17
Pour utiliser le
nébuliseur
sans sélecteur, tenir ferme-
ment le corps du
nébuliseur
et, de l’autre main, tourner
le régulateur de granulométrie (C1.1) dans le sens des
aiguilles d’une montre jusqu’à ce qu’il ne soit éjecté de
la partie supérieure (C1.2)
C1.1
C1.2
MODE D’EMPLOI
Avant chaque utilisation, se laver soigneusement les mains et nettoyer l’appareil,
comme décrit au paragraphe « NETTOYAGE, ASSAINISSEMENT, DÉSINFECTION ». Le
nébuliseur et les accessoires sont uniquement à usage personnel an d’éviter les ri-
sques éventuels de transmission des infections. Lors de l’application, il est conseillé
de se protéger de façon appropriée contre les écoulements éventuels. Cet appareil est
approprié à l’administration de substances médicamenteuses et non, pour lesquelles
est prévue l’administration par aérosol, ces substances doivent être de toute façon
prescrites par le médecin
.
En présence de substances visqueuses, il peut être nécessai-
re de diluer avec une solution physiologique appropriée,
selon la prescription médicale.
1. Raccordez le cordon d’alimentation (A6) dans une
prise de courant ayant une tension correspondant à
celle de l’appareil. Celle-ci doit être placée de manière
à ce qu’il ne soit pas dicile d’eectuer le débranche-
ment du réseau électrique.
2. Verser le liquide à nébuliser (dispositif médical et/
ou médicament prescrit par le médecin) dans la par-
tie inférieure (C1.4) du
nébuliseur
ouverte. Introduire la partie supérieure (C1.2) du
nébuliseur
dans la partie inférieure (C1.4), fermer le
nébuliseur
en tournant la partie
supérieure (C1.2) dans le sens des aiguilles d’une montre.
3. Assemblez les accessoires, comme indiqué sur le ‘’Schéma de connexion’’.
4. Régler le sélecteur de nébuliseur pour la granulométrie souhaitée, comme décrit au
paragraphe « Modes d’utilisation du nebuliseur Clenny
®
A »
5. Asseyezvous confortablement en tenant en main le nébuliseur, posez l’embout buc-
cal sur la bouche ou bien utilisez l’embout nasal ou le masque. Si vous utilisez le
masque, posez-le sur le visage, comme illustré sur la gure (avec ou sans élastique),
de manière à ce que les bords adhèrent bien à la peau du visage.
6. Allumez l’appareil en appuyant sur l’interrupteur (A1) et inspirez et expirez le plus
profondément possible. Après avoir inspiré, il est conseillé de retenir la respiration un
instant de sorte que les petites gouttes d’aérosol inhalées puissent se déposer. Puis
expirer lentement.
7. Une fois l’application terminée, éteignez l’appareil et débranchez la che. Laver le
visage et rincer la bouche.
ATTENTION: Si un dépôt d’humidité important se forme à l’intérieur du tube (B) après
la séance thérapeutique, décrochez le tube du nébuliseur et séchez-le avec la ven-
tilation du compresseur; cette actionempêche d’éventue
lles proliférations de moisis-
sures à l’intérieur du tube.
APPAREIL
RESPIRATOIRE
VOIES
RESPIRATOIRES
SUPÉRIEURES
VOIES RESPIRATOIRES INFÉRIEURES
Section oro-
rhino-pharyngée
Trachée et bron-
ches primaires
Bronches secon-
daires Bronchioles
CONFIGURATION
NÉBULISEUR
Sans
Sélecteur
Sélecteur en
position 1
Sélecteur en
position 2
Sélecteur en
position 3
MMAD
(m) . (3) . (1) . (1) . (1)
Vitesse
(ml/min’) . (2) . (2) . (2) . (2)
Fraction
respirable < 5
m (FPF) 31.3%(3) 54.5%(1) 62.0%(1) 80.0%(1)
(1) In-vitro-Charakterisierung durch TÜV Rheinland Italia S.r.l., in Zusammenarbeit mit der Universität Parma und
in Übereinstimmung mit der Europäischen Norm für Aerosoltherapie-Geräte Norm EN 13544-1:2007 + A1. Weitere
Details auf Anfrage.
(2) Daten, die nach dem unternehmensinternen Verfahren Flaem I29-P07.5 erhoben werden. Die Werte der
Geschwindigkeit der Verabreichung können je nach Atemkapazität des Patienten variieren. Weitere Details auf
Anfrage.
(3) Daten, die auf der Grundlage der mit Malvern Spraytec ermittelten Werte berechnet und mit den Werten der
an der Universität Parma durchgeführten Tests verglichen wurden.

18
Lors de l’application, il est conseillé de se protéger de façon
appropriée contre les écoulements éventuels.
1. Introduire le vaporisateur (C6.3) dans le compartiment de
nébulisation (C6.4.1).Voir le schéma de raccordement.
2. Introduire la solution (10 ml max.) dans le compartiment de
nébulisation (C6.4.1) (g.A)..
3. Appliquer le séparateur (C6.2). Introduisez l’adaptateur na-
sal (C6.1). Voir le schéma de raccordement.
4. Raccorder la douche nasale à l’appareil au moyen du tube
(B) et du raccord (C7).Voir le schéma de raccordement.
5. Allumer l’appareil.
6. Rapprocher le nez en posant le trou de l’adaptateur à une
narine.
7. Pendant le traitement, il est préférable de laisser l’autre na-
rine, celle où la DOUCHE NASALE n’est pas posée, fermée
avec un doigt.
8. Actionner la DOUCHE NASALE en bouchant l’orice de distri-
bution (C6.5) (g. B) pendant l’inspiration et le libérer avant
d’expirer (g. B) ; pendant cette phase, pour aider l’expul-
sion du mucus, souler délicatement avec la narine traitée
directement dans la DOUCHE NASALE.
9. Recommencer les opérations du point 6. au point 8. pour
l’autre narine, en essayant de répartir uniformément la so-
lution entre les deux narines.
10. En présence d’enfants ou de personnes non autonomes,
qui ne sont pas capables de coordonner les diérentes phases du point 6 au point
8, il est conseillé d’exécuter l’application en changeant de narine toutes les 20 se-
condes environ et en faisant les pauses nécessaires à l’expulsion du mucus.
Masques SoTouch
Les masques SoTouch ont le bord externe réalisé
en matière souple biocompatible qui garantit une
excellente adhérence au visage, et sont de plus
dotées du Limiteur de Dispersion innovateur.
Ces
éléments caractéristiques qui le distinguent permet-
tent une plus grande adhérence du masque sur le vi-
sage et donc un apport correct du liquide à nébuliser
(dispositif médical et/ou le médicament prescrit par
le médecin).
Dans la phase inspiratoire la lan-
guette qui sert de Limiteur de Dis-
persion, se plie vers l’intérieur du
masque.
Dans la phase expiratoire la
languette qui sert de Limi-
teur de Dispersion, se plie
vers l’extérieur du masque.
Matériau souple
biocompatible
Fente limitative
de dispersion
A
C6.3
B
C6.5
C6.4.1
Découvrez la vidéo de
démonstration pour
l’assemblage de la
douche nasale
Avant chaque utilisation, se laver soigneusement les mains
et nettoyer la DOUCHE NASALE ainsi que les accessoires
comme décrit au paragraphe « NETTOYAGE, ASSAINISSEMENT,
DÉSINFECTION ». La DOUCHE NASALE et les accessoires sont
uniquement à usage personnel an d’éviter les risques éven-
tuels d’infection par contagion.
CLENNY®A DOUCHE NASALE
Table of contents
Languages:
Other Chiesi Medical Equipment manuals
