Optopol SOCT Copernicus REVO Quick start guide

Manufacturer:
OPTOPOL Technology Sp. z o.o.
ul. Żabia 42
42-400 Zawiercie
POLAND
www.optopol.com
REVO NX / SOCT Copernicus REVO
Installation/upgrade manual
Ver. 2.0 rev. E
This manual is dedicated for authorized
personnel only.

2
Copyright
© 2017 OPTOPOL Technology Sp. z o.o.
All rights reserved.
Installation manual
Date of issue of manual: July 2017
Date of review: July 2017
For Technical Service and support contact Optopol Technology Sp. z o.o. Service Department.
service@optopol.com.pl or Tel. +48 32 67 09 173 ext. 230
Before contact request make sure that you followed below manual step by step.
Contact details are available on www.optopol.com

3
Table of Contents
1 Introduction.......................................................................................................................................... 4
1.1 Proper steps selection! Must read!.............................................................................................. 4
1.2 Minimum computer system requirements .................................................................................. 5
1.1.1 Capture station..................................................................................................................... 5
1.1.2 Review station ...................................................................................................................... 5
2 Computer preparation ......................................................................................................................... 6
2.1 Connecting USB 3.0 communication cable .................................................................................. 6
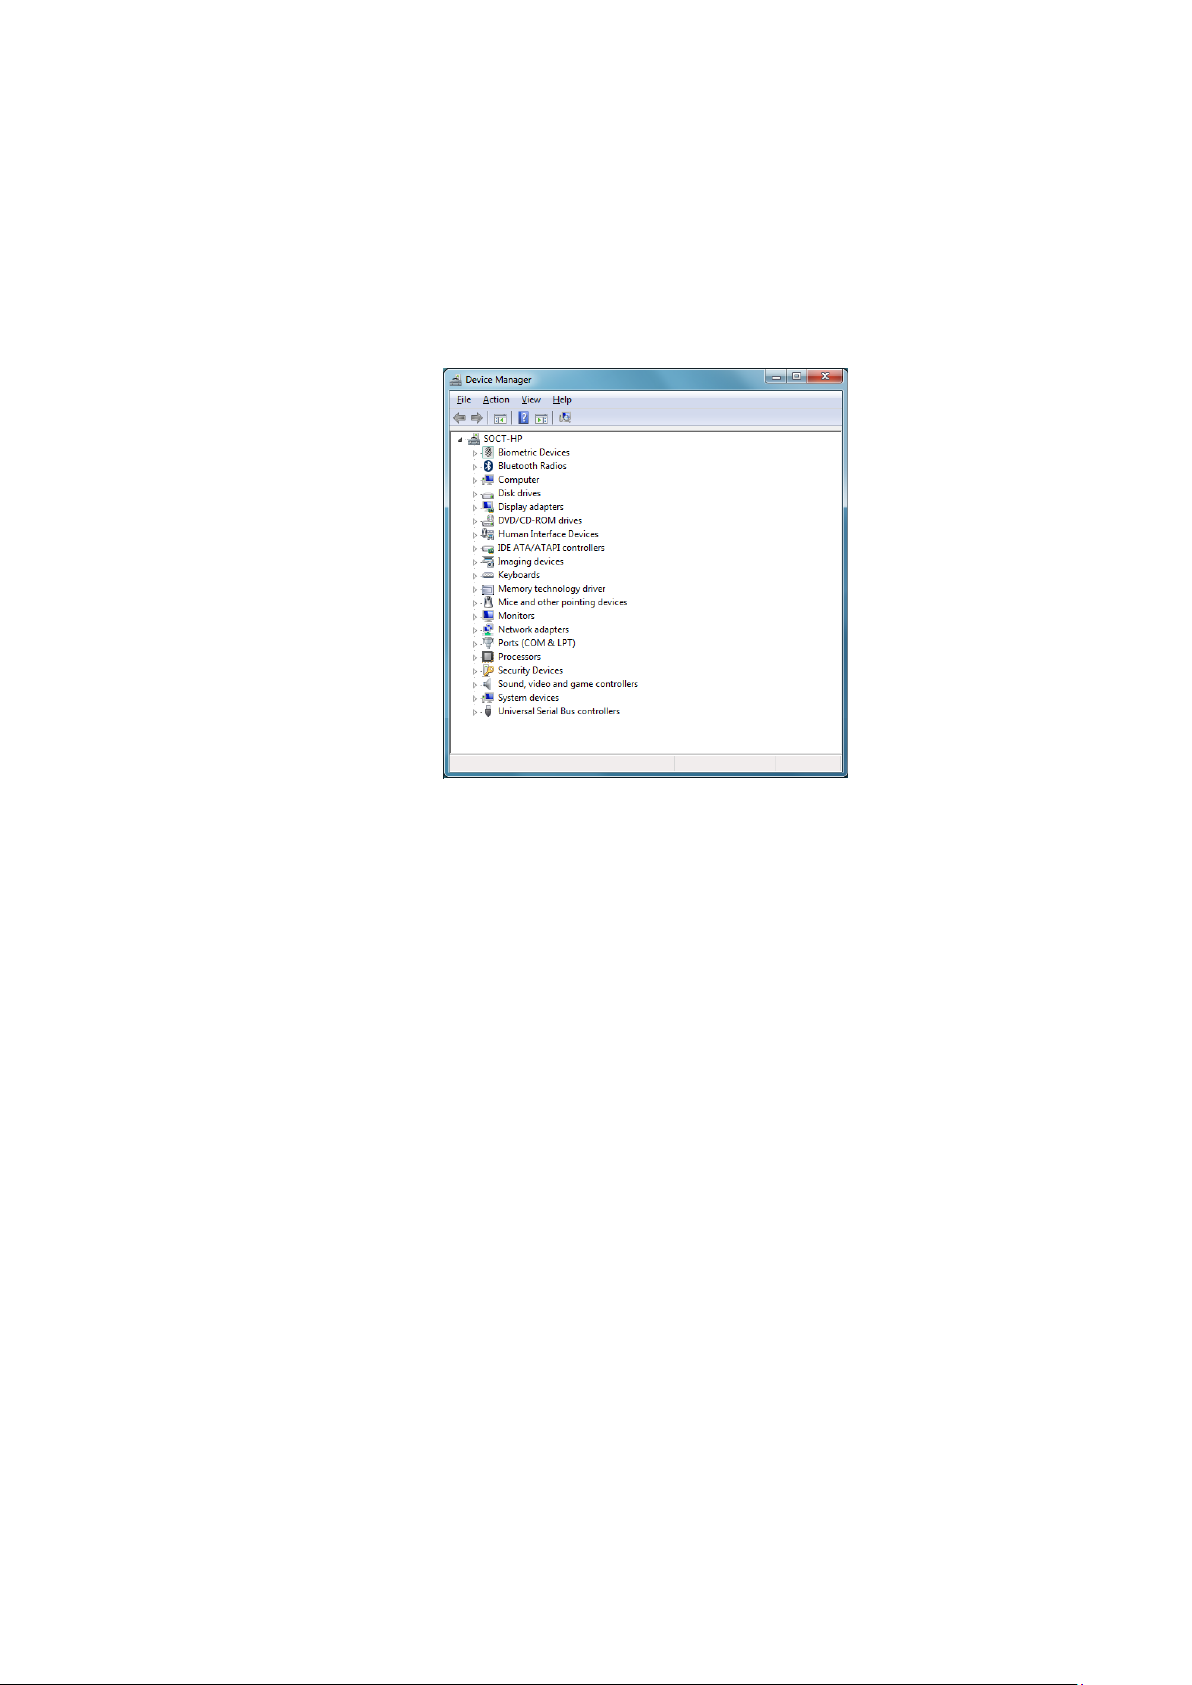
2.2 Motherboard drivers installation ................................................................................................. 7
2.3 Partition preparation.................................................................................................................... 7
3 OS Windows 7 configuration................................................................................................................ 8
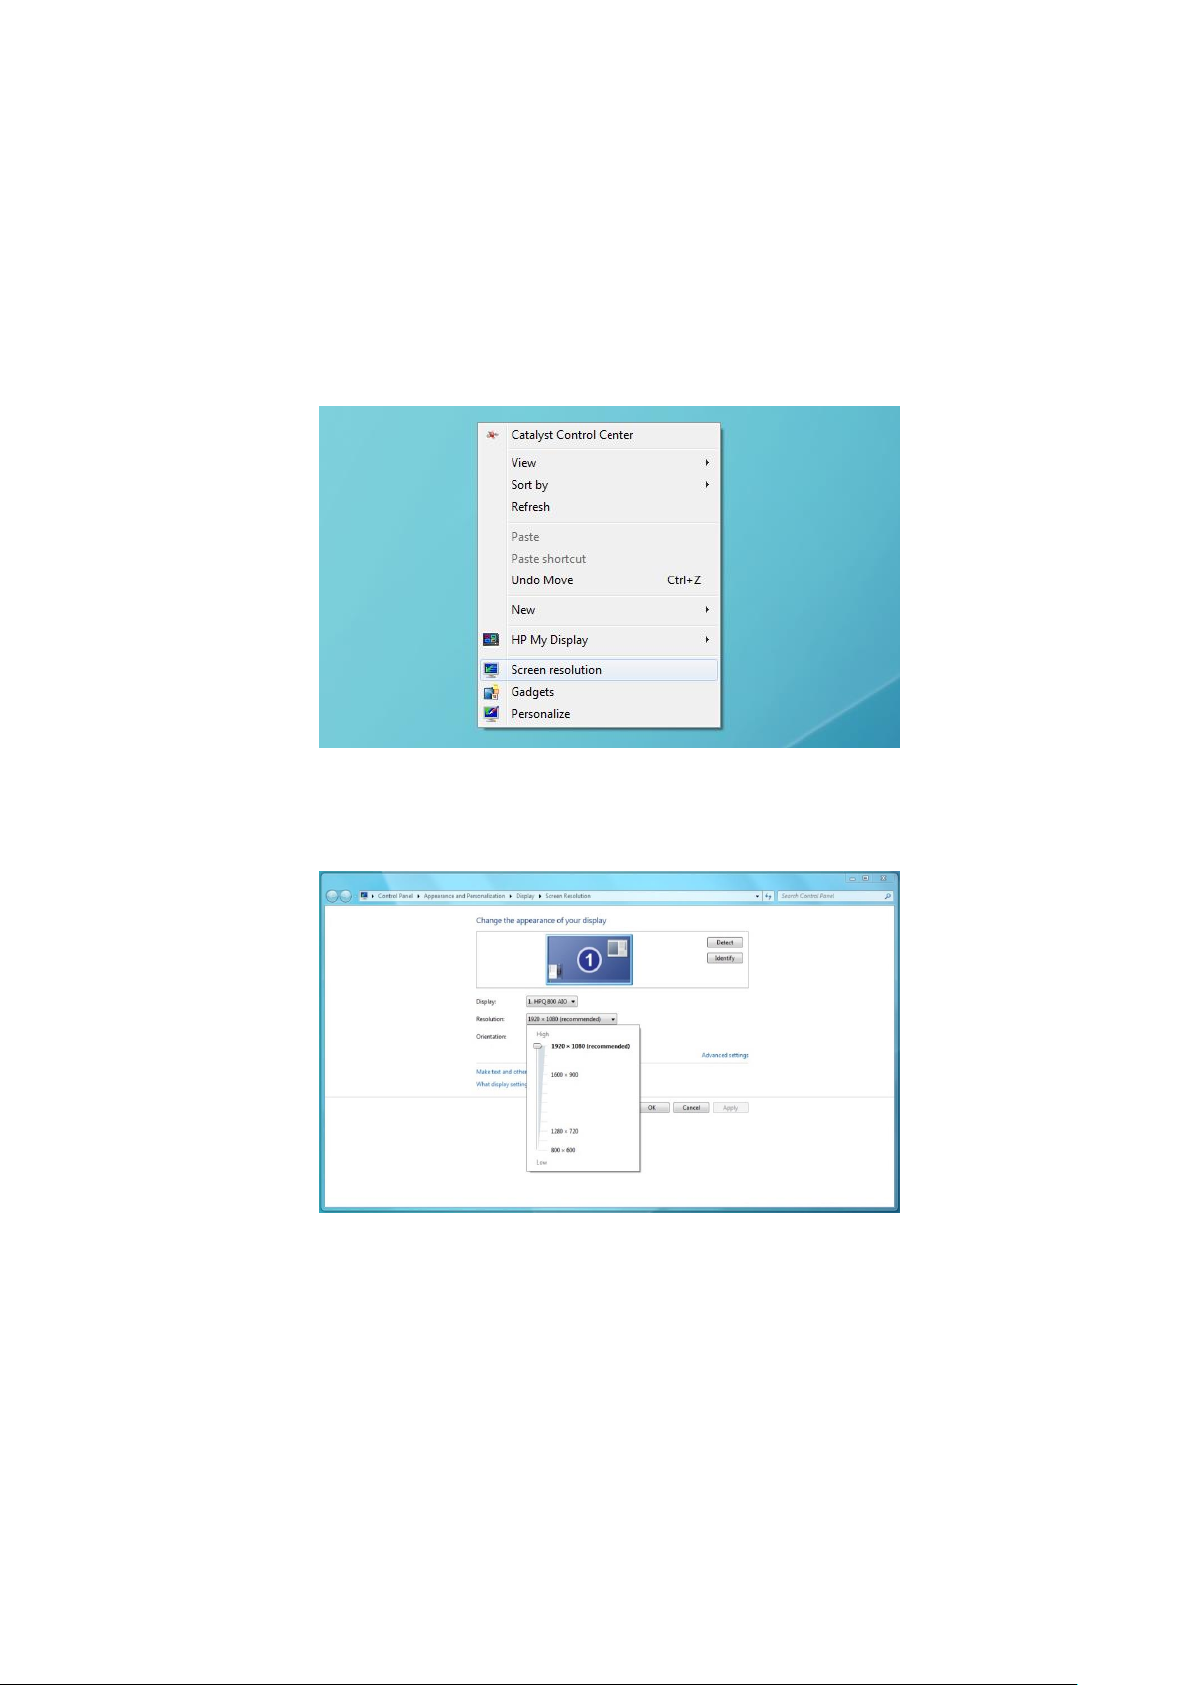
3.1 Screen resolution.......................................................................................................................... 8
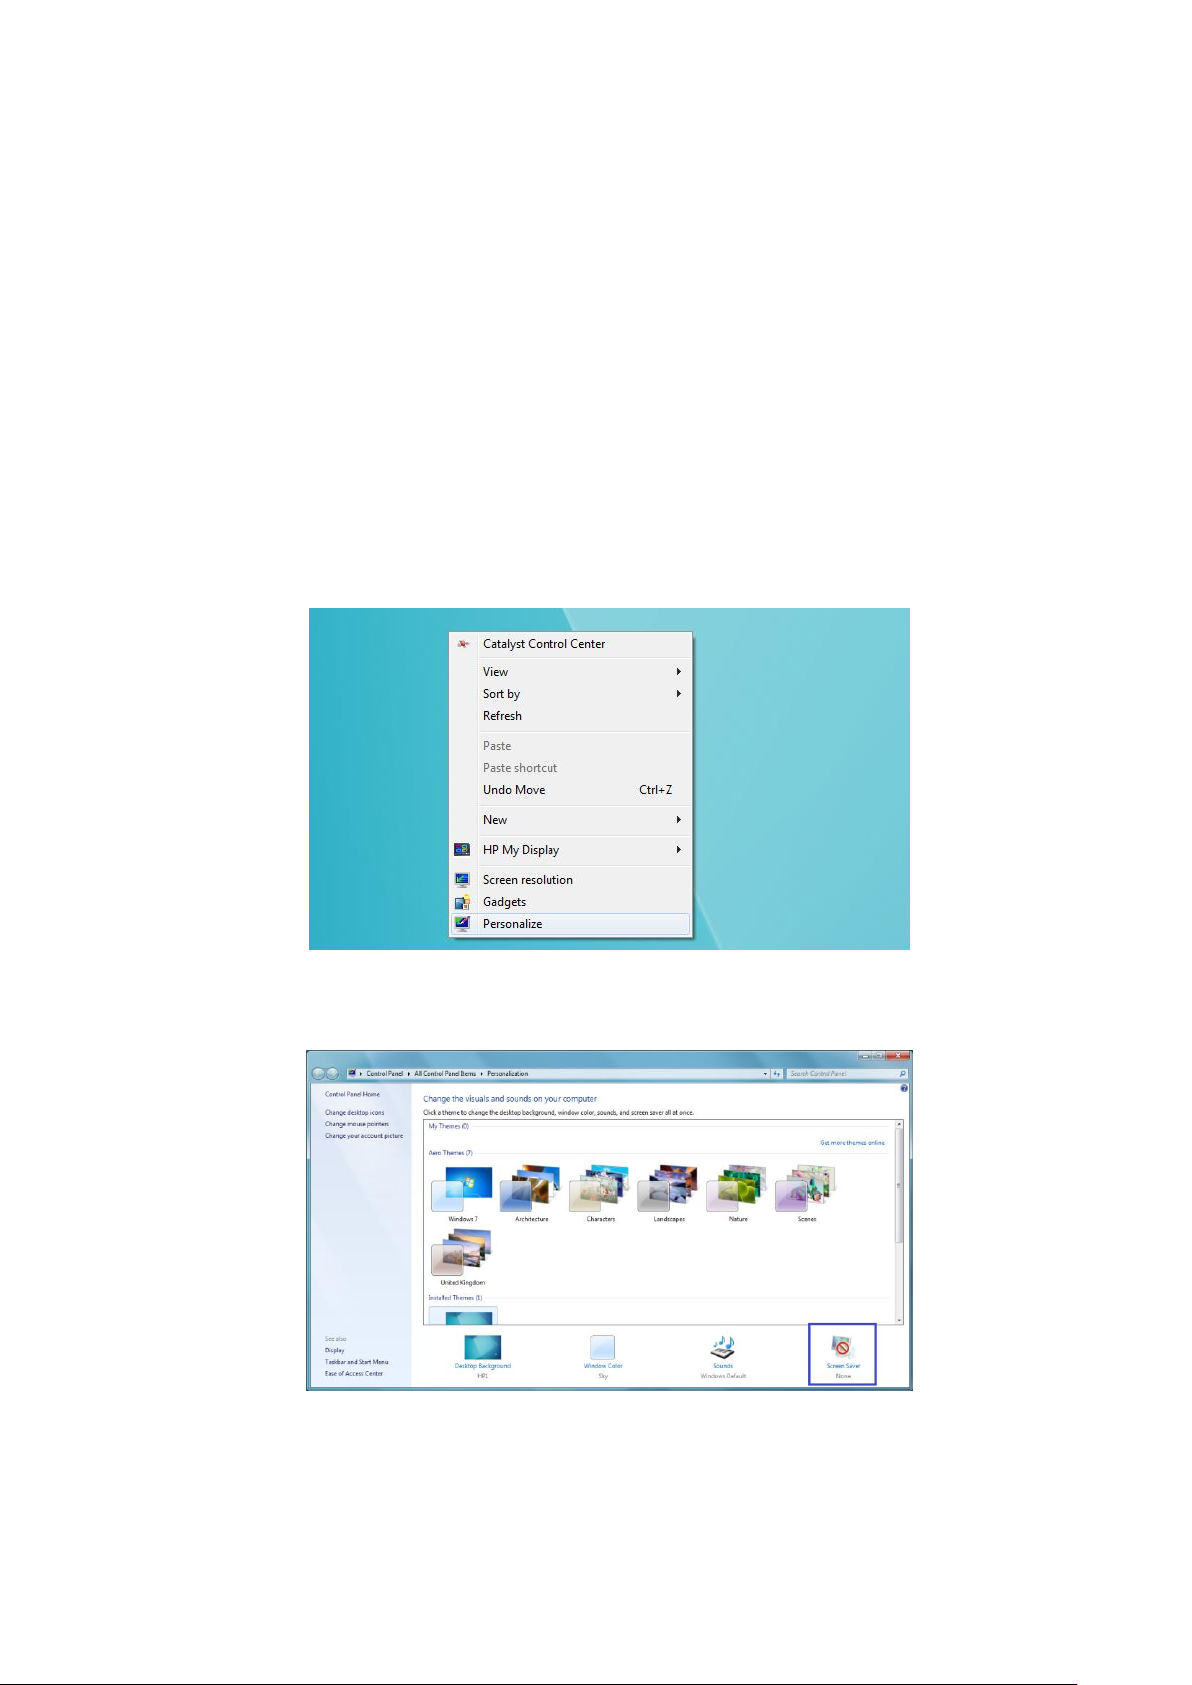
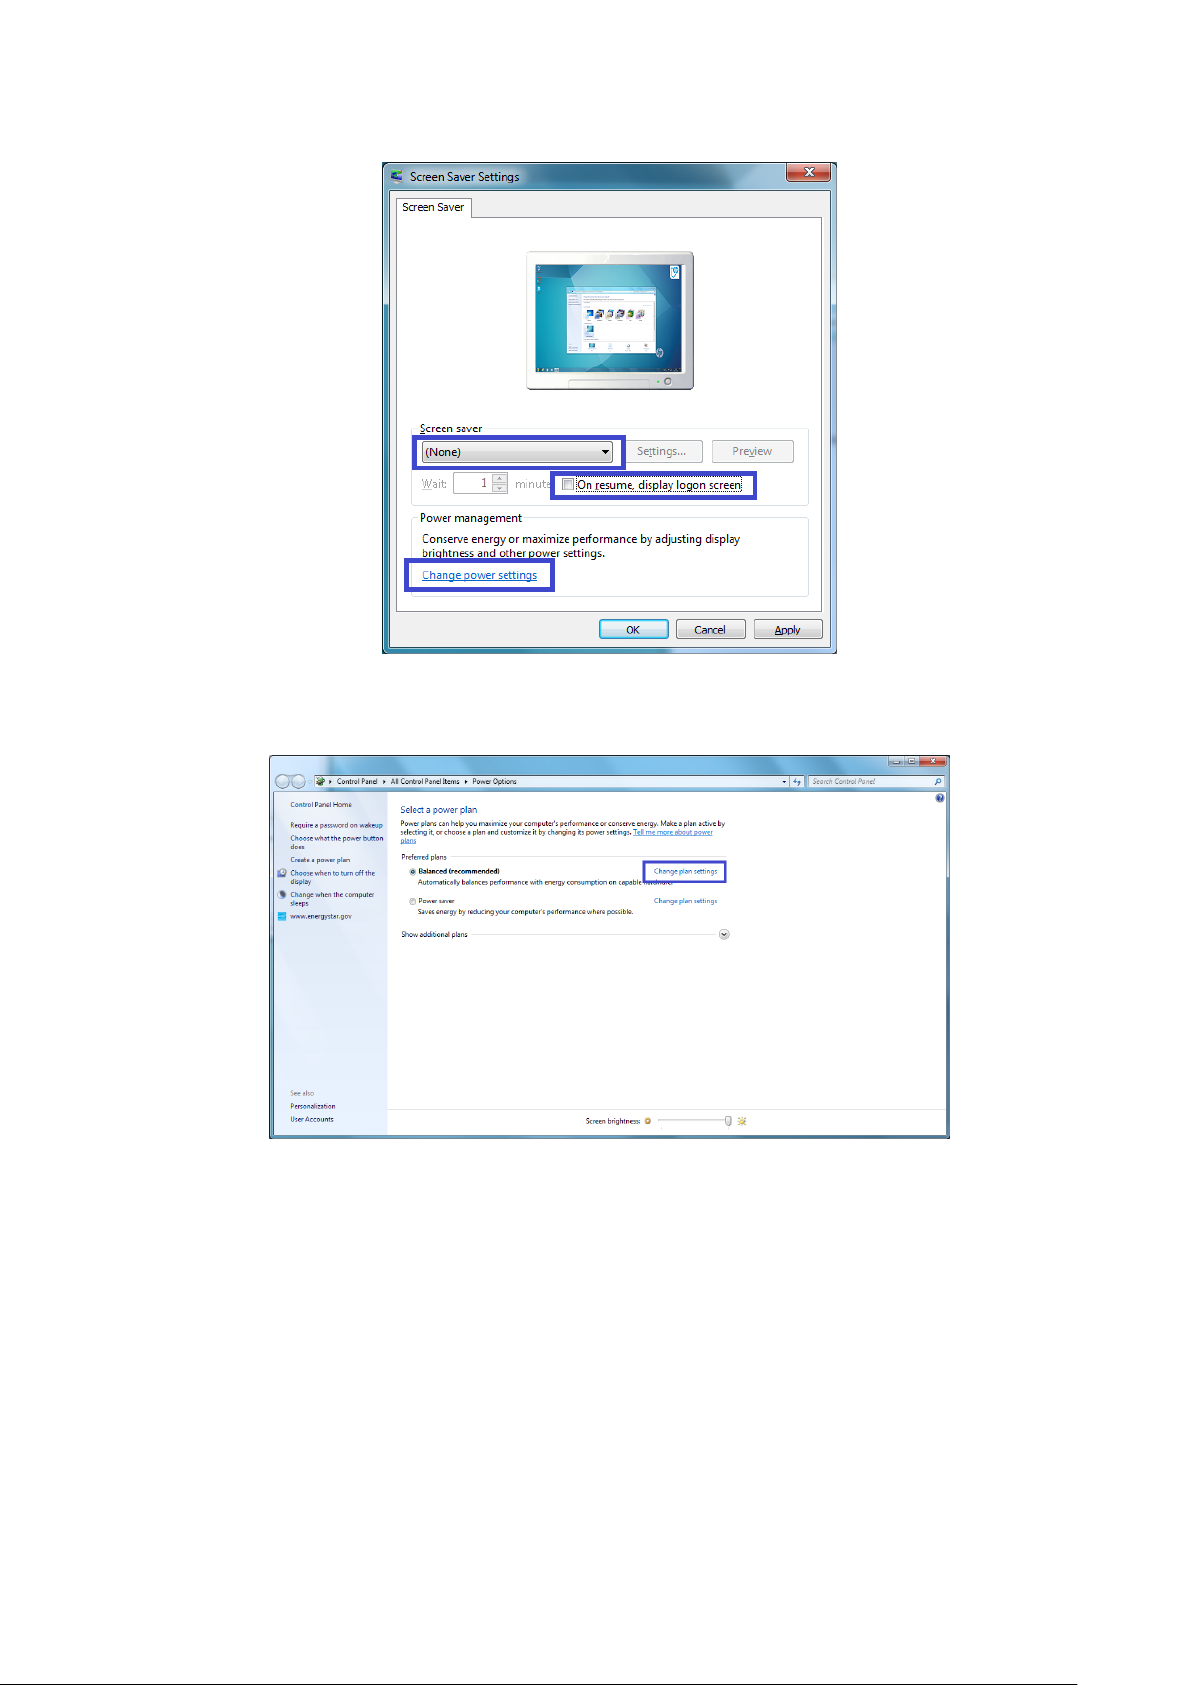
3.2 Configure Power balance plan and screen saver ......................................................................... 9
3.3 Windows Update........................................................................................................................ 13
3.3.1 Install Windows Updates.................................................................................................... 13
3.3.2 Disable automatic Windows updates................................................................................. 16
3.3.3 Switch off Action Center settings ....................................................................................... 16
3.3.4 Uninstall Windows 10 update reminder number KB3035583 ........................................... 17
3.4 Antivirus protection.................................................................................................................... 18
3.5 Configure Date format ............................................................................................................... 21
4 SOCT drivers installation .................................................................................................................... 23
4.1.1 Live preview camera driver ................................................................................................ 23
4.1.2 e2v camera ......................................................................................................................... 25
5 Software installation on Windows 7, 10... ......................................................................................... 28
6 SOCT Copernicus software configuration........................................................................................... 33
7 Networking......................................................................................................................................... 38
7.1 Firebird engine installation......................................................................................................... 39
7.2 MySQL Database engine installation.......................................................................................... 50
7.3 SOCT application settings for networking.................................................................................. 59
7.4 Setting on the viewing station.................................................................................................... 63
8 Troubleshooting ................................................................................................................................. 65
9 APPENDIX A ........................................................................................................................................ 66

4
1Introduction
This manual describes procedure of software and drivers installation on SOCT Revo and Revo NX
devices. The installation procedure is divided into four steps :
-Computer preparation (PC motherboard drivers installation, Intel drivers)
-Operating System configuration
-Drivers installation or upgrade on Device PC
-Software installation/upgrade and setup
1.1 Proper steps selection! Must read!
Before starting to operate SOCT application it is necessary to prepare the operating system, install SOCT
Copernicus REVO/ REVO NX drivers and install SOCT application. Depending on your situation please
select desired chapter to follow:
-First SOCT software installation on new PC
// SOCT REVO from sn. 1550539/R; SOCT REVO NX
Start from chapter 5
// SOCT REVO till sn. 1550538/R;
Start from APENDIX A than continue chapter 5
-Software upgrade from ver. 6.0.0 or 6.0.1 to ver. 7.1.0 or higher –start from APENDIX
Athen chapter 5 and recover all examinations directly from old software [data] folder
-Software upgrade from ver. 7.0.0 to ver. 7.1.0 or higher –start from APENDIX A then
chapter 5
-Software upgrade from ver. 7.1.0 to ver. 7.x.x higher –Start from chapter 5
NOTE:
For upgrade/ fresh installation of SOCT 7.1.0 or highier it is necessarily to perform camera firmware
upgrade. In case upgrade is not performed the PC will not recognize SOCT Revo device(DISCONECTED
status in software) Besides that it is mandatory to perform Windows OS update. Detailed manual is
located in APPENDIX A. For AllinOne G1 HP PC please contact service division.

5
1.2 Minimum computer system requirements
1.1.1 Capture station
Processor Intel® Core™ i7 3.0 GHz or higher
No of cores: 4 physical cores
RAM min. 16 GB, 32 GB recommended
Operating system Windows 7 Professional 64-bit, Windows 10 PRO 64bit ,
HDD Minimum 500 GB
CD/DVD Recordable
Graphic card NVIDIA chipset
Screen resolution: Minimum 1920 x 1080
Communication ports 1 available USB 3.0 port
2 available USB minimum 2.0 ports
Mouse Mouse Wheel
Touch screen Recommended
1.1.2 Review station
Processor Intel® Core™ i5 2.4 GHz or higher
No of cores: min. 2 physical cores, 4 logical
RAM min. 16 GB
Operating system Windows 7 Professional or Ultimate SP1 or later, Win 10
Professional 64-bits
HDD Minimum 80 GB
CD/DVD Recordable recommended
Screen resolution: Minimum 1920 x 1080
Communication ports 2 available USB minimum 2.0 ports
Mouse Mouse Wheel

6
2Computer preparation
2.1 Connecting USB 3.0 communication cable
1. Connect the USB 3.0 cable provided with the SOCT REVO to PC into fully supported USB 3.0 port.
Usually the USB 3.0 ports are blue inside. Make sure that USB 3.0 plug is tightly plugged in the
port. Secure the plug from any cable tension which can affect the loss of connection or
decrease of USB transmission speed.
NOTE: To avoid incidental losing USB 3.0 high speed connection we recommend to physically
secure the cable from physical tension or disconnecting. See image below.
All sockets and plugs are different so it is not possible to connect plugs improperly. The figure below
shows the rear panel view of SOCT Copernicus REVO.
Firstly connect USB cable make sure that cable holder screws are tightened, in the next step connect
power supply cables.
Power connector
USB 3.0 Type B
Fuses socket
Power switch

7
2.2 Motherboard drivers installation
1. Install all required drives provided by PC manufacturer. Note that in some cases default drivers
installed by OS Windows do not support USB 3.0 bridge host to allow Full speed USB 3.0
transmission. In this case update necessary drivers manually(use Pc producer website and look
for drivers update)
2. Before plugging in the REVO USB cable, make sure that all devices are properly installed in the
system. To verify it go to Start-> Control panel -> System -> Device manager. In case all devices
work properly there is not exclamation mark. The computer is ready to plug the REVO cable.
3. Sample of device manager with properly installed devices.
Before installing SOCT REVO device drivers we recommend first to configure the OS Windows.
2.3 Partition preparation.
It is recommended to prepare two logical partitions:
1. First partition for the Windows system. We suggest to assign 80 GB
2. Second partition for SOCT application and database recommended 900 GB.
3. Software allows to store examination data in multiply external network locations.

8
3OS Windows 7 configuration
To effect the procedure of preparation of operating system you need a user account with Admin
rights.
3.1 Screen resolution
1. The SOCT application requires a Full HD screen resolution of 1920 x 1024 pixels.
2. Click right mouse button on Desktop and select ‘Screen resolution’ item from submenu.
Or click Start Control Panel Appearance and Personalization Display Screen Resolution.
3. From submenu ‘Resolution’ select required resolution 1920 × 1080 pixels. Click on [OK] to save
settings.
NOTE: If your screen does not support Full HD resolution it will not be possible to work with the SOCT
Copernicus REVO device.

9
3.2 Configure Power balance plan and screen saver
1. SOCT Copernicus REVO device and application require modified power plan settings.
Set the screen saver, power options on the computer as shown in the table. Below, you will find
detailed instructions.
Items Settings
Screen saver None
Turn off the display Never
Put the computer to sleep Never
Turn off hard disks Never
When I press the power button Shut down
Start menu power button Shut down
2. To configure Screen Saver settings, click Right Mouse Button on Desktop, then from submenu
select ‘Personalize’ item.
Or go to Start Control Panel All Control Panel Items Personalization.
3. Click on ‘Screen Saver’ icon.

10
4. In section ‘Screen saver’ select ‘(None)’ item, Uncheck check box ‘On resume, display logon
screen’. Then click on ‘Change power settings’.
5. On a ‘Balanced’ recommended power plan, click ‘Change plan settings’
6. Click on ‘Change advanced power settings’

11
7. Click on [Hard disk] → [Turn off hard disk after] → select “Never”.
8. Then, click on [Sleep] → [Sleep after] → select “Never”, [Allow hybrid sleep] →select “Off”,
[Hibernate after] →select “Never”.
9. Then, click on [Display] → [Turn off the display after] → select „Never”.

12
10.To apply modified power plan, click on [OK] button.
11. In a ‘Turn off the display’ field select “Never” and in ‘Put the computer to sleep’ select ‘Never’.
Click on [Save changes] button to close the window.

13
3.3 Windows Update
To run SOCT Copernicus REVO application properly it is required to install the newest Microsoft
Windows updates. After finishing updating the Windows it is required to switch off automatic updates.
3.3.1 Install Windows Updates
1. Click Start Control Panel System and security Windows Update.
2. Click on [Yes] button in User Account Control window.
3. In window ‘Windows Update’, click [Check for updates] button.
NOTE: Before Windows Update process starts, network connection should be established.
NOTE: For proper antivirus protection it is mandatory to perform OS update once a
month. Then automatic updates should be switched off again.

14
4. System starts checking for updates. It may take a few minutes.
5. At the end, system displays information about number of available updates. To start installation,
click on [Install updates] button.
6. System starts downloading updates. The process starts automatically and may take several
minutes.
7. At the end of downloading process, confirm the License Terms by checking ratio button ‘I accept
the license terms’. Then, click on [Finish] button.
8. System starts installation process. This process is automatic. It may take a few minutes.

15
9. Repeat steps from 3 to 8 until information ‘There are no updates available for your computer’
appears.
10.Install also optional updates especially if they are referring to USB ports communication.

16
3.3.2 Disable automatic Windows updates.
1. After installing updates it is required to switch off Automatic Updates.
Click on Start → Control Panel → System and Security → Windows Update → Change settings. at
Form ‘Important updates’ list select ‘Never check for updates (not recommended)’ item and click
on [OK] button.
3.3.3 Switch off Action Center settings
1. Switch off reminder messages.
In order to Switch off the reminder messages.
Click Start Control Panel System and Security Action Center, then click on ‘Change Action
Center settings’.
Note! For proper antivirus protection it is mandatory to perform OS
update once a month using manual mode.

17
2. Uncheck check boxes ‘Windows Update’, ‘Check for updates’ and ‘Virus protection’. To continue,
click on [OK] button.
3.3.4 Uninstall Windows 10 update reminder number KB3035583
In case Device and software will be used on Windows 10 below point is not applicable.
For safety reasons it is recommended to remove tool Windows 10 upgrade reminder.
1. In order to delete information to free upgrade to Windows 10 operating system. Click on Start
Control Panel Programs Programs and Features View Installed Upgrades. From list of
installed actualizations find package number KB3035583.
2. Click right mouse button on the “Update for Microsoft Windows (KB3035583)” package and
select ‘Uninstall’.
3. Click on [Yes] button to continue uninstallation process.
4. Wait until uninstallation process is finished.
5. After uninstallation process is finished, restart the computer.
6. Open Windows Update window. Click Start Control Panel System and security Windows
Update. Click [Check for update] and wait for system check of available updates for this computer.

18
7. On the list of available updates to install find package number KB3035583. Click right mouse
button, then from submenu select ‘Hide update’. Click [OK] to close this window.
3.4 Antivirus protection
It is recommended to use Antivirus protection.
IMPORTAINT NOTE: Each antivirus protection software has to have exceptions for SOCT installation
folder and all SOCT software components. All SOCT software components should be marked as
trusted.
You can use e.g. freeware Microsoft Antivirus program Microsoft Security Essentials.
Verify with clinic IT department the security policy before starting installation.
1. To install the program go to web page https://www.microsoft.com/en-
us/download/details.aspx?id=5201 or Start program provided on the Memory stick
\Other\Microsoft Security Essential\ MSEInstall.exe file
1. When installation of Microsoft Security Essentials starts, click on [Yes] button in User Account
Control window.
2. Click on [ Next > ] button in Microsoft Security Essentials window.

19
3. Click on [I Accept] button to confirm the License Terms.
4. Select ‘I do not want to join the program at this time’ radio button, then click [ Next > ] button.
5. Select check box ‘Scan my computer for potential threats after getting the latest updates’, then
click on [Finish] button.

20
6. Click on [Yes] button in User Account Control window.
7. Update process starts automatically. It can take a few minutes.
8. After update process, the scanning of your computer starts automatically. It can take a few
minutes.
Other manuals for SOCT Copernicus REVO
2
This manual suits for next models
1
Table of contents
Other Optopol Medical Equipment manuals

Optopol
Optopol SOCT Copernicus User manual

Optopol
Optopol SOCT Copernicus User manual

Optopol
Optopol SOCT Copernicus REVO User manual

Optopol
Optopol SOCT Copernicus + User manual

Optopol
Optopol SOCT Copernicus HR User manual

Optopol
Optopol REVO nx User manual

Optopol
Optopol SOCT Copernicus REVO User manual