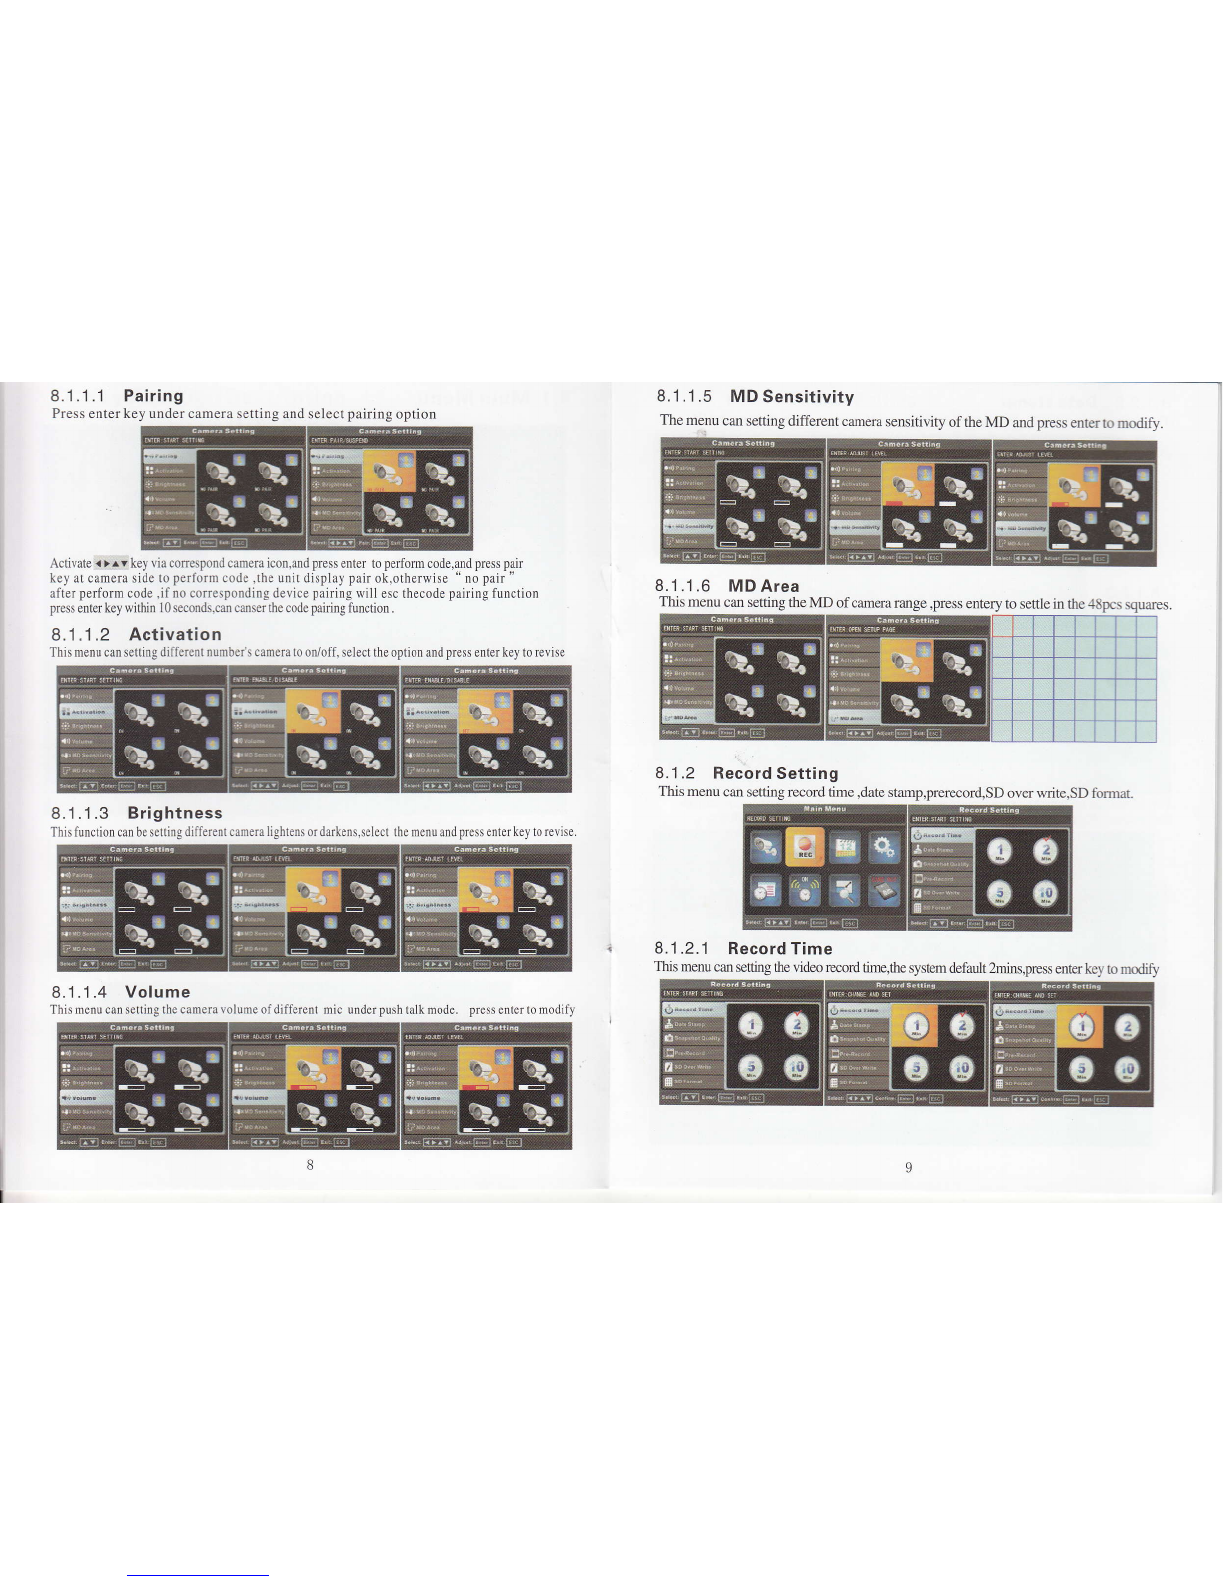
chinavasion CVYH-I395 User manual

Op eraltion Guide
2.AGHz Digital Wieeless DVR
fff;
The Graphies Included Are Subject To Minor Change Without Notice

r rrarr^ yrJu rur Puruilcruilr9 tJur Pruuuur.u,
please before using the product caref ully read the
instruitions,
1. lntroduction
This product is digital wireless security system with low
cost, the camera uses a dynamic detection technology, SD
card recording, it supports single and 4 at the same time
display and video. You can manually and moving objects
1. lntroduction....'.-.. .....................1 automatically record.
2l Features ....................1 Scope of application: warehouses, shopping malls, home
3. packing List.......'.... '....................2 security' care for children and the elderly'
4. Diagram. ............"""'2
5. Structure """"""""""3 2. Features
6. osD""" """"""""""5 ' Digital wireless 2.4 GHz camera & DVR
7. Keys Function..... .......6 ' 7 lnch high resolution TFT digitalied display
CONTENTS
. Digitalwireless long range transmission
. Digital video recorder with motion detection
. support system information displayed on the screen
(OSDXunction;
1 1 . Failure diagnosis"" """""""""19 . supports the NTSC/PAL video output;
.::"#:ffii+;i;.:"",.

,*o
,' il
o
3. PACKING LIST
O oigital wlreless Camera
(2 z Inch Digital Wireless Receiver
O Lithium Battery For Receiver
@ Adapter For Camera
@ Adapter For Receiver
(OAntenna
Q)video/Audio Cable
@ usb cable
4. DIAGRAM
Colour video
lnage sensor LL. .
Dc plug connects
to power adapter
2.4GHz wireless
transmission to receiver
Power adapter
connects to any socket
I
5. STRUCTURE
5.1 Camera:

7 lnch Lcd Display
5.2 RECEIYER:
Antenna
-
POWER LED
POWER ON/OFF
SD CARD
USB
A/V OUT
POWER JACK
CHARGE
6. OSD
No Scil Mode.
Camera No. View Mode Camera Signal
\ " -
' t Battery volue
:,,';n:it;liii:.tl"i:, .ji;i;,;,2
I
.... a.,rt:. L!: a,:'jaat li::;:)
::tlii;:.ri;i::L.,.,. ..,,,..." "- ...,.,..,,,,. ..."=...._. i!t:i:t;l video Mode
: ::: : : : : ::
tI
Preview Mode:,;:iNo Sen Md.: j:.q*a moa", :;s* voa"
Keys
Speaker
SPLIT
ESC
UP
RIGHT
DOWN
MENU
REC
Recording PIay pause
Battery Cover
Brace
LEFT
Video Mode

7. Key Function Description
7.1 SPLIT:preriew Mode Switch
7.1 .1 t'to Scan Mode
7.1 .2 ouao uoae
7.1 .3 Scan uode
7.2 ESC:esc
7.3 UP DOWN:
7,3.1 ln The Noscan Mode lsCameraSwitchjng Function
7 .3,2 ln The Main Menu ls The Up Down Function
7.4 LEFT RIGHT
7.4..1 ln The Main Menu ls The Left Right Function
7 .4.2 hf he Preriew Mode ls The Volume Control Function
7.5 ENTER:menu Enter
7.6 MENU:main Menu
7.7 REC Record Record Stop
7.7.1 ln The Preriew Mode ls The Record And Stop Function
7 -7 .2lnf heYideo Playback mode ls Paused f unction
8. Menu
this menu provide 8 oplions,customer can make a selection based on the
buttons at the bottom ofihe scyeen prompts as following:
L'amera SeLting
Record Setting
llecord Trigger Sett ing
Systefi Srrttlng
Evonr Li-sr
Alamr Swiich
Par//Ti l r,/Zoon
iiD Capaci tJ-"/'Xpdate FW
8.1 Main Menu
After Activate a different icon by tl,,.;i key p."ss enter key to next step -press esc
key to return last step.
8.1.1 Camera Setting
Under this menu can setting pairing activation,brigtness,volume,MD area function

8.1 .1 .1 Pairing
Press enter key under camera setting and select pairing option
Activate<)^rkeyviaconespondcameraicon,andpressenter toperformcode,andpresspair
key at camera side to perform code .the unit display pair ok,otherwise " no pair "
after perform code ,if no corresponding device pairing wjll esc thecode pairing function
press enter key within I 0 seconds.can canser the code pairing function .
8.1 .1 .2 Activation
This menu can setting different number's camera t0 0n/0ff, select the option and press enter key to reyise
8.1.1.3 Brightness
This function can be setting different camera lightens or darkens.select the menu and press enter key to revise
8.1 .1 .4 Volume
Ihismenucansettingthecamerarolumeofdifferent mic underpushlalkmode. pressenlertomodify
8.1.1.5 MD Sensitivity
The menu can setting different camera sensitivity ofthe MD and press enrer to modify.
8.1.1.6 MD Area
This menu can setting the MD of cmera range ,press eniery to settle in the -18pcs squares.
8.1 .2 Record Setting
This menu can setting record time ,date stamp,prerecord,SD over write,SD fomat
8.1 .2.1 Record Time
This menu can setting *re video record time,fie system default 2lnins,press enter key to modif)

8.1 .2.2 Date stamp
This option can set wheether har,ing the date stamp in video files ,use the enter key to modify
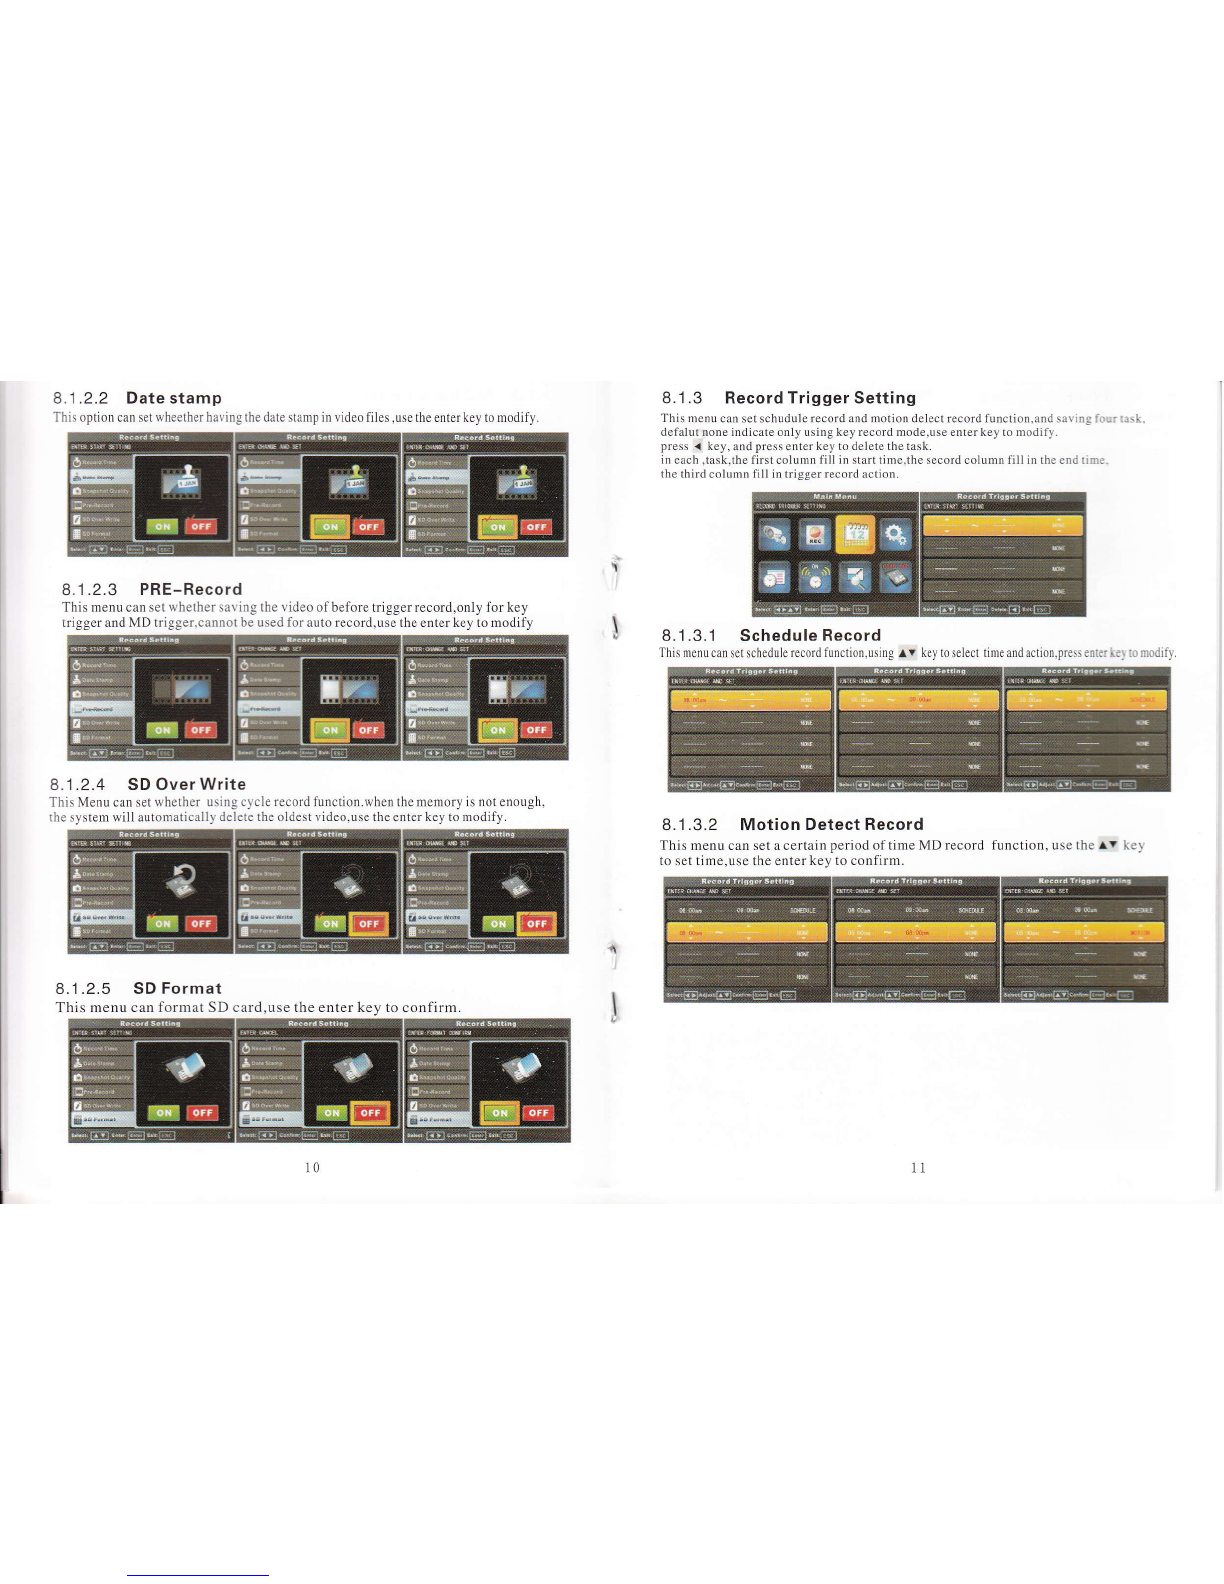
8.1.2.3 PRE-Record
This menu can set whether sar ing the video of before trigger record,only for key
trigger and MD trigger.cannot be used for auto record,use the enter key to modify
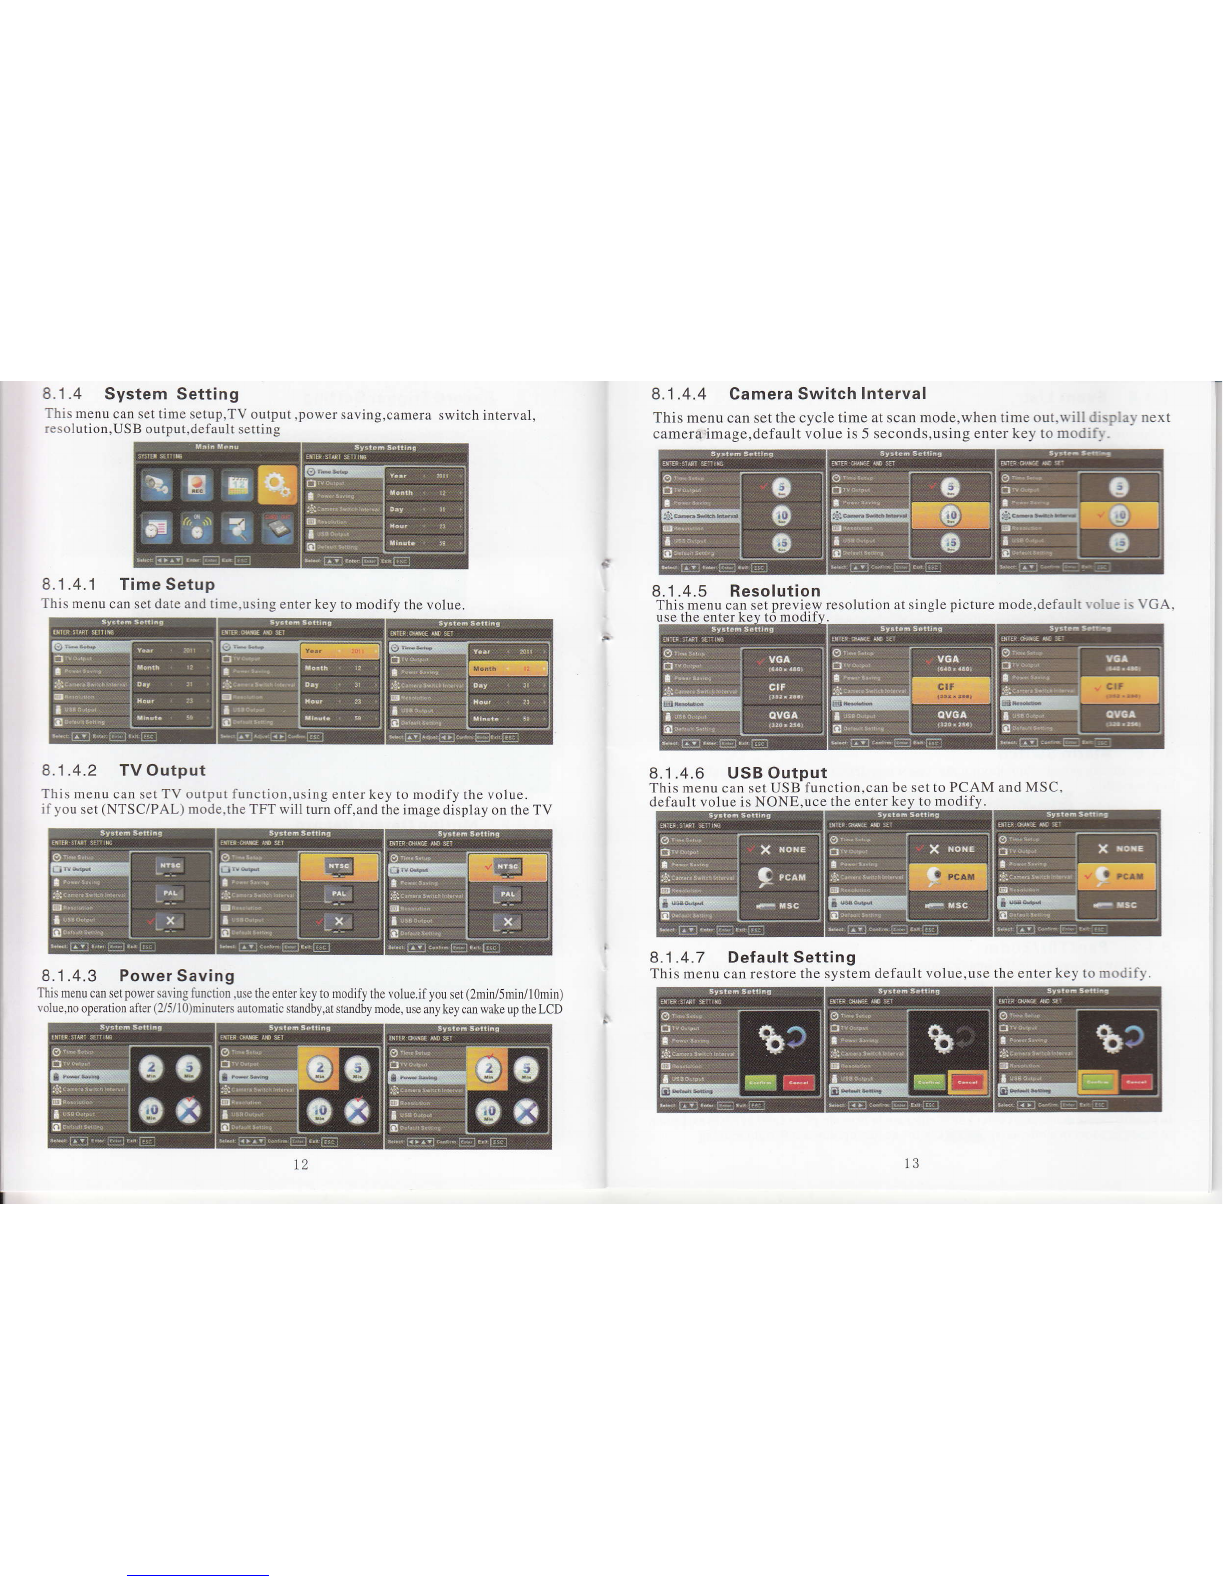
8.1 .2.4 SD Over Write
ThisMenucansetwhether usingcyclerecordfunctjon.whenthememoryisnotenough,
the system will automaticalll'delete the oldest video.use the enter key to modify.
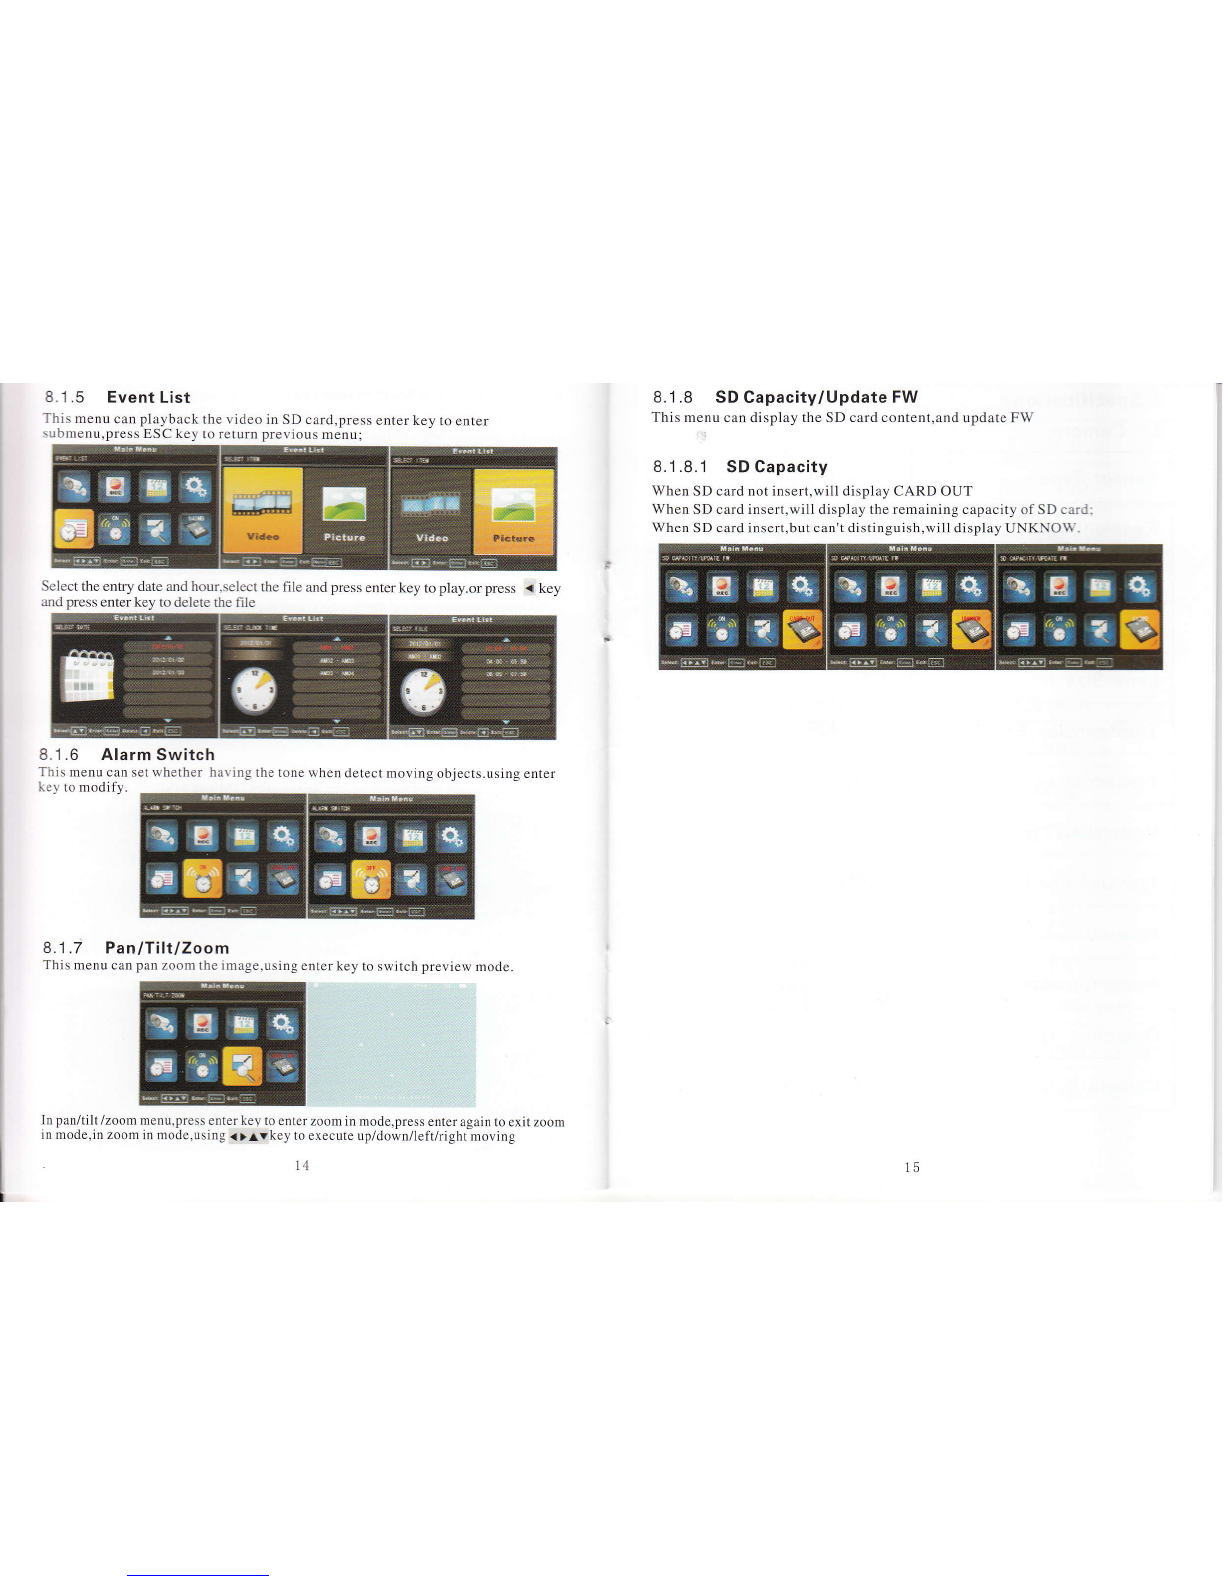
8.1 .2.5 SD Format
This menu can format SD card,use the enter key to confirm
8.1 .3 Record Trigger Setting
Thi s menu can set schudule record and motioo delect record function,and sa\ ln! : a:: :..1
defalut trone indicate olly using key record mode,use enter key to modifl' .
press < key, and press enter key to delete the task.
in each ,task,the first column iill in start time,the secord column fill in the end ri n:.
rhe third columil lill in rrigger record action.
8.1.3.1 ScheduleRecord
This menu can set schedule record function,using l.v key t0 select time and action.press enter i:r :r modifl'
8.1 .3.2 Motion Detect Record
This menu can set a certain period oftime MD record function, use the ,aY ke\
to set time,use the enter key to confirm.
10

8.1 .4 System Setting
This menu can set time setup,TV output,power saving,camera switch interval,
resolution,USB output,default setting
8.1.4.1 Time Setup
This menu can set date and time.using enter key to modify the volue
8.1 .4.2 TV Output
This menu can set TV output function,using enter key to modify the volue.
if you set (NTSC/PAL) mode.the TFT will turn off,and the image display on the TV
8.1.4.3 Power Saving
This menu cm set power saving function ,use the enter key to modify the volue.if you set (2min/5min/1Omin)
Yolue,no operation after (2/5/10)minuters automatic standby,at stmdby mode, use my key cm wake up the LCD
8.1 .4.4 Camera Switch lnterval
This menu can set the cycle time at scan mode,when time out.u ill dispiar next
camera image,default volue is 5 seconds,using enter key to modiil.
8.1.4.6 USB Output
This menu can set USB function,can be set to PCAM and MSC,
8.1 .4.7 Default Setting
This menu can restore the system default volue,use the enter key to modifl
8.1 .4.5 Resolution resolution at single picture mode,default volue is VGA,
default volue is NONE.uce the enter kev to mod
L3

8.1.5 Event List
This menu can playback the video in SD card,press enter key to enter
submenu.press ESC key to return previous menu;
Select the entry date md hou,select the file and press enter key to play.or press i key
and press enter key to delete the hle
8.1 .7 Pan/Tilt/Zoom
This menu can pan zoom the image,using enter key to switch preview mode
8.1.8 SD Capacity/Update FW
This menu can display the SD card content,and update FW
8.1.8.1 SD Capacity
When SD card not insert,will display CARD OUT
When SD card insert,will display the remaining capacity of SD card:
When SD card insert,but can't distinguish,will display UNKNO\\'.
In pan/tilt /zoom menujpress enter key to enter zoom in mode,press enter again to exit zoom
in mode,in zoom in mode,using <> vkey to execute up/down/lefthight moving
14
8.1.6 Alarm Switch
fhis menu can set whether having the tone when detect moving objects.using enter
key to modify.
15

9. Specifications
9.1 Camera: 9.2 Receiver
LCD 7" TFT
LCD resolution 800 x 480
Receiving Frequency lSM2400-2483MH2
Modulation Type GFSK
Receiving Sensitivity <-80dBm
Battery Type Lithium Battery
Battery Capacity 1020 mah
Video Output 1.0 Vpp
Audio Output 1.SVpp
Video Format NTSC/PAL
Storage Type SD Card
Card Maximum Capacity 32 GB
Power Supply DC 5V
Power Consumption 1000ma(charge)
Dimensions 200mmx117mmx20mm
Operating Temperature -10" C-+60' C
Sensor Type: Colour cmos
Resolution 640x480 ( VGA )
Lens Focus 3.6mm
Viewing angle 70"
Lens Size 1/4"
Transmission Frequency lsm 2400 -2483MH2
Transmission Power 23dBm
Modulation Type GFSK
Transmission Range 1 00m - 300m
Power Supply DC5V
Power Consumption daytime:300mA
night: 700mA
Operating Temperature -'l 0' C - +60' C
Camera Size 1 1Omm x 58mm x 58mm

10. Matters need to be noticed
O tne product should be placed where is stable , windy ,
air-dry, non-sunshine ,non strong magnetic and
non-dusty;
@ Don't clean the surface with chemicals but with soft and
clean dry cloth;
@ Oon' t press several buttons at the same time;
@ f ne outdoor and indoor unit must be matched with
appointed specified models and cannot match with
others that are not our products.
@ Do not disassemble the machine without authorization,
if the need for fault repair, please contact the distributor
or the company's technology department.
11. Failure diagnosis
Defec' Judgement Operation
Unable to
start the
product
lf turn the switch to the "ON"? Turn the swiur bltEOl{
lf the power of Li-ion batteries is nol
enough? To charge tE tirr
batteries
lf connect the power adaptor? To conneci tE p*r
adaptor
Unable to
charge
lf the plug of power adaptor correctly
plug into the charging slot?
Re-connect the deYi-s
and power adaptor
lf the power adapter has been
connected to the 110-24OV AC?
Re-insert the plug so tB
power supply conre*d
to AC power adatrr
Speaking
state no
voice
lf the volume is adjusted to be the
least?
To adjust the volurne b be
suitable
The image
is flashing
or noise
lf the receiver is close to ry set ,
fluorescent lamps , mobile phone ,
which has electronical and magnetic
wave?
Keep the devices 6tE
things which h6
electronical and merElb
wave
The
receiver
shows no
signal
image
lf the camera doesn't connect the
power? To connect the ouEoo.
device power
lf the camera is far away from the
indoor phone?
Keep the distance wiE*r
60 meters (with mufii{r,ail
barrier case)
EU Etrvironmat l Protetior
wste eleqical produG shouid not be
dispGed of wirh household wa,te, pletre
reSle where facilities si$.. Cheet wirh
your Locl Authoriry or retailer for r
18 t9
Other chinavasion DVR manuals