chinavasion CVJI-E65 DMP10 User manual

Full-HD HDMI Media Player
USER’S MANUAL
Please read this User’s Manual carefully before using this product
and keep this manual for future reference.
DMP10

Table of Content
Getting Started.....................................................................................................1
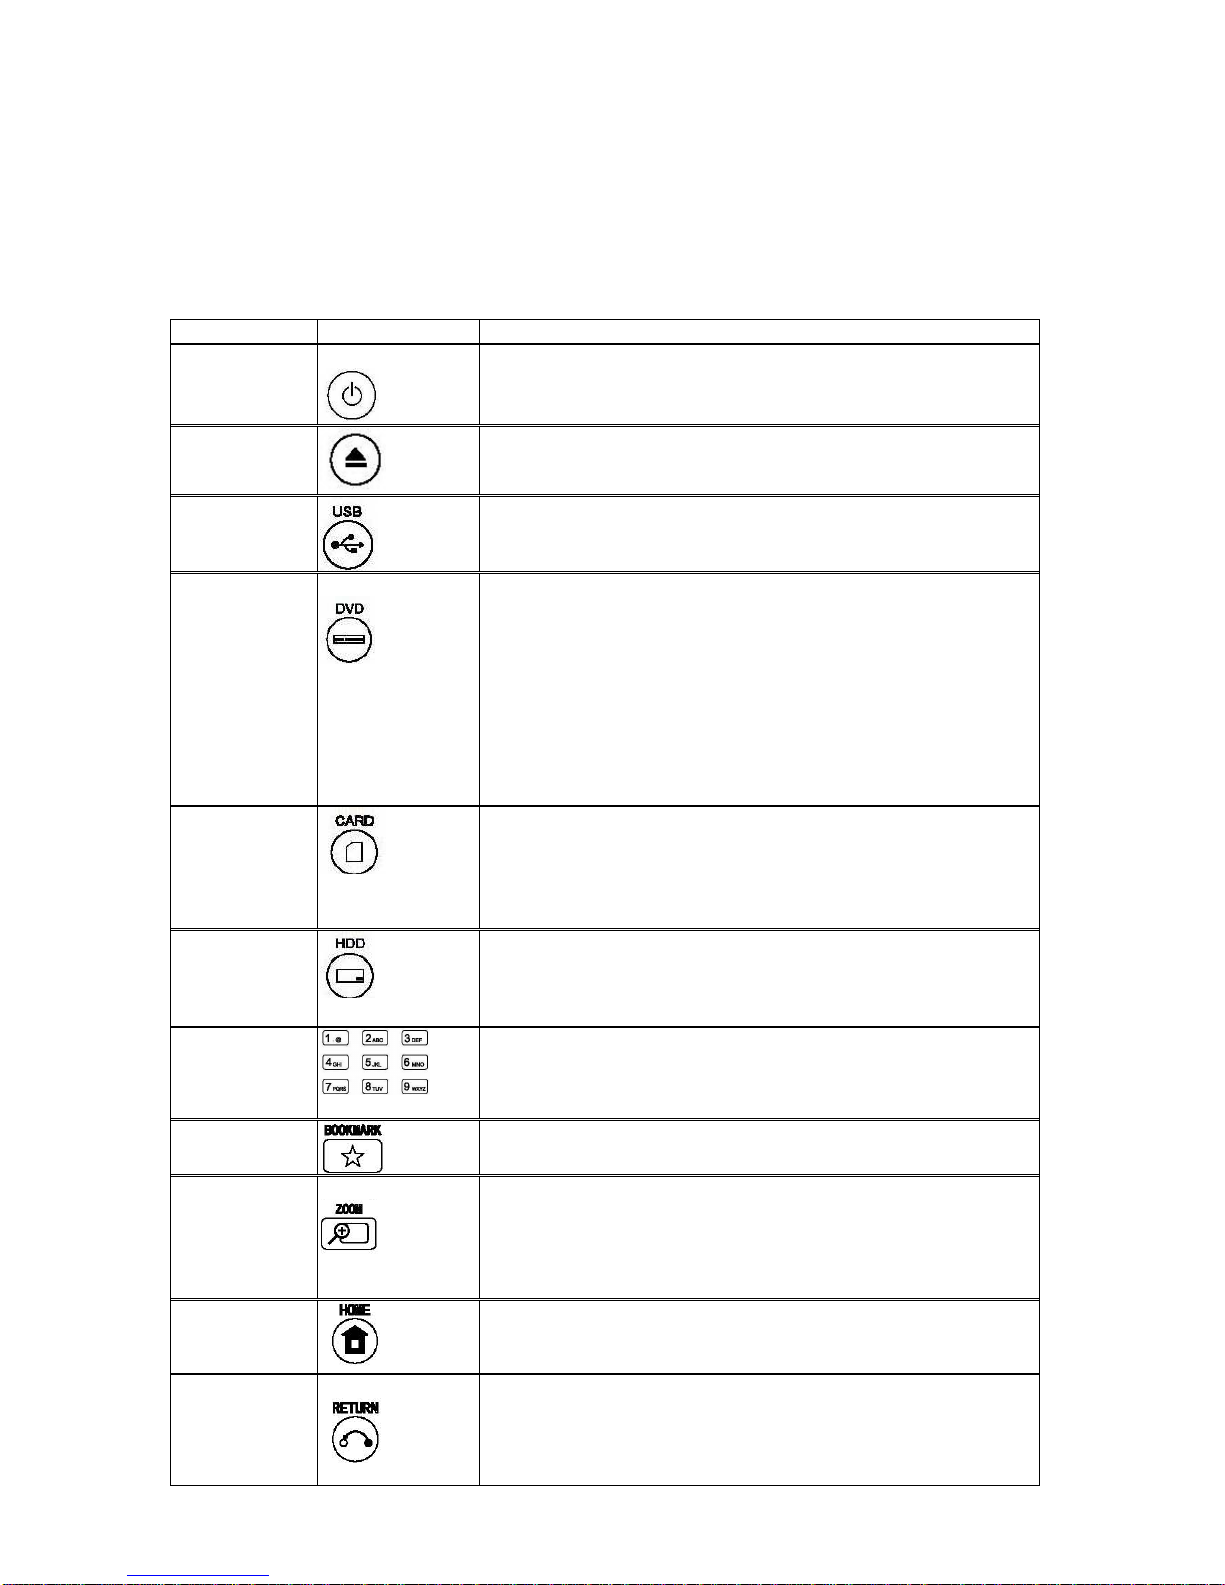
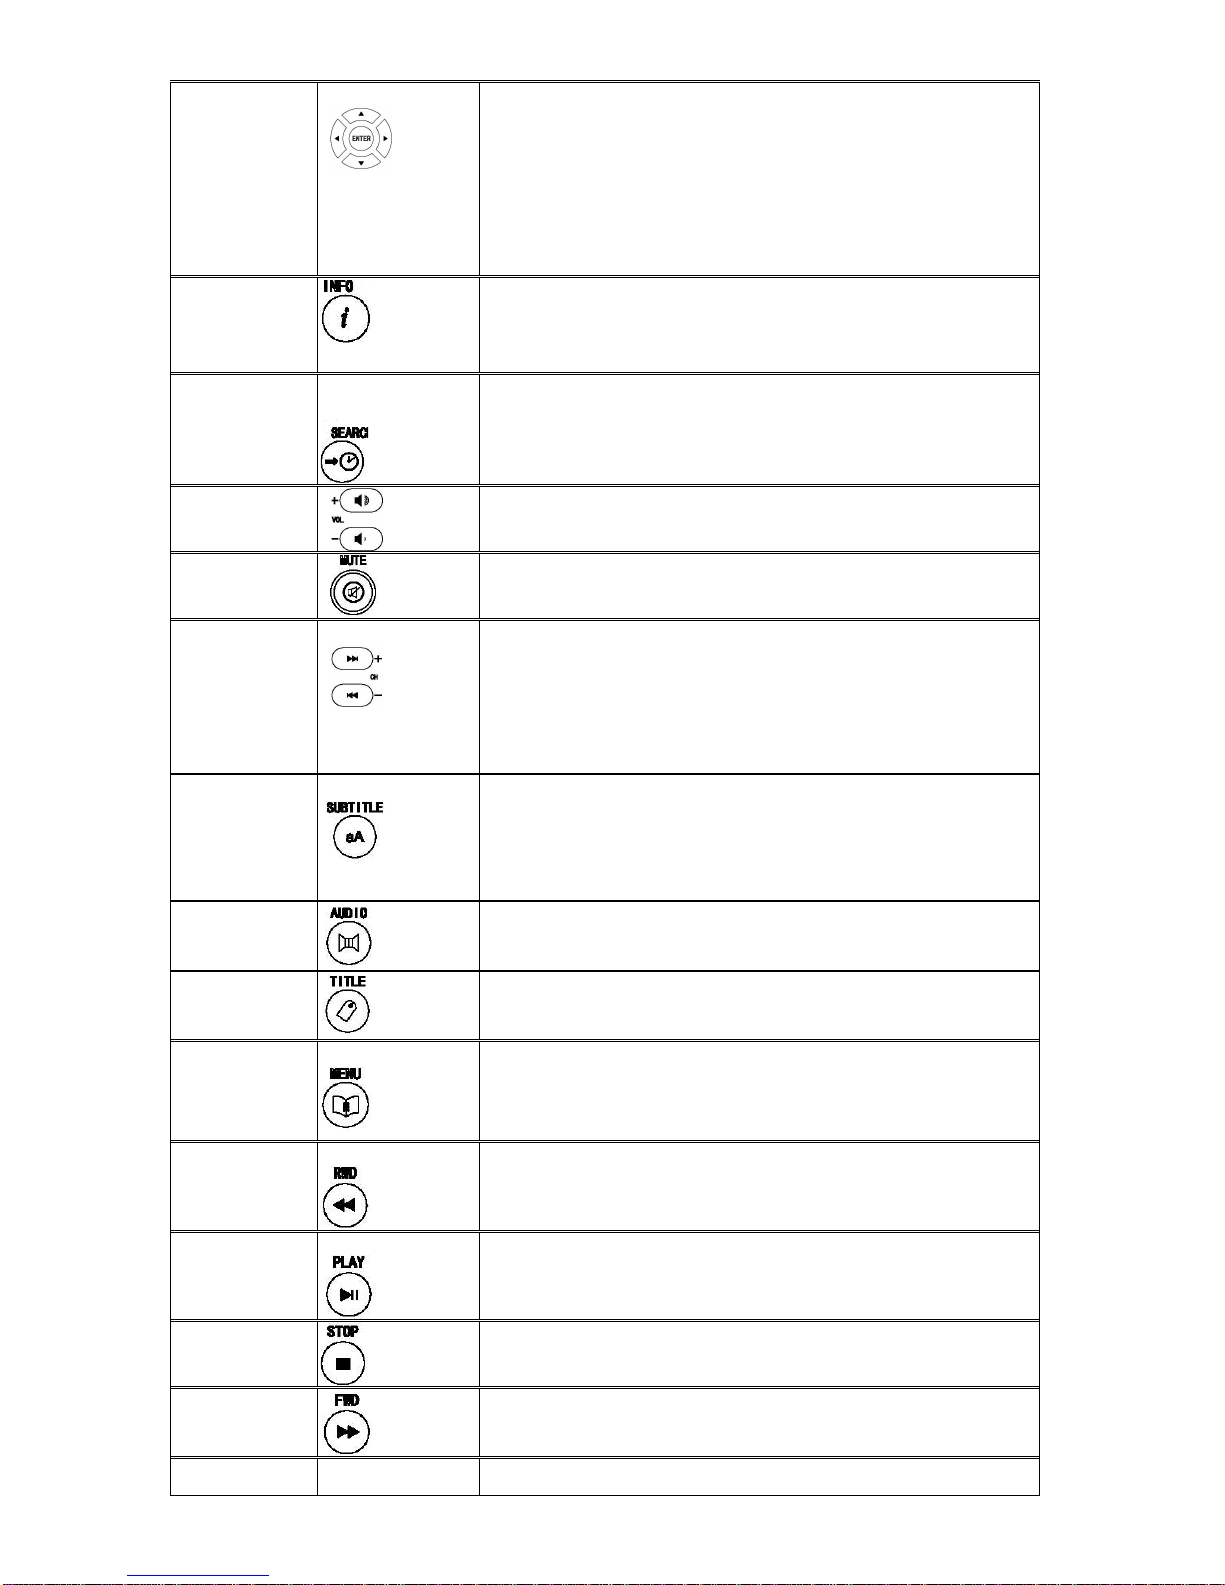
The Remote Controller..........................................................................................1
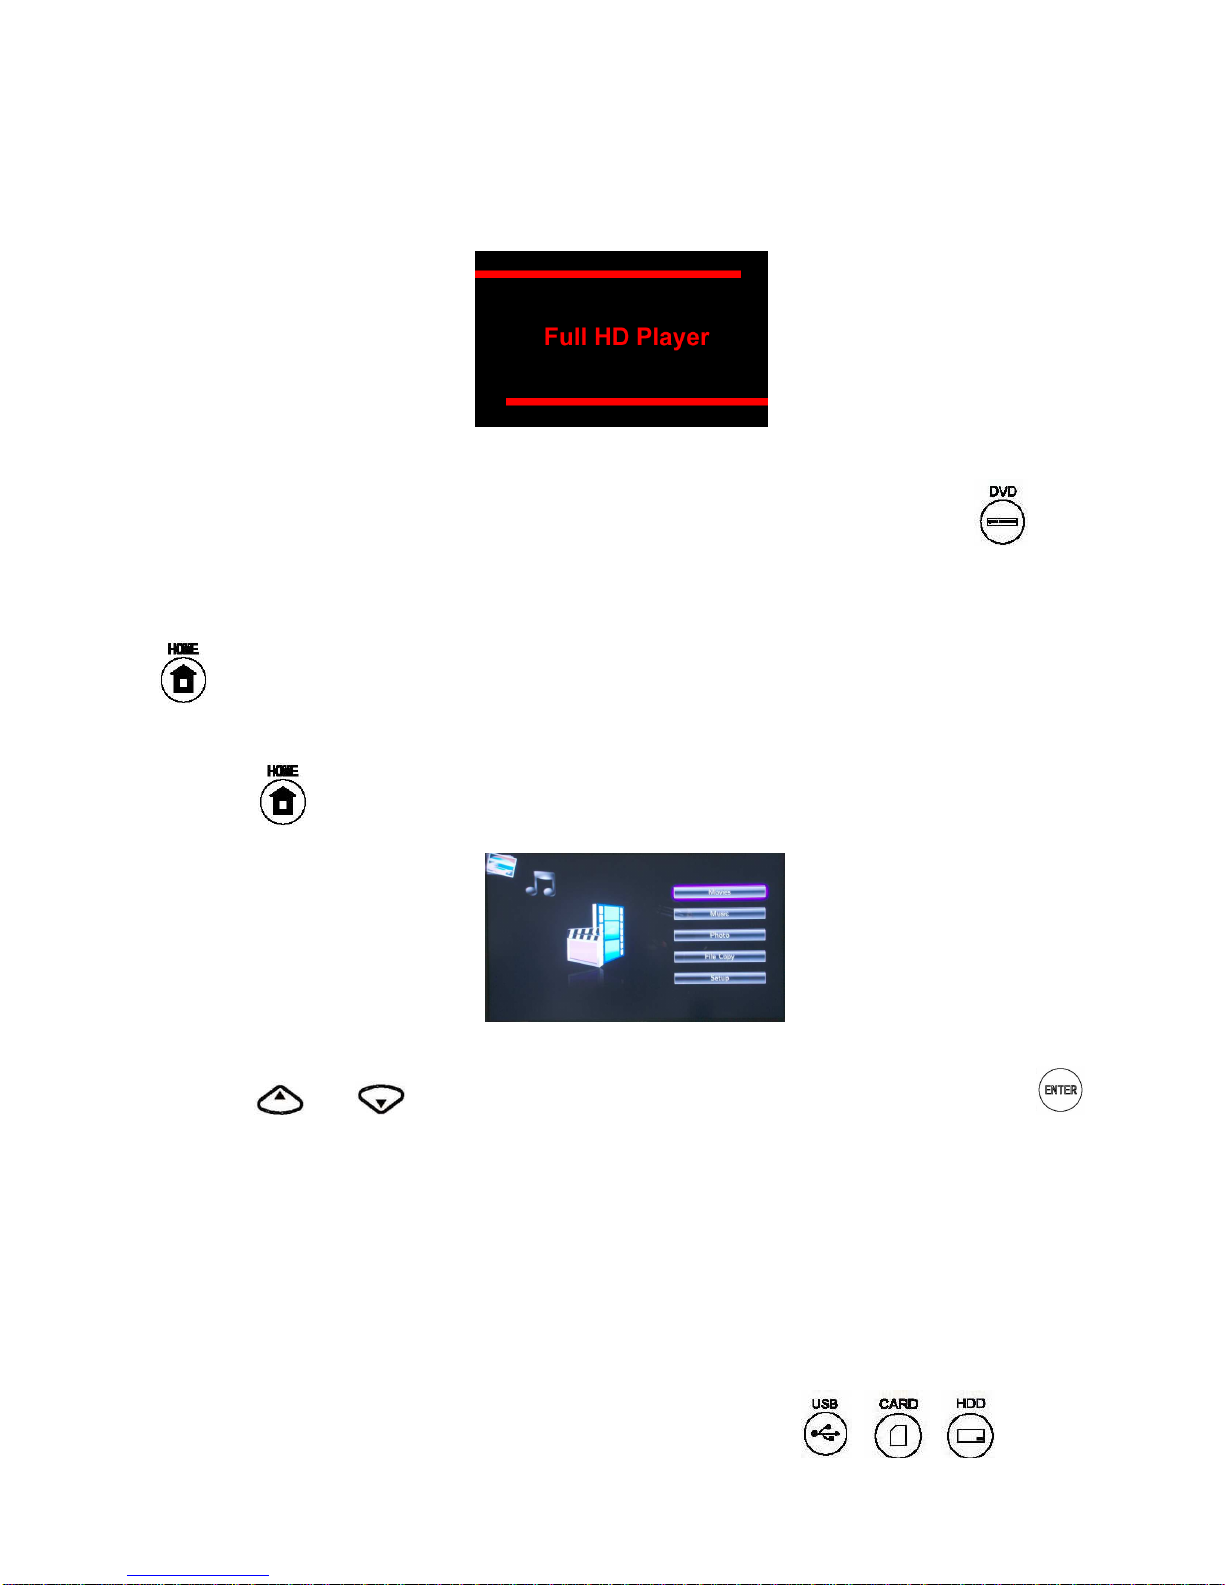
Menu Introduce....................................................................................................4
Start-up Screen.....................................................................................................4
DVD player Menu..................................................................................................4
Media Center Menu...............................................................................................4
File Copy Menu.....................................................................................................4
File Browser Menu................................................................................................4
Setup Menu...........................................................................................................5
DVD Player Menu.................................................................................................6
Open/Close...........................................................................................................6
Play.......................................................................................................................6
Stop.......................................................................................................................6
Media Center Menu..............................................................................................7
MOVIE...................................................................................................................7
MUSIC...................................................................................................................7
PHOTO .................................................................................................................7
FILE COPY ...........................................................................................................7
SETUP..................................................................................................................7
Setup Menu..........................................................................................................8
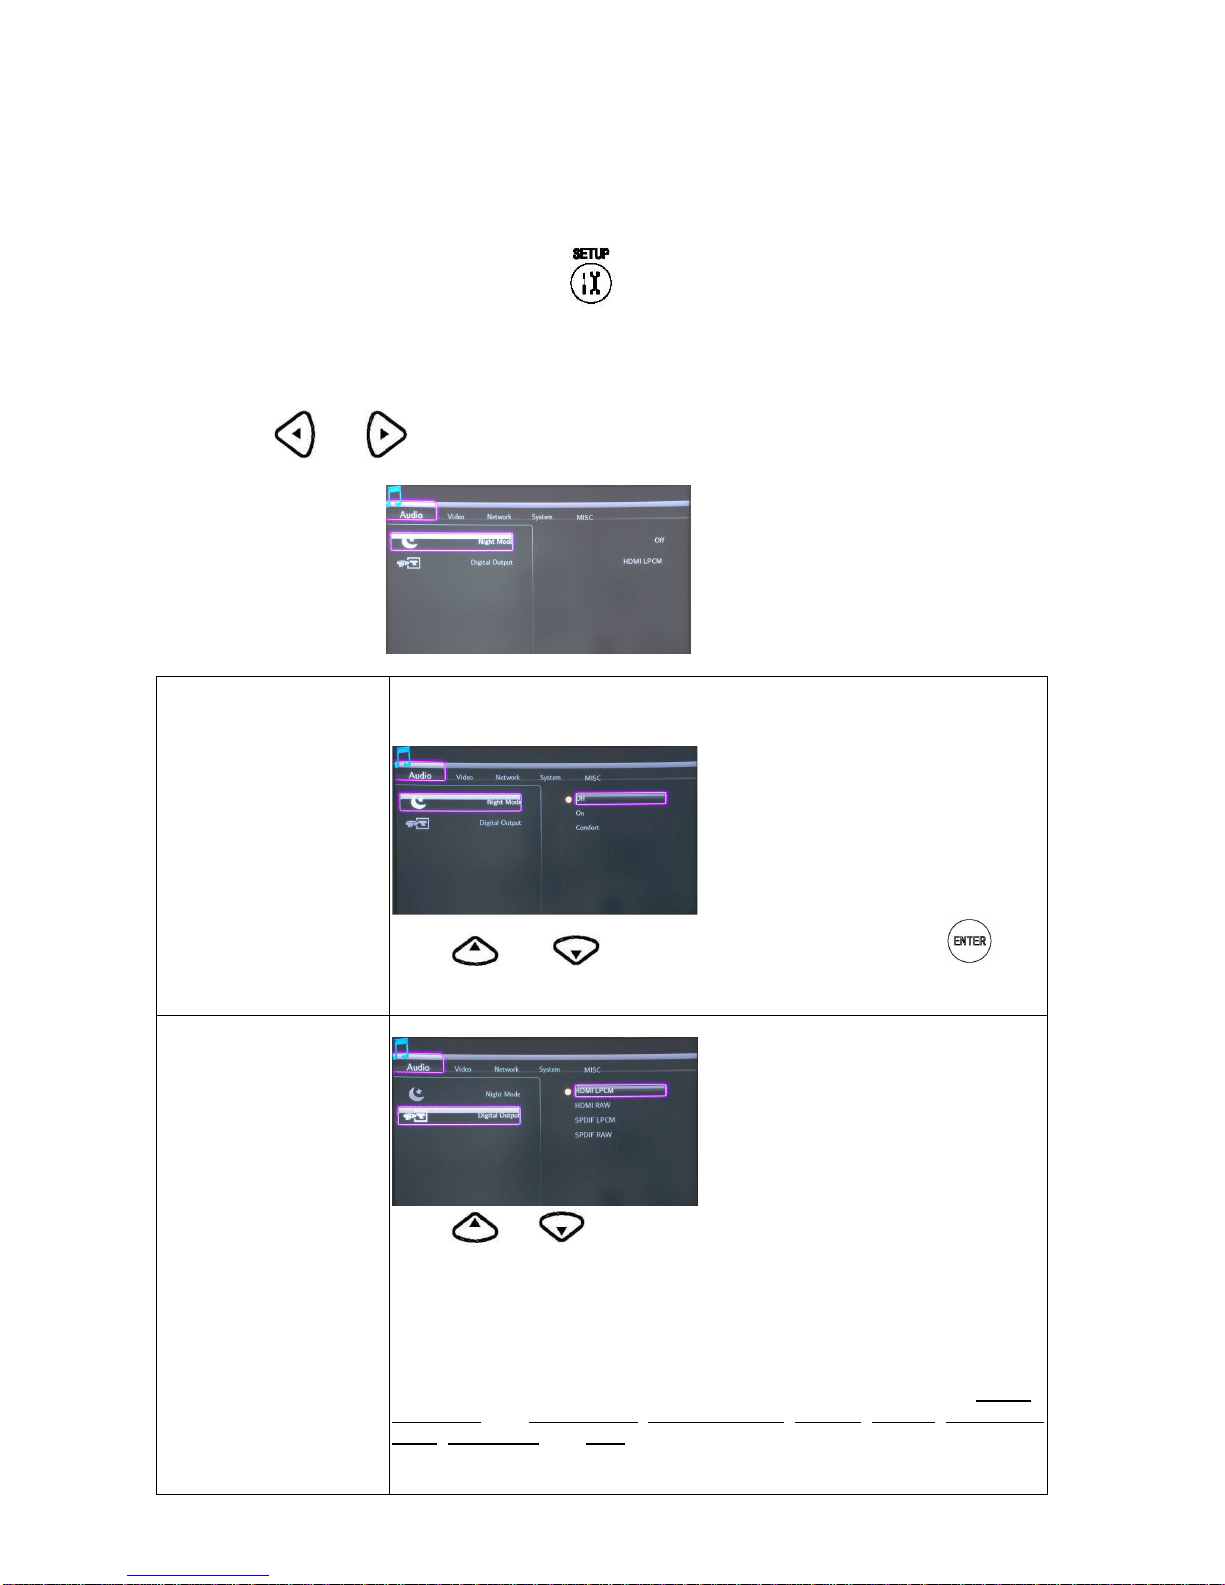
Changing Audio Settings.......................................................................................8
Changing Video Settings.......................................................................................9
Changing Network Settings ................................................................................11
Changing System Settings..................................................................................16
MISC...................................................................................................................17
File Browser Menu.............................................................................................20
Browsing All.........................................................................................................20
Browsing Music...................................................................................................20
Browsing Photos.................................................................................................21
Browsing Movies.................................................................................................21
Browsing Network...............................................................................................22
Browsing through ‘My_Shortcuts’ .......................................................................23
File Edit Menu.....................................................................................................24
File Copy Menu..................................................................................................26
Step 1. Select Source Device .............................................................................26
Step 2. Select Destination Device.......................................................................26
Step 3. Select copy files or folders......................................................................26
Step 4. Select the folders of Destination.............................................................27
Step 5. Copy Status ............................................................................................27
System Upgrade ................................................................................................28
How to get the new firmware ..............................................................................28
Normal upgrade mode ........................................................................................28
Special upgrade mode ........................................................................................28

1
Chapter 1
Getting Started
The Remote Controller
All procedures in this manual can be carried out using the remote controller buttons. Certain functions can
also be carried out using the front panel.
See the following for details on each button and its function:
Seq Button Function
1
POWER button:
On running status, Press to power off the machine.
On standby status, Press to power on the machine
2
EJECT
button:
Press to eject a DVD from the DVD Loader.
3
USB
button:
Press to browser the USB directory.
4
DVD
button:
This player has two types of playback mode: Dvd Player
mode and Media center mode.
DVD player mode: All kinds of the dvd-like operation can be
done on this mode.
Media center mode: This mode also can be named as
HDD media player, which can browser the file on HDD, USB,
network, UPNP etc, select the file to start playback.
5
USB
button:
Press to browser the CARD directory.
(
only valid in the player
with CARD interface
)
6
HDD
button:
Press to browser the internal HDD directory.
(
only valid in the
player with HDD
)
7
Numeric
buttons:
Press to enter channel numbers or numeric input when
changing settings.
8
Bookmark
button:
During video playback, record the current position.
9
ZOOM
button:
Press to zoom in/out when playing back photos or Video
programs
Photo Zoom level: 2x, 4x, 8x, 16x.
Video Zoom level: 0.9x, 1x, 2x, 3x, 4x,8x.
10
HOME
button:
Press to view the Guide menu. See
“The Media Center Menu”
for more details.
11
RETURN
button:
Press to return to the previous screen when navigating the
menus.

2
12
Navigational
buttons:
Press the arrow buttons to navigate the menus.
During video playback, press these keys to adjust the position
and size of external subtitle.
On the photo zoom status
,
press these keys to select different
position to show.
13
INFO
button:
During video playback, press to show the file’s detail
information.
14
SEARCH
button:
During video playback, Press to select show up the search
menu
15
VOL + / -
buttons:
Press to increase or decrease the volume.
16
MUTE
button:
Press to mute audio output, and press again to resume
17
Next/Prev
buttons:
File browser, use to page up and page down
BD/DVD playback
,
use to switch next and previous chapter
Normal file playback
,
use as switch next and previous file.
Photo slide show
,
use as switch next and previous file.
18
SUBTITLE
button:
Media center playback mode: Press to activate available
subtitles menu to change the subtitle track, size, color,position.
Dvd player mode
,
Press to select a subtitle track on disk file
19
AUDIO
button:
Press to select an audio track on a HDD or USB file.
20
TITLE
button:
Press to show HDD or DVD Title List.(only valid in DVD
playback)
21
MENU
button:
DVD playback: Press to return to the DVD navigation menu.
BD-like file playback
,
Press to return to the simple BD menu.
22
FR(FAST REWIND)
button:
Press to fast rewind the current playback.
Press repeatedly to select faster rewind speeds.
23
PLAY
button:
If the player is in playing status, press to pause.
If the player is in trick play status, press to resume play.
24
STOP
button:
Press to stop playback
25
FF(FAST FORWARD
button:
Press to fast forward the current playback.
Press repeatedly to select fast forward speeds.
26
PAUSE / STEP
button:

3
Press to pause current playback
Press again to step to the next frame.
Press to resume playback.
27
SLOW button:
Press to play back in slow motion. Three motion settings are
available Five slow motion levels (3/4, 1/2, 1/4, 1/8, 1/16x) are
available.
Press to resume regular playback.
28
AB Repeat
button:
DVD playback, use to start the A-B repeat mode.
(
Only valid in
DVD playback
)
29
REPEAT
button:
Press REPEAT 1 / ALL to set repeat option - Chapter, Title or
Off
30
Angle
button:
DVD playback,
Press to select the angle of DVD.
31
16:9
button:
Press to select the mode among of 16:9, 4:3Letter Box , 4:3
Pan Scan.
32
SETUP
button:
Press to access the Setup Menu directly to change system
settings.
33
TV MODE
button:
Press to switch among of 480-576-720-1080i-1080p.
34
COLOR
buttons:
Reserved key, different function on different menu page.
The button of front panel
1
EJECT
button:
Press to Open/Close the DVD loader.
2
PLAY
button:
If the player is in playing status, press to pause.
If the player is in trick play status, press to resume play.
3
STOP
button:
Press to stop playback
4
NEXT
button
Press to jump to next chapter in BD/DVD playback
5
PREV
button
Press to jump to previous chapter in BD/DVD playback

4
Chapter 2
Menu Introduce
Start-up Screen
Power on the player, you can see the start up page.
DVD player Menu
After a few second, the system will enter a DVD player menu. To enter this menu, press on the
remote controller too.
The DVD player Menu is the default page, on the menu, all DVD like operation can be done. You can use
to switch to Media Center Menu.
Media Center Menu
Press to enter the Media Center Menu.
Press and on the remote controller to select the button from the menu bar, and press
to enter the related Menu.
File Copy Menu
Select File Copy button on the Media Center menu page to copy files between HDD, USB, Card
Reader and Network.
File Browser Menu
S
elect Movie, Music, Picture button on the Media Center menu page to browser movie, photo, music files
stored either on a HDD, USB, Card Reader, NET or a USB device., To Press 、 、 to enter this
page too.

5
Setup Menu
The Setup Menu allows you to configure audio, video, network, photo and system settings.
To enter the menu, select Setup from the Media Center menu or on the remote controller.

6
Chapter 3
DVD Player Menu
This player has two playback modes: Dvd Player mode and Media center mode.
,
DVD player mode: All kinds of the DVD functions can be done on this mode.
Media center mode: In this mode the player can be named as HDD media player, which can browser the file
on HDD, USB, network, UPNP etc. Select the file to start playback.
This Player enters the DVD player mode in default, also, can be use to switch back to this mode
from Media center mode.
Open/Close
On dvd player menu, use front-panel’s or key to open and close the DVD
loader.
Play
Use to restart the playback after stop, when there is show “Press PLAY to start”.
Stop
During playback
,
press to stop and return the DVD player menu
;
Note
:
::
:
1) During playback
,
press to zoom video ,there are six zoom modes;
2) During playback
,
press to start seek operation;
3 ) During playback
,
press to switch audio track or audio L/R channel;
4
)
During playback
,
press to switch the subtitle track
;
5 ) During playback
,
press to show the file information
;
6
)
During playback
,
press to start the trick play controller;
Chapter 4

7
Media Center Menu
Media center Menu
allows you to enter the file browser menu, file copy menu and setup menu. Press the
on the remote controller
to enter this menu,
MOVIE
Press this button to enter the file browser menu, which located at music tab.
MUSIC
Press this button to enter the file browser menu, which located at music tab.
PHOTO
Press this button to enter the file browser menu, which located at photo tab.
FILE COPY
Press this button to enter the file copy menu.
SETUP
Press this button to enter the setup menu.

8
Chapter 5
Setup Menu
The Setup Menu allows you to configure audio, video, network, photo and system settings.
Select Setup from the Media Center menu or on the remote controller to enter the menu,
Changing Audio Settings
Press and on the remote controller to select the Audio tab from the menu bar.
Night Mode
Select to toggle Night Mode on and off.
This function reduces the maximum dynamic audio range
Press and to enable or disable the function. Press to
confirm.
Digital Output
Select to set Digital output type.
Press or to select from HDMI and SPDIF RAW or LPCM.
S/PDIF (Sony/Phillips Digital Interface Format) carries digital audio signals
between the player and other component devices, such as a home theater
setup with surround sound.
The HDMI(High Definition Multimedia Interface) is a compact audio/video
connector interface for transmitting uncompressed digital streams. It
represents a digital alternative to consumer analog standards such as Radio
Frequency (RF) coaxial cable, composite video, S-Video, SCART, component
video, D-Terminal, and VGA.
RAW data is the original bit stream and will provide a better audio output

9
quality.
LPCM is the default setting, and provides 2 channels audio output.
Changing Video Settings
Press and on the remote controller to select the Video tab from the menu bar.
Aspect Ratio
Select to set aspect ratio
Press and to select from Pan Scan 4:3, Letter Box
4:3, or 16:9. Press to confirm.
Pan Scan 4:3
: Display a wide picture on the entire screen and cuts off the
redundant portions. Select when a standard 4:3 TV is connected.
Letter Box 4:3: Display a wide picture with two black borders on the top
and bottom of 4:3 screens Select when a standard 4:3 TV is connected.
16:9: Compress the image to convert the whole image. Select when a
16:9 TV is connected.

10
Brightness
Select to set brightness levels
Press and to adjust brightness. The new setting is
previewed onscreen. Press to confirm.
Contrast
Select to set contrast levels
P
ress and to adjust contrast. The new setting is
previewed onscreen. Press to confirm
DNR
Select to adjust DNR.
Press and to set. Press to confirm.
TV System
Select to adjust TV system.
Press and to set the TV system, depending on your
viewing preferences. Press to confirm.

11
1080P 24HZ Select to open 1080P 24HZ
On: If the Content is 24fps mode, player will change to 1080P/24Hz
mode automatically before playback start.
Off: Do nothing.
Changing Network Settings
Press and on the remote controller to select the Network tab from the menu
Wired Lan Setup
Select to set the Network Setting. Before using the Network functions, please
check following items:
Connect the player to Network first
1) Please enable NetBIOS of TCP/IP on computer.
2) Please turn off your PC’s firewall.
Please share the folders which you wish to browse in your PC
Press
and
to select DHCP (AUTO) or FIXED IP (MANUAL).
Press to confirm.

12
DHCP DNS(AUTO)
Set the DNS server IP address by auto
Press to confirm.
FIX IP (MANUAL)
Using Fixed IP, it is required to enter followings. IP address, Subnet Mask,
Default Gateway. For further assistant to above sett
ings, please contact to the
network administrator.
to enter the IP address Press to confirm.

13
Wireless Setup
Before configuring the WLAN settings, please check the following
Make sure the WLAN USB Adapter is connected to the USB HOST port
Make sure there is a wireless router or an AP (Access Point) on the network,
or your PC is equipped with a wireless network adapter/card;
Make sure your player is in the effective range of the WLAN
Select a Profile Name
Press
and
to select. Press the ENTER button to the next step.
Press Play button to direct connect. Press the RETURN button to return.
Get Connection Mode
There are two connection modes: Infrastructure (AP) mode and Peer to
Peer (Ad Hoc) mode
Press the RETURN button to return, and the ENTER button for next step.
Press the UP / DOWN button to select items.

14
Infrastructure (AP)
Infrastructure mode is used to connect computers with wireless network
adapters, also known as wireless clients, which connect to an existing wired
network with the help of wireless router or access point
Get SSID Name
System will search for an existing SSID (Service Set Identifier) auto. And
select the access point you wish to access from the SSID list.
Note: In the Security list, WEP (Wired Equivalent Privacy) and WPA (Wi-Fi
Protected Access) means the network is encrypted, i.e. an encryption key is
needed to access the network. NONE means it is an open system network.
Select Open System if the network is not encrypted. Otherwise, select
Shared Key (WEP) or WPA Key to enter the encryption key
Select SSID the system will get the IP address automatically.
The test will take
for a while, please be patient to wait.
If the test is ok, the network information will be displayed

15
Peer to Peer (Ad Hoc)
Peer to Peer mode, which is also called Ad Hoc mode or
computer-to-computer mode, is used to connect wireless clients directly
together, without the need for a wireless router or access point.
Ad Hoc Setup
Set the Wireless SSID, Wireless Security, and Host IP for the Ad Hoc
connection.
Press ENTER button to enter. Press RETURN to return.
Note: Both the player and your PC need to use the Ad Hoc mode, share a
common SSID, and be put into the same IP range
Select PLAY button to confirm and the next step.
If
the test is ok, the network information will be displayed.

16
Changing System Settings
Press and on the remote controller to select the System tab from the menu.
Menu Language
Select to choose the OSD (On Screen Display) language.
Press and to select the language. Press to confirm.
Text Encoding
Select to choose the text encoding language.
Press and to select the text encoding language.
Press to confirm.
S
ystem Upgrade
Select to Upgrade SW from HDD.
Press
and to select. Press to confirm. Otherwise,
Select Cancel to return.

17
Select to set the system time.
Time
Press and to select from Manual and Auto(via TV).
Press to confirm.
BD/DVD
Auto-Play
Select to toggle the Auto Play function on or off.
Auto Play begins playing a DVD immediately when you insert it into the DVD
drive.
Press
and to enable or disable this function.
HDD Format
Select to HDD Format.
Press
and button on the remote controller to select Cancel or
CONFIRM from the menu.
MISC
Press and on the remote controller to select the MISC tab from the menu

18
Resume playback Resume playback
Press
and to select. Press to confirm.
Slide Show Time
Select to set slide show time.
Press and to select the interval that you require.
Press to confirm.
Transition Effect
Select to set the transition effect of photos.
Press and to select the transition of photo you require
Press
to confirm.
Cross Fade – fade in and fade out
Left to Right- from left to right
Top to Bottom- from top to bottom
Waterfall- like a steep descent of water from a height
Snake – like snake motion
Dissolve – like water dissolve
Trip Left Down – like strip cover from top of left to bottom of right
All Effect Shuffle – shuffle in and out
Table of contents
Other chinavasion Media Player manuals