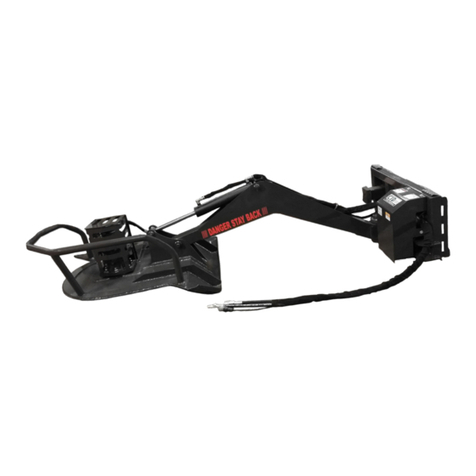
CID X-treme TRENCH36 Owner's manual

Save this manual for future reference!
X-treme
TRENCHER
Owner’s/Operator’s Manual
Construction Implements Depot, Inc
1248 N. Main Street
Denton, NC 27239
(336) 859-2002
For safe operation, read these
rules and instructions carefully to
avoid accidents that could result
in Death or Serious Injury.
TO THE OWNER/OPERATOR OF THIS IMPLEMENT
Please read this manual “before” unpacking or using this implement for the first time.
This manual provides you with the necessary instructions to safely install and use your
purchase. Do not let other people use this attachment without first being instructed
how to safely use it.

Save this manual for future reference!

Construction Implements Depot PAGE 3 Trencher
September 2017
Thank You
Our sincere appreciation to you on the purchase of a quality Trencher attachment designed
and manufactured in the USA by Construction Implements Depot, Incorporated. Product
experience of more than a combined 30 years is the cornerstone of our company, and our goal
is to provide you with a heavy duty product that will give you years of satisfaction and
operation.
Our record of successful and satisfied customers is evidence of the concern for quality and
designed strength that we place into each and every product we build.
As this manual expresses the need for safe operation of your acquisition from Construction
Implements Depot, Inc, it is important that you and all operators of this implement become
familiar with the operation, maintenance and safety instructions found in this manual, as well
as in the manual that accompanied the skid steer machine that will power this attachment.
Add some common sense to the items mentioned in these manuals as the recipe for safe
operation.
We invite you to look at more innovative products on our web site:
http://www.cidattachments.com or if in the area stop and visit our modern manufacturing
facilities located in Denton, NC.
Sincerely,
Management & Employees
Construction Implements Depot, Inc.
Information
Record product information here for future reference.
Model _____________
S/N or MFG. Date ______________
GPM (L) 15-20 (56 - 76) ______
20-30 (76 – 113) ______
Dealer Name _________________
Dealer Phone ____-_____-_______
Date of Purchase ___/____/______

Construction Implements Depot PAGE 4 Trencher
September 2017
Table of Contents
Importance of Safety ........................ 4
Operator Safety Training Tips ............. 5
Skid Steer Requirements .................. 6
Unpacking Your Shipment .................. 6
Connecting Trencher to Skid Steer . 6
Trencher Controls ........................... 7
Before Using Trencher the First Time
....................................................... 7
Getting Familiar with the Attachment
....................................................... 7
Before Digging ................................ 8
Digging Tips .................................... 8
Service ................................................ 9
Chain Tension ................................. 9
Chain Removal & Installation ......... 9
Adjusting Cut Width ..................... 10
Before Every Use .......................... 10
Every Week .................................. 11
After Every Season ....................... 11
Troubleshooting ............................... 12
Parts .................................................. 13
Trencher Frame Parts ................... 15
Trencher Boom ............................. 16
Trencher Crumber Parts ............... 17
Trencher Chain Parts .................... 18
Decals ........................................... 19
Limited Warranty .............................. 23
Orientation
Serial Number Plate is Located on Top of
Mounting Plate
Importance of Safety
Accidents can be very costly to human life
and property. As the operator is the #1
safety device on all types of vehicles or
equipment, it is important that the
operator read, learn and know all safety
recommendations for this product. The
user is responsible to his family, friends
and co-workers to operate in a safe
manner. Ensure that everyone who
operates or assists in the operation or
maintenance of this product read and
understand all the elements required to
safely operate this piece of equipment.
This attachment has pinch points that
include additional dangers.
Throughout this manual you will find
safety notes which are very important to
read and understand before operating this
piece of equipment. These classifications
alert you to situations that could be
harmful to you or bystanders. When you
see these alerts in the manual, carefully
read and follow all instructions and also
protect other workers from the same
danger.

Construction Implements Depot PAGE 5 Trencher
September 2017
Will result in Death
or Serious Injury.
Could result in
Death or Serious Injury.
Could result in
Minor or Serious Injury.
Not related to
Personal Injury.
Operator Safety
Training Tips
It is the responsibility of the operator
using this attachment to be acquainted
with the safe operation. In addition to
reading this manual, it is important that
the operator read the skid steer’s
operation manual and follow the
manufacturer’s recommendations!
Know the area before trenching.
Always contact your local “Diggers
Hotline” or “One-Call” to have
underground utilities marked. In the USA
or Canada, call the Diggers Hotline at
“811” or 1-888-258-0808. If you make
contact with a utility, call 911
immediately.
Before raising, lowering or swinging
the machine & trencher, make sure area is
clear of bystanders or objects.
Machinery parts sometimes have
sharp edges. Wear work gloves when
moving parts.
Never use drugs or alcoholic drinks
when operating or servicing this piece of
equipment.
Always wear the proper personal
protection equipment when servicing or
operating this piece of equipment. Never
service or operate this attachment with
bare feet, sandals, or other light footwear.
Always use eye protection during
operation.
Speed Kills! Operate this attachment
at a safe working speed. When
transporting the attachment, keep a safe
speed to avoid losing control of the
attachment or prime mover.
Keep proper clearance between the
implement and objects (tree stumps, large
rocks, buildings, etc.). Contacting these
objects with the implement or prime
mover could cause a loss of control or
damage to the implement.
Before each operation of this
implement, check all hardware (bolts,
nuts, pins, cotter pins, etc.) for their
proper location and tightness.
Stop the engine on the skid steer and
set the brake to avoid the implement
rolling forward or backwards while you
are exiting the prime mover.
Store this implement in an area not
frequented by children.
Allow NO riders on this attachment.
Keep all bystanders clear of attachment
during operation.
Always replace worn, torn or missing
safety decals before operating.

Construction Implements Depot PAGE 6 Trencher
September 2017
Never operate the trencher when
bystanders are within 20 feet (6 m) of the
work area. Identify the work zone with
caution tape or cones.
Skid Steer
Requirements
Your trencher attachment is compatible
with attachment couplers from all major
skid steer manufacturers. This trencher
should only be used on skid steers with a
compatible attachment coupler.
A skid steer equipped with tracks will
provide superior traction in this
application.
Make sure your skid
steer is in good working condition. Follow
the operating instructions found in the
manual that accompanied your skid
steer. Failure to do so could result in
Minor or Serious Injury.
Unpacking Your
Shipment
Your attachment arrives from the factory
banded to a wooden pallet, and requires
no final assembly.
Careless removal
of the shipping bands that secure the
implement to the pallet could result in
Minor or Serious Injury. Clear the area of
all bystanders and stand to the side when
cutting the bands with a pair of sheet
metal shears.
Using Your Implement
Connecting Trencher to
Skid Steer
Never enter the area
underneath the coupler or any part of the
attachment when it is in the raised
position to avoid an accident that will
result in Death or Serious Injury.
Verify that the hydraulic hoses are clear
from the front of the attaching plate on
the attachment and that the mounting
plate is free from dirt and debris. When
clear, move the skid steer to proximity of
attachment plate. Tilt skid steer coupler
forward to align coupling point with the
upper part on the attachment plate and
raise the coupler slightly.
Connecting Coupler to Attachment
When the top edge of the coupler is
seated in the top part of the coupler plate,
roll the skid steer tilt function back until
the attaching plate is flat against the skid
steer coupler. Lock down the coupler
levers. If equipped with a hydraulic
coupler, actuate the attachment locks at
this time.
Wipe off any dirt or
dust from the male or female hydraulic
flat-face couplers with a clean rag before
attaching hoses, to keep contaminants
from entering the hydraulic system. .
Connect the trencher hydraulic hoses to
the auxiliary circuit connectors on the skid
steer (Two hoses for standard flow

Construction Implements Depot PAGE 7 Trencher
September 2017
attachments or three hoses for high flow
attachments)
Check the surrounding area for
bystanders and clear them before starting
the skid steer or attachment.
Before operating the attachment, always
visually inspect and verify that the coupler
lock pins are fully engaged through the
latch slots on the attachment plate.
Check Coupler Lock Engagement
Trencher Controls
This trencher attachment uses the loader
arm lift and the tilt controls of the skid
steer loader. Consult your skid steer
operator’s manual for instructions on how
to operate the lift and tilt controls.
Positioning the trencher to one side or the
other relies on the motion of the prime
mover. To move the trencher to the right,
counter-rotate the skid steer to the right
using the skid steer’s drive controls. To
move the trencher left, counter-rotate the
skid steer to the left using the skid steer’s
drive controls.
The auxiliary hydraulic control of the skid
steer loader will provide hydraulic fluid
flow to make the trencher chain system
rotate as necessary to dig a trench.
With practice, the operation of all the
functions listed above will provide an easy
means to dig a trench.
Before Using Trencher the
First Time
If this is your initial
startup with this attachment on this
machine, check the skid steer’s hydraulic
oil level and add oil, if necessary, before
and after doing steps 1- 3 below.
After starting skid steer, lift the
attachment 12” (305mm) off the ground
surface:
1. With the skid steer engine RPMs just
above idle, engage the auxiliary
hydraulic flow to the trencher circuit.
Rotate the digging chain to eliminate
any air in the circuit.
2. Return trencher to the level position
and rest the attachment on the
ground.
3. Apply the brake and shut off the skid
steer’s engine and exit the operator’s
compartment.
4. Check the skid steers hydraulic oil
level, and add oil if necessary.
5. Inspect the trencher’s hydraulic
plumbing for any noticeable leaks.
Correct these leaks before
continuing.
Getting Familiar with the
Attachment
Never operate the
trencher when bystanders are within 20’
(6 m) of your work area. Flying debris or
trench cave-in could result in Death or
Serious Injury.
Be cautious when
operating on un-level ground surfaces. A
machine roll over could result in Minor or
Serious Injury. Always wear your seat
belt when operating this attachment.

Construction Implements Depot PAGE 8 Trencher
September 2017
Before starting the skid steer engine with
this trencher attached, make sure you are
knowledgeable and comfortable with the
operation of the skid steer controls as
outlined in the skid steer’s Operator’s
Manual.
When operating the trencher, set the skid
steer throttle at a speed that provides the
necessary flow to operate the trencher
and the drive tires at the same time. Note:
Contact your prime-mover’s service
department to help you set the engine
RPM that will provide the correct flow to
this attachment
Before Digging
Before digging into
any surface, always contact the “Diggers
Hotline” to identify underground utilities
to avoid an accident that could result in
Death or Serious Injury to the operator or
fellow workers.
Locate Utilities First
Keep bystanders and
co-workers away from the trench’s edge
to avoid a trench wall cave-in that could
result in Death or Serious Injury.
Section off your intended work area with
cones and yellow barrier tape that
includes not only the trenching area, but
also the travel direction of the prime
movement. Stop operating if anyone steps
inside the designated safety zone.
Digging Tips
Exposure to
crystalline silica dust along with other
hazardous dusts may cause serious or
fatal respiratory disease. Wear a dust
mask whenever working in dusty
environments.
Never operate this
attachment when bystanders are in
proximity of the work area that could
result in Minor or Serious Injury from
flying debris or trench wall cave-in.
1. Operate at a safe -paced speed that
will allow you to watch the area
being excavated and the area around
the skid steer.
2. Make sure you are operating the skid
steer’s engine at an rpm that will
produce the volume of oil flow
required for this attachment and skid
steer’s drive circuit
3. Do not use this attachment to “push”
down trees.
4. Listen to your skid steer. If the
trencher circuit stalls, you may be
taking too big of a bite. Slow the
reverse travel speed and allow the
machine to adequately handle the
trenching.
5. Lift the attachment above the ground
surface before swinging the trencher
with the skid steer drive system.
6. If a curve in the trench is necessary,
plan a long sweeping cut with the
trencher attachment in the most
vertical position possible.
7. Avoid excessive side loading on this
attachment.

Construction Implements Depot PAGE 9 Trencher
September 2017
Service
Chain Tension
Chain tension is critical on a skid steer
attachment. A chain that is over tightened
will not allow the soil material to escape
from around the nose wheel in some soil
conditions, and will rob necessary power
from your chain line. As the soil material
starts to pack in around the chain
components, the result causes the chain
to stretch and builds pressure on the
chain links and boom components.
To tighten or loosen the chain, loosen the
hardware on the side of the outer boom
section (#6), then loosen the adjusting
bolt jam nuts and screw the tensioning
bolt (#5) clockwise until there is only
about between 1 and 2 inches sag
between the chain and the boom at the
middle of the boom when the boom is in a
horizontal position.
Trencher Chain Adjustment
Chain Slack
Tighten the jam nuts and side plate
hardware before returning the equipment
back to work.
Chain Removal &
Installation
Machinery parts sometimes have
sharp edges. Wear work gloves when
moving parts to avoid Minor or Serious
Injury.
Chains are heavy and difficult to
handle. Use proper assistive devices for
lifting, holding and positioning the chain
to avoid Minor or Serious Injury during
removal or installation of a chain.
To maximize the life
and efficiency of a new chain, always
install a new drive sprocket and nose
roller.
Rotate the chain line until the chain’s
master link is on the top of the boom.
Relieve the chain tension by loosening the
side plate hardware and adjustment bolt.
Install an assistive device to safely control
the chain when the master link pin is
removed. Remove the master pin keeper
and master pin from the chain. Remove
the chain from the boom using an
adequate assistive device.
Note: It can help to use the machines
hydraulics to slowly roll the chain off the
drive sprocket.
Use an assistive device (like a lifting strap)
to pull the chain to be installed over the
sprocket, then “slowly and carefully”

Construction Implements Depot PAGE 10 Trencher
September 2017
utilize the machine’s hydraulics to rotate
the chain over the sprocket.
Shut the prime mover’s engine “OFF” and
use an assistive device to move the other
end of the chain into position to install the
master link pin.
When the two chain ends are aligned,
insert the master pin and keeper.
Note: the keeper pin must be installed
opposite to the direction of the chain
travel as shown in the following
illustration.
Lock Pin Installation
Adjusting Cut Width
The greatest trench cut efficiency is
accomplished with as narrow a cut as
possible while still allowing enough trench
width to adequately accept the item being
buried. Trench width can be adjusted by
attaching the teeth to the inside or
outside of the chain side plates.
Trench Width Adjustment
Maintaining your
Attachment
Not maintaining
your implement correctly could result in
Minor or Serious Injury. Keep your
implement in top operating condition.
Before Every Use
Check that all fasteners (nuts, bolts, pins,
keepers) are in their right place and are
tight. Remove and replace any worn or
missing cutting tools on the trencher
chain.
Inspect and replace any worn, torn or
missing safety decals.
Pump No. 2 lithium or molybdenum
disulfide grease into all required areas
until you see old grease is being flushed
out.
Investigate the location of any oil leaks
and repair.

Construction Implements Depot PAGE 11 Trencher
September 2017
After every use, clean off any dirt residue
with a garden hose and repeat grease
application.
Every Week
Inspect the trencher teeth and replace
any worn or broken teeth.
After Every Season
Inspect the implement for any loose or
worn parts that may need to be replaced
prior to the next season.
Clean, sand & repaint any area that looks
worn or scratched to prevent further
rusting. Use an equipment-paint found at
your local hardware store or building
center.
Lubricate all pivot joints. If located in an
area near an ocean or other corrosive
conditions, apply a thin layer
of grease to any exposed cylinder rod
surfaces. Wipe grease from cylinder rods
with a clean rag when taking the
attachment out of storage.
Store your implement in a shed or cover
with a water-proof tarp to protect it from
the weather. Store in an area not
frequented by children.
Specifications
XTRENCH36
XTRENCH48
XTRENCH36
XTRENCH48
GPM(L) 15-
20
(57-
76)
15-
20
(57-
76)
20-
30
(76-
114)
20-
30
(76-
114)
Width 48” (1219mm)
Height 24” (610mm)
Length 90”
(228
6
mm)
90”
(2286
mm)
Weight
(no
chain)
Weight
Cupped
Teeth
Weight
Combo
Teeth
Weight
Rock &
Frost
Teeth

Construction Implements Depot PAGE 12 Trencher
September 2017
Troubleshooting
Problem Cause Resolution
Chain will not attempt to
turn at all when auxiliary
hydraulics is activated.
Connection to prime
mover’s hydraulic system
Check and reconnect hoses
to prime mover.
Prime mover not producing
oil flow in auxiliary circuit
Check prime mover’s
hydraulic system.
Chain tries to move when
auxiliary hydraulics is
actuated, but chain does
not rotate freely.
Chain line is bound up with
dirt or rock(s).
Clean chain line at nose
roller and sprocket. Loosen
chain if problem persists.
Chain tension is too tight. Loosen the chain a bit.
Obstruction in ground
preventing rotation
Investigate and clear
ground obstruction.
Chain falls off boom Incorrect chain tension Adjust the chain tension.
Trench cut tries to veer off
in one direction
Improper digging tooth
arrangement
Rearrange cutting teeth
alternating left-hand and
right-hand cutting tools.
Tail roller or drive sprocket
worn
Replace tail roller and drive
sprocket. (Replace tail
roller and drive sprocket
when a new chain is
installed)
Trencher seems to be
lacking power and speed
Too aggressive reverse
drive speed while
trenching
Slow down drive of prime
mover.
Chain is not turning freely
on boom
Check chain tension and
check for dirt build-up on
tail roller and/or drive
sprocket.
Lack of hydraulic flow to
the attachment
Increase engine speed if
not running at max RPMs.
Visit the prime mover’s
dealer to verify flow
available in the auxiliary
circuit.
Wrong digging
components for soil
conditions…possibly too
many teeth on chain.
Investigate proper chain
tool and tool arrangement
for the soil conditions you
are working in.
Dirt is not coming out of
the trench when using rock
and frost chain teeth
components
Lack of teeth to pull dirt
out of trench
Evaluate if the right chain
components are being
used in your soil
conditions.
Install some cupped teeth
on the chain line.

Construction Implements Depot PAGE 13 Trencher
September 2017
Chain’s master link lock pin
falls out
Lock pin installed
incorrectly
Lock pin must be installed
opposite of the chain’s
digging direction (See page
9).
Parts
When requiring any parts for your implement, please collect the following information:
Implement Model Number
Implement Serial Number
Digging Boom Length
Type of Chain & Teeth
Parts Manual Date (lower right corner)
Parts Manual Page
Part Description
Quantity Required
Ship-to Name & Address
Payment Method
…then call your local dealer for factory fresh Construction Implement Depot parts
specifically designed for your attachment.
New Chain & Cupped Tooth Worn Chain & Cupped Tooth
New Drive Sprocket Worn Drive Sprocket
New Roller Worn Roller

Construction Implements Depot PAGE 14 Trencher
September 2017
New Rock Pick Worn Rock Pick Rock Pick
Not Rotating
In Holder

Construction Implements Depot PAGE 15 Trencher
September 2017
Trencher Frame Parts
Ref. Description Qty.
1 Main Frame 1
2 Drive Support 1
3 Auger 2
4 Hardware (Secure Auger to Output Shaft) 1
5 Drive Sprocket 1

Construction Implements Depot PAGE 16 Trencher
September 2017
Trencher Boom
Ref. Description Qty.
1 Boom Mount Bracket 1
2
Boom 36” 1
Boom 48” 1
3 Pin, End Roller 1
4 Roller, End 1
5 Tensioning Bolt Hardware (Bolt, 2 jam nuts) 1
6 Bolt Set (Boom Tension Lock) 1
7 Bolt Set 1
Indicate the length of boom when ordering boom parts.

Construction Implements Depot PAGE 17 Trencher
September 2017
Trencher Crumber Parts
Ref. Description Qty.
1 Support Tube, Crumber 1
2 Extension Tube 1
3 Lock, Extension Tube 1
4 Crumber Support 1
5 Blade, Crumber 1
6 Link, Crumber, Set 1
7 Pivot Hardware Set, Crumber 1
Indicate the length of boom when ordering boom parts.

Construction Implements Depot PAGE 18 Trencher
September 2017
Trencher Chain Parts
Ref. Description Qty.
1
Chain Only (for 36” Boom) 1
Chain Only (for 48” Boom) 1
Chain, Cupped Teeth, (for 36” Boom) 1
Chain, Cupped Teeth, (for 48” Boom) 1
Chain, Combo, Cupped & Rock Teeth, (for 36”
Boom 1
Chain, Combo, Cupped & Rock Teeth, (for 48”
Boom 1
Chain, Rock & Frost, (for 36” Boom) 1
Chain, Rock & Frost, (for 48” Boom) 1
2 Tooth, Cupped, LH A/R
3 Tooth, Cupped RH A/R
4 Bit, Rock A/R
5 C-Clip, Securement for Rock Bit A/R
6 Holder, Rock & Frost Bit LH A/R
Holder, Rock & Frost Bit RH A/R
A/R = As Required
Indicate the length of boom when ordering boom parts.

Construction Implements Depot PAGE 19 Trencher
September 2017
Decals
1 2
3 4
5
Ref. Description Qty.
1* Decal, (Danger Pinch Point) 1
2* Decal, (Warning, High Pressure Fluid Hazard) 1
3 Decal, (Made in the USA) 1
4 Decal, (Registration & Warranty Info) 1
5 Decal, (Construction Implements Depot, Inc.) 1
* Replace any worn, torn or missing safety decals
before operating.

NOTES
_________________________________________________
_________________________________________________
_________________________________________________
_________________________________________________
_________________________________________________
_________________________________________________
_________________________________________________
_________________________________________________
_________________________________________________
_________________________________________________
_________________________________________________
_________________________________________________
_________________________________________________
_________________________________________________
_________________________________________________
_________________________________________________
_________________________________________________
_________________________________________________
_________________________________________________
_________________________________________________
_________________________________________________
_________________________________________________
__________________________
This manual suits for next models
1
Table of contents
Other CID Tractor Accessories manuals
Popular Tractor Accessories manuals by other brands

Toro
Toro 30517 Nstallation instructions

CAEB
CAEB USA custom MOUNTAINPRESS 550TPL Assembly instructions

Avantco
Avantco A44412 Operator's manual for Attachment

New Holland
New Holland 717173046 Operator's manual

Tecnoma
Tecnoma VECTIS 800e Adjustments, Use and Maintenance

Kubota
Kubota 77700-VC5040 installation manual

Femco
Femco WEATHERBRAKE 2175 instructions

Avantco
Avantco A36621 Operator's manual for Attachment

Raven
Raven AutoBoom Rogator 54 Series 1997+ installation manual

McConnel
McConnel ROTA-ROLL Twose Series Operator's & parts manual

LELY
LELY HIBISCUS 735 Vario Operator's manual

DR
DR Premier Safety and operating instructions