Cingular 3125 User manual

Getting Started Guide
Cingular
® 3125
CINGULAR MAKES BUSINESS RUN BETTER
^ white (reversed)
Table of Contents
Welcome to Cingular
2
What’s in the Box? 2
Get To Know Your Cingular 3125 3
Set Up Your Cingular 3125
4
Insert Battery 4
Make a Phone Call 5
Set Up Voicemail 6
Type Information 7
Send a Text Message 10
Get Started Using the Cingular 3125
11
Browse the Web 11
Set Up Email on Your Phone 13
Take a Picture, Send It To a Friend 24
Sync Contacts, Calendar, Email and More (Optional) 25
Play a Song 27
FAQ
29
Tips and Tricks
31
1

Cingular 3125
2
Welcome to Cingular
Getting Started Guide
Getting Started CD
Includes Microsoft
ActiveSync, User
Manual and Warranty
Information for your
Cingular 3125.
Cingular 3125
USB Sync cable
AC charger
Headset
Rechargeable battery
What’s in the Box?
Thank you for purchasing the Cingular 3125.
To get started, we recommend the following:
• Carefully follow the step-by-step instructions below to set up your Cingular
3125.
• Review the User Manual on the Getting Started CD to learn the full power of
what you can do with the Cingular 3125.
Right now, make sure the following components are included in the box:
The Cingular 3125 will hold a microSD card, which is not
included in the box. You will want one to load more than
a few songs from your PC to the phone.
Y cable
For simultaneous use of
headset and charger.
^ white (reversed)
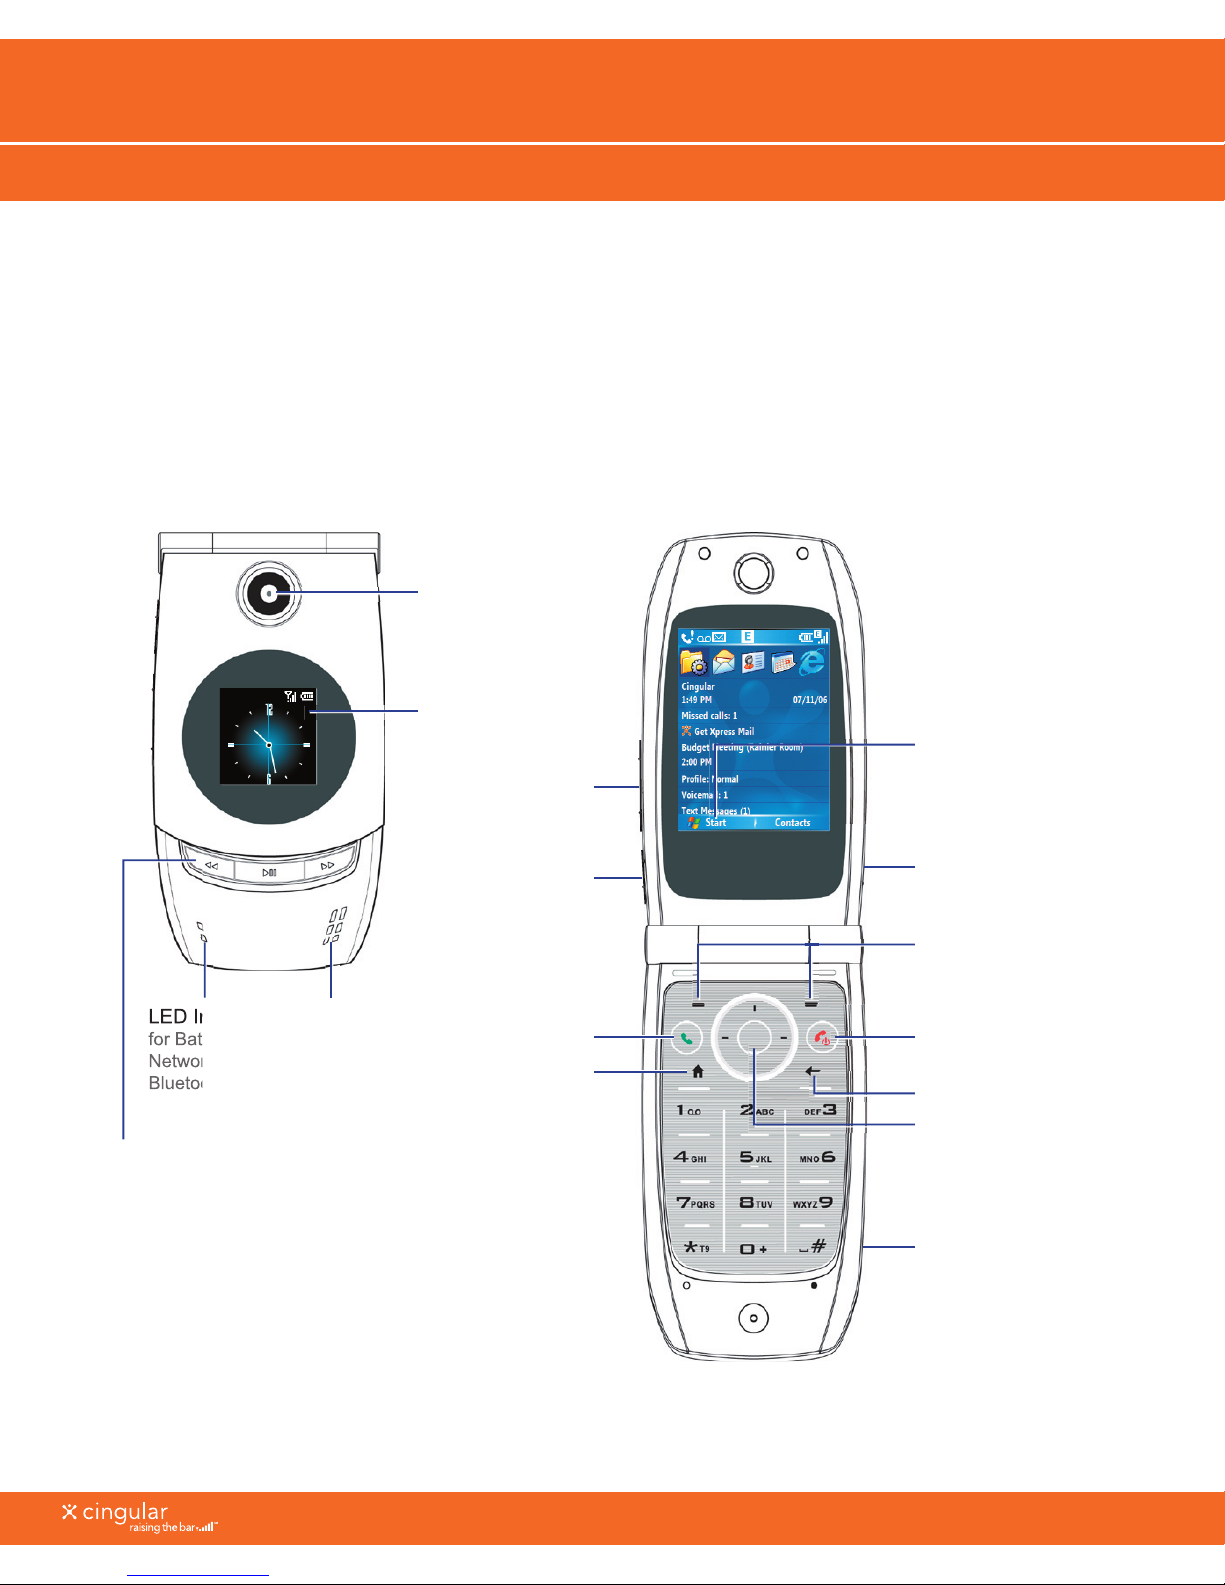
Get To Know Your Cingular 3125
Your Cingular 3125 is a powerful wireless device. It does much more than you
would expect from a phone, including access to your work and personal email/
contacts/calendar and a rich multi-media experience. Get to know your phone so
that you can easily walk through the next steps.
3
External Screen
for the time, music
and device status
Camera Lens
Music Buttons
(Rewind, Play/Pause,
Forward)
LED Indicators
for Battery life,
Network and
Bluetooth
Speaker
Volume
POWER/END
turns the phone on
and off, ends a call
5-way Navigation/
ENTER
to scroll up and down,
side to side and select
with the Enter key
Left/Right
SOFT KEY
BACK
HOME
brings you to the
Home screen
TALK
Accessory and Y
cable Connector
Port
for headset, battery
charging and sync
CAMERA
Start Menu
Press the left SOFT
KEY below Start to
see the programs on
the phone.
Voice Notes/
Voice Tag
LED Indicators
for Battery life,
Network and
Bluetooth
^ white (reversed)

Cingular 3125
4
Set Up Your Cingular 3125
Insert Battery
1. Open the battery cover. Hold the phone in one hand with the
front panel facing down. With your other hand press down on the
battery cover and slide it open.
Battery cover
2. Insert the battery so that the
connectors on the battery align
with the connectors on your
Cingular 3125.
3. Replace the battery cover.
Steps?
3
Takes?
3 minutes
!
Warning:
Use only the battery that specifi es for use with your
Cingular 3125. See the Battery Information section on the
User Manual PDF for more information about using the battery
safely.
Note
Your battery
comes partially
charged. To
fi nd out how
to charge your
device refer
to the ‘
Charge
the battery
’
section of your
User Manual
on the Getting
Started CD.

^ white (reversed)
Make a Phone Call
To connect to the wireless network successfully, your Cingular 3125
must be powered on, your wireless service must be active, and you
must be in a coverage area. On the top right corner of the Home
screen, you will fi nd the network coverage indicator.
Wireless Network Coverage Indicator
Full wireless coverage
Full wireless coverage using GPRS
No wireless coverage
Wireless is turned off
1. On the Home screen, access the Phone screen by pressing
the TALK button (
) or directly pressing numeric keys on the
keypad.
2. When you enter the phone number completely, press the TALK
button (
).
3. To end the call, press the END button (
).
Note: The built-in speakerphone of Cingular 3125 allows you to talk
hands-free or lets other people listen to the conversation.
• To turn the speakerphone on during a call, click Menu >
Speakerphone On.
• The speakerphone icon ( ) appears at the top of the screen.
• To turn off the Speakerphone, click Menu > Speakerphone Off.
Steps?
3
Takes?
3 minutes
5
^ white (reversed)
Cingular 3125
6
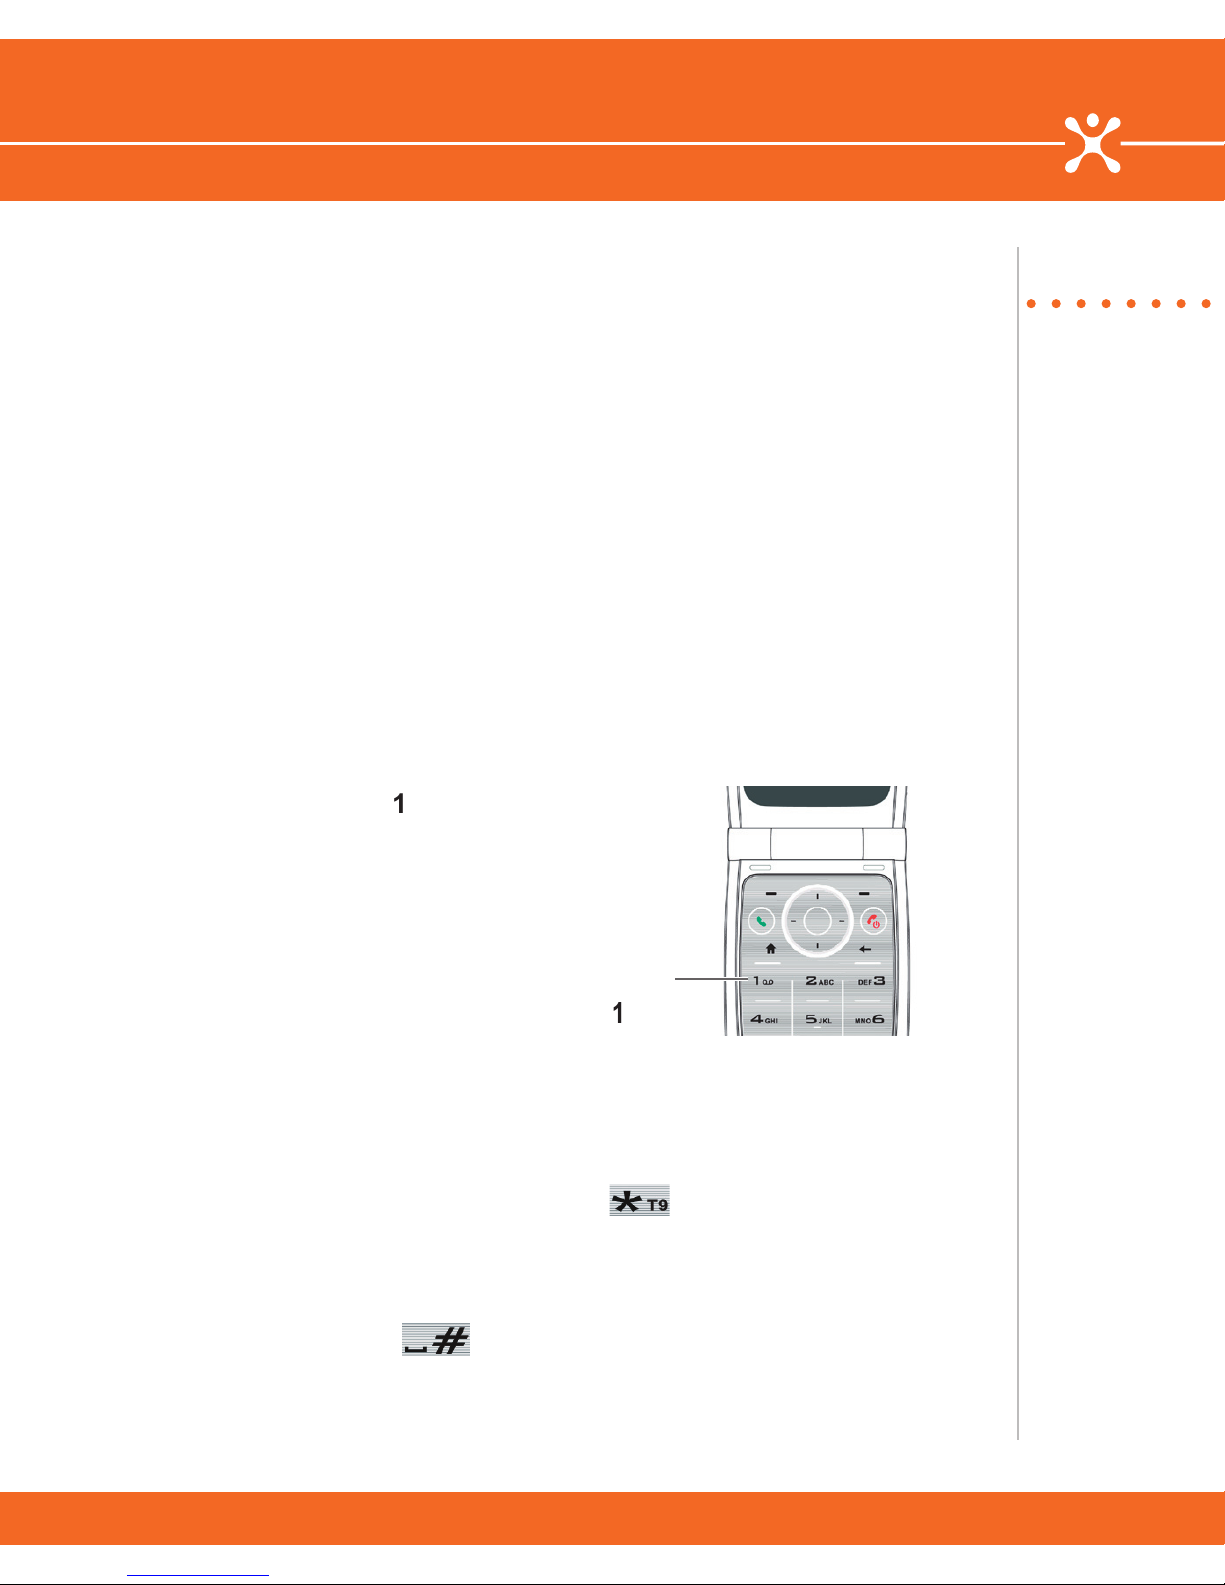
Set Up Voicemail
Press and hold the 1 key on your Cingular 3125. You will be
connected to the voicemail system, which will then ask you to:
1. Create your password.
2. Record your name.
3. Record a greeting.
Check Your Voice Mail Messages From Your
Cingular 3125
1. Press and hold the
1
key.
2. Follow the voice prompts.
Note: You can check your voicemail messages from other phones.
• For all locations except Puerto Rico: Dial your 10-digit
wireless number and press the key when you hear
your personal greeting. Then, enter your personal passcode
and follow the voice prompts.
• For users in Puerto Rico: Dial your 10-digit wireless number
and press the key when you hear your personal
greeting. Then, enter your personal passcode and follow
the voice prompts.
Press and hold
the
1
key
Steps?
3
Takes?
2 minutes
^ white (reversed)
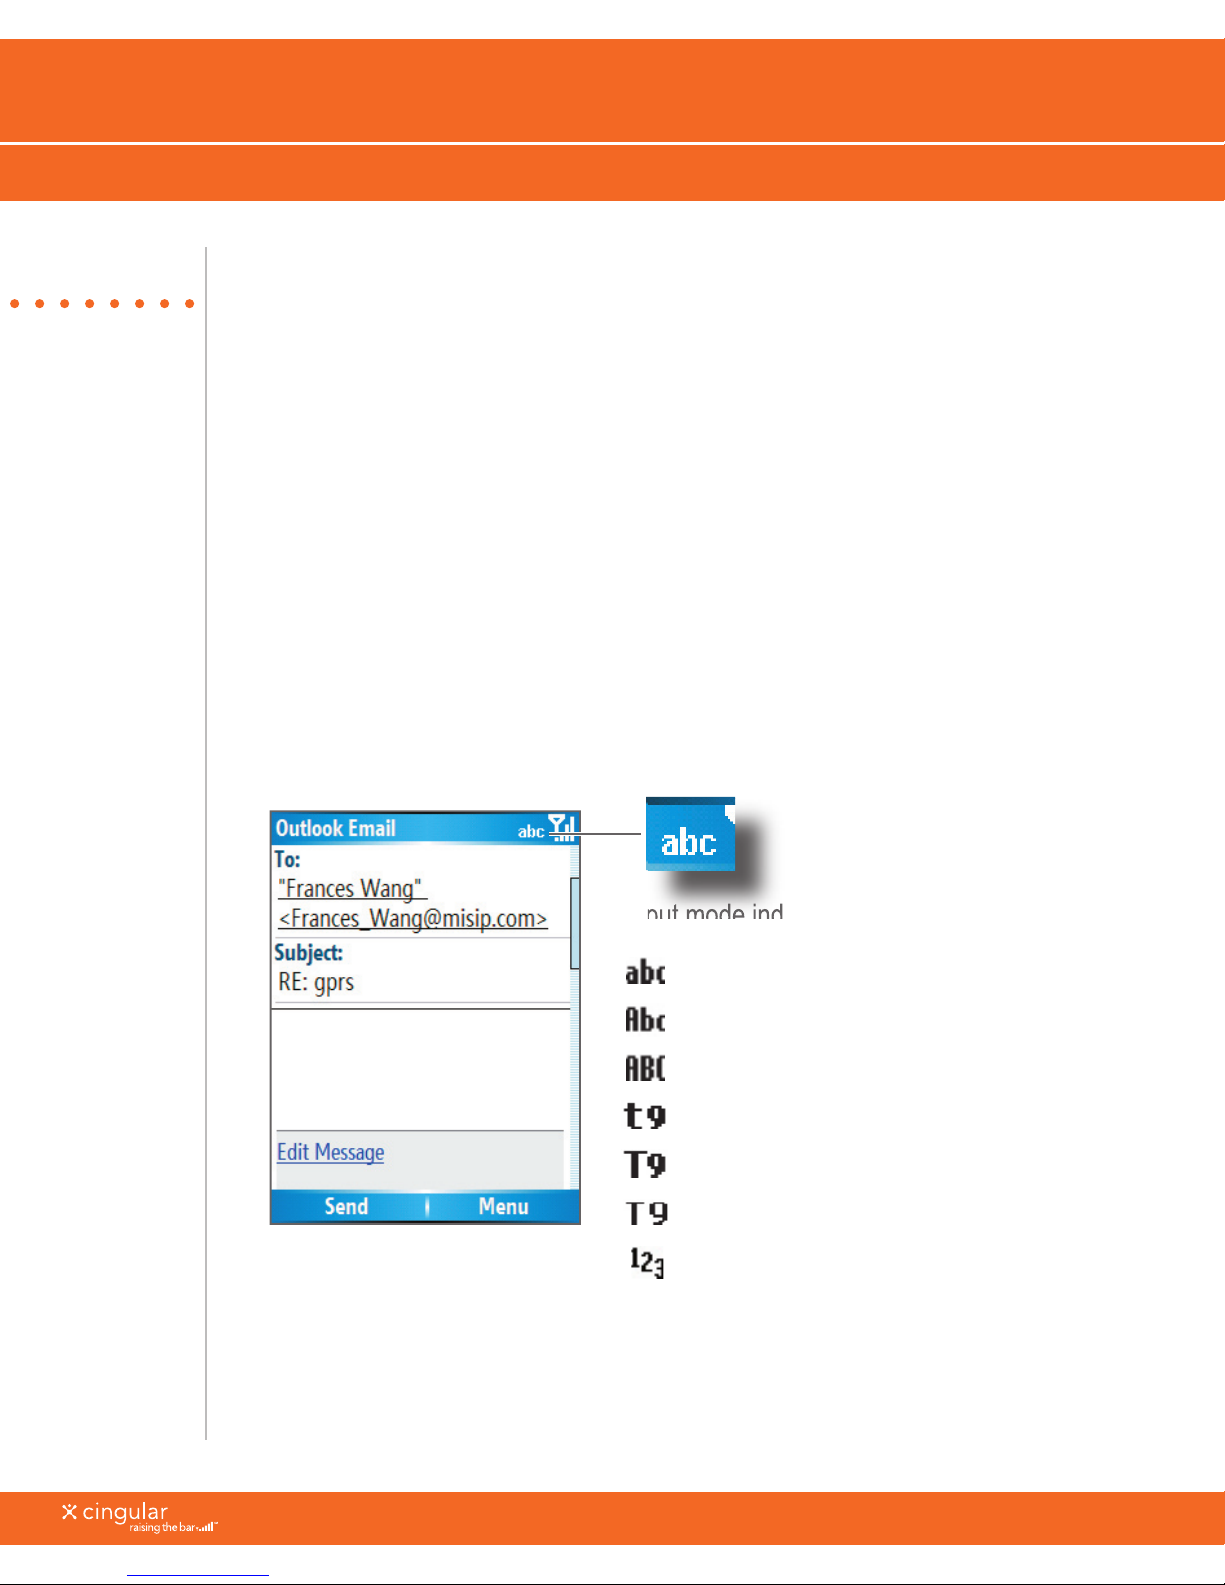
Type Information
This information will be useful when entering a text message or
email. You can enter text, numbers and symbols by using the
keypad. The phone supports three input modes for entering text and
numbers: Multipress, T9 Text Input, and Numeric. Multipress and
T9 Text Input modes are used for entering text and numbers, and
Numeric mode is used for entering numbers only.
When you are in a screen to enter text or numbers, the indicator on
the top right corner of the display screen shows the input mode that
you are currently using.
Input mode indicator
Input mode indicator
Multipress text input mode, lowercase
Multipress text input mode, uppercase
Multipress text input mode, caps lock
T9 text input mode, lowercase
T9 text input mode, uppercase
T9 text input mode, caps lock
Numeric input mode
Steps?
2
Takes?
1 minute
7
Note
With multipress,
you press the
key multiple
times and each
number on the
key will appear
in order.
^ white (reversed)

Cingular 3125
8
Steps?
2
Takes?
1 minute
Change the Input Mode
1. Press and hold the
key.
2. On the menu, click the input mode you want.
Use MultiPress
Press the key once or several times to enter the letter(s) you want.
For example, press the 2 key three times to enter the letter C.
•
0 enters + or zero.
•
1 enters different symbols.
•
# enters a space.
Use T9 Input Mode
Type quickly using T9 Text Input. To form a word in T9 mode, press
the numeric keys that contain the letters you want. As you enter
letters, T9 analyses your key presses and attempts to complete the
word.
1. Press and hold the
key to select
T9
input mode.
2. Enter letters by pressing the keys on which the letters appear.
Press a key only once for each letter. If there is more than one
choice in the T9 dictionary for your entry, a list of available words
is displayed.

^ white (reversed)
9
For example, to enter the word “shoe”, press
7
,
4
,
6
,
3
.
If you do not see the desired word, click
Add Word?
from the list,
and then enter the word using Multipress.
3. Press the
key to enter a space after the word as entered,
or click one of the available words and the space is added
automatically.
4. To enter punctuation, press
1
, and select from a list of common
punctuation marks. You can practice this by sending a text
message in the next section.
^ white (reversed)
Other manuals for 3125
1
Table of contents
Other Cingular Cell Phone manuals


