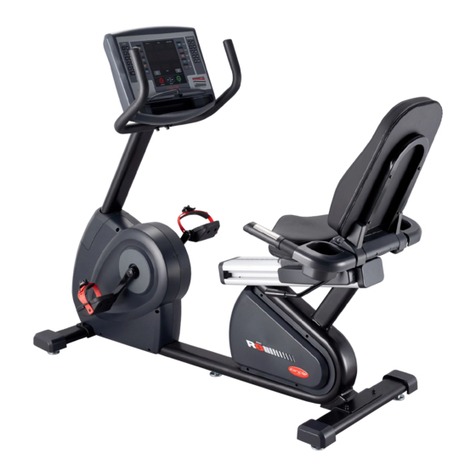
CIRCLE FITNESS B8 E User manual


1
TABLE OF CONTENTS
SAFETY INSTRUCTIONS ------------------------------------------------------------------------ 2-3
TECHNICAL SPECIFICATIONS ---------------------------------------------------------------- 4
UNPACKING & ASSEMBLY ------------------------------------------------------------------- 5-15
WARM UP & COOL DOWN ---------------------------------------------------------------------- 16
PANEL CONTROL --------------------------------------------------------------------------------- 17
PROGRAM ---------------------------------------------------------------------------------------- 18-20
OPERATION-------------------------------------------------------------------------------------- 21-22
PREVENTATIVE MAINTENANCE---------------------------------------------------------- 23-24

2
SAFETY PRECAUTIONS
Dear Customer,
Thank you for your purchasing our products. This product has been designed and manufactured for
studio use, even though we go to great efforts to ensure the quality of each product, occasional
error, and/or omissions do occur. In any event should you find this product to be defective or
missing parts please contact us.
IMPORTANT: Read all instructions and warnings before assembly and operation.
‧Only one person at a time should use this equipment. If dizziness, nausea, chest pains, or any
other abnormal symptoms are experienced while using this upright bike, stop the workout at
once.
‧Always use this exerciser on a clear and level surface. Do not use outdoors or near water.
‧Don't insert any object into any openings.
‧Before using this equipment to exercise, always do stretching exercises to properly warm up.
‧Advice to replace defective components immediately and keep the equipment out of use until
repair.
‧This product is designed for adults. Please ensure that children only use it under the supervision
of an adult.
‧Consult your physician before starting a workout or training program. Have your doctor review
your training and diet programs to advise you of a workout routine you should adopt.
‧Make sure that all bolts and nuts are tightened when equipment is in use. Periodic maintenance is
required on all exercise equipment to keep it in good condition.
Warning: incorrect/ excessive training can cause health injuries. Stop using the home exerciser
when feeling uncomfortable.
‧Turn off the power after using.
‧If the power cord is damaged, it must be replaced by the manufacturer or its service agent or a
similarly qualified person in order to avoid a hazard.
‧Operation and maintenance: Always remove the adaptor when you do not use the equipment to
prevent the reach of the children. Do not use the adaptor if it is wear or damage found on the
jacket of the wire.

3
SAFETY PRECAUTIONS
CONSULT A PHYSICIAN IMMEDIATELY
Warning: before starting any exercise program consult your physician. This is especially important
for individuals over the age of 35 or persons with preexisting health problems. Read all instructions
before using any fitness equipment. We assume no responsibility for personal injury damage
sustained by or through the use of this product.
How often you exercise:
You should exercise three to four times a week to improve your cardiovascular and muscle fitness.
How hard you exercise:
Intensity of exercise is reflected in your heart rate. Exercise must be sufficiently rigorous to
strengthen your heart muscle and condition your cardiovascular system.
Only your doctor can prescribe the target training heart range for you. Before starting any exercise
program consult your physician.
How long you exercise:
Sustained exercise conditions your heart, lungs and muscles. The longer you are able to sustain
exercise within your target heart range, the greater the aerobic benefits. To begin maintain 2~3
minutes of steady, rhythmic exercise, then check your heart rate.
Care and Maintenance
‧The upright bike should not be used or stored in a moist area because of possible corrosion.
‧Check at least every 4 weeks that all connecting elements are tightly fitted and in good
condition.
‧In case of repair please ask your dealer for advice.
‧Replace defective components immediately and/or keep the equipment out of use until repair.
‧Only use original spare parts for repair.
‧Use a damp cloth to clean the upright bike and avoid the use of aggressive detergents when
cleaning the bike.
‧After exercising, immediately wipe of the sweat; perspiration can ruin the appearance and
proper function of the upright bike exerciser.
‧A warning notice to the effect that the safety level of the equipment can be maintained only if it is
Examined regularly for damage and wear, e.g. ropes, pulleys, connection points.
‧Special attention to components most susceptible to wear.
‧Always check before use and maintain regularly to make sure the safety of the equipment.
‧Be careful and check the easily wearing components like the bearing of he pedals to prevent
dangers.MAX.
‧MAX. user weight: 150 kg (330 Ibs)

4
TECHNICAL SPECIFICATIONS
SPECIFICATIONS:
Length: 113 cm
Width: 69cm
Weight of product: 63 kgs
Program: Quick start, 3HRC, constant watt, constant RPM, random, hill, manual
Standard features: 10.1”digital TFT LCD
Resistance System: AC powered

5
UNPACKING & ASSEMBLY
Parts
Main frame / 1pc
Front stabilizer /1pc
Rear stabilizer /1pc
Console set /1pc
Handlebar /1pc
Pedal set /1set
Upper waterbottle
holder cover /1pc
Lower waterbottle
holder cover /1pc
Rear stabilizer cover
/1pc
Upright tube
cover, right/ left
/1 set
#3-1
#5-1
#5-2
#5-22
#5-15
#5-9
#5-8
#5-18
#5-19
#5-6
#5-11
#5-10
Console upright Tube /
1pc

6
UNPACKING & ASSEMBLY
Hardware kit
X 2
(lower waterbottle
holder cover)
M4*20mm
X 1
Allen wrench
(6mm)
X 1
Allen wrench
(5mm)
M15/M15
M4*12mm
X 2
(rear stabilizer)
#5-7
#5-21
M8*20mm
X 1
(handlebar)
#5-12
M8*65mm
X 2
(handlebar)
#5-16
M8 curve
X 2
(handlebar)
#5-17
X 1
(PAL system
connector)
X 1
Step2
Step7
Step8

7
UNPACKING & ASSEMBLY
Unpacking your bike where will be using it. Being careful not to damage. Place your bike on a level
flat surface. It is recommended that you place a protective covering on your floor.
Step1: assembly Front, Rear base tube with main frame.
1). Please take off pre-lock screws on the front and back base tube.
2).Use Allen wrench (6mm) to lock on 2pcs M8*20mm screw, S washer and washer for fixing front
base tube to main frame.
3). Use Allen wrench (6mm) to lock on 2pcs M8*20mm screw, S washer and washer for fixing back
base tube to main frame.
X1
X1
X 4
M8*20mm
X 4
M8 S washer
#5-1
#5-2
#5-3
#5-4
X 4
M8 washer
#5-5
Allen wrench
(6mm)

8
UNPACKING & ASSEMBLY
Step2: Assembly Rear base tube cover with main frame.
1). Use Allen wrench (6mm) to lock on 2pcs M4*12mm screw for fixing housing of back base tube to
main frame.
X1
X 2
M4*12mm
#5-6
#5-7
Allen wrench
(6mm)

9
UNPACKING & ASSEMBLY
Step3: Assembly pedal set with crank
1).Use wrench to clockwise fix right pedal set to crank set.
2).Use wrench to counterclockwise fix left pedal set to crank set.
X1 set
#5-9
#5-8

10
UNPACKING & ASSEMBLY
Step4:
1). Please take off pre-lock screws on the main frame.
2). Use the guide wire to make the console wire and cable connecter through the console upright
tube. Don’t take off the guide wire and tied it up on the console upright tube.
X1
#3-1

11
UNPACKING & ASSEMBLY
Step5: Assembly console upright tube with main frame
1).Slide the console upright tube into the main frame, lock the console upright tube via Round head
Phillips screw.
2).Use Allen wrench (6mm) to lock on 4pcs M8*20mm screw、M8 S washer and washer for fixing
the console upright tube to main frame.
X 4
M8*20mm
#5-12
X 4
M8 S Washer
#5-13
X 4
#5-14
M8 Washer
Allen wrench
(6mm)

12
UNPACKING & ASSEMBLY
Step6: Assembly upright tube cover, right / left with console upright tube.
X1 set
#5-11
#5-10

13
UNPACKING & ASSEMBLY
Step7: Assembly handlebar set with console upright tube
1). Connect the hand pulse wire.
2). Fix the Handlebar to the console upright tube using 1PCS M8*20mm Screw (1), 2PCS
M8*65mm Screws (2) and 2PCS M8 Wave Washers (3) by the provided Allen wrench (6mm).
X 1
M8*20mm
X 1
X 2
M8*65mm
X 2
M8 curve
#5-15
#5-12
#5-16
#5-17
Allen wrench
(6mm)

14
UNPACKING & ASSEMBLY
Step8: Assemble bottle holder cover with handlebar.
1) Please take off pre-lock screws on the bottle holder.
2).Use Allen wrench (5mm) to lock on 2pcs M6*15mm screw for fixing the Upper bottle Holder cover
to handlebar.
3).Use Allen wrench (5mm) to lock on 2pcs M4*20mm screw for fixing the Lower bottle Holder cover
to handle bar.
X 2
M6*15mm
X 1
X 1
X 2
M4*20mm
#5-18
#5-19
#5-20
#5-21
Allen wrench
(5mm)

15
UNPACKING & ASSEMBLY
Step9: Assemble console with handle bar post
1). Please take off pre-lock screws on the console.
2). Take off the guide wire after connecting upper and lower wires, such as console wires, hand
pulse wires and cable connecter.
3). Use Allen wrench (6mm) to lock on 4pcs M5*12mm screw for fixing the console to console
upright tube.
X 4
M5*12mm
X 1
Upper handle pulse wire
Upper console wire
Lower console wire
Lower handle pulse wire
#5-22
#5-23
CABLE wire
Allen wrench
(6mm)

16
WARM UP & COOL DOWN
A successful exercise program consists of a warm up, aerobic exercise and a cool down. Warming
up is an important part of your workout, and should begin every session. It prepares your body for
more strenuous exercise by heating up and stretching out your muscles. At the end of your workout,
repeat these exercises to reduce sore muscle problems. We suggest the following warm-up and
cool-down exercises:
HEAD ROLLS
Rotate your head to the right for one count, feeling the stretch up the left side of
your neck. Next rotate your head back for one count, stretching your chin to the
ceiling and letting your mouth open. Rotate your head to the left for one count,
and finally, drop your head to your chest for one count.
Repeat this action for several times.
SHOULDER LIFTS
Lift your right shoulder up
toward your ear for one count.
Then lift your left shoulder up
for one count as you lower
your right shoulder.
Repeat this action for several times.
SIDE STRETCHES
Open your arms to the side and
continue lifting them until they
are over your head. Reach your
right arm as far upward toward
the ceiling as you can for one
count. Feel the stretch up your
right side. Repeat this action with
your left arm.
INNER THIGH STRETCH
Sit with the soles of your feet together with your knees pointing outward. Pull
your feet as close into your groin as possible. Gently push your knees toward the
floor. Hold for 15 seconds.
Repeat this action 3-5 times.
HAMSTRING STRETCHES
Keep your right leg straight and the left foot on the floor; try to stretch your right
hand toward the toe, hold this posture for 15 seconds.
Relax, then repeat the action for left leg.
QUADRICEPS STRETCH
With one hand against a wall for
balance, reach behind you and
pull your right foot up. Bring your
heel as close to your buttocks as
possible. Hold for 15 seconds and
repeat with left foot up.
CALF/ACHILLES STRETCH
Step your right foot in front of your
body. Lean against a wall with
your arms and stretch your left foot
backward your body. Bend
forwards your right foot, and
slightly push your buttock toward
to the wall for 15 seconds.
Repeat the action with front left
foot and rear right foot for another
15 seconds.

17
PANEL CONTROL
Display
Function
Time
The amount of time remaining in your workout.
Distance
An estimate of your walking or running distance for a comparable amount of
calories expended.
RPM
Your pedal cadence.
Heart Rate
In beats per minute (bpm).
Watts
The amount of mechanical power the bike is receiving from your exercise.
This is not the same as the amount of power your body is using, since the
average person is only about 20% efficient at generating mechanical power.
Mets
Your METS rate.
Calories
An estimate of your calories burned. This doesn't include your basal
metabolic rate, which is about 72 calories per hour for a 150-pound person.
Level
Workload Level.
Buttons
Function
▲or ▼
Adjust workload up and down. Adjust value when program setting.
Select program.
Stop
Stop a workout. Hold it 3 seconds for reset.
Pause
To pause the bike while exercising.
Go
Start a workout. Hold it 3 seconds for reset.

18
PROGRAM
1. Quick Start:
1.1. Press Quick Start to start exercise.
1.2. Resistance level starts from level 4, you can press level adjust keys to change exercise level.
1.3. Machine will enter pause mode if under sports mode but without RPM for 5 seconds.
2. Heart Rate Control:
2.1. Press 【Heart Rate Control】to enter the program.
2.2. Set Target HR / Time / Weight then press OK to begin workout.
2.3. Begin workout:
2.3.1. Execute the warm up program first for 3 minutes, press Skip can starting workout right
away.
2.3.2. During the program, program will change the level to make your heart rate to reach
the set heart rate. You can press Target Up or Target Down key to change the level.
2.3.3. The program will end when the time counter reaches 0, then enter cool down.
3. Constant Watts:
3.1. Press 【Constant Watts】to enter the program.
3.2. Set Target Watts / Time / Weight then press OK to begin workout.
3.3. Begin workout:
3.3.1. During the program, program will change the level to make your watts to reach the set
watts. You can press Target Up or Target Down key to change the watts setting.
3.3.2. The program will end when the time counter reaches 0, then enter idle mode.
4. Constant RPM:
4.1. Press 【Constant RPM】to enter the program.
4.2. Set Target RPM / Time / Weight then press OK to begin workout.
4.3. Begin workout:
4.3.1. During the program, program will change the level to make your RPM to reach the set
RPM. You can press Target Up or Target Down key to change the RPM setting.
4.3.2. The program will end when the time counter reaches 0, then enter idle mode.

19
PROGRAM
5. Random:
5.1. Press 【Random】to enter the program.
5.2. Set Work Level / Time / Weight, press CHANGE LEVEL to change workout profile, press OK
to begin workout.
5.3. Begin workout:
5.3.1. Level will change automatically according to the profile; you can press Level Up or
Level Down to change the exercise level.
5.3.2. The program will end when the time counter reaches 0, then enter idle mode.
6. Hill:
6.1. Press 【Hill】to enter the program.
6.2. Set Work Level / Time / Weight, press CHANGE LEVEL to change workout profile, press OK
to begin workout.
6.3. Begin workout:
6.3.1. Level will change automatically according to the profile, you can press Level Up or
Level Down to change the exercise level.
6.3.2. The program will end when the time counter reaches 0, then enter idle mode.
7. Manual:
7.1. Press 【Manual】to enter the program.
7.2. Set Work Level / Time / Weight, press OK to begin workout.
7.3. Begin workout:
7.3.1. You can press Level Up or Level Down to change the exercise level.
7.3.2. The program will end when the time counter reaches 0, then enter idle mode.
8. DTV settings: must be set before use the DTV function.
8.1. Press logo for 5 seconds to enter setting page.
8.2. Press DTV Config key to enter Config page then press Menu.
8.3. Press ▲/▼ to select System Setting then press OK.
8.4. Press ▲/▼ to select Regional Setting then press OK.
8.5. Press ▲/▼ to select Country then press OK will back to Regional Setting page.
8.6. Press BACK to forward page.
8.7. Press ▲/▼ to select Program Search then press OK.
8.8. Select Automatic Search then press OK and wait, system will be searching DTV program
automatically.
8.9. Press SAVE then press EXIT to exit.
8.10. Press Back Menu to finish the settings and back to idle mode.
Table of contents
Other CIRCLE FITNESS Exercise Bike manuals

CIRCLE FITNESS
CIRCLE FITNESS Sp7 User manual

CIRCLE FITNESS
CIRCLE FITNESS E7 User manual

CIRCLE FITNESS
CIRCLE FITNESS E7 User manual

CIRCLE FITNESS
CIRCLE FITNESS B-7 SERIES Quick start guide

CIRCLE FITNESS
CIRCLE FITNESS R6 User manual

CIRCLE FITNESS
CIRCLE FITNESS R8 User manual

CIRCLE FITNESS
CIRCLE FITNESS Sp8 User manual

CIRCLE FITNESS
CIRCLE FITNESS R8 User manual

CIRCLE FITNESS
CIRCLE FITNESS E7 User manual