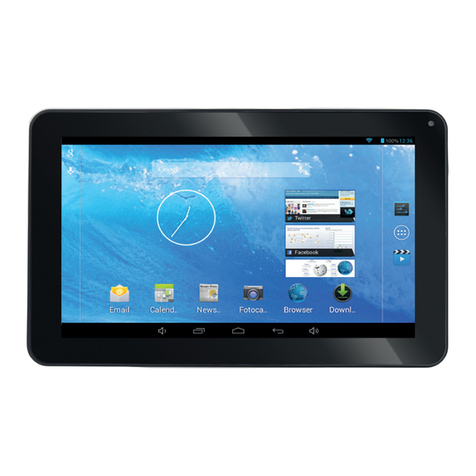
Cisco Cius User manual

Setting Up Cisco Cius
This chapter comprises the following topics, which help you install Cisco Cius on an IP telephony network.
Before you install Cisco Cius, you must decide how to configure Cisco Cius in your network. Then you
can install Cisco Cius and verify its functionality. For more information, see Preparing to Install Cisco
Cius on Your Network.
Note
This chapter comprises the following topics:
•Before You Begin, page 1
•Understanding Cisco Cius Components, page 2
•Installing Cisco Cius, page 11
•Verifying Cisco Cius Startup Process, page 12
•Configuring Startup Network Settings, page 12
•Configuring Security on Cisco Cius, page 12
Before You Begin
Before installing Cisco Cius, review the requirements in these sections:
•Network Requirements, on page 1
•Cisco Unified Communications Manager Configuration, on page 2
Network Requirements
For Cisco Cius to operate successfully as an endpoint in your network, your network must meet the following
requirements:
• Working Voice over IP (VoIP) Network:
◦ VoIP configured on your Cisco routers and gateways
Cisco Cius Administration Guide, Release 9.2(4)
OL-27284-01 1

◦ Cisco Unified Communications Manager installed in your network and configured to handle call
processing
◦ IP network that supports DHCP or manual assignment of IP address, gateway, and netmask
Cisco Cius obtains the date and time from Cisco Unified Communications Manager by default.Note
• Voice over Wireless LAN
◦ Cisco Aironet Access Points (APs) configured to support Voice over WLAN (VoWLAN)
◦ Controllers and switches configured to support VoWLAN
◦ Security implemented for authenticating wireless voice devices and users
Cisco Unified Communications Manager Configuration
Cisco Cius requires Cisco Unified Communications Manager to handle call processing. See the Cisco Unified
Communications Manager Administration Guide or context-sensitive help in the Cisco Unified Communications
Manager application to ensure that Cisco Unified Communications Manager is set up properly to manage
Cisco Cius and to properly route and process calls.
If you plan to use auto-registration, verify that it is enabled and properly configured in Cisco Unified
Communications Manager Administration before connecting any Cisco Cius to the network. For information
about enabling and configuring auto-registration, see the Cisco Unified Communications Manager
Administration Guide. Also, see the Adding Cisco Cius Mobile Collaboration Endpoints to the Cisco Unified
Communications Manager Database.
You must use Cisco Unified Communications Manager Administration to configure and assign telephony
features to Cisco Cius devices. See the Telephony Features Available for Cisco Cius.
In Cisco Unified Communications Manager Administration, you can add users to the database and associate
them with specific Cisco Cius devices. In this way, users gain access to their Unified CM User Option page
to configure options for their Cisco Cius. See the Configuring Reset Options/Load Upgrades for details.
Understanding Cisco Cius Components
Cisco Cius includes these components or accessories:
•Accessory Support on Cisco Cius, on page 3
•USB Port and USB Serial Console Data Information, on page 3
•Using External Devices, on page 10
•Video Displays, on page 10
Cisco Cius Administration Guide, Release 9.2(4)
2OL-27284-01
Setting Up Cisco Cius
Cisco Unified Communications Manager Configuration

Accessory Support on Cisco Cius
The following table indicates the accessories that Cisco Cius supports.
Table 1: Accessory Support for Cisco Cius
TypeAccessory
Analog
3.5 mm single plug analog wideband with integrated
with integrated microphone
RJ11 analog headsets are not
supported
Note
Bluetooth
Headsets - See the Headsets, on page 6. This section
includes information about each headset type.
External PCVideo Displays - See the Video Displays, on page
10.
USB Port and USB Serial Console Data Information
Cisco Cius includes one micro-USB port at the top of the unit. Additionally, Cisco Cius may be used with a
media station, which extends the capabilities of the device and includes three standard USB ports, two in the
back of the unit and one on the right side. Cisco Cius supports a maximum of 15 devices total connected to
the USB ports. Each device that is connected to Cisco Cius is included in the maximum device count. Supported
accessories include USB serial cable, USB mouse, USB keyboard, USB-powered hub, and USB memory
stick.
The micro-USB port cannot be used to charge the Cisco Cius mobile collaboration device by connecting
to a personal or laptop computer.
Note
You can also use a USB connection for Android Debug Bridge (ADB) access. For more information on using
ADB, see http://developer.android.com/index.html.
For information on troubleshooting the USB Console, see the Troubleshooting USB Console.
Cisco Cius Administration Guide, Release 9.2(4)
OL-27284-01 3
Setting Up Cisco Cius
Accessory Support on Cisco Cius

The following illustration shows the front view of the media station with handset.
Figure 1: Media Station with Handset - Front View
The following table describes the features on the front of the media station.
Table 2: Media Station with Handset - Front View
ItemNo.ItemNo.
Speaker button5Handset1
Volume button6Speaker2
Mute button7USB Port3
Docking ports4
Cisco Cius Administration Guide, Release 9.2(4)
4OL-27284-01
Setting Up Cisco Cius
USB Port and USB Serial Console Data Information

The following illustration shows the back view of the media station with handset.
Figure 2: Media Station with Handset - Back View
The following table describes the features on the back of the media station.
Table 3: Media Station with Handset - Back View
ItemNo.ItemNo.
PC port5Antitheft security lock connector (lock
optional)
1
DisplayPort™Connection6Foot stand2
USB ports7AC power wall plug3
Handset connection8Network port4
Avoid lowering the media station to the lowest level when using a DisplayPort cable. DisplayPort connector
damage may result due to forced contact with a desk top surface. Plug the DisplayPort cable in through
the hole in the foot stand to prevent the media station from being lowered to the lowest level.
Caution
The USB Serial Console allows a USB port on the media station to be used as a console, eliminating the need
for a serial port. The following table shows the settings for the USB console:
Table 4: USB Console Settings
SettingParameter
115200Baud rate
8 bitData
Cisco Cius Administration Guide, Release 9.2(4)
OL-27284-01 5
Setting Up Cisco Cius
USB Port and USB Serial Console Data Information

SettingParameter
noneParity
1 bitStop
noneFlow control
Because Cisco Cius comes preloaded with drivers, Cisco supports only a limited number of cable types.
Cisco recommends using IOGEAR USB-serial adapter.
Note
Use USB console
The USB console cable has a USB interface on one end and a serial interface on the other. The USB interface
may be plugged in to any of the three USB ports on Cisco Cius. The serial interface connects to the serial port
on the PC.
If you do not have a serial port on your PC/laptop, two USB console cables can be connected back to
back, with a Null modem cable between them.
Tip
To use a USB console, use the following procedure.
Procedure
Step 1 In Cisco Unified Communications Manager, set credentials on device page.
Step 2 Enable USB debugging under Product Specific Configuration window.
Step 3 Connect a USB serial cable to Cisco Cius. Cisco Cius console output appears on your terminal screen.
Step 4 After output stops, tap <Return> to sign in.
Step 5 Sign in as default using default password. See .
Step 6 After $ prompt screen, you can use tools such as debugsh to diagnose Cisco Cius problems.
For information on troubleshooting the USCB console, see the Troubleshooting USB Console.
Headsets
Although Cisco performs internal testing of third-party headsets for use with Cisco Cius, Cisco does not certify
or support products from headset or handset vendors.
Cisco Cius reduces some background noise that is detected by a headset microphone, but if you want to further
reduce the background noise and improve the overall audio quality, use a noise-canceling headset.
Cisco Cius Administration Guide, Release 9.2(4)
6OL-27284-01
Setting Up Cisco Cius
Headsets

Cisco recommends the use of good-quality external devices, for example, headsets that are screened against
unwanted radio frequency (RF) and audio frequency (AF) signals. Depending on the quality of headsets and
their proximity to other devices such as mobile (cell) phones and two-way radios, some noise or echo may
still occur. A hum or buzz may be heard either by the remote party or by both the remote party and Cisco Cius
user. Humming or buzzing sounds can be caused by a range of outside sources; for example, electric lights,
electric motors, or large PC monitors. See the Using External Devices, on page 10, for more information.
In some cases, you can reduce or eliminate hum by using a local power cube or power injector.Note
These environmental and hardware inconsistencies in the locations where Cisco Cius are deployed means that
there is not a single headset solution that is optimal for all environments.
Cisco recommends that customers test headsets in their intended environment to determine performance before
making a purchasing decision and deploying them system wide.
Audio Quality Subjective to the User
Beyond the physical, mechanical, and technical performance, the audio portion of a headset must sound good
to the user and to the party on the far end. Sound quality is subjective and Cisco cannot guarantee the
performance of any headsets. However, a variety of headsets from leading headset manufacturers are reported
to perform well with Cisco devices. See manufacturer sites for details.
Wired Headsets
Cisco Cius supports 3.5 mm single plug headsets. To connect a wired headset to Cisco Cius, plug it in to the
headset port on the bottom of Cisco Cius to place and answer calls using the headset. Single plug wired
headsets may also be plugged into the headset port, located on the left side of the media station.
You can use the wired headset with all of the features on Cisco Cius, including the Volume and Mute buttons.
Use these buttons to adjust the earpiece volume and to mute the speech path from the headset microphone.
If the headset is analog, see the for the procedure on configuring the wideband codec.
Bluetooth Wireless Headsets
Cisco Cius supports Bluetooth Version 2.1+EDR technology when the headsets support Bluetooth. Bluetooth
enables low-bandwidth wireless connections within a range of 30 feet (10 meters). The best performance is
in the 3- to 6-foot range (1 to 2 meters). You can pair five or more headsets, but only the last one connected
is used as the default.
There can be a potential interference issues. Cisco recommends that you reduce the proximity of other 802.11b/g
devices, Bluetooth devices, microwave ovens, and large metal objects. If possible, configure other 802.11
devices to use the 802.11a channels.
For a Bluetooth wireless headset to work, it does not need to be within direct line-of-sight of the Cisco Cius
device, but some barriers, such as walls or doors, and interference from other electronic devices could affect
the connection.
Adding a Bluetooth Wireless Headset to Cisco Cius
By default, Bluetooth is enabled for Cisco Cius on the Cisco Unified Communications Manager.
Cisco Cius Administration Guide, Release 9.2(4)
OL-27284-01 7
Setting Up Cisco Cius
Headsets

To disable Bluetooth from the Cisco Unified Communications Manager, choose Device > Phone. In the
Find and List Phones window, enter the search criteria for the Cisco Cius device that you want to modify,
and then select Find. On the Product Specific Configuration Layout portion of the Phone Configuration
window, scroll down to Bluetooth, click on the Down Arrow and select Disabled.
Note
With Bluetooth enabled on the Cisco Unified Communications Manager, follow these steps to add the headset
as an accessory to Cisco Cius:
Procedure
Step 1 Place the headset into discovery/pairing mode.
The procedure for placing a headset into discovery/pairing mode is specific to the headset. Please
see headset manufacturer’s instructions regarding pairing procedure.
The headset must be in discovery/pairing mode for Cisco Cius to successfully pair and connect to
the device.
Note
Step 2 Enable Bluetooth and Bluetooth settings on Cisco Cius, if they are not already enabled.
To verify whether Bluetooth and Bluetooth settings are enabled, from Cisco Cius Main Screen, press the
Menu key and choose Settings >Wireless & networks >Bluetooth settings.
You can tell that the Bluetooth wireless headset is enabled if there is a check mark next to Bluetooth
in the Bluetooth Settings dialog box.
If Airplane Mode is enabled, then the Bluetooth and Bluetooth settings are disabled.
Note
Step 3 Select Scan for devices.
After the Bluetooth device is located, its name appears in the window.
Cisco Cius automatically tries to pair with the headset by using a PIN of 0000. If the headset uses a different
PIN, enter the correct PIN by referring to the user guide that came with the headset.
Cisco recommends that users read the headset user guide for more information about pairing and
connecting the headsets.
If pairing is unsuccessful, Cisco Cius prompts you to enter the correct PIN.
Note
After Cisco Cius has the correct PIN, it tries to connect to the accessory. Cisco Cius provides feedback to the
user while it is trying to connect the accessory. If Cisco Cius cannot connect, it displays an error alert to let
the user know the reason for the failure. A timeout of 10 seconds occurs for the Cisco Cius device to try to
connect the accessory. If the timer expires without a successful connection, an error alert is shown.
Cisco Cius connects with headsets using a shared key authentication and encryption method. Cisco Cius can
be connected with five or more headsets at a time. The last one connected is used as the default. Pairing is
typically performed once for each headset.
After a device has been paired, its Bluetooth connection is maintained as long as both devices (Cisco Cius
and headset) are enabled and within range of each other. The connection typically reestablishes itself
automatically if either of the devices powers down and then powers up. However, some headsets require user
action to reestablish the connection.
The Bluetooth status indicator indicates whether or not a device is connected.
When headset is out of range from the Cisco Cius, Bluetooth drops the connection after a 15- to 20-second
timeout. If the paired headset comes back into range of Cisco Cius (and Cisco Cius is not connected to another
Bluetooth headset), the in-range Bluetooth headset automatically reconnects. The user may have to wake-up
the headset by tapping on its operational button to begin the reconnect process.
Cisco Cius Administration Guide, Release 9.2(4)
8OL-27284-01
Setting Up Cisco Cius
Headsets
If a user is actively on a call using a Bluetooth headset, and the headset is set to off, out-of-range, or is
disconnected for any reason, an alert is presented to either continue the call on the speaker/headset or disconnect
the call. If no action is taken by the user after 30 seconds, the call is ended.
Removing a Bluetooth Device From the Cisco Cius Device
To remove a Bluetooth device from Cisco Cius, follow these steps:
Procedure
Step 1 From the home screen, press the Menu key and choose Settings >Wireless & networks >Bluetooth settings.
Step 2 Tap Device name.
Step 3 Highlight the device you want to remove and hold that selection until the options appear.
Step 4 Tap Disconnect or Disconnect and Unpair.
For information about how to use your Bluetooth wireless headset, see:
•Cisco Cius User Guide
•User guide provided with your headset
Advanced Audio Distribution (A2DP) Profile
Cisco Cius supports A2DP streaming audio from a music player to a Bluetooth headset that supports A2DP.
A2DP can be disabled by the user. From the Bluetooth devices submenu, select the connected headset and
choose Options >Disable A2DP.
Hands-Free Profile
Cisco Cius supports various hands-free profile features that enable you to use hands-free devices (such as
Bluetooth wireless headsets) to perform certain tasks without having to handle the Cisco Cius device. For
example, instead of tapping Redial on Cisco Cius, users can redial a number from their Bluetooth wireless
headset according to instructions from the headset manufacturer.
These typical hands-free features apply to Bluetooth wireless headsets that are used with Cisco Cius:
• Ring notification
• Answer a call
• End a call
• Volume control
• Last number redial
• Call waiting notification
Cisco Cius Administration Guide, Release 9.2(4)
OL-27284-01 9
Setting Up Cisco Cius
Headsets
• Divert/Reject
• Three-way call handling
• Speed dialing
Hands-free devices may differ in how features are activated. Device manufacturers may also use different
terms when referring to the same feature.
For more information, see the manufacturer documentation.
Important Note about Headset Types
Only one headset type works at any given time, so if you have both a Bluetooth headset and an analog headset
attached to the Cisco Cius device, enabling the Bluetooth headset disables the analog headset. To enable the
analog headset, disable the Bluetooth headset.
Using External Devices
Cisco recommends the use of good-quality external devices that are shielded (screened) against unwanted
radio frequency (RF) and audio frequency (AF) signals.
Depending on the quality of these devices and their proximity to other devices such as mobile phones or
two-way radios, some audio noise may still occur. In these cases, Cisco recommends that you take one or
more of the following actions:
• Move the external device away from the source of the RF or AF signals.
• Route the external device cables away from the source of the RF or AF signals.
• Use shielded cables for the external device, or use cables with a better shield and connector.
• Shorten the length of the external device cable.
• Apply ferrites or other such devices on the cables for the external device.
Cisco cannot guarantee the performance of the system because Cisco has no control over the quality of external
devices, cables, and connectors. The system performs adequately when suitable devices are attached using
good-quality cables and connectors.
In European Union countries, use only external headsets that are fully compliant with EMC Directive
89/336/EC.
Caution
Video Displays
Cisco Cius supports external display devices through the micro-HDMI port on the bottom of the device.
Connect a monitor to the device by inserting one end of an HDMI cable into the micro-HDMI port and the
other end into a monitor HDMI port. The Cisco Cius media station connects to an external monitor through
a DisplayPort connection.
Cisco Cius Administration Guide, Release 9.2(4)
10 OL-27284-01
Setting Up Cisco Cius
Using External Devices

Installing Cisco Cius
You must connect Cisco Cius to the network and to a power source before using it. Cisco Cius can be powered
directly through the AC Adapter on Cisco Cius or through Power over Ethernet (PoE+ 802.3at) through the
media station.
Before using external devices, read the Using External Devices, on page 10 for safety and performance
information.
Firmware upgrades over the WLAN interface may take longer than upgrading over the wired interface,
depending on the quality and bandwidth of the wireless connection. Some upgrades may take more than
one hour.
Note
Downgrading Cisco Cius from Release 9.2(4) to a previous release resets all Cisco Cius device settings
to the default values.
Note
To install Cisco Cius, you must perform the following tasks:
Before You Begin
Before you install a Cisco Cius device, it must be added to Cisco Unified Communications Manager. For
more information, see the Adding Cisco Cius Mobile Collaboration Endpoints to the Cisco Unified
Communications Manager Database. Make sure you upgrade Cisco Cius to the current firmware image.
Procedure
Step 1 Power Cisco Cius one of the following ways:
•CIUS-PWR-CUBE AC adapter
•removable battery
•Enhanced Power over Ethernet (PoE+ 802.3at) through the Media Station dock
•through the Media Station dock (the Media Station is powered by the CP-PWR-CUBE-4 AC adapter)
With PoE+ 802.3at, the Media Station will be operational. Accessories that are plugged in to the
Media Station, such as mouse or keyboard, will negotiate for power. If there is not enough power is
available for the accessory, an error message will appear on the Cisco Cius screen.
Note
See the Cisco Cius User Guide for information.
Step 2 Charge Cisco Cius.
See the Cisco Cius User Guide for information.
Step 3 Connect a headset to the headset port.
You can add a headset later if you do not connect one now.
See the Cisco Cius User Guide and the user guide provided with your headset for information.
Step 4 (Optional) Enable Cisco Cius to use the wireless local area network (WLAN).
Cisco Cius Administration Guide, Release 9.2(4)
OL-27284-01 11
Setting Up Cisco Cius
Installing Cisco Cius

See the Configuring Wireless LAN and the Wireless and Network Settings Menu.
Step 5 Configure Network Settings.
See TFTP Server Settings Menu.
Step 6 Configure features.
See the Cisco Cius User Guide for information.
Related Topics
Verifying Cisco Cius Startup Process, on page 12
Configuring Startup Network Settings, on page 12
Verifying Cisco Cius Startup Process
After Cisco Cius is charged, press the Power button at the top of the unit to start the device. Cisco Cius begins
its startup diagnostic process as the device checks its hardware. The home screen cycles through two screens,
the first displays Cisco Cius and the second a flashing blue Cisco logo. The Cisco Cius then boots to the
unlock screen with the clock, missed-call calendar and voicemail count icons, and swipe-to-unlock arrow.
If Cisco Cius successfully passes through these stages, it has started up properly. If Cisco Cius does not start
up properly, the Cisco Unified Communications Manager will show the device as unregistered and and Cisco
Cius will display the unregistered icon (red X) at the top left of the status bar. In addition, when the user opens
the phone application, the user will see a message that the device is not registered. For information on resolving
startup problems, see the General Troubleshooting.
Configuring Startup Network Settings
If you are not using DHCP in your network, you must configure these network settings on Cisco Cius after
installing it on the network:
• IP address
• Gateway
• Netmask
• Domain name
• TFTP server IP address
You also may configure the DNS server settings, if necessary.
Collect this information and see the instructions in Configuring Settings on Cisco Cius
Configuring Security on Cisco Cius
The security features protect against several threats, including threats to the identity of Cisco Cius and to data.
These features establish and maintain authenticated communication streams between Cisco Cius and the Cisco
Cisco Cius Administration Guide, Release 9.2(4)
12 OL-27284-01
Setting Up Cisco Cius
Verifying Cisco Cius Startup Process

Unified Communications Manager server, and ensure that Cisco Cius uses only digitally signed files. Data
on the Cisco Cius device itself is protected by an Encrypted File System.
Cisco Unified Communications Manager (beginning with Release 8.5(1)) includes Security by Default, which
provides the following security features for Cisco Cius devices without running the CTL client:
• Signing of Cisco Cius configuration files
• Cisco Cius configuration file encryption
• HTTPS with Tomcat and other web services
Secure signaling and media features still require you to run the CTL client and use hardware eTokens.Note
For more information about the security features, see the Understanding Security Features for Cisco Cius.
Also, see the Cisco Unified Communications Manager Security Guide.
A Locally Significant Certificate (LSC) is installed on Cisco Cius after you perform the necessary tasks that
are associated with the Certificate Authority Proxy Function (CAPF). You can use Cisco Unified
Communications Manager Administration to configure an LSC, as described in the Cisco Unified
Communications Manager Security Guide.
Alternatively, you can initiate the installation of an LSC from the Enterprise Security Settings menu on Cisco
Cius. This menu also lets you update or remove an LSC.
To configure an LSC on Cisco Cius, perform these steps:
Before You Begin
Make sure that the appropriate Cisco Unified Communications Manager and the CAPF security configurations
are complete. See the Cisco Unified Communications Manager Security Guide and the Cisco Cius Wireless
LAN Deployment Guide for more information.
Procedure
Step 1 Obtain the CAPF authentication code that was set after the CAPF was configured.
Step 2 From the home screen on Cisco Cius, choose Applications Menu >Settings >Location & security >
Enterprise security settings.
Step 3 Tap LSC.
Cisco Cius prompts for an authentication string.
Step 4 Enter the authentication string if required by administrator and tap Submit.
Cisco Cius begins to install, update, or remove the LSC, depending on how the CAPF was configured. During
the procedure, a series of messages appears in the LSC option field in the Security Configuration menu, so
you can monitor progress. After the procedure is completed successfully, Cisco Cius displays Installed or Not
Installed.
The LSC installation, update, or removal process can take a long time to complete. You can stop the process
at any time by tapping Cancel.
After the installation procedure is completed successfully, Cisco Cius indicates Installed. If Cisco Cius indicates
Not Installed, the authorization string may be incorrect or Cisco Cius may not enabled for upgrading. If the
CAPF operation deletes the LSC, Cisco Cius indicates Not Installed to indicate that the operation was successful.
See error messages generated on the CAPF server and take appropriate actions.
Cisco Cius Administration Guide, Release 9.2(4)
OL-27284-01 13
Setting Up Cisco Cius
Configuring Security on Cisco Cius

Cisco Cius restarts after LSC is installed, upgraded, or
deleted.
Note
Cisco Cius Administration Guide, Release 9.2(4)
14 OL-27284-01
Setting Up Cisco Cius
Configuring Security on Cisco Cius
Other manuals for Cius
4
Table of contents
Other Cisco Tablet manuals

Cisco
Cisco Webex DX80 User manual

Cisco
Cisco TelePresence DX70 User manual

Cisco
Cisco TelePresence User manual

Cisco
Cisco Z70 User manual

Cisco
Cisco Cius User manual

Cisco
Cisco Cius User manual

Cisco
Cisco Smart+Connected User manual

Cisco
Cisco TelePresence Touch 10 User manual

Cisco
Cisco Cius Installation guide

Cisco
Cisco TelePresence Touch 10 User manual