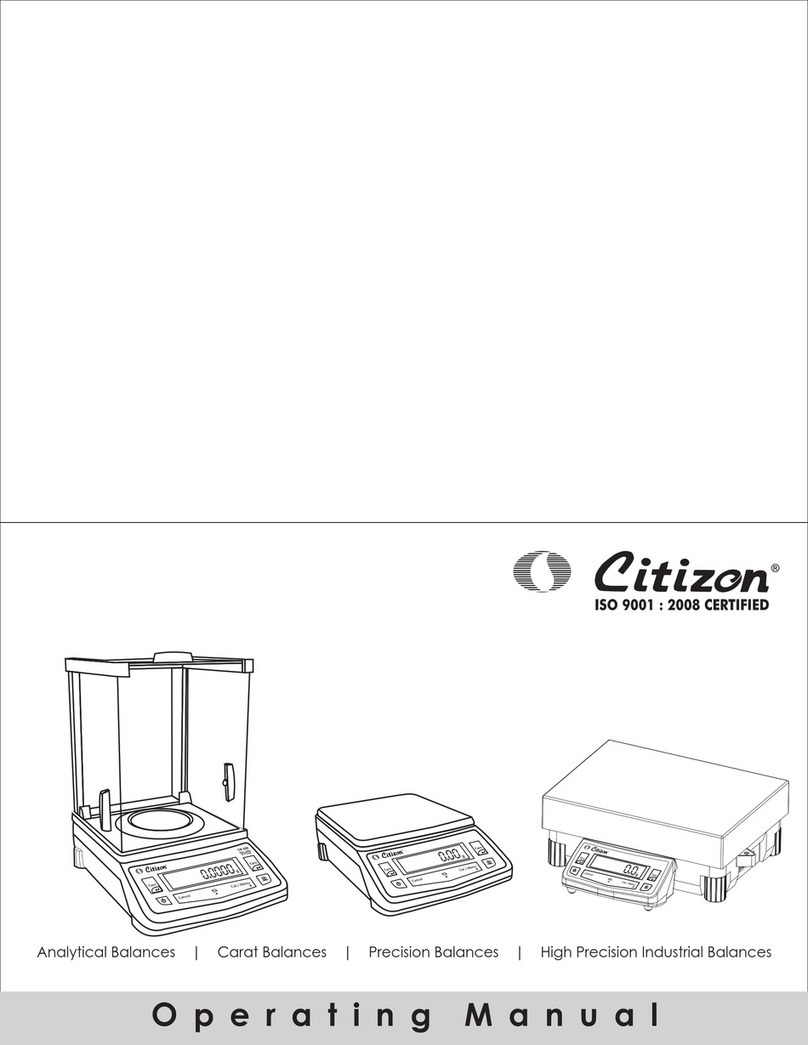
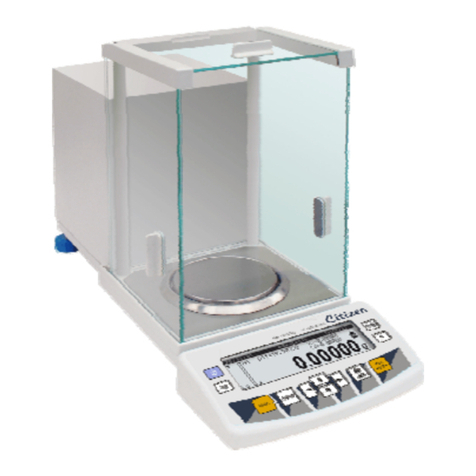
Citizen CY series User manual

!
!!!!!!!!!!!!!!!!!!!!!!!!!!!!!!!!!!!!"#$%&'&()!*+,+)%$'!
!!!!!!!!!!!!!!!!!!!!!!!!!!!!!!!!!!!!!!!!!!!!!!!!!!-./-0!1$#&$'!!!!!!!!!!
!!!!!!!!!!!!!!!!!!!!!!!!!!!!!!!!!!!!!!!!
!!!!!!!!!!!!!!!!!!!!!!!!!!!!!!!!!!!!!!!!!!!!!!!!!!!
!
!
!
!
!
!
!
!
!
!
!
!
!
!
!
!
!
!
!

Contents
1. SETTING UP THE BALANCE..............................................................................3
2. APPLICATION...................................................................................................... 4
3. CONDITIONS OF APPROPIATE USING............................................................. 5
4. KEYBOARD ......................................................................................................... 6
5. START AND SERVICE......................................................................................... 7
6. WEIGHING ........................................................................................................... 8
7. CALIBRATION ..................................................................................................... 9
7.1. Balance with external calibration................................................................. 10
8. SCHEDULE OF ENTERS IN SETTING FUNCTIONS........................................11
8.1. Counting pieces .......................................................................................... 12
8.2. Control of deviations % according to standard mass................................... 16
8.2.1. Standard mass defined by its weighing........................................... 16
8.2.2. Standard mass introduced to balance memory by user .................. 17
8.3. Definition thickness of solids and liquids ..................................................... 18
8.3.1. Testing thickness solids ..................................................................18
8.3.2. Testing thickness of liquid............................................................... 18
9. Adjusting the balance to working conditions ................................................ 19
9.1. Turn on/off autozero system........................................................................ 20
9.2. Choice of criteria of stable result depending on conditions of using ............ 21
9.3. Average result of weighing .......................................................................... 22
9.4. Adjusting scale for dosage procedures ....................................................... 23
9.5. Select default unit of weighing..................................................................... 24
10. FUNCTIONS FOR USING RS 232 ...................................................................25
10.1. Choice of speed of transmission ............................................................... 26
10.2. Definite sent data as stable/not stable....................................................... 27
10.3. Continuous work (RS 232) ........................................................................28
10.4. Set-up date as basic parameter of printout ............................................... 29
11. COOPERATION WITH PRINTER OR COMPUTER......................................... 30
11.1. Schedules of connecting conductors......................................................... 30
11.2. Printing data with date and time ................................................................ 31
11.3. Cooperation with statistic printer ............................................................... 31
11.4. Format of sending data ............................................................................. 31
- 2 -
12. REPORTS FROM SCALE................................................................................ 33
12.1. Current control of calibration fault ............................................................. 33
12.2. Report from calibration of scale................................................................. 34
13. WEIGHING LOADS UNDER SCALE ............................................................... 35
14. LIST OF ORDERS COMPUTER - SCALE .......................................................36
15. ORDERS ON DIGITAL DISPLAY .................................................................... 37
16. TECHNICAL PARAMETERS ........................................................................... 38
17. ADDITIONAL EQUIPMENT.............................................................................. 39

- 3 -
1. SETTING UP THE BALANCE
Cut safety tape off. Take balance off the box. Take all necessary to correct
performance of balance elements off the box. After replace balance in place of use
put scale and rest of elements on.
Assembly of elements for scale with precision 10mg:
-Put pan scale (2) on gum mandrels
-Put cover on scale (1) using pins in back part of
balance cover.
-After assembly check if scale touches gum
mandrels
-Turn power supply on
plug in feeder to socket at back of balance
casing
-Display shows digits (test of display) and then
display shows 0.00g
-If indication is not zero press tare key
Assembly elements for scale with precision 1mg:
-Put pan scale (3) on gum mandrels
-Put glass shield on scale (2) using masking
frame which is on balance cover (4), (scale
masking frame must be inside of scale)
-Put upper cover on cover of scale
-After assembly check if scale touches gum
mandrels
-Turn power supply on, plug in feeder to socket
at back of balance casing
-Display shows digits (test of display) and then
dislpay shows 0.000g
-If display doesn’t show zero press tara key

- 4 -
2. APPLICATION
Electronic scale CY - CG is appropriate for precise measurements mass in
laboratory conditions with possibility of setting to zero in all measure range. Balance
calibration is done by CAL on balance keyboard.
Functions accessible to user are divided into 4 parts:
!Functions for weighing units (press F key)
-Weighing in grams,
-Result with 3 places after dot,
-Weighing in carats [ct],
-Weighing in units from beyond SI: [GN], [mom], [oz], [dwt]. Access to
these units is blocked from factory menu level.
!Functions for calibration and weighing modes
(tare key + f key)
-Summing function
-Counting pieces
-Control of deviations % according to standard mass
-Thickness of liquids
-Thickness of solids
!Choice of criteria of stable result depending on conditions of using
(tare key + cal key)
-Turn off/on system of autozero
-Summing function
-Turn off / on automatic calibration in relation to changes of temperature
-Turn off/ on automatic calibration in relation to time from last calibration
-Setting amount of average measurements
-Average result of weighing
-Adjusting balance for dosage procedure
-Select default unit of weighing
!Function for using RS 232
(tare key + print key)
-Choose speed of transmission
-Define sent data as: stable / not stable
-Continuous work
-Setting data as additional element of parameter in printouts
-turn on/off marking of last digit in printout
Moreover balance can be used to weigh hang loads, print report of
calibration, check deviation of calibration and print reports of testing
thickness of liquids and solids.

- 5 -
3. CONDITIONS OF APPROPIATE USING
•scales should be used and stored in rooms without vibrations and shakes,
without drafts and dust
•temperature of air should be +15
o
C ÷+35
o
C
•during using balances changes of temperature shouldn’t be higher than
0,5oC per one hour
•scales should be replaced on wall console or stable table, far from sources
of heating
•strong magnes is installed inside of balance – so it’s important to be carefull
during weighing magnetic materials. Use hang loads if it’s possible not to
expose magnetic load to magnes influence. Suspension is replaced on basic
of the balance.
•If static electrisity has influence on scale annunciators it’s neccesary to
connect it to earth. Earth screw is replaced in back part of balance base.
•Scale should be replaced in horizontal level to assure precision of weighing

- 6 -
4. KEYBOARD
Key ON/OFF is to turn display off. Others subassemblies are still
suppplying and scale is in stage of waiting for further work. If user
press this once again weighing stage with measure units are
displayed.
PRINT key is to send current state of display to external mechanism
by connector RS 232
CAL key is to calibrate. It’s manual calibration. After press if scale
starts calibration. There shouldn’t be any load on scale. If you press
TARE during calibration calibration stops and weighing returns
Fis function key. It’s to choose measure unit (in which measurement
is done) or to change some functions in user menu
TARE key is to sett indication to zero. After setting to zero indication
is zero. If load is taken off scale display show its mass with “minus”
sign. Setting to zero can be done in all measure range of scale

- 7 -
5. START AND SERVICE
Before supply is turn on glass of weighing chamber should be draw
Balance should be leveled. To level scale screw legs in order air bubble was in
centre position.
TIME OF HEATING
It’s neccesary to wait untill scale gets heat stabilization. It’s time of own heating.
User has to wait 15 min. in case of analitycal scales.
Given values refers to scales that were in temperature of conditions of work
before they are connected to suppling net.
If scales were in much lower temperature (f.eg. in winter) time of acclimatization
and heating is 4 hours before connect to supply net. During warm stabilization of
scale indications on display can change.
After time of warm stabilization press TARE key – zero indication of mass appears
on display and orders Stab and Zero. Balance is ready to weighing. If display
doesn’t show zero stage press TARE once again.

- 8 -
6. WEIGHING
Before weighing or if the conditions of work changes (f.eg. if temperature of
surrounding is higher then 3
o
C) scale should be calibrated according to way
in point 7.
•
Scale should be load few times by mass close to max capacity befor
measurements
•
Check if not load scale shows „precise zero” - ZERO if measurement is
stable - order STAB,
if not press key TARE,
•
by means of F key sett measure unit
•g, ct, and if they are accessible in factory menu GN, mom, oz,
dwt,
•
put load on scale and read result on display
•
indication can be setting to zero many times by pressing key TARE
(summary of mass loads recordede to scale memory cannot be bigger then
its max capacity)
Don’t turn off scale from supply power between following
measurements. Turn scale off by key ON / OFF.
If user press key ON/OFF once again scale is ready to
following measurements.

- 9 -
7. CALIBRATION
To assure very precise weighing introduce correction factor to balance memory –
it’s calibration. Scales have system of internal calibration (calibration mass with all
automatic system is built inside of scale)
Balances CG and CY can have:
-system of internal calibration ( calibration mass with automatic system is
installed inside of balance) - option
-System of external calibration (calibration is done by external weight)
Calibration should be made if:
•we start weighing
•there are long breaks between following measurements
•temperature of surrounding changes not more than 3
0
C
During calibration platform of balance cannot be loaded.
If there is load on platform order unLoad appears on display. This is
command to take load off platform.
Calibration can be stopped if it’s neccesary.
To stop calibration press key TARE after
pressing key CAL.

- 10 -
7.1. Balance with external calibration
Pressing key CAL causes calibration of balance
- on display appears:
(balance starts autotest for calibration –during test you cannot load the scale), and
then order
(it is command to put calibration mass on scale) calibration mass is given in grams.
If you the mass on scale on display appears
calibration and then
take calibration mass off scale. After take calibration weight off scale balance shows
zero. If unsuitable load is put on scale – balance displays
CAL ER (calibration is cancelled)

- 11 -
8. SCHEDULE OF ENTERS IN SETTING FUNCTIONS
-Counting pieces
-Control of deviations % according to standard mass
-Thickness of liquids
-Thickness of solids
Press TARE key (scale shouldn’t display STAB). If horizontal lines appears on
display press key F
After pressing key Fname of first approachable function appears. Every next
pressing key Fmakes names of following approachable functions appear on
display. Way of setting functions is described in further part of instruction.

- 12 -
8.1. Counting pieces
Softwares enables to amount small elements with the same mass To use this
function:
•put package on scale and press TARE its mass to balance memory
•press key TARE. When horizontal lines appear on display
press key F
•Press Fkey – display appear
•Press PRINT key to activate function (you can select from 10, 20, 50pcs or
free definable)
•Press Fkey – choose value
•If you want to start the counting pieces function, please choose one of the
values, eg. 20 pcs

- 13 -
•After displaying of LoAd information, please put on the pan of the balance
as many pieces as have been chosen (20pcs).
•If option Free was chosen, the display will show the number of pieces with
flashing of the first digit – you should inscribe as many pieces are in the
mass pattern

- 14 -
•set up batch quantity by mens of keys
ON/OFF – choose digit
F– choose value
•confirm by pressing key PRINT -
LOAD appears on display
•after making sure that batch with declared quantity is put on scale
confirm by key PRINT once again - balance displays
Process, and then amount of elements and PCS.
•after adding or take counted elements off scale their amount appear on
display

- 15 -
Return to weighing mode
•press key F many times untill - PIECES appears on display
•press TARE key
Balance return to weighing mode and diode with g mark starts flashing
Attention:
1. If you choose batch quantity remember that precision of counting depends on
metrological parameters of balance and on repeatability of mass singular
counted elements.
2. Result of measurement is more precise if batch quantity is bigger
3. If summary mass of batch quantity is less than 5 reading divisions (5d) –
balance shows order about error -LO- and return to weighing automatically.

- 16 -
8.2. Control of deviations % according to standard mass
Software enables control of deviations (in %) mass of weighed loads from
standard mass. Standard mass can be defined by weighing (function PERC A)
or written to balance memory by user(function PERC B)
8.2.1. Standard mass defined by its weighing
Procedure:
Press key TARE. When horizontal lines appear on display press F
•Press key F many times untill on display appear
•press key PRINT to active function
•on display appears:
•put load on scale. Mass of this load is assumed as standard
•press PRINT to confirm this work mode
•on display appears Process and after few seconds 100,00%
From this time instead of mass weighed load relation load on scale to standard
mass is displayed. (in %).

- 17 -
8.2.2. Standard mass introduced to balance memory by user
Procedure
Press key TARE. When horizontal line appear on display press key F
•Press key F many times untill - PERC B
•Appears on display
•press PRINT key to activate this function
•on display appears:
•by means of keys:
ON/OFF – choose digit,
F- choose value of digit
set value of standard mass and write it in balance memory by means of
key PRINT – on display appears: 0,00 %
From this time relation of load on scale to standard mass (in%) is displayed instead
of weighed load mass. Leave mode of percentage deviations from standard mass
control
•Press key TARE. When horizontal lines appear on display
press F. Press key F many times untill Perc A or Perc B
appears on display - press TARE,

- 18 -
8.3. Definition thickness of solids and liquids
There is equipment to defining thickness of solids and liquids in additional
equipment. For user request Citizen service can render special software to define
thickness by scale accessible.
1. beaker support
2. frame of scale
3. plunger
4. beaker
5. thermometer clench
6. thermometer
7. plunger string
8. plunger hanger
9. upper scale
10. scale string
11. down pan
12. additional loads
for leveling initial load
8.3.1. Testing thickness solids
Thickness of solids can be tested in one of 3 liquids:
•H2O (distilled water),
•C2H5OH (spirit 100% +/- 0.1% in temp. 20
0
C),
•AnotHEr (another liquid with known thickness)
Give temperature of liquid for distilled water and spirit. For liquid with known
thickness value is written on keyboard.
To test thickness weigh sample on upper scale and weigh the same
sample in liquid (on down scale). Result is represented on display
automatically after replacing sample in liquid. After pressing key
PRINT scale gives report from examination automatically.
8.3.2. Testing thickness of liquid
Basic element for measuring thickness of liquid is glass plunger. It has
precise capacity shown on hook.
Before final measurements this value should be introduced to scale
memory. To test thickness of liquid weigh glass plunger on upper
scale and in tested liquid. Result of testing is shown on display
automatically after introducing mass of plunger. After pressing key PRINT scale
generates report from made examination automatically.

- 19 -
9. Adjusting the balance to working conditions
-Turn off/on system of autozero
-Speed of stabilization
-Average result of weighing
-Adjusting balance for dosage procedure
-Select default unit of weighing
Press TARE key (scale shouldn’t display STAB). If horizontal lines appears on
display press key CAL
After pressing key Fname of first approachable function appears. Every next
pressing key Fmakes names of following approachable functions appear on
display. Way of setting functions is described in further part of instruction.
This manual suits for next models
10
Table of contents
Other Citizen Scale manuals

Citizen
Citizen CTP Series User manual

Citizen
Citizen CTG Series User manual

Citizen
Citizen CKG-3000 User manual

Citizen
Citizen CARAT BALANCES CT103 User manual

Citizen
Citizen CX 265N User manual

Citizen
Citizen CZ series User manual

Citizen
Citizen CW series User manual

Citizen
Citizen MB Series User manual

Citizen
Citizen PHS 100 User manual

Citizen
Citizen CTB-150 User manual
Popular Scale manuals by other brands

Minebea Intec
Minebea Intec Compact scale Puro Basic EF-P1 operating instructions

iHealth
iHealth HS5 user manual

Jeulin
Jeulin 701 058 quick start guide

OBH Nordica
OBH Nordica Wellness art 6273 instruction manual

Taylor
Taylor TE10C instruction manual

Steinberg Systems
Steinberg Systems SBS-PW-402C user guide