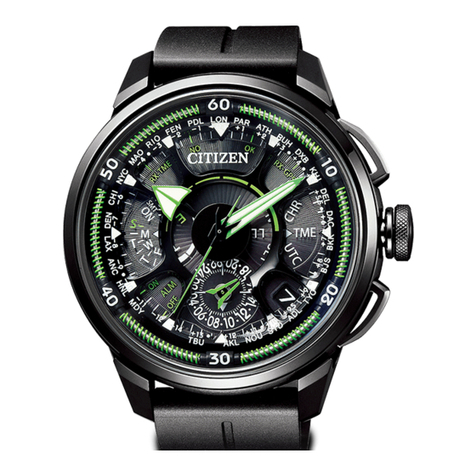
Citizen H61 Series User manual

1
Table of contents
Parts identification . . . . . . . . . . . . . . . 2
Preparation
1: Confirming the time signal
reception and power reserve . . . . 4
2: Checking the reference
position of the hands . . . . . . . . . . 6
3: Setting the city . . . . . . . . . . . . . . 7
Using the chronograph . . . . . . . . . . .10
Using the world time . . . . . . . . . . . . .11
Using the alarm. . . . . . . . . . . . . . . . . .12
Setting the daylight saving time . . .14
Notes on the time signal . . . . . . . . . .16
Receiving the time signal manually
(On-demand reception) . . . . . . .20
Notes on the indications for the time
signal reception . . . . . . . . . . . . . .21
Notes on the reception
of the time signal. . . . . . . . . . . . .22
Setting the time/
calendar manually. . . . . . . . . . . .26
Adjusting the reference position . . .30
Using the calculation scales . . . . . . .32
Notes on charging your watch . . . . .44
Troubleshooting . . . . . . . . . . . . . . . . .48
Precautions . . . . . . . . . . . . . . . . . . . . .54
Maintenance . . . . . . . . . . . . . . . . . . . .62
Information. . . . . . . . . . . . . . . . . . . . .63
Specifications . . . . . . . . . . . . . . . . . . .66

2
Parts identification
• The illustrations in this instruction manual may differ from the actual appearance of your watch.
Chronograph second hand
Chronograph minute hand
Power reserve indication
Hour hand
Daylight saving time
indication
Crown for the scale*
Scale*
Second hand
Signal station indication
Signal reception
indication
(NO/RX/H/M/L)
24-hour hand
Alarm indication
Upper right button (B)
Crown
Minute hand
Lower right button (A)
Date indication
City indication
60
30
45 15
60
30
1050
2040
24
20
16 8
4
12
NYC
㻣
CHI
SCL
NO
RX
EUR
CHN
JPN
USA
MA
AU
MA
AU
STD
SMT
H
M
L
ON
ALM
OFF

3
How to use the screw down crown and screw down push button
Some models feature a screw down crown and screw down push button.
Locking the crown and button prevents accidental operation. Unlock them when you
want to operate the watch.
Unlock Lock
Screw down
crown
Rotate the crown
counterclockwise (left)
until it releases from the
case.
Rotate the crown
clockwise (right) while
pushing it in, and tighten
firmly.
Screw down
push button
Rotate the locking screw
counterclockwise (left),
and loosen until it stops.
Rotate the locking screw
clockwise (right), and
tighten firmly.
• Unlocking is not required when a standard crown and button are equipped.
* Some models do not feature the scale and the crown for the scale.

4
Preparation
1: Confirming the time signal reception and power reserve
You must confirm the signal reception result and charge level at first before use.
1. Ensure that the crown is in position 0.
2. Press the lower right button (A).
The chronograph second hand indicates the
signal reception result and the chronograph
minute hand indicates the current power reserve
level.
• See the next page to show the indications.
3. Press the lower right button (A) to return
to normal operation.
012
60
15
24
20
A
60
30
45 15
60
Crown position
• Before the operation above, reset the chronograph.

5
60
30
45 15
60
30
45 15
60
30
45 15
60
30
45 15
The indication of the signal reception result
Indication
Result H M L
The indication of the power reserve level
Indication
Power
duration
About six days About six to 35 days
About 35 to 150 days About 150 to 240 days
Charge the watch at once.
The indication is not so precisely. Charge the watch frequently . See page 44.
For in depth information on
the receiving, see page 22.

6
2: Checking the reference position of the hands
If the reference position is incorrect, the time and calendar are not indicated properly.
1. Ensure that the crown is in position 0.
2. Press and hold the upper right button (B)
for ten seconds.
The hands moves quickly to show the current
reference position.
The correct reference position is when;
• all hands are indicating 12:00;
• the date indication is between “31” and “1”.
• You can select any city for checking the reference
position.
If all the hands are not in the correct reference
position, adjust them referring to page 30.
3. Press the upper right button (B) to
complete confirmation.
TYO
HKG
ADL
㻝
㻟㻝
B
012
Crown position
• Before the operation above, reset the chronograph.
Correct reference position

7
3: Setting the city
You can select your home or favorite city from 26 cities in the world.
1. Pull the crown out to position 1.
The chronograph second hand indicates the
daylight saving time setting.
2. Rotate the crown to select the city.
• Refer to the pages 8and 9.
• Adjust the position of the city name to the center of the
window.
• Each time you change the city, the time of the selected
city is shown.
3. Push the crown in to position 0.
TYO
HKG
ADL
㻣
12
Crown position
0
Crown
Crown position
012

8
Table of the city names
The signal station is
changed depending
on the selected city.
Some cities cannot
receive the signal
though the signal
station is assigned in
the list.
Indication City name Time difference Signal station
UTC −0−
LON London 0
EUR
PAR Paris +1
CAI Cairo +2
MOW Moscow +3
DXB Dubai +4
KHI Karachi +5
CHN
DEL Delhi +5.5
DAC Dhaka +6
BKK Bangkok +7
HKG Hong Kong +8
TYO Tokyo +9
JPN
ADL Adelaide +9.5

9
Indication City name Time difference Signal station
SYD Sydney +10
JPN
NOU Noumea +11
AKL Auckland +12
MDY Midway Island -11
USA
HNL Honolulu -10
ANC Anchorage -9
LAX Los Angeles -8
DEN Denver -7
CHI Chicago -6
NYC New York -5
SCL Santiago -4
RIO Rio de Janeiro -3
FEN Fernando de Noronha -2
EUR
PDL Azores -1

10
Using the chronograph
You can record up to 60 minutes in increments of 0.2 seconds.
1. Ensure that the crown is in position 0.
2. Press the upper right button (B) to start
timing.
The chronograph second hand starts timing.
3. Press the upper right button (B) to stop
timing.
• Pressing the upper right button (B) restarts timing.
• You have to reset the chronograph after timing for
using other functions.
To reset the chronograph
Press the lower right button (A) while stopping.
• While resetting, you can start a new timing by
pressing the upper right button (B).
• The chronograph is also reset if you pull the crown
out while timing.
B
A
012
Crown position

11
Using the world time
You can display a local time among 26 cities or UTC.
1. Pull the crown out to position 1.
The chronograph second hand indicates the
daylight saving time setting.
2. Rotate the crown to select the city.
• Refer to the pages 8and 9.
• Adjust the position of the city name to the center of the
window.
• You can change the daylight saving time setting by
pressing the lower right button (A). Refer to page 14.
3. Push the crown in to position 0.
TYO
HKG
ADL
㻣
12
Crown position
0
Crown
Crown position
012

12
Using the alarm
1. Pull the crown out to position 2.
The chronograph second hand moves to indicate
the alarm on/off setting while the hour and
minute hands move to indicate the current alarm
time setting.
2. Rotate the crown to set the alarm time.
• The hands start to move continuously by rotating the
crown quickly. To stop the rapid movement, rotate the
crown.
• Each time you press the upper right button (B),
the “minute” and “hour” of the setting time changes
alternately.
3. Press the lower right button (A) to turn the
alarm “ON”.
• Each time you press the lower right button (A), the
chronograph second hand indicates “ON” and “OFF”
alternately.
4. Push the crown in to position 0.
• The alarm tone does not sound when the crown is
pulled out.
24
8
4
12
A
B
Crown
Crown position
120

13
To stop the alarm tone
Press the upper or lower right button (Aor B).
• The alarm tone sounds for 15 seconds and then stop if a button is not pressed.
When using world time
The alarm tone sounds based on the time of the selected city.
• The alarm cannot be set for each city.
To confirm the alarm tone
Pull the crown out to position 2and press and hold the lower right button (A) for
two or more seconds.

14
Setting the daylight saving time
In regions where the daylight saving time (DST) is in effect, the time signal includes
the daylight saving time check signal.
• When “UTC” is selected as the city, you cannot change the setting.
1. Pull the crown out to position 1.
The chronograph second hand indicates the
daylight saving time setting.
2. Press the lower right button (A) to change
the daylight saving time setting.
• Each time you press the lower right button (A), the
chronograph second hand indicates items in the
following order:
SMT AU → SMT MA → STD AU → STD MA →
To the beginning
3. Push the crown in to position 0.
30
A
12
Crown position
0
Crown position
012

15
About the daylight saving time setting
Select the daylight saving time setting to fit the implementation of the daylight saving
time.
Status Setting Clock indication
Daylight saving is not
performed. STD MA manual The watch always shows the standard time.
Daylight saving starts/
ends out of sync with the
time signal.
SMT MA manual
The watch always shows the daylight saving time.
You need change the setting each time the daylight
saving starts/ends.
Daylight saving starts/
ends in sync with the time
signal.
SMT AU
STD AU auto The setting changes between “SMT AU” and “STD
AU” automatically.
• The period of the daylight saving time varies from countries/areas.
• SMT (summer time), AU (auto), STD (standard), MA (manual)

16
Notes on the time signal
This watch receives the time signal from the five signal stations located in four regions
and automatically adjusts the time and calendar. The receivable signal stations are
listed as follows:
Signal stations Kind of the time signal Signal station
indication
Fukushima station, Japan
JJY JPN
Kyushu station, Japan
Fort Collins station, Denver, Colorado, USA WWVB USA
Mainflingen station, Southeast Frankfurt, Germany DCF77 EUR
Shangqui station, Henan, China BPC CHN
Refer to the maps on pages 17 to 19 to see the locations of the signal stations and their
receivable area roughly.

17
JJY:
Kyushu station
JJY:
Fukushima station

18
WWVB:
Fort Collins station

19
BPC:
Shangqui
station
DCF77:
Mainflingen
station

20
Receiving the time signal manually (On-demand reception)
You can adjust the watch by receiving the time signal any time when the time is not
correct or the reception result is “NO”.
• You must be in an area that you can receive a time signal.
• Before attempting on demand reception, be sure to reset the chronograph.
1. Ensure that the crown is in position 0.
2. Press and hold the lower right button (A)
for two or more seconds.
The watch starts to receive the signal with the
beep sound, and the chronograph second hand
moves to “RX”.
• It takes from two to 15 minutes for updating to
complete.
• The watch will not start to receive if the second hand is
moving once every two seconds (this is the insufficient
charge warning).
• The signal station is changed depending on the
selected city.
• You can cancel the reception by pressing the lower
right button (A) for two or more seconds.
60
15
24
20
30
60
30
1050
2040
AD
A
012
Crown position
Table of contents
Other Citizen Watch manuals

Citizen
Citizen C470 User manual

Citizen
Citizen H41 Series User manual

Citizen
Citizen 3740-04 Manual

Citizen
Citizen Quartz 7810 Manual

Citizen
Citizen F52 User manual

Citizen
Citizen A010 User manual

Citizen
Citizen E260 User manual

Citizen
Citizen YF05 User manual

Citizen
Citizen E81 Series User instructions

Citizen
Citizen B876 Operating manual

Citizen
Citizen Promaster Skyhawk A-T User manual

Citizen
Citizen 8219 User manual

Citizen
Citizen Eco-Drive AP2XXX User manual

Citizen
Citizen 0S62 User manual

Citizen
Citizen 2502 User manual

Citizen
Citizen 6P25 User manual

Citizen
Citizen 9051 User manual

Citizen
Citizen JP25 User manual

Citizen
Citizen 510 Manual

Citizen
Citizen Calibre 8700 Series User manual