3/3
E650 Abbreviated instruction
Setting summer time
In regions utilizing summer time, the time signal includes summer time check
signal. This watch is equipped with the function to detect the summer time check
signal and switch summer time and standard time automatically.
Checking the current summer time setting
You can check whether the time currently indicated is summer time or standard
time.
1.
Change the mode to [LON], [NYC], [CHI], [DEN], [LAX] or [A-TM]
and push the crown in to position 0.
2.
Press and release the upper right button B.
The second hand indicates the current summer time setting.
Summer time setting Indicated time
ON
Summer time
OFF
Standard time
3.
Press and release the upper right button Bto finish the
procedure.
• It returns to normal indication automatically in about 10 seconds without
pressing the button.
Changing the summer time setting
• The summer time setting of each mode is saved separately.
1.
Change the mode to [LON], [NYC], [CHI], [DEN], [LAX] or [A-TM]
and pull the crown out to position 2.
2.
Press and release the upper right button B.
• Each time you press the button, the alarm sounds and the summer time
setting changes alternately.
Change of
setting Description
OFF
→
ON
The time indicated changes to summer time.
Summer time and standard time will automatically be switched
corresponding to the summer time check signal at the next
signal reception and there after.
• For the modes [NYC], [CHI], [DEN] and [LAX], the time is automatically
switched in all the modes with the setting “ON” at one signal reception.
• No signal reception is performed when the mode is [A-TM] and
consequently automatic time switching does not occur.
ON
→
OFF
Summer time and standard time do not switch automatically
and the standard time is always indicated.
• When the summer time setting before pressing button
B
is “OFF”, set it
“ON” once and set it “OFF” again.
3.
Push the crown in to position 0to finish the procedure.
Checking the reference position
1.
Change the mode to [CHR] and pull the crown out to position
2.
The hands and indication start to move to the current reference positions
stored in memory.
2.
Check the reference positions.
Correct reference positions:
• Hour, minute and second hands: 0 hour 00 minute 0 second
• 24-hour hand: “24”
• Date indication: midway between “31” and “1”
• Function hand: “30” (straight below)
When the current reference position is different from the correct one,
proceed to step 3 of “Correcting the reference position”.
3.
Change the mode to [LON], [NYC], [CHI], [DEN], [LAX] or [A-TM]
and push the crown in to position 0to finish the procedure.
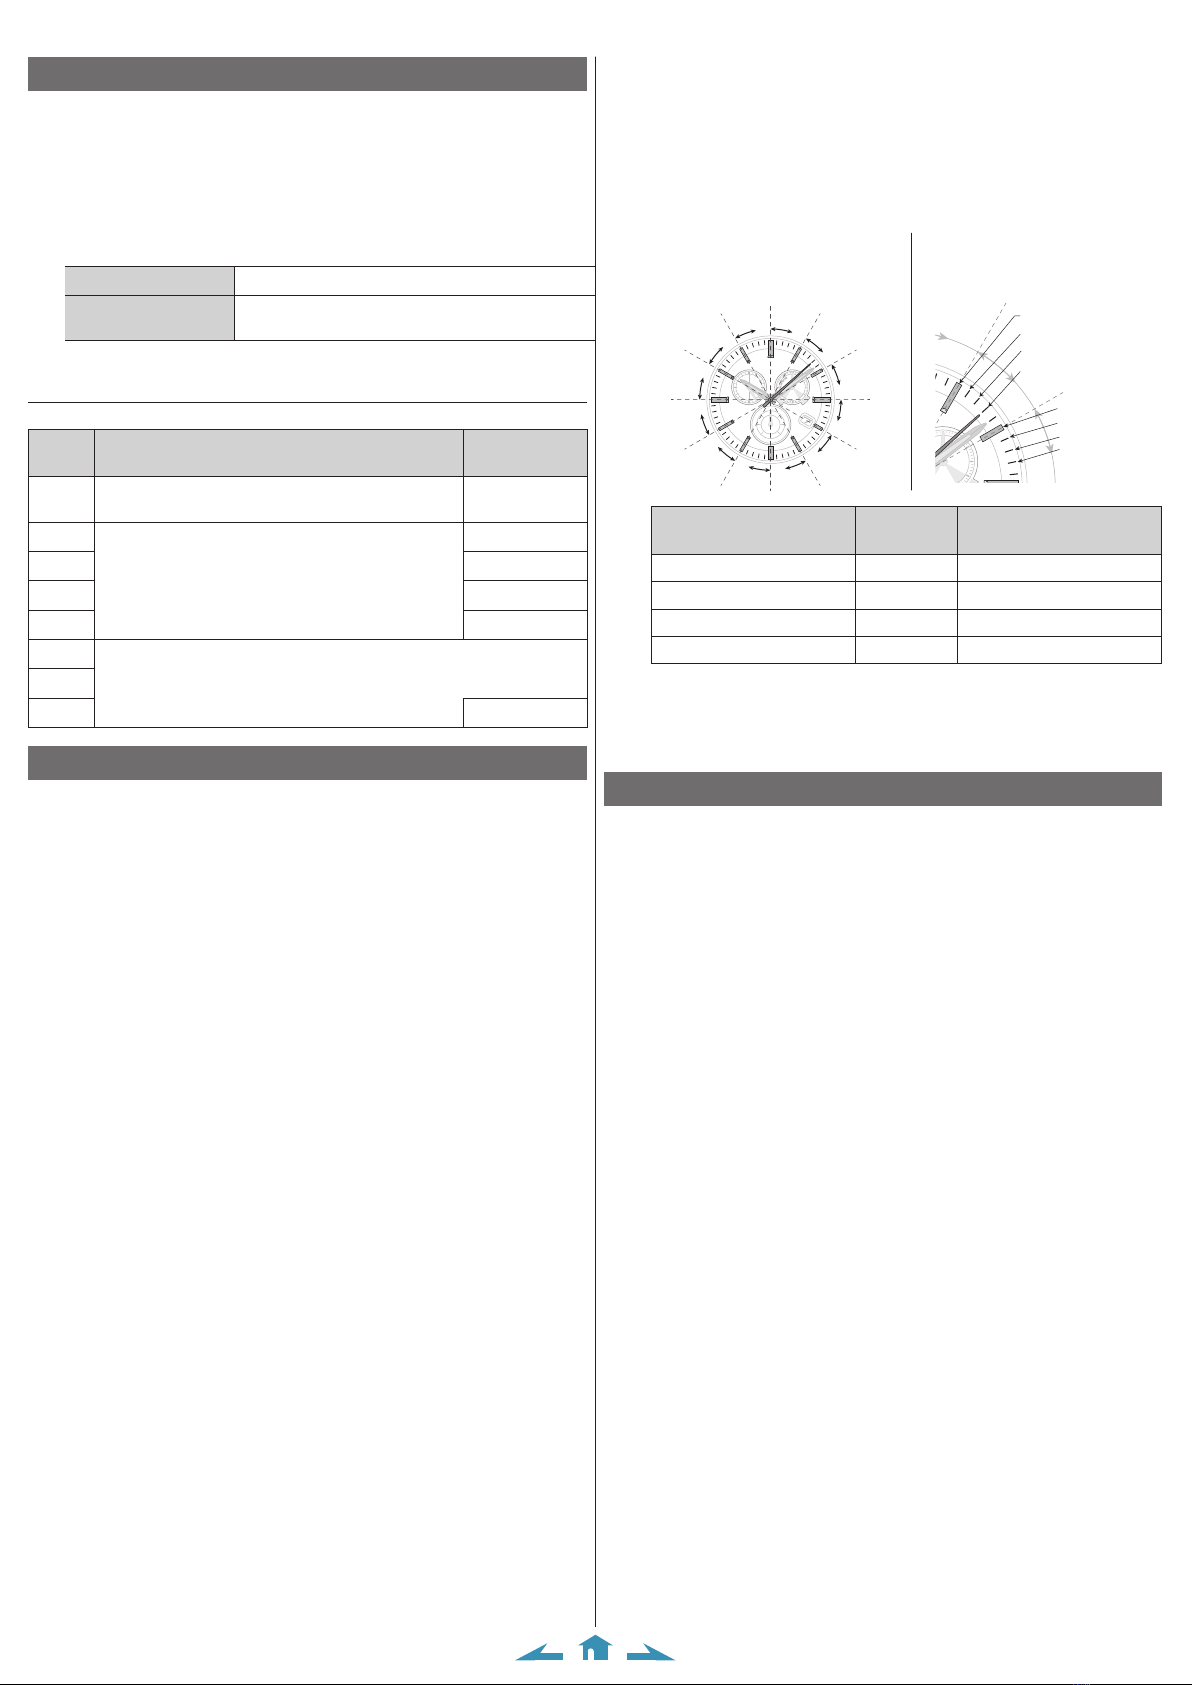
Correcting the reference position
1.
Change the mode to [CHR] and pull the crown out to position
2.
The hands and indication start to move to the current reference positions
stored in memory.
2.
Press and release the lower right button A.
The function hand slightly moves and becomes adjustable.
3.
Press and release the lower right button Arepeatedly to
change the hand/indication to be corrected.
• Each time you press the button, the target changes as follows:
Function hand/date indication → hour /minute/24-hour hands → second hand
→ (back to the top)
• The hands slightly move when selected to show they become adjustable.
4.
Rotate the crown to adjust the hand/indication.
• The hour, minute and 24-hour hands move synchronously.
• Date indication changes to the next as the function hand rotates 5 times.
• When you rotate the crown quickly a few times, the hand/indication will
move continuously. To stop the rapid movement, rotate the crown in either
direction.
5.
Repeat steps 3 and 4.
6.
Change the mode to [LON], [NYC], [CHI], [DEN], [LAX] or [A-TM]
and push the crown in to position 0to finish the procedure.
Resetting the watch - All Reset
1.
Change the mode to [CHR] and pull the crown out to position
2.
2.
Press and release both the lower right button Aand upper
right button Bat the same time.
As you release the buttons, the alarm sounds and all reset is executed.
The setting values after All Reset
Time 0:00:00 AM at the mode [LON]
Calendar January 1, Sunday of leap year at the mode [LON]
Alarm setting “OFF”
Alarm time 0:00 AM
Summer time setting
Mode Automatic switching
function Indicated time
[LON][NYC]
[CHI][DEN]
[LAX]
“ON” Standard time
[A-TM] “OFF”
Reception result “NO”
After All Reset
After All Reset, adjust the reference position and set the time and calendar and
other settings.