7
English
35
36
37
38
39
40
51
52
53
54
41
42
43
44
45
46
47
48
49
50
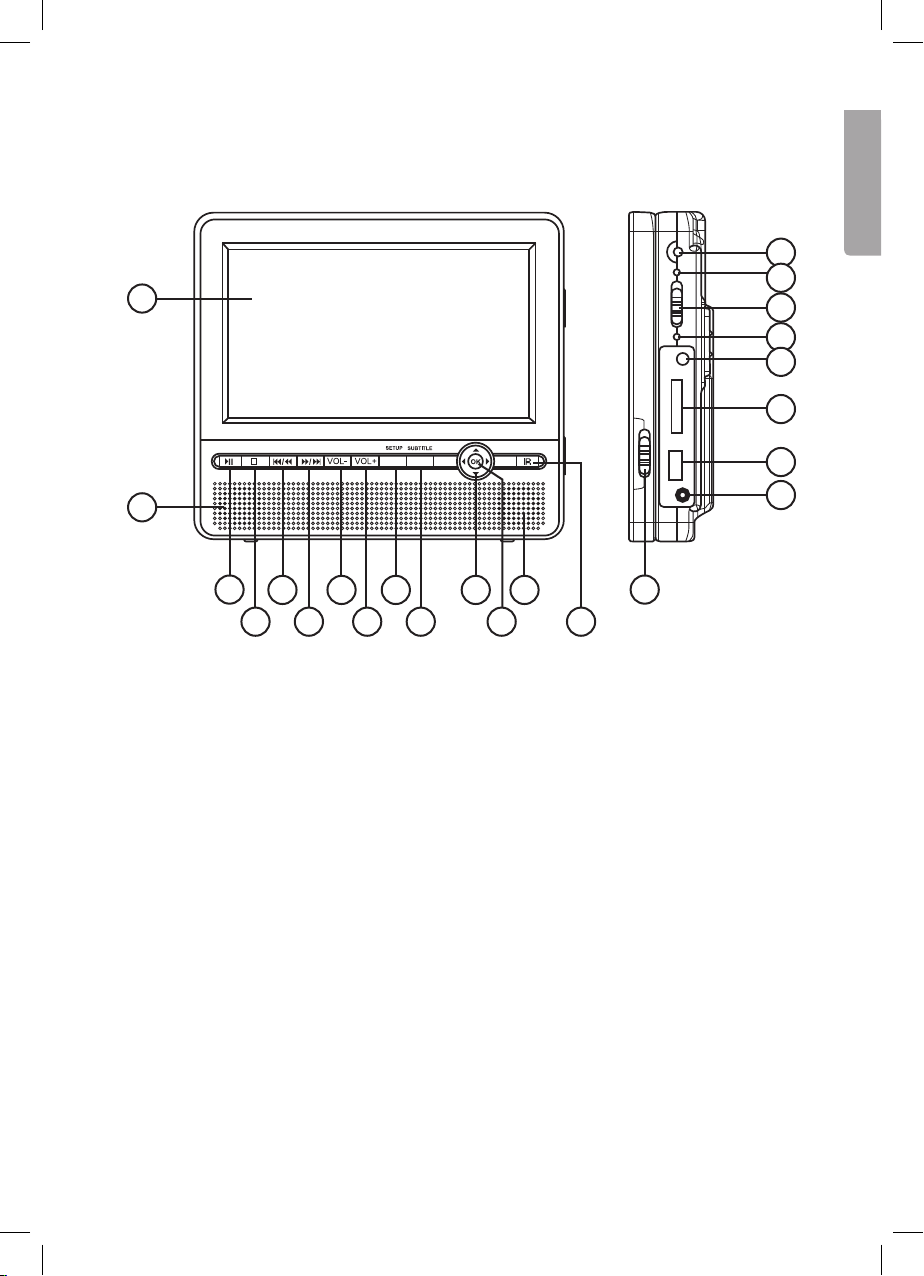
Remote control
N.B. Certain buttons have several
functions (E.g. 35 and 35b each have
two functions)
35. [SCREEN ON/OFF] – Turns the
display screen on/off
35b [BRI/COL] – Adjust brightness/
colour
36. [TITLE] – Press to enter DVD’s
title menu (during DVD playback)
37. [I◄◄] – Previous chapter
37b [◄◄] – Fast rewind
38. [►►I] – Next chapter
38b [►►] – Fast forward
39. [▲►▼◄] – Direction buttons
40. [0-9] – Numerical buttons
41. [PROGRAM] – Select
programme
41b [ANGLE] – Changes the picture
angle (if supported by the DVD)
42. [VOL–] – Volume down
43. [MUTE] – Turns off volume
44. [SETUP] – View detailed settings
and make changes
45. [MENU] – During DVD playback:
Press to go to the DVD’s
main menu
46. [DISPLAY] – Display disc
information
47. [■ STOP] – Stop playback
47b [USB/SD/MMC CARD] – Select playback from: USB, SD or MMC memory and disc.
48. [OK] – Confirm selection
48b [PLAY/PAUSE] – Start or pause playback
49. [SUBTITLE] – Select subtitle language
50. [AUDIO] – Select audio track During audio playback: Press to switch between left,
right, mixed or stereo. During DVD playback: Press to select language
(if the disc has this option).
51. [SEARCH] – During playback: Press during playback to find/select what is
to be played.
52. [REPEAT] – During playback: Press to select the start and end of a section
that you wish to playback repeatedly. Press to repeat a programmed section,
the entire film or the entire DVD.
53. [ZOOM] – Enlarge/reduce image
53b [SLOW] – Play the film in slow-motion
54. [VOL+] – Volume up