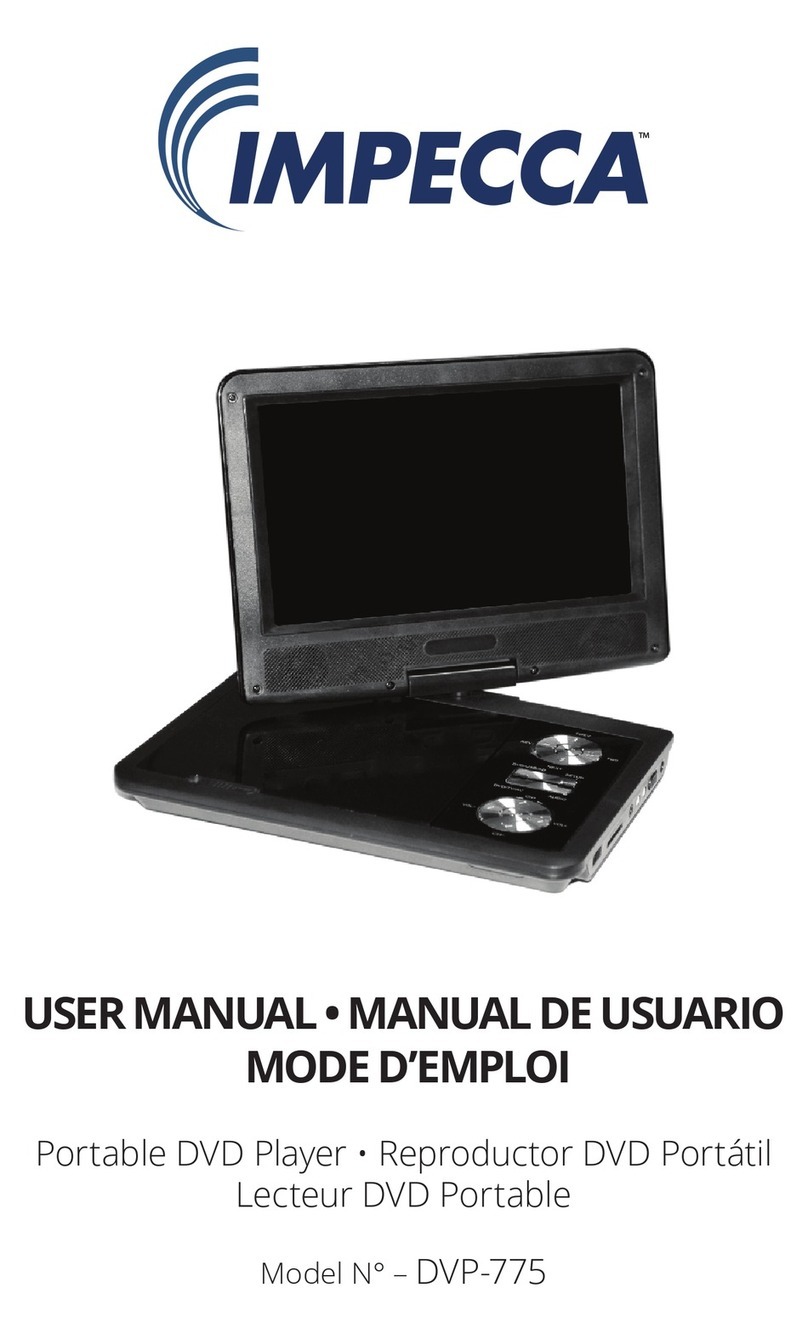
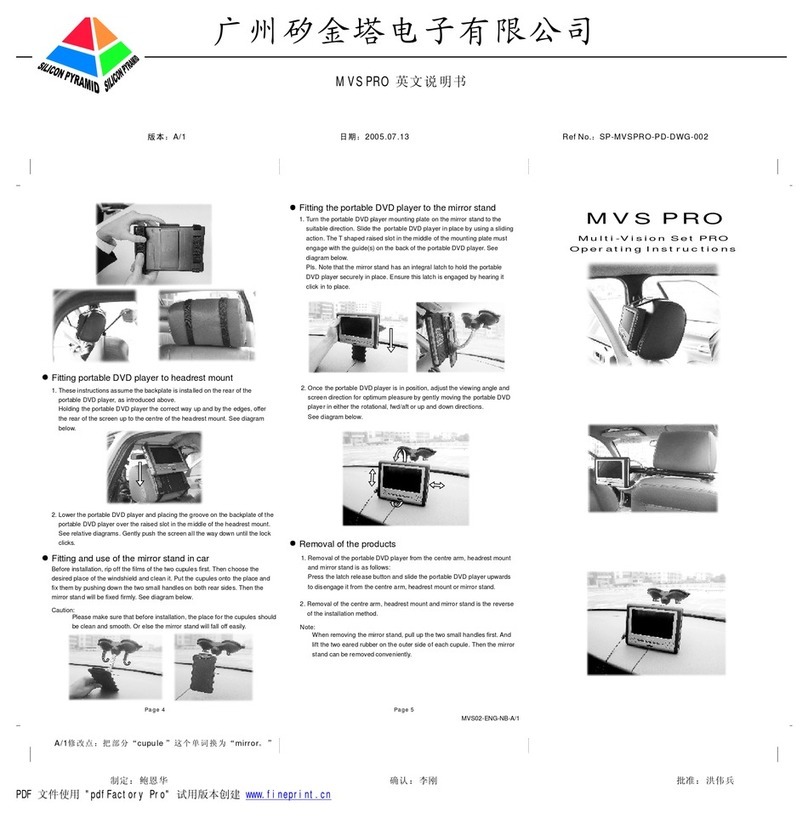
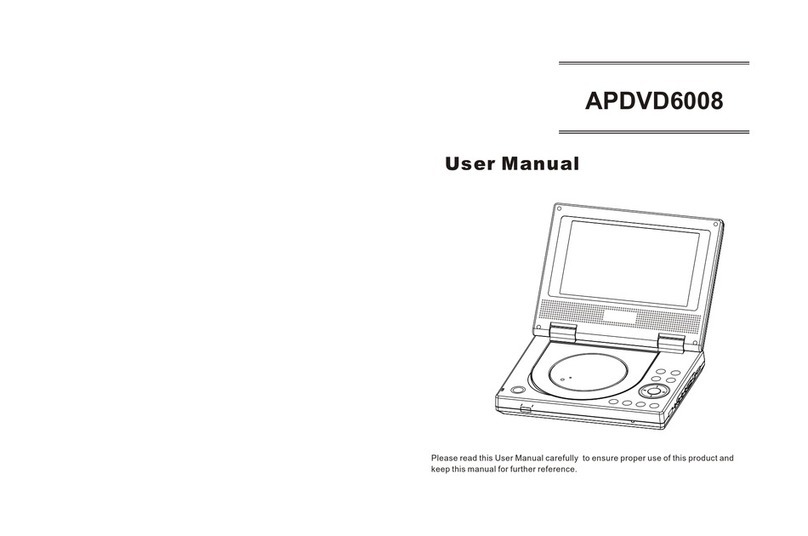
Clas Ohlson PDVD-163BHD2P-UK User manual

EnglishSvenskaNorskSuomi EnglishSvenskaNorskSuomiDeutsch
Ver. 20130830
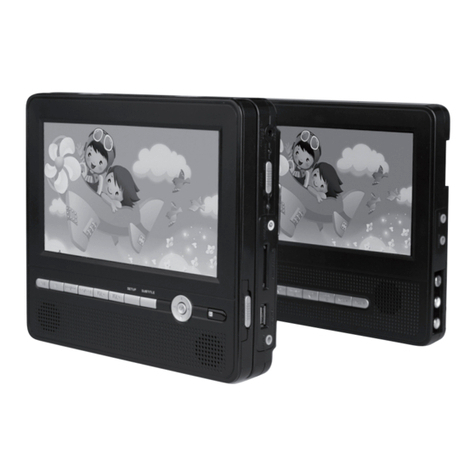
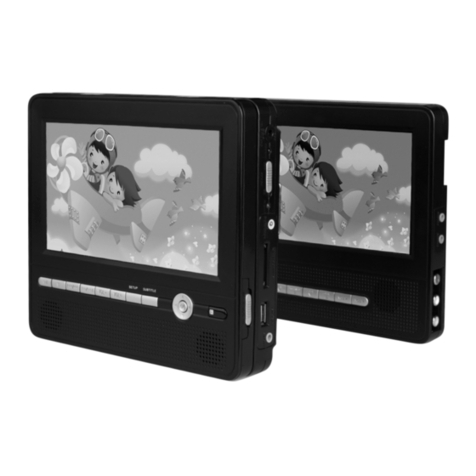
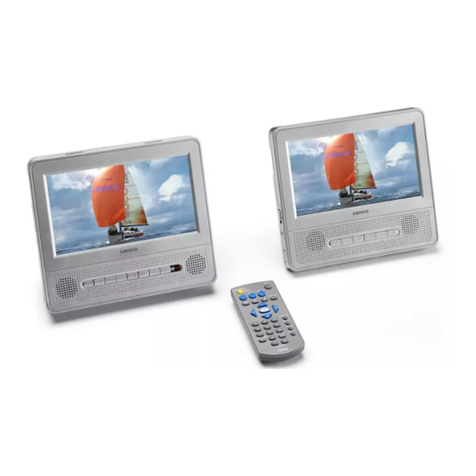
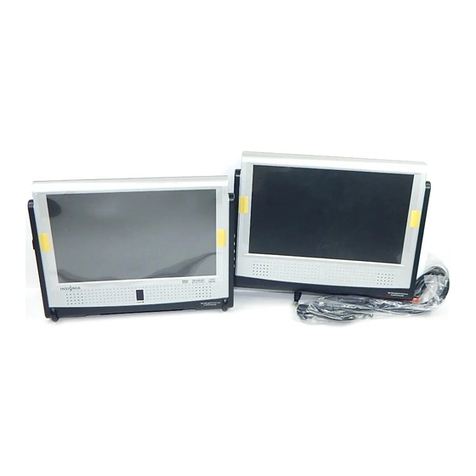
7″Dual Screen Portable
DVD/MPEG4 Player
7″DVD/MPEG4-spelare med dubbla skärmar
7″DVD/MPEG4-spiller med to skjermer
7″DVD/MPEG4-soitin ja kaksi näyttöä
7″-DVD/MPEG4-Player mit zwei Displays
Art.no Model
18-8265 PDVD-163BHD2P-UK
38-4567 PDVD-163BHD2P


3
English
CLASS 1
LASER PRODUCT
7″Dual Screen Portable
DVD/MPEG4 Player
Art.no 18-8265 Model PDVD-163BHD2P-UK
38-4567 PDVD-163BHD2P
Please read theentire instruction manual before using theproduct and save it for future
reference. We reserve theright for any errors in text or images and any necessary
changes made to technical data. If you have any questions regarding technical
problems please contact our customer services.
Safety CLASS 1 LASER PRODUCT
Warning! Donot open thecasing. Theproduct contains invisible
laser beams which can cause eye damage. Do not look directly
into thelaser beam or look directly at it using an optical instrument.
• The product should not be taken apart or modified. Certainexposed parts inside
thecasing carry dangerous current and can cause fires or electric shocks
if touched.
• The on/off switch only switches thedevice into standby power mode and
does not totally cut off current from themains.
• Make sure that thewall socket you are using is accessible so that it is easy to
disconnect themains adaptor from themains when it is not in use.
• Never subject theproduct to high temperature, dust, heavy vibration, impacts,
humidity or moisture.
• Do not place theproduct where there is arisk of it falling into water or other liquid.
Donot place any objects which contain liquid on theproduct such as vases,
drinks, etc.
• Do not cover theproduct. Theventilation openings on theproduct must not
be blocked.
• Do not place theproduct in aconfined space with poor air circulation.
Adequateventilation is required to prevent thedevice from overheating.
• Do not place theproduct on asoft surface such as acushion or aquilt.
Placethe product on ahard surface to ensure adequate ventilation/cooling.
• The product is intended for indoor use only.
• Do not place heavy or sharp objects onto theLCD screen.
• If aUSB cable is used to connect an external device such as amedia player,
thecable should be no longer than 25 cm.
• Use only theincluded AC/DC mains adaptor.
• Do not abuse themains lead. Makesure that themains lead does not come into
contact with heat, sharp edges or is crushed.
Protect your hearing! Listening on high volume for prolonged
periods can lead to permanent hearing damage.
4
English
• Always unplug themains adaptor from thewall socket at night or before leaving
thehouse.
• Protect your hearing. Listeningto theplayer on high volume for prolonged periods
can lead to permanent hearing loss.
• This product must not be used by anyone (including children) suffering from
physical or mental impairment. Thisproduct should not be used by anyone that
has not read theinstruction manual unless they have been instructed in its use by
someone who will take responsibility for their safety.
• If theproduct emits an unusual odour or starts to overheat, switch it off immediately.
Donot use theproduct again until it has been inspected by aqualified technician.
• The product must only be repaired by qualified service technicians and only using
genuine spare parts.
Product description
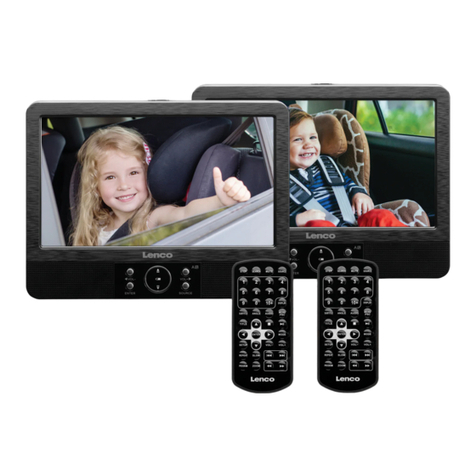
• DVD player with two 7″widescreen display screens.
Built-in speakers.
• USB port, SD slot and stereo headphone socket.
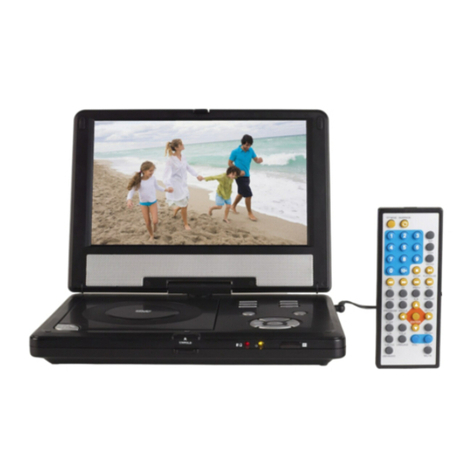
• Remote control (1 × CR2025 battery, sold separately).
• Comes with mains adaptor for home use and 12 V cable for thecar.
• Monitor leads, headrest straps and carrying case included.
• Last memory function: Continues to play aDVD from thepoint where play was
interrupted if thepower is turned off (e.g. if thecar ignition is switched off).
Specifications
Power supply 100–240 V AC, 50/60 Hz or 12 V DC
Power consumption <15 W
Main unit size 190 × 140 × 39 mm
Extra monitor size 190 × 140 × 23 mm
Screen 2 × 7″
Outputs Video output 1.0 V (p-p) / 75 Ω
Audio output 1.0 V rms (1 kHz, 0 dB)
Output power Speakers 2 × 1 W, 3.5 mm headphone socket
Remote control 1 × CR 2025 battery
System
Laser system Semiconductor laser, wavelength 650 nm
Signal system PAL/NTSC
Frequency response 20 Hz to 20 kHz (±1 dB)
SNR Over 80 dB (analogue output)
Dynamic range Over 85 dB (DVD/CD)
Disposal
Disposal of this product should be in accordance with local regulations.
Ifyou are unsure how to proceed, contact your local authority.

5
English
1 2
3
4
5
6
8
9
10 11 12 13 14 15
7
Buttons and functions
Main unit
1. Memory card slot
2. Open theCD/DVD compartment
3. [ON/OFF] On/off switch
4. 3.5 mm headphone socket
5. AV socket
6. Coaxial audio outlets
7. USB port
8. 9–12 V socket for connecting theextra monitor.
9. 9–12 V socket for connecting themains adaptor or 12 V cable.
10. [◄VOL-] Move left; lower thevolume of playback from CD/DVD and video from
USB flash drive or other type of memory card. Whenplaying music stored on aUSB
flash drive or memory card, thevolume is controlled using theremote control.
11. [ENTER] Confirm menu selection; start playback from themain unit
12. [▲/l◄◄ ] Move up; go back to the previous chapter/track
13. [▼/►►l ] Move down; advance to thenext chapter/track
14. [SOURCE] Select playback source: CD/DVD, USB flash drive or memory card
15. [VOL+►] Move right; raise thevolume of playback from CD/DVD and video from
USB flash drive or other type of memory card. Whenplaying music stored on aUSB
flash drive or memory card, thevolume is controlled using theremote control.

6
English
16 17 18 19 20 21
22
23
24
26
25
Extra monitor
16. [◄] Reduce thevalues in theextra monitor’s MODE and OPTION menus.
17. [BACKLIGHT] On/Off: If theswitch is set to OFF, no image will be displayed on
thescreen.
18. [▲] Move up in theextra monitor’s MODE menu.
19. [▼] Move down in theextra monitor’s MODE menu.
20. Enter theextra monitor’s MODE menu. Pressonce more to enter theOPTION menu.
The MODE menu has settings for:
• Bright: Brightness
• Contrast: Contrast
• Color: Colour
• English: Language
• Reset: Reset to factory settings
The OPTION menu has settings for picture format 16:9 or 4:3.
Navigate, change values and make settings using the [►][◄][▼][▲] keys.
21. [►] Increase thevalues in theextra monitor’s MODE and OPTION menus.
22. [ON/OFF] On/off switch
23. 3.5 mm headphone socket
24. Input socket for AV signal from themain unit
25. Input socket for power cable from themain unit
26. Volume

7
English
1234
56 7 8
9 0 10+
R E P E A T
TI TLE
S U B T I T L E
A U D I O
M U T E
S O U R C E
S T E P
DI SPLAY
ME NU
/P BC
V O L +V O L -
S L O W
Z O O M
MO DE
EN TER
31
32 33
34
46 35
47 36
45
37
48 38
49 39
50 40
51 41
52 42
53 43
54 44
27 28 29 30
Remote control
27. [STEP] Display astill image, press [STEP] to advance frame by frame.
28. [SEARCH] Skip to anew place in aDVD film based on time, chapter or title.
Pressthe button repeatedly in order to be able to enter thetime, chapter of title.
29. [MUTE] Turn off thevolume
30. [SOURCE] Select playback source: DVD, USB flash drive or memory card
31. [1–9] Numerical keys for selecting tracks from your playlist and other commands
requiring digits.
32. [10+] For entering numbers from 10 and upwards.
33. [DISPLAY] Press repeatedly to select in which way theplayback time is displayed.
34. [MENU/PBC] Enter theDVD menu, PBC (Playback control) on/off. PBC is used to
control theplayback of VCDs using theremote control. Note: Not all VCDs have
PBC functions.
35. [AUDIO] Press repeatedly to change language or soundtrack if such afunction is
supported by thedisc.
36. [►ll] Play, pause
37. [■] Stop
38. [MODE] Brightness, contrast, hue and saturation setup
39. [VOL +] Increase thevolume

8
English
40. [VOL -] Decrease thevolume
41. [►►l] Skip to thenext chapter/track
42. [l◄◄] Skip to theprevious chapter/track
43. [►►] Fast forward DVD/media file playback at 2, 4, 8, 16 or 32 times
thenormal speed.
44. [◄◄] Fast reverse DVD/media file playback at 2, 4, 8, 16 or 32 times
thenormal speed.
45. [SUBTITLE] Press repeatedly to change language or subtitles during DVD playback
if such afunction is supported by thedisc.
46. [ANGLE] View thevideo material from various camera angles if such material is
available on thedisc.
47. [TITLE] Return to theDVDs title page if there is one on thedisc.
48. [▲][▼][◄][►] Direction buttons
49. [ENTER] Confirm menu selection
50. [SETUP] Enter thesettings menu
51. [REPEAT]
DVD: Choose whether to either repeat thechapter, current title, all titles or turn off
therepeat function
VCD: Choose whether to either repeat thefile, all files or turn off therepeat function
CD, MP3: Choose whether to either repeat thecurrent title, theentire folder or turn
off therepeat function
52. [SLOW] Press this button repeatedly to slow down theplayback speed.
1/2, 1/4, 1/8, 1/16 or normal speed.
53. [PROGRAM] Programme your favourite chapter/track. Usethe numerical keys
to enter atitle, chapter or track and then select PLAY in themenu. Toreturn
to normal playback, press [PROGRAM] and select CLEAR in themenu.
Press[PROGRAM] again to exit theprogramme menu.
54. [ZOOM]
DVD, VCD: Zoom in/out on apicture during playback or in pause mode.
Eachpress of thebutton enlarges or diminishes thepicture in thefollowing order:
2 X – 3 X – 4X magnification – 1/2 – 1/3 – 1/4 reduction – normal size.
JPEG: Press [ZOOM] followed by [◄◄] or [►►] to reduce/enlarge thepicture.
Use[►][◄][▼][▲] to move around inside theenlarged picture.

9
English
17
22
3
Twin screen
DVD player
AV lead
Power lead
Car adaptor/Main adaptor
Getting started
Remote control
Insert abattery (CR2025) into theremote control if there is not already one in it.
Note: Only themain unit has areceiver for thesignal sent from theremote control.
1. Push thecatch to theright at thesame time as
you pull thebattery holder out.
2. Insert 1 × CR2025 battery, positive side (+)
facing up.
3. Connect themains lead to theDVD player and plug theadaptor into awall socket
(100–240 V, 50/60 Hz) or plug the12 V cable into a12 V power socket and
connect it to theDVD player.
Connecting theextra monitor
The provided cable should be used to connect themain unit to theextra monitor and
provide it with power, audio and visual data.
Note: Important details:
The on/off switches of both themain unit (3) and extra monitor (22) must be set to on.
1. [BACKLIGHT] (17) on theextra monitor must be set to ON in order for apicture to
be visible.
2. Make sure that thepower, audio and video connection cable is securely connected
to both theDVD player and theextra monitor.

10
English
Use
General setup
1. Press [SETUP] to display thesetup menu.
2. Use thedirection buttons [►][◄][▼][▲] to navigate, enter thesub-menus and
working towards theright, make thedesired settings.
3. After making your settings under GENERAL SETUP PAGE, press [◄] to return to
themain categories.
4. Confirm your selection by pressing [ENTER].
5. Press [SETUP] once more to exit themenu.
The main categories and their sub-menus
GENERAL SETUP PAGE
General settings with thefollowing sub-menus:
• TV Display: Picture format
• Angle Mark: Display or deactivate information about different camera angles used
for video material if such information is available on thedisc.
• OSD Language: Choose thedesired language.
• Closed caption: Display or deactivate hidden text captions if there are any on
thedisc and thefunction is supported by your TV.
• Screen saver: Turns thescreensaver on or off.
• Last memory: Activate or deactivate thefunction whereby theDVD player
resumes playback from thepoint you were last at before thepower was
switched off (e.g. car ignition turned off).
• Auto Standby: Use this setting to put the player into standby mode. Select between
these settings: OFF, 3 or 4 hours.
AUDIO SETUP PAGE
Audio settings with thefollowing sub-menus:
• Downmix: Analogue audio settings.
– LT/RT: Used if theDVD player is connected to aDolby Pro Logic
surround sound system.
– STEREO: Used if theDVD player’s built-in loudspeakers are used.
• Digital output: Digital audio settings.
– SPDIF/OFF: Deactivates theSPDIF audio output.
– SPDIF/RAW: Used if theDVD player is connected to amulti-channel surround
sound system via thedigital audio output.
– SPDIF/PCM: Used if your audio player cannot handle multi-channel stereo.
• Dolby Digital: 5.1 audio settings: Dual Mono (Stereo, L-mono, R-mono,
Mix-mono) and Dynamic.

11
English
VIDEO SETUP PAGE
Video settings with thefollowing sub-menus:
• Sharpness: High, Medium or Low
• Brightness
• Contrast
• Hue
• Saturation
PREFERENCE PAGE
Personal settings with thefollowing sub-menus:
Note: These settings can only be changed if playback has been stopped.
• TV type: Select TV system – PAL, NTSC or AUTO.
• Audio: Selects theaudio output language (if available).
• Subtitle: Selects thesubtitle language (if available).
• Disc menu: Selects thedisc menu language (if available).
• Parental: Parental control. Requiresa password.
Note: The preset password is 1369.
Set theparental control level restricting “adult content” if supported by thedisc.
Thereare 8 levels; level 1 is “suitable for children” whilst level 8 is “adult content”.
Certaindiscs have aparental control function for theentire disc or sections of
thedisc. Onthese discs, thelevel can be set for theentire disc or just for certain
sections of thedisc. The levels are country dependent and only work if theDVD
supports this function. VCDs, SVCDs and CDs do not support this function.
Mostillegal DVDs also lack this function. CertainDVDs lack this function despite
thefact that aclassification category is printed on thepackaging.
• Default: Resets theDVD player to factory default settings.
PASSWORD
Password setup page:
• Password mode: Activates or deactivates thepassword function.
Note: If thepassword function is deactivated, no password is required
in order to change theparental control level.
• Password: Changing thepassword:
1. First enter thecurrent password in theOLD PASSWORD box using
thenumerical keys on theremote control. Thecursor will automatically
jump to NEW PASSWORD.
2. Enter thenew password. Thepassword must be 4 digits.
3. The cursor will automatically jump to CONFIRM PASSWORD.
4. Confirm thenew password by entering it once more (if an incorrect password
is entered, thecursor will stay in thebox.
5. The cursor automatically jumps to OK, press [Enter] to confirm and exit.
Note: If thepassword is changed, theparental control password is also changed.
Thedefault password, 1369 can always be used even if thepassword has been
changed.

12
English
Playback
1. Press [SOURCE] and select an audio source, CD, DVD, memory card or
USB flash drive.
2. Navigate and control playback as described in theButtons and functions section.
Care and maintenance
Cleaning
• Always unplug theadaptor from thewall socket before cleaning.
• Make sure that no liquids penetrate theplayer.
• Use only adamp cloth and mild detergent when cleaning theexterior.
• Never use solvents or abrasive cleaning agents.
• The screen itself should only be cleaned using specialized screen cleaning products.
Disc care
• Hold thedisk by thehole and edge when handling in order to avoid fingerprints
and dirt from contaminating thedisk.
• Do not bend thedisc or expose it to direct sunlight or heat.
• Clean thediscs with asoft dry cleaning cloth starting from thecentre and
working outwards. Neveruse solvents or strong detergents.
• Store thediscs in their cases.

13
English
Troubleshooting guide
The product
does not turn
on or turns off
by itself.
• Make sure that themains adaptor and its cable are
undamaged and correctly plugged into thewall socket and
DVD player.
• Check to see if there is power at thewall socket.
• If using a12 V cable, make sure it is not damaged and that
it is plugged into a12 V socket and theDVD player.
• Check to see if there is power at the12 V socket.
Note: Some cars need theignition to be on for the12 V
socket to work.
• Start thedevice by turning it on and off with theswitch.
The product
does not react
to theremote’s
commands.
• Make sure that theremote control battery is not discharged.
• Make sure that thebattery is inserted correctly.
• Make sure theremote is aimed at thesensor on thefront of
theDVD player.
• Make sure that nothing is blocking thesignal from theremote
and that you are not out of range of theDVD player.
No picture or
sound.
• Make sure that both monitors are turned ON and that
thebacklight switch on theextra monitor is set to ON.
• Make sure that all sound and video leads are correctly
connected.
• Make sure that thedisc is one of thefollowing: DVD, DVD-R,
DVD-RW or CD.
• Make sure that thedisc is whole, scratch-free and inserted
correctly with thelabel facing upwards.
• Make sure theDVD player’s laser pickup is not dirty.
ContactCustomer Services if this is thecase.
• Make sure that any connected TV is set to thecorrect
channel (VIDEO, AV, etc.).
• Change your media file, some files can be damaged or
of poor quality.
No sound. • Check that none of thecables are damaged and that they
are properly connected.
• Change your media file, some files can be damaged or
of poor quality.
Poor sound or
picture.
• Check that none of thecables are damaged and that they
are all properly connected.
• Check thedisc. Usea clean and scratch-free disc.
• Change your media file, some files can be damaged or
of poor quality.

14
Svenska
CLASS 1
LASER PRODUCT
7″DVD/MPEG4-spelare med
dubbla skärmar
Art.nr 18-8265 Modell PDVD-163BHD2P-UK
38-4567 PDVD-163BHD2P
Läs igenom hela bruksanvisningen före användning och spara den sedan för framtida
bruk. Vireserverar oss för ev. text- och bildfel samt ändringar av tekniska data.
Vid tekniska problem eller andra frågor, kontakta vår kundtjänst (se adressuppgifter
på baksidan).
Säkerhet
KLASS 1 LASERAPPARAT
Varning! Öppnainte höljet! Osynliglaserstrålning som kan orsaka
ögonskador. Riktainte blicken in mot strålen och titta inte direkt på
den genom optiska instrument.
• Produkten får inte demonteras eller ändras. Farligspänning finns oskyddad på
komponenter inuti produktens hölje. Kontaktmed dessa kan leda till brand eller
ge elektriska stötar.
• Strömbrytaren är sekundärt kopplad och bryter inte strömmen från nätet.
• Se till att uttaget där nätadaptern sitter är lättillgängligt eftersom nätadaptern
på apparatens nätsladd används som frånkopplingsanordning från elnätet.
• Utsätt aldrig produkten för höga temperaturer, dammig miljö, starka vibrationer,
stötar, fukt eller väta.
• Placera inte produkten så att den kan falla ner ivatten eller annan vätska. Ställinte
heller några föremål som innehåller vätska på produkten, t.ex. enblomvas eller dryck.
• Täck inte över anläggningen. Anläggningensventilationshål och öppningar får inte
blockeras.
• Placera inte apparaten iett för trångt utrymme så att inte luften kan cirkulera runtom.
Tillräckligventilation är nödvändig för att förhindra att anläggningen blir för varm.
• Placera inte produkten på ettmjukt underlag t.ex. filt, kudde eller täcke.
Användett hårt underlag för att produkten ska få tillräcklig kylning.
• Produkten är endast avsedd för inomhusbruk.
• Placera inte tunga och/eller vassa föremål på LCD-displayen.
• Om enUSB-kabel används för att ansluta t.ex. enmediaspelare får den inte vara
längre än 25 cm.
• Använd endast den bifogade nätadaptern.
• Misshandla inte nätsladden. Setill att nätsladden inte kommer ikontakt med
värme, vassa kanter eller kläms på något sätt.
• Dra ur nätadaptern ur vägguttaget under natten och när du reser bort.
Skydda din hörsel! Lyssning med hög volym under längre tid kan
leda till bestående hörselskador.

15
Svenska
• Skydda din hörsel. Lyssningmed hög volym under lång tid kan leda till
bestående hörselskador.
• Produkten får inte användas av personer (inklusive barn) med begränsad fysisk
eller mental förmåga. Denfår inte heller användas av personer utan tillräcklig
erfarenhet och kunskap om de inte har fått instruktioner om användningen av
någon som ansvarar för deras säkerhet.
• Om onormal lukt uppstår eller om produkten överhettas vid användning, stäng
genast av apparaten. Användinte apparaten förrän den kontrollerats av
kvalificerad servicepersonal.
• Produkten får endast repareras av kvalificerad servicepersonal och endast
med originalreservdelar.
Produktbeskrivning
• 7" DVD-spelare med dubbla skärmar.
• Inbyggda högtalare.
• Uttag för USB-minne, SD-kort och hörlurar.
• Fjärrkontroll (1 x CR2025-batteri, säljs separat).
• Drivs via medföljande nätadapter för hemmabruk eller 12 V-kabel för bilen.
• Monitorkablar, remmar för montering på t.ex. nackstöd samt väska ingår.
• Last memory-funktion: Fortsätter att spela upp DVD-skivan från den punkt där
man sist var när strömmen slogs av (om t.ex. bilens tändning slås ifrån).
Specifikationer
Nätanslutning 100–240 V AC, 50/60 Hz eller 12 V
Effektförbrukning <15 W
Mått huvudenhet 190 × 140 × 39 mm
Mått extraskärm 190 × 140 × 23 mm
Skärm 2 × 7″
Utgångar Videoutgång 1,0 V (p-p)/75 Ω
Audioutgång 1,0 V rms (1 kHz, 0 dB)
Uteffekt Högtalare 2 × 1 W, 3,5 mm hörlursutgång
Fjärrkontroll 1 × CR 2025-batteri
System
Laser Halvledarlaser, våglängd 650 nm
Signalsystem PAL/NTSC
Frekvensomfång 20 Hz till 20 kHz (±1 dB)
S/N-nivå Bättre än 80 dB (analog utgång)
Dynamik Bättre än 85 dB (DVD/CD)
Avfallshantering
När du ska göra dig av med produkten ska detta ske enligt lokala föreskrifter.
Är du osäker på hur du ska gå tillväga, kontakta din kommun.

16
Svenska
1 2
3
4
5
6
8
9
10 11 12 13 14 15
7
Knappar och funktioner
Huvudenhet
1. Uttag för minneskort
2. Öppnar luckan för CD/DVD-skivor
3. [ON/OFF] På/av
4. 3,5 mm-hörlursuttag
5. AV-utgång
6. Koaxial ljudutgång
7. Uttag för USB-minne
8. 9–12 V-utgång för anslutning av medföljande extraskärm
9. 9–12 V-ingång för medföljande nätadapter eller 12 V-kabel
10. [◄VOL-] Navigera vänster, minska volymen vid uppspelning från CD/DVD och
vid videouppspelning från USB-minne och minneskort. Vidmusikuppspelning från
USB-minne och minneskort styrs volymen från fjärrkontrollen.
11. [ENTER] Bekräfta menyval, starta uppspelning från huvudenhet
12. [▲/ l◄◄] Navigera uppåt, gå till föregående kapitel/spår
13. [▼/ ►►l] Navigera nedåt, gå till nästa kapitel/spår
14. [SOURCE] Val av uppspelningskälla: CD/DVD, USB-minne eller minneskort
15. [VOL+►] Navigera höger, öka volymen vid uppspelning från CD/DVD och vid
videouppspelning från USB-minne och minneskort. Vidmusikuppspelning från
USB-minne och minneskort styrs volymen från fjärrkontrollen.

17
Svenska
16 17 18 19 20 21
22
23
24
26
25
Extraskärm
16. [◄] Navigera och minska värden iextraskärmens MODE- och OPTION-menyer.
17. [BACKLIGHT] På/av: Om knappen är iläge AV visas ingen bild på skärmen.
18. [▲] Navigera uppåt iextraskärmens MODE-meny.
19. [▼] Navigera nedåt iextraskärmens MODE-meny.
20. Öppna extraskärmens MODE-meny. Trycken gång till för att öppna
OPTION-menyn.
MODE-menyn har inställningar för:
• Bright: Ljusstyrka
• Contrast: Kontrast
• Color: Färg
• English: Språk
• Reset: Återställ till fabriksinställningarna
OPTION-menyn har inställningar för bildstorlek 16:9 eller 4:3.
Navigera, ändra värden och gör inställningar med [►][◄][▼][▲]-tangenterna.
21. [►] Navigera och öka värden iextraskärmens MODE- och OPTION-menyer
22. [ON/OFF] På/av
23. 3,5 mm hörlursuttag
24. Ingång för AV-signal från huvudenhet
25. Ingång för strömkabel från huvudenhet
26. Volym

18
Svenska
1234
56 7 8
9 0 10+
R E P E A T
TI TLE
S U B T I T L E
A U D I O
M U T E
S O U R C E
S T E P
DI SPLAY
ME NU
/P BC
V O L +V O L -
S L O W
Z O O M
MO DE
EN TER
27 28 29 30
31
32 33
34
46 35
47 36
45
37
48 38
49 39
50 40
51 41
52 42
53 43
54 44
Fjärrkontroll
27. [STEP] Visa stillbild, tryck på [STEP] för att stega fram bildruta för bildruta.
28. [SEARCH] Hoppa till nytt ställe iDVD-filmen baserat på tid, kapitel eller titel.
Tryckupprepade gånger för att kunna skriva in tid, kapitel eller titel.
29. [MUTE] Stänger av ljudet
30. [SOURCE] Val av uppspelningskälla: DVD, USB-minne eller minneskort.
31. [1–9] Siffertangenter för val av numrerade filer ien spellista, övriga sifferkommandon,
lösenord m.m.
32. [10+] För att skriva in tal från 10 och uppåt.
33. [DISPLAY] Tryck upprepade gånger för att välja på vilket sätt uppspelningstiden
ska visas.
34. [MENU/PBC] Öppna DVD-menyn, PBC (Playback control) på/av. PBC används för
att från fjärrkontrollen styra uppspelningen av VCD-skivor (Video CD).
Obs! AllaVCD-skivor har inte PBC-funktioner.
35. [AUDIO] Tryck upprepade gånger för att byta språk eller ljudspår om sådan
funktion finns tillgänglig på skivan.
36. [►ll ] Play, pause
37. [■] Stopp
38. [MODE] Inställning av ljusstyrka, kontrast, färgton och färgmättnad.

19
Svenska
39. [VOL+] Höj volymen
40. [VOL-] Sänk volymen
41. [ ► ► l] Gå till nästa kapitel/spår
42. [l◄◄ ] Gå till föregående kapitel/spår
43. [►►] Snabbspola DVD-uppspelning och uppspelning av mediafiler framåt med
2, 4, 8, 16 eller 32 gångers hastighet.
44. [◄◄] Snabbspola DVD-uppspelning och uppspelning av mediafiler bakåt med
2, 4, 8, 16 eller 32 gångers hastighet.
45. [SUBTITLE] Tryck upprepade gånger för att byta språk på textningen under
DVD-uppspelning om sådan funktion finns tillgänglig på skivan.
46. [ANGLE] Se det inspelade videomaterialet från olika kameravinklar om sådant
material finns tillgängligt på skivan.
47. [TITLE] Återvänd till DVD-skivans titelmeny om sådan finns tillgänglig på skivan.
48. [▲][▼][◄][►] Navigationsknappar
49. [ENTER] Bekräfta menyval
50. [SETUP] Öppnar menyn för grundinställningar.
51. [REPEAT]
DVD: Välj mellan att reprisera kapitel, aktuell titel, alla titlar eller stäng av repetition.
VCD: Välj mellan att reprisera enfil, alla filer eller stäng av repetition.
CD, MP3: Välj mellan att reprisera aktuell titel, hel mapp eller stäng av repetition.
52. [SLOW] Tryck upprepade gånger på [SLOW] för att välja uppspelningshastighet.
1/2, 1/4, 1/8, 1/16 eller normal hastighet.
53. [PROGRAM] Programmera favoritkapitel/spår. Användsifferknapparna för
att skriva in titel, kapitel eller spårnummer och välj PLAY imenyn. Föratt
återgå till normal uppspelning tryck [PROGRAM] och välj CLEAR från menyn.
Tryck[PROGRAM] igen för att gå ur programmenyn.
54. [ZOOM]
DVD, VCD: Zooma in/ut ibilden under uppspelning eller från pausläge.
Varjetryckning förstorar och förminskar bilden iföljande ordning:
2 X – 3 X – 4 X förstoring – 1/2–1/3–1/4 förminskning – normal storlek.
JPEG: Tryck [ZOOM] och sedan [◄◄] eller [►►] för att förminska/förstora bilden.
Använd[►][◄][▼][▲] för att flytta runt iden förstorade bilden.

20
Svenska
17
22
3
Extraskärm
DVD-spelare
AV-kabel
Strömkabel
Biladapter/240 V-adapter
Att komma igång
Fjärrkontroll
Sätt iett batteri (CR2025) ifjärrkontrollen om det inte redan är monterat.
Obs! Endasthuvudenheten har mottagare för fjärrkontrollens signaler.
1. Tryck snäpplåset till höger samtidigt som
batterihållaren dras rakt ut.
2. Sätt i1 × CR2025-batteri och se till att plus-
märkningen (+) på batteriet överensstämmer
med plusmärkningen (+) på batterihållaren.
3. Anslut nätsladden till ingången på DVD-spelaren och nätadaptern till ettvägguttag
(100–240 V, 50/60 Hz) eller anslut 12 V-kabeln till en12 V-strömkälla och till
ingången på DVD-spelaren.
Anslutning av extraskärm
Anslut den medföljande kabeln för överföring av ström, bild och ljud mellan
huvudenheten och extraskärmen.
Obs! Tänkpå att:
Både huvudenhetens och extraskärmens strömbrytare (3) och (22) måste vara
påslagna.
1. [BACKLIGHT] (17) på extraskärmen måste vara iläge PÅ för att bilden ska visas.
2. Se till att kabeln för överföring av ström, bild och ljud är ordentligt ansluten till både
DVD-spelare och extraskärm.
This manual suits for next models
1
Table of contents
Languages:
Other Clas Ohlson Portable DVD Player manuals

Clas Ohlson
Clas Ohlson SPDV-1020US-UK User manual

Clas Ohlson
Clas Ohlson DPU3270V+SSD70S-UK User manual

Clas Ohlson
Clas Ohlson DPU2290MB User manual

Clas Ohlson
Clas Ohlson PDV-196-UK User manual

Clas Ohlson
Clas Ohlson PDVD-196-UK User manual

Clas Ohlson
Clas Ohlson DPX3270V SSD70S-UK User manual

Clas Ohlson
Clas Ohlson DPX3270V SSD70S User manual