Classic Flame INFRARED+HALOGEN 13QI071ARA User manual
INFRARED+HALOGEN
BY:
THE SAFEST AND MOST ADVANCED HEATING TECHNOLOGY AVAILABLE
Model # 13QH8017-H394
Insert Model: 13QI071ARA
SMART
HEATER

2
B066
IMPORTANT INSTRUCTIONS
1. Read all instructions before using this appliance.
2. This appliance is hot when in use.To avoid burns, do not let bare skin touch
hot surfaces. If provided, use handles when moving this appliance. Keep
combustible materials, such as furniture, pillows, bedding, papers, clothes and
curtains at least 3 feet (0.9 m) from the front of this appliance and keep away
from the sides and the rear.
WARNING: In order to avoid overheating, do not cover the heater.
3. CAUTION: Never leave the heater operating unattended. Extreme caution is
necessary if unsupervised children or invalids are nearby.
4. The appliance is not to be used by children or persons with reduced physical,
sensory or mental capabilities, or lack of experience and knowledge, unless they
have been given supervision or instruction.
5. Always unplug this appliance when not in use.
6. Do not operate any heater with a damaged cord or plug or after the appliance
malfunctions, or if it has been dropped or damaged in any manner.
7. If the supply cord is damaged, it must be replaced by the manufacturer, its
service agent or similarly qualied persons in order to avoid a hazard.
8. Do not use outdoors.
9. This heater is not intended for use in bathrooms, laundry areas and similar indoor
locations. Never locate this appliance where it may fall into a bathtub or other
water container.
10. Do not run cord under carpeting. Do not cover cord with throw rugs, runners or
the like.Arrange cord away from trafc areas and where it will not be tripped
over.
11.To disconnect this appliance, turn controls to the off position, then remove plug
from outlet.
12. Connect to properly grounded outlets only.This heater is for use on 120 volts.The
cord has a plug as shown at A in Fig.1.
Do not use a 2 prong adapter. Never use with an extension cord or relocatable
power tap (outlet/power strip).
When using electrical appliances, basic precautions should always be followed to
reduce the risk of re, electrical shock, and injury to persons including the following:
1. Read all instructions before using this appliance.
2. This appliance is hot when in use. To avoid burns, do not let bare skin touch hot surfaces. If provided, use handles when moving
this appliance. Keep combustible materials, such as furniture, pillows, bedding, papers, clothes and curtains at least 3 feet
(0.9 m) from the front of this appliance.
WARNING: In order to avoid overheating, do not cover the heater.
3. CAUTION: Whenever the heater is left operating and unattended, extreme caution is necessary if children or invalids are nearby.
4. The appliance is not to be used by children or persons with reduced physical, sensory or mental capabilities, or lack of
experience and knowledge, unless they have been given supervision or instruction.
5. Always unplug this appliance when not in use.
6. Do not operate any heater with a damaged cord or plug or after the appliance malfunctions, or if it has been dropped or
damaged in any manner.
7. If the supply cord is damaged, it must be replaced by the manufacturer, its service agent or similarly qualied persons in order
to avoid a hazard.
8. Do not use outdoors.
9. This heater is not intended for use in bathrooms, laundry areas and similar indoor locations. Never locate this appliance where it
may fall into a bathtub or other water container.
10. Do not run cord under carpeting. Do not cover cord with throw rugs, runners or the like. Arrange cord away from trafc areas
and where it will not be tripped over.
11. To disconnect this appliance, turn controls to the off position, then remove plug from outlet.
12. Connect to properly grounded outlets only, See Fig.1. Do not use a 2 prong adapters.
13. This appliance, when installed, must be electrically grounded in accordance with local codes or, in the absence of local codes,
with the current CSA C22.1 Canadian Electrical Code or for U.S.A. installations, follow local codes and the National Electrical
Code, ANSI/NFPA NO.70.
14. Do not insert or allow foreign objects to enter any ventilation or exhaust opening as this may cause an electric shock or re, or
damage the appliance.
15. To prevent a possible re, do not block air intakes or exhaust in any manner. Do not use on soft surfaces, like a bed, where
opening may become blocked.
16. This appliance has hot and arcing or sparking parts inside. Do not use it in areas where gasoline, paint or ammable liquids are
used or stored. This replace should not be used as a drying rack for clothing. Christmas stockings or decorations should not be
hung in the area of it.22. Use this appliance only as described in the manual. Any other use not recommended by the
manufacturer may cause re, electric shock or injury to persons.
17. Always plug heaters directly into a wall outlet/ receptacle. Never use with an extension cord or relocatable power tap (outlet/
power strip).
IMPORTANT INSTRUCTIONS
When using electrical appliances, basic precautions should always be followed to reduce the risk of re, electrical shock, and injury
to persons including the following:
2
ABFig.1
SAVE THESE INSTRUCTIONS

3B066
13.This appliance, when installed, must be electrically grounded in accordance
with local codes or, in the absence of local codes, with the current CSA C22.1
Canadian Electrical Code or for U.S.A. installations, follow local codes and the
National Electrical Code,ANSI/NFPA NO.70.
14. Do not insert or allow foreign objects to enter any ventilation or exhaust
opening as this may cause an electric shock or re,
or damage the appliance.
15.To prevent a possible re, do not block air intakes or exhaust in any manner. Do
not use on soft surfaces, like a bed, where
opening may become blocked.
16.This appliance has hot and arcing or sparking parts inside. Do not use it
in areas where gasoline, paint or ammable liquids are used or stored.This
heater should not be used as a drying rack for clothing. Christmas stockings or
decorations should not be hung in the area of it.
17. Use this appliance only as described in the manual.Any other use not
recommended by the manufacturer may cause re, electric shock or injury to
persons.
18. CAUTION: Do not sit or stand on the heater; the heater may become unstable.
19.This heater may include a visual alarm to warn that parts of the heater are
getting excessively hot. If the alarm ashes immediately turn the heater off
and inspect for any objects on or adjacent to the heater that may cause high
temperatures.
DO NOT OPERATE THE HEATER WITH THE ALARM FLASHING!
SAVE THESE INSTRUCTIONS

4
B066
GETTING STARTED
PRODUCT SPECIFICATIONS
1. The serial number is located on the back of the heater.
The serial number is necessary for product warranty registration and customer service.
2. Go to tsicustomerservice.com for product warranty registration.
For registration use the MODEL NUMBER: 13QI071ARA. If you are unable to complete
registration save your proof of purchase for warranty purposes.
VOLTAGE 120V~, 60 Hz
AMPS 12.5 Amps
WATTS 1500 Watts
MOVABLE HEATER/
MEUBLE CHAUFFANT/
CALENTADOR DE MUEBLES
MADE IN CHINA
FABRIQUÉ EN CHINE
FABRICADO EN CHINA
13QI071ARA
120V ~, 1500W, 60Hz
Twin-Star International, Inc.
www.twinstarhome.com
CONFORMS TO UL STD. 1278
CERTIFIED TO CSA C22.2 NO.46
EN CONFORMITÉ AVEC LA NORME
UL 1278
CERTIFIÉ CSA C22.2 NO 46
CONFORME A UL STD.1278
CERTIFICADO POR CSA C22.2 N. º 46
(+1) 866-661-1218
www.tsicustomerservice.com
SN #: AB-12345-A
Date Code/ Code de Date/ Código Fecha:
Serial Number
Model Number

5B066
REGISTER YOUR NEW PURCHASE online!
Thank you for purchasing our product. Please take a moment to
visit tsicustomerservice.com to register your new purchase:
When registering your product, be sure to sign up for our updates to receive important
service information and helpful tips.We value your privacy and will never share your personal
information with other organizations.The information you submit is used only for providing
product related services to you.
Questions?
Call customer service Monday to Friday 8:30 am – 5:30 pm EST.
1.866.661.1218
Login
New Registration
Product
Manuals FAQs Help Videos Manufacturer
Warranty
Retailers
Returns
Order
Tracking
log in >
Customer Service Portal
Twin-Star Customer Service online resource to Order Parts,
Product Registration, and to request Product and General Information
DON’T FORGET TO
REGISTER YOUR PRODUCT
ONLINE TO RECEIVE SPECIAL
OFFERS, TIPS AND MORE!
tsicustomerservice.com
Product
Registration
DEPENDABLE CUSTOMER SERVICE
IMPORTANT:
Before contacting Customer Service, please have this information available:
• Serial Number
• Model Number
• Sales Receipt or Proof of Purchase
6
B066
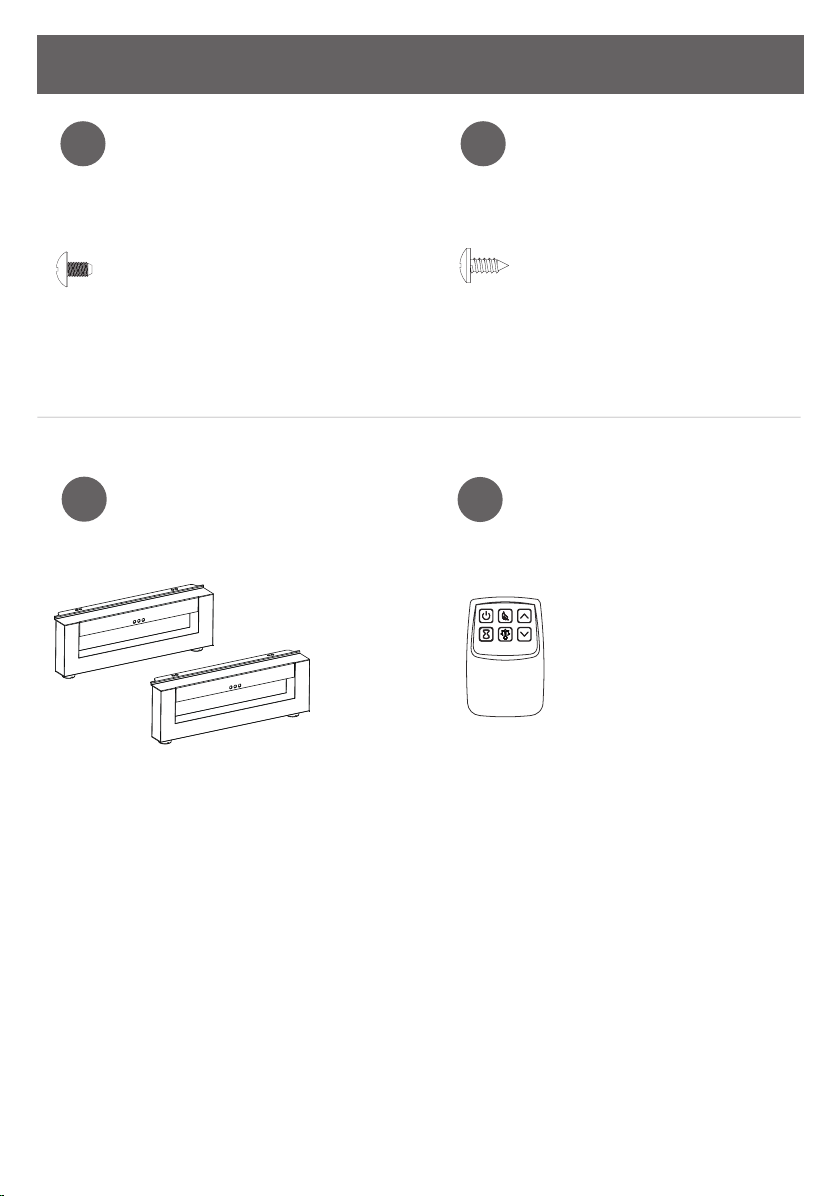
Remote Control
Leg
HARDWARE
[x2]
Ø4x6mm
BB
[x2]
CC
[x4]
AA
Ø4x10mm
[x1]
DD
7B066
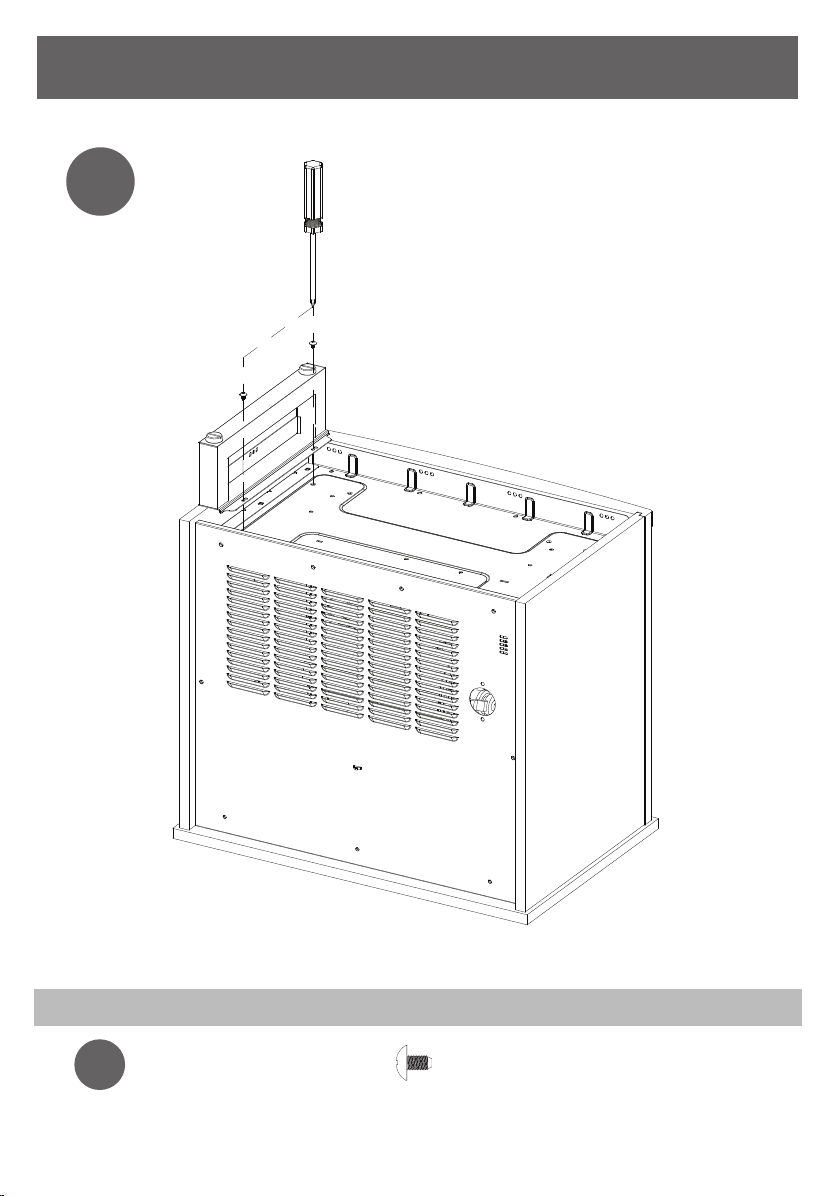
INSTALLATION INSTRUCTION
[x2]
AA
1

8
B066
INSTALLATION INSTRUCTION
[x1]
BB
2
Repeat steps 1 and 2 for the other leg installation.

9B066
OPERATION INSTRUCTIONS
Control
Panel
Display
Power
Timer
Temperature
ECO Mode
Heater Boost
The heater can be operated by either the remote control or the control panel.

10
B066
ECO MODE Pressing this button will turn
on/ off the ECO setting.
When enabled ECO Mode
will use less energy when
running to maintain warmth.
FUNCTION ICON
DESCRIPTION
The power button supplies
power to all of the functions
of the heater.The power
button will put the heater
in a standby mode.This will
turn off all functions at once
but will hold the settings in
the memory. By pressing
the Power button again the
heater will turn on at the
same settings.
Pressing and holding the
POWER button on the control
panel for 3 seconds will
switch between °F and °C.
SETTING TEMPERATURE When pressing the up
and down buttons
the display will enter
temperature setting mode.
When in temperature setting
mode pressing the
buttons will change the
thermostat by 1 °F (1 °C.)
The temperature setting
range is between 50 °F - 97
°F (10 °C - 36 °C).
After 10 seconds without
control input the display
will exit temperature setting
mode and show the current
ambient temperature.
POWER
11 B066
Press this button to turn on/
off heater boost.
“HI” will appear on the
display when it is on and
will not display while it is off.
Default setting is off.
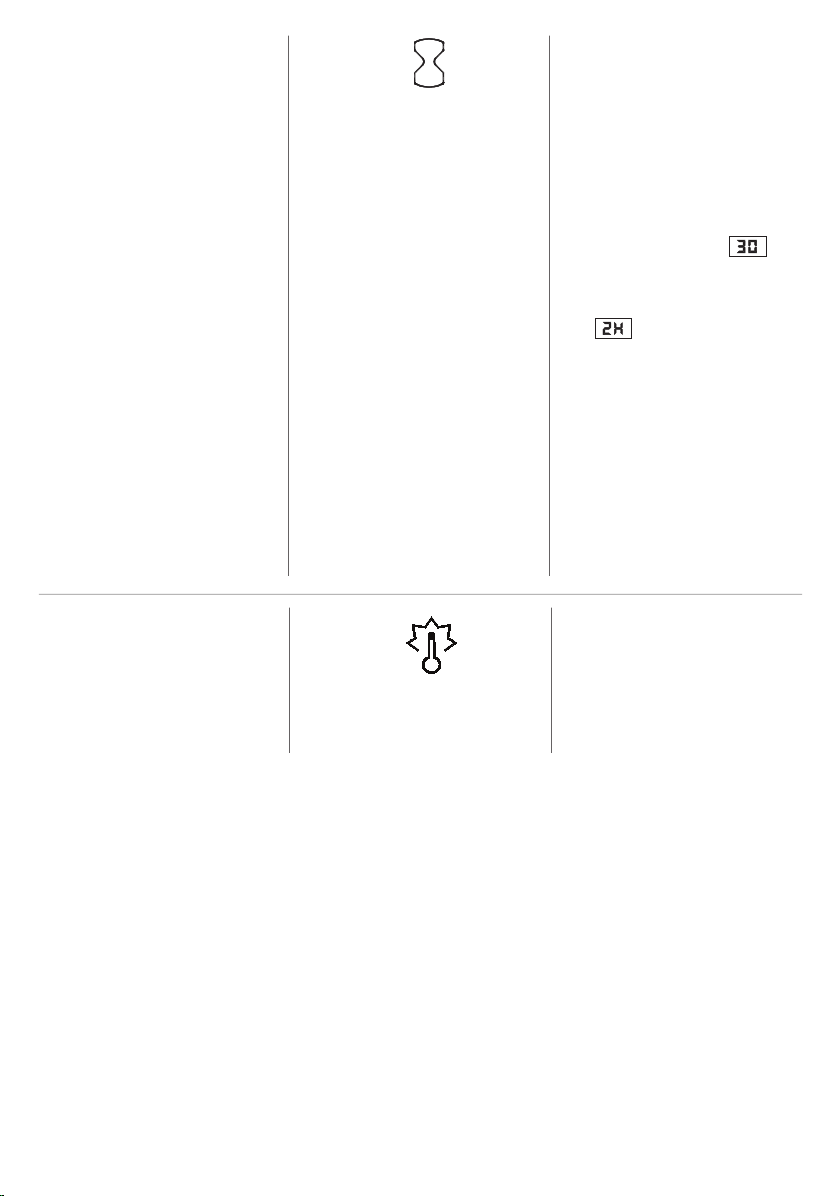
TIMER Press TIMER button will turn
on or off timer settings.
There are 10 timer settings
and OFF that can be
selected. OFF(00), 30min,
1Hour, 2H, 3H, 4H, 5H, 6H, 7H,
8H, 9H.
Double-digit minute settings,
such as 30, look like:
A single-digit with an “H”
indicates hours and looks
like:
If the timer function was
previously set the rst press
of the timer button won’t
change the previous setting.
Pressing the timer button will
activate the timer display.
When the timer is active, the
display will count down from
60 seconds before shutting
off the heater.
HEATER BOOST

12
B066
SAFER PLUG®This product is equipped with a Safer Plug®; an advanced
safety device that helps detect electrical res caused from
faulty outlets.
Overloading of outlets, adapters and surge protectors may
cause overheating, damage, and increase risk of res. Safer
Plug®continuously monitors the temperature in the plug and
outlet and will turn off the heater to prevent unsafe outlet
overheating.
If the Safer Plug®cuts the power due to unsafe conditions it
will show an “ ”message on the screen. If this occurs the
Safer Plug®has prevented a potentially unsafe condition.
To reset the device if this occurs, rst allow the plug to cool
down. Once the plug has cooled down, unplug the device
and wait 5 seconds, then plug back in and continue to use
normally.
If the Safer Plug®continues to activate your outlet may
be faulty. Check your heater cord and plug connections.
Faulty wall outlet connections or loose plugs can cause the
outlet or plug to overheat. Be sure the plug ts tight in the
outlet. Heaters draw more current than small appliances,
so overheating of the outlet may occur even if it has not
occurred with the use of other appliances. During use check
frequently to determine if your plug, outlet or faceplate is
HOT! If so, discontinue use of the heater and have a qualied
electrician check and/or replace the faulty outlet(s).
This product is equipped with a Safer Sensor™; an advanced
safety device that helps prevent heaters from being
accidently covered or blocked causing a potentially unsafe
condition.
The SAFER SENSOR detects if an object is too close to the
front of the heater potentially obstructing the air outlet. If
blocked, the SAFER SENSOR icon on the control panel will
ash, the heater will beep continuously, and then shut off.
Once the object has been moved, the icon will stop ashing,
the beeping will cease, and the heater will turn back on.
To disable the Proximity Sensor safety function press and
hold the ECO MODE button for 10 seconds. Once disabled
the SAFER SENSOR icon will remain lit indicating it is disabled.
Repeat this step to re-enable the function.
SAFER SENSOR™
Patent Pending
Patent Pending

13 B066
SmartStar™ App The Infragen Smart Heater is equiped with app control that
allows the corresponding Smart Star app on compatible iOs
or Android devices to work with the heater.The Smart Star app
works as a remote control for the heater.The Smart Star app
also allows advanced scheduling to be easily setup.
Download the Smart Star App:
To get started using the Smart Star app download the Smart
Star app from the iTunes App Store or Google Play App Store
by searching for “Smart Star” or go to the URL below for direct
links to the iTunes and Google Play app stores:
For direct links:
www.twinstarhome.com/GetSmartStar
To connect the Smart Star app with the heater:
1) Turn on the heater.
2) Make sure your iOs or Android device is Bluetooth®
enabled; if you are unsure how to enable Bluetooth® on
your device consult the user manual or technical support
from the device manufactuer.
3) With the heater turned on and the device within 20 feet
line-of-sight to the heater, open the Smart Star app.The
module will automatically pair to the mobile device when
the heater is turned on.
4) If the device fails to connect to the heater check that the
heater is powered on, that Bluetooth® is enabled on the
iOs or Android device and that the device is within 20 feet
of the heater.
Note: Only one Bluetooth® app can connect to the
heater at one time.
5) Once connected the Smart Star app can now be used
with the heater.
Smart Star
Patent Pending

14
B066
TROUBLESHOOTING
Problem Root Cause Corrective Action
Display shows “ ”
The thermostat
sensor is broken or
disconnected.
Unplug the heater, remove the back
panel of the heater and check that
the thermostat is plugged into the
main circuit board. If this does not
solve the problem contact customer
service for a replacement
thermostat sensor.
Display shows “ ” The thermostat
sensor is broken.
Contact customer service for a
replacement thermostat sensor.
Display shows “ ”
Manual Reset
overheat
protection has
triggered.
Inspect the heater and check that
the air inlets and outlets are not
blocked as this may cause over-
heating. Unplug the heater for 30
minutes and allow it to cool down.
Replug and operate, but monitor the
heater for signs of overheating. If the
problem persists, discontinue use of
the heater and contact customer
service.
Display shows “ ”
Power cord
overheating
protection has
activated.
Check your heater cord and plug
connections. Faulty wall outlet
connections or loose plugs can
cause the outlet or plug to overheat.
Be sure the plug ts tight in the
outlet. Heaters draw more current
than small appliances, so overheat-
ing of the outlet may occur even if
it has not occurred with the use of
other appliances. During use check
frequently to determine if your plug,
outlet or faceplate is HOT! If so,
discontinue use of the heater and
have a qualied electrician check
and/or replace the faulty outlet(s).
SAFER SENSOR icon on
the control panel is
ashing.
An object is too close
to the front of the
heater potentially
obstructing the air
outlet.
Verify there is a 3 foot clear space in
front of the heater air outlet.
To disable the Proximity Sensor safety
function press and hold the
ECO MODE button for 10 seconds.

15 B066
Problem Root Cause Corrective Action
Heater does not blow
warm air.
Cool down cycle
Normal operation. Heater will contin-
ue to run for several minutes before
shutting down. Times will vary based
on temperatures. During this time
cool air will blow.
Not reaching set
temperature.
Perform a master reset; turn off and
unplug unit. Hold down main power
button on the unit itself. Continue to
hold button down while plugging
unit back in. Once unit is plugged
back in continue to hold button for 5
seconds and then release.Turn unit
back on and temperature should
ash 72 degrees then display the
ambient room temperature.
Not reaching set
temperature.
Unit is designed to be used as a
supplemental heat source in
conjunction with a primary heat
source.
The heater is taking a
long time to reach
desired room
temperature.
Improper use of unit
Unit is designed to be used as a
supplemental heat source in
conjunction with a primary heat
source.
Location
Your unit should always be
positioned on an inside wall with
proper insulation.The heater
provides supplemental heating for
up to 1000 sq/ft in conjunction with
a primary heat source.
Location
The back and side of the heater
should be greater than 6 inches
away from objects for proper air
intake.
Use of surge
protector/ extension
cord.
Plug unit directly into the wall outlet.
Temperature will not
change.
Defective control
panel circuit board. Replace control panel circuit board.
Unit continues to run
after reaching set
temperature/or
powering off.
Cool down cycle
Normal operation. Heater will
continue to run for several minutes
before shutting down.Times will vary
based on heating. UNIT WILL BLOW
COOL AIR.

16
B066
Problem Root Cause Corrective Action
Buttons do not work. Defective control
panel circuit board. Replace control panel circuit board.
Control panel does not
illuminate.
Defective control
panel circuit board. Replace control panel circuit board.
Remote control is not
working when buttons
are pressed.
No batteries or
battery power. Change the remote batteries.
Poor signal.
Operate remote transmitter at a slow
measured pace. Press the remote
control buttons with an even motion
and gentle pressure. Repeatedly
pressing buttons in rapid succession
may cause the transmitter to
malfunction.
Distance.
Operate the remote at a distance
less than 20 feet from the front of the
appliance; point the remote at the
control panel.
CARE AND MAINTENANCE
• Clean the trim using a soft cloth, slightly dampened with citrus oil based product and buff
with a clean soft cloth.
• DO NOT use brass polish or household cleaners as these products will damage the metal
trim. Citrus oil based products can be obtained at supermarkets or hardware stores.
• WARNING: Electrical outlet wiring must comply with local building codes and other
applicable regulations to reduce the risk of re, electrical shock and injury to persons.
• WARNING: Disconnect power before attempting any maintenance or cleaning to reduce
the risk of re, electrical shock or personal injury.

17 B066
REPLACEMENT PARTS
EXPLODED VIEW
Part Part Name Part Number
1 Control Panel Circuit Board Y16-S175-P32
2 Main Circuit Board Y16-S175-P15
3 Leg LEG-8017
4 Remote Control P139

18
B066
FCC/IC INFORMATION
WARNING: Changes or modications to this unit not expressly approved by the party
responsible for compliance could void user’s authority to operate the equipment.
NOTE: This equipment has been tested and found to comply with the limits for Class B digital
device, pursuant to part 15 of the FCC Rules.These limits are designed to provide reasonable
protection against harmful interference in a residential installation.This equipment generates,
uses, and can radiate radio frequency energy and, if not installed and used in accordance
with the instructions, may cause harmful interference to radio communications.
However, there is no guarantee that interference will not occur in a particular installation. If
this equipment does cause harmful interference to radio or television reception, which can
be determined by turning the equipment off and on, the user is encouraged to try to correct
the interference by one or more of the following measures:
• Reorient or relocate the receiving antenna.
• Increase the separation between the equipment and the receiver.
• Connect the equipment into an outlet on a circuit different from that to which the
receiver is connected.
• Consult the dealer or an experienced radio/TV technician for help.
This device complies with Part 15 of the FCC Rules. Operation is subject to the following
two conditions:
(1) This device may not cause harmful interference, and
(2) this device must accept any interference received, including interference that may
cause undesired operation.
The device must not be co-located or operating in conjunction with any other antenna or
transmitter.
To comply with FCC’s RF radiation exposure limits for general population/uncontrolled
exposure, this device must be installed to provide a separation distance of at least 20cm
from all persons.

19 B066
BATTERY REPLACEMENT
• Always purchase the correct size and grade of battery most suitable for the intended use.
• Replace all batteries of a set at the same time.
• Clean the battery contacts and also those of the device prior to battery installation.
• Ensure the batteries are installed correctly with regard to polarity (+ and -).
• Remove batteries from equipment which is not to be used for an extended period of
time.
• Remove used batteries promptly.
NOTE: Battery disposal
Please alwaysdispose of batteries
at a suitable recycling point.
AAA 1.5V
AAA 1.5V
NOTE: Do not mix old and new batteries.
Do not mix alkaline, standard (carbon zinc), or rechargable (nicad, ni-mh, etc.)
batteries.
CAUTION: Do not ingest batteries.

20
B066
3-YEARS LIMITED WARRANTY
The manufacturer warrants that your new Electric Heater is free from manufacturing and
material defects for a period of three years from date of puchase, subject to the following
conditions and limitations.
1. Install and operate this appliance in accordance with the installation and operating
instructions furnished with the product at all times.Any unauthorized repair, alteration,
willful abuse, accident, or misuse of the product shall nullify this warranty.
2.This warranty is non-transferable, and is made to the original owner, provided that the
purchase was made through an authorized supplier of the product.
3.The warranty is limited to the repair or replacement of part(s) found to be defective in
material or workmanship, provided that such part(s) have been subjected to normal
conditions of use and service, after said defect is conrmed by the manufacturer’s
inspection.
4.The manufacturer may, at its discretion, fully discharge all obligations with respect to this
warranty by refunding the wholesale price of the defective part(s).
5.Any installation, labor, construction, transportation, or other related costs/expenses arising
from defective part(s), repair, replacement, or otherwise of same, will not be covered by
this warranty, nor shall the manufacturer assume responsibility for same.
6.The owner/user assumes all other risks, if any, including the risk of any direct, indirect
or consequential loss or damage arising out of the use, or inability to use the product,
except as provided by law.
7.All other warranties – expressed or implied – with respect to the product, its components
and accessories, or any obligations/liabilities on the part of the manufacturer are hereby
expressly excluded.
8.The manufacturer neither assumes, nor authorizes any third party to assume on its behalf,
any other liabilities with respect to the sale of the product.
9.The warranties as outlined within this document do not apply to non accessories used in
conjunction with the installation of this product.
10.This warranty gives you specic legal rights, and you may also have other rights which
vary from state to state.
This warranty is void if:
a.The replace is subjected to prolonged periods of dampness or condensation.
b.Any unauthorized alteration, willful abuse, accident, or misuse of the product.
c.You do not have the original receipt of purchase.
This manual suits for next models
1
Table of contents
Other Classic Flame Heater manuals


