Cleamix VCS-100Cr User manual

User Manual
VCS-100Cr
Decontamination Unit
Compatible for software version 2021-01-02 vs. 2.3

Cr 2021-01-02 vs. 2.3 User Manual for VCS-100Cr 1
Table of Content
For the User .................................................................................................................................................................................................................. 2
Disclaimer...................................................................................................................................................................................................................... 2
VCS-100Cr and VCS-100Ext........................................................................................................................................................................................ 2
Safety............................................................................................................................................................................................................................. 4
Hazard identification ................................................................................................................................................................................................... 4
Accessories ................................................................................................................................................................................................................... 9
Technical Specification: VCS-100Cr......................................................................................................................................................................... 10
Technical Specification: VCS-100Ext....................................................................................................................................................................... 11
Cleamix VCS-100Cr Operation ................................................................................................................................................................................. 12
Operating Cleamix decontamination unit with hose connector........................................................................................................................ 13
Catalytic Converter .................................................................................................................................................................................................... 16
HPP272 Sensor........................................................................................................................................................................................................... 17
Operating with Extension Units............................................................................................................................................................................... 18
Get started................................................................................................................................................................................................................... 18
Settings........................................................................................................................................................................................................................ 19
Login............................................................................................................................................................................................................................. 19
Self check .................................................................................................................................................................................................................... 19
Supply .......................................................................................................................................................................................................................... 20
Set................................................................................................................................................................................................................................. 20
Circulate....................................................................................................................................................................................................................... 20
Cat................................................................................................................................................................................................................................. 21
Dash.............................................................................................................................................................................................................................. 21
Extensions and Info ................................................................................................................................................................................................... 22
Prg ................................................................................................................................................................................................................................ 23
Save and Load............................................................................................................................................................................................................. 24
Delete ........................................................................................................................................................................................................................... 24
Enviro ........................................................................................................................................................................................................................... 24
Trends .......................................................................................................................................................................................................................... 25
Importing of measured data.................................................................................................................................................................................... 26
Alarms and notifications .......................................................................................................................................................................................... 27
Tightvnc viewer installation and configuration guide for controlling VCS-100Cr ......................................................................................... 28
Ending operation........................................................................................................................................................................................................ 29
Troubleshooting......................................................................................................................................................................................................... 30
Appendix I.................................................................................................................................................................................................................... 30
Appendix II................................................................................................................................................................................................................... 31
Appendix...................................................................................................................................................................................................................... 33

Cr 2021-01-02 vs. 2.3 User Manual for VCS-100Cr 2
This manual is intended to provide the user with all necessary information for the
appropriate, safe and independent operation of Cleamix VCS-100Cr device. Instructions
contain information on technical features, maintenance, storage and disposal of the device.
Read the operating instructions carefully. In case of uncertainty regarding the interpretation
of these instructions or if you require additional information, contact your local Cleamix
dealer or
Store operating instructions carefully with the Cleamix VCS-100Cr device.
For the User
Disclaimer
Given hydrogen peroxide vapour output and concentration values are indicative examples
and are intended to help the planning and running of decontamination processes in different
applications. The type and characteristics of the space and surfaces to be decontaminated
have an impact on the actual process parameters. Hydrogen peroxide vapour is an effective
biocide in a broad temperature range. Under certain circumstances it can create a
condensate with water vapour unfavourable for the supposedly dry decontamination
process.
High humidity rates and/or low temperatures are likely to cause condensation. This can be
prevented by conducting dry, heated air through the space prior to hydrogen peroxide
vapour production. The lower humidity permits a higher hydrogen peroxide concentration
and a dry process.
Cleamix takes no responsibility for the process parameter choices applied in individual
decontamination targets. The responsibility lies always with the user.
Cleamix reserves the right to make changes to the operating instructions.
VCS-100Cr and VCS-100Ext
Cleamix VCS-100Cr is a portable decontamination master unit designed for demanding
hydrogen peroxide bio-decontamination processes capable of mastering numerous
additional units (Ext, Cat, dryer and fan). Cleamix VCS-100Cr uses up to 50% aqueous
hydrogen peroxide solution for generating hydrogen peroxide vapour capable of destroying
even the most resistant microorganisms, like bacterial spores at room temperatures and
low concentrations.

Cr 2021-01-02 vs. 2.3 User Manual for VCS-100Cr 3
Hydrogen peroxide vapour has good material compatibility and it is residue free
decomposing into water and oxygen only.
Cleamix VCS-100Ext is operated together with a VCS-100Cr master unit. VCS-100ExtU unit is
a slave unit that receives commands from the master unit.
Cleamix VCS-100Ext uses up to 50% aqueous hydrogen peroxide solution for generating
hydrogen peroxide vapour capable of destroying even the most resistant microorganisms,
like bacterial spores at room temperatures and low concentrations.
Identification data
Model of the device, operating voltage, serial number and manufacturing year are recorded
on the type plate.
Cr 2021-01-02 vs. 2.3 User Manual for VCS-100Cr 4
NATO Stock Number (NSN) for VCS-100Cr: 6840580013819
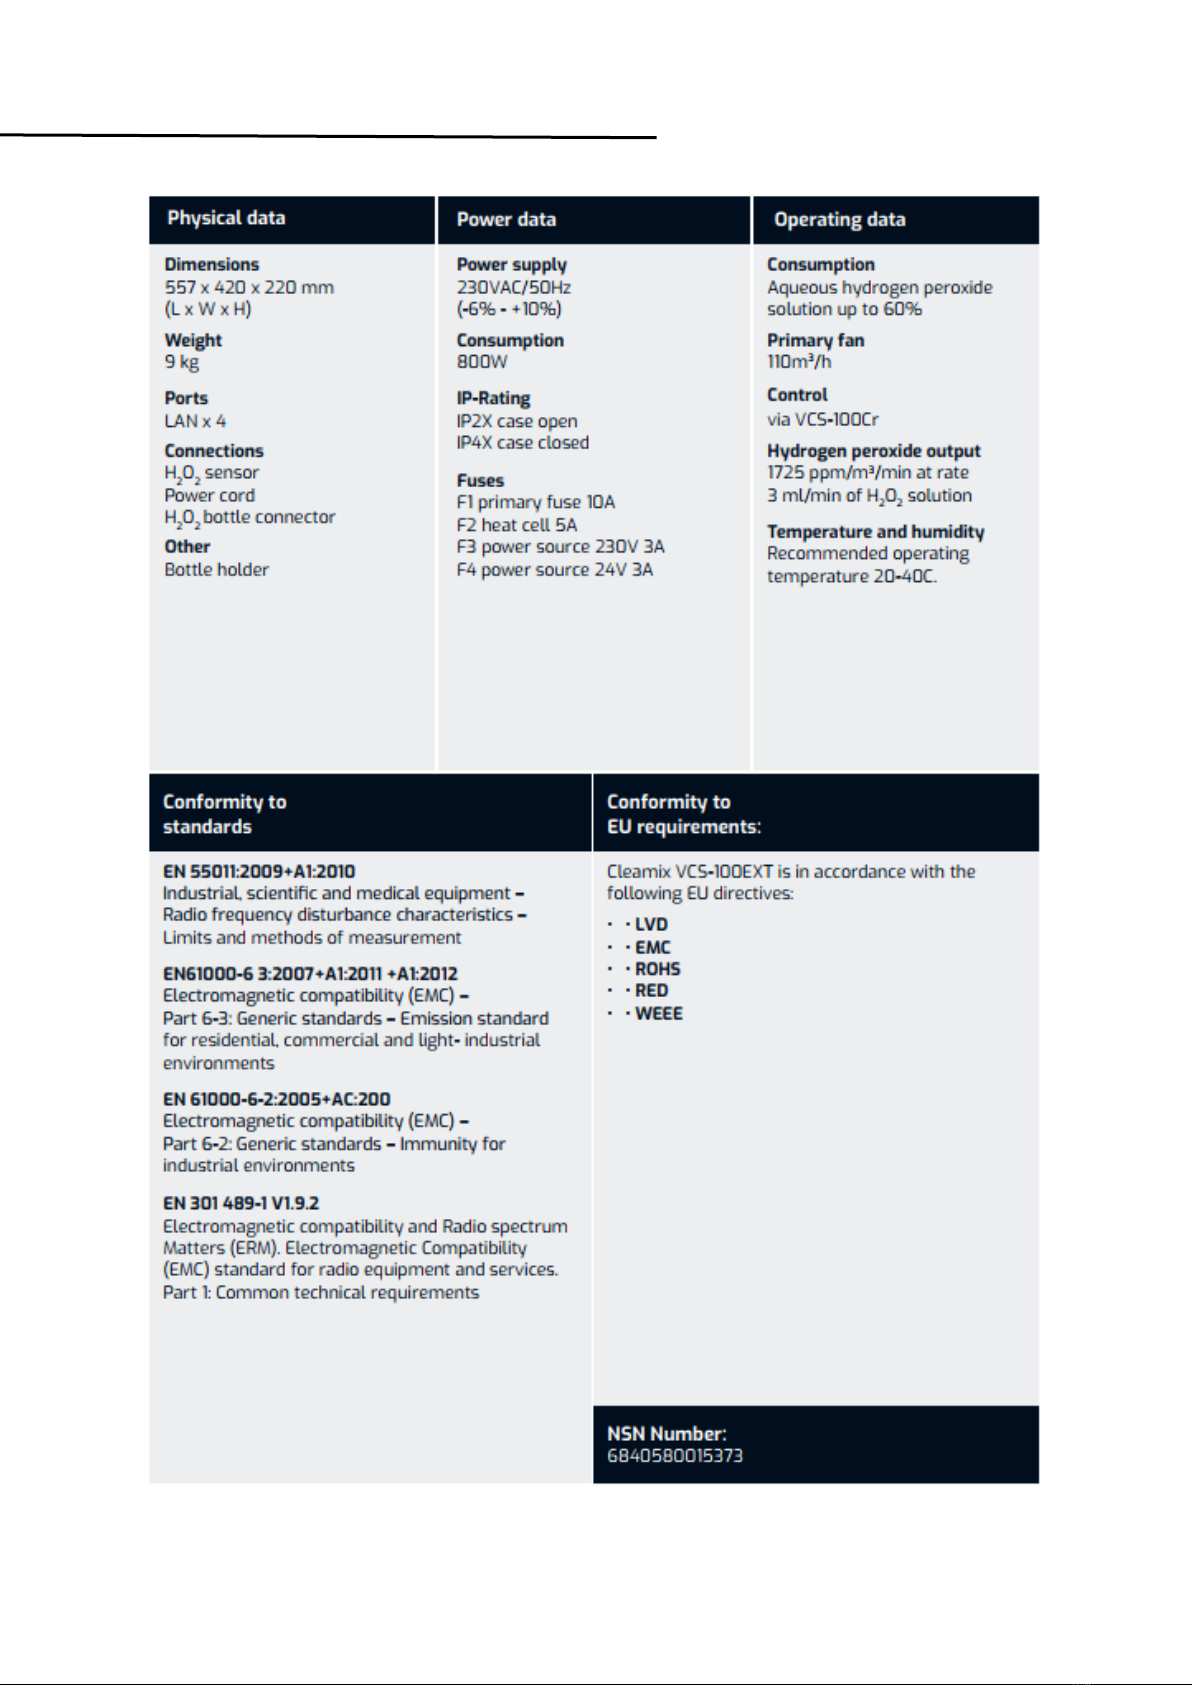
NATO Stock Number (NSN) for VCS-100ExtU: 6840580015373
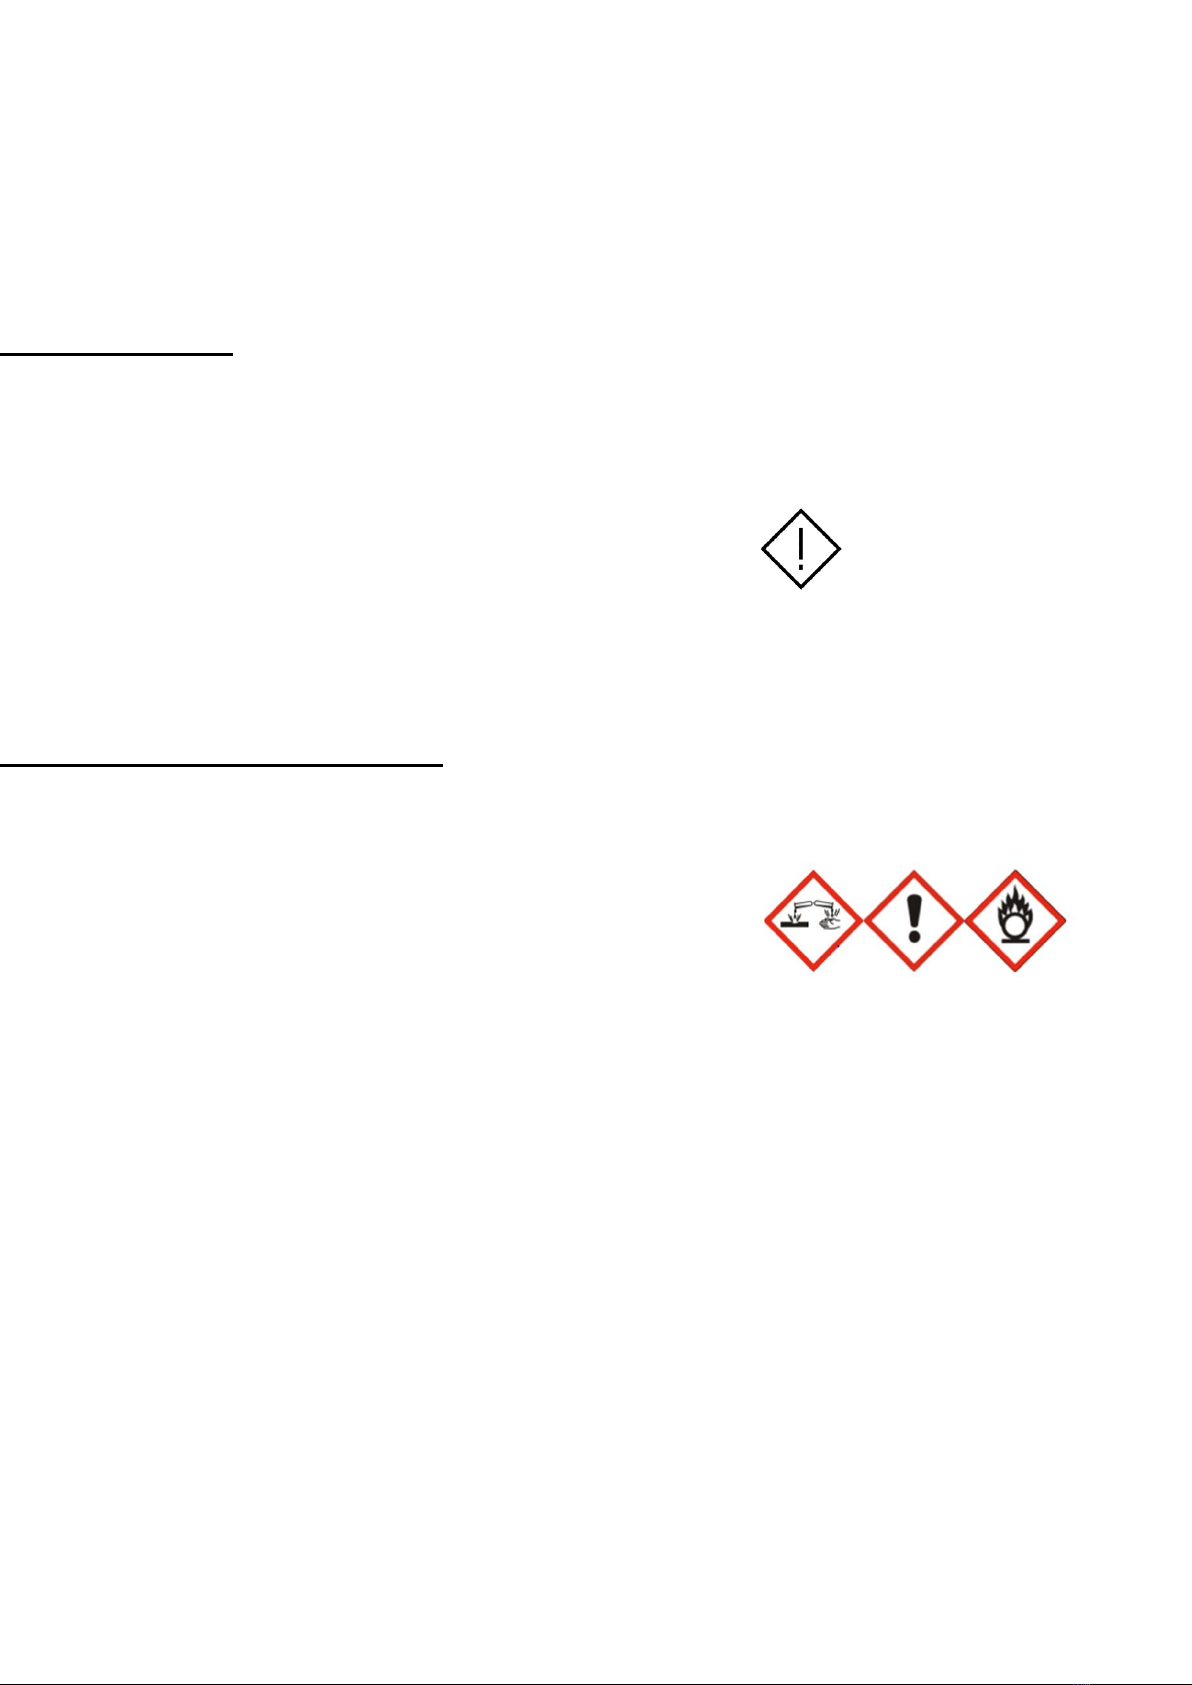
Safety
Classification of the substance: The substance is classified as dangerous according to EU
Regulation 1272/2008
Hazard Statements
H314 - Causes severe skin burns and eye damage
H302 - Harmful if swallowed
H332 - Harmful if inhaled
H335 - May cause respiratory irritation
H272 - May intensify fire; oxidizer
Precautionary Statements - Prevention
P271 - Use only outdoors or in a well-ventilated area
P260 - Do not breathe mist, vapours or spray.
P280 - Wear protective gloves/ protective clothing/ eye protection/ face protection
P210 - Keep away from heat/sparks/open flames/hot surfaces. - No smoking
P220 - Keep/Store away from clothing/flammable materials/combustibles
Make sure there is no hydrogen peroxide liquid leakage out to the surroundings. Use
protective cloves, glasses and appropriate protective clothing. Follow local safety
precautions.
Remember the safety limits:
1 PPM = 8 h
3 PPM = 15 min
75 PPM = IDLH (Immediate Danger for Life and Health)
Hazard identification

Cr 2021-01-02 vs. 2.3 User Manual for VCS-100Cr 5
P221 - Take any precaution to avoid mixing with combustibles/flammables Precautionary
Statements - Response
P305 + P351 + P338 - IF IN EYES: Rinse cautiously with water for several minutes. Remove
contact lenses, if present and easy to do. Continue rinsing
P310 - Immediately call a POISON CENTER or doctor
P303 + P361 + P353 - IF ON SKIN (or hair): Take off immediately all contaminated clothing.
Rinse skin with water/ shower
P363 - Wash contaminated clothing before reuse
P304 + P340 - IF INHALED: Remove person to fresh air and keep comfortable for breathing
P312 - Call a POISON CENTER or doctor if you feel unwell
P301 + P330 + P331 - IF SWALLOWED: rinse mouth. Do NOT induce vomiting
P310 - Immediately call a POISON CENTER or doctor
P370 + P378 - In case of fire: Use water for extinction
Other information
Keep container in a cool place out of direct sunlight. Store only in vented containers. Do not
store on wooden pallets. Do not return unused material to its original container. Avoid
contamination - Contamination could cause decomposition and generation of oxygen
which may result in high pressure and possible container rupture. Empty drums should be
triple rinsed with water before discarding.
Eye Contact Rinse immediately with plenty of water, also under the eyelids, for at
least 15 minutes. Remove contact lenses, if present, after the first 5
minutes, then continue rinsing. Seek immediate medical
attention/advice.
Skin Contact Take off contaminated clothing. Rinse skin immediately with plenty of
water for 15-20 minutes. Call a poison control center or doctor for
further treatment advice.

Cr 2021-01-02 vs. 2.3 User Manual for VCS-100Cr 6
Inhalation Move to fresh air. If person is not breathing, contact emergency
medical services, then give artificial respiration, preferably
mouth-to-mouth if possible. Call a poison control center or
doctor for further treatment advice.
Ingestion Rinse mouth. Do not induce vomiting. If conscious, give 2 glasses
of water. Get immediate medical attention. Never give anything
by mouth to an unconscious person.
Most important symptoms and effects, both acute and delayed
Hydrogen Peroxide irritates respiratory system and, if inhaled, may
cause inflammation and pulmonary oedema. The effects may not be
immediate. Overexposure symptoms are coughing, giddiness and sore
throat. In case of accidental ingestion, necrosis may result from
mucous membrane burns (mouth, oesophagus and stomach). Oxygen
rapid release may cause stomach swelling and haemorrhaging, which
may product major, or even fatal, injury to organs if a large amount
has been ingested. In case of skin contact, may cause burns,
erythema, blisters or even necrosis.
Indication of immediate medical attention and special treatment needed, if necessary
Hydrogen peroxide at these concentrations is a strong oxidant. Direct
contact with the eye is likely to cause corneal damage especially if
not washed immediately. Careful ophthalmologic evaluation is
recommended and the possibility of local corticosteroid therapy
should be considered. Because of the likelihood of corrosive effects
on the gastrointestinal tract after ingestion, and the unlikelihood of
systemic effects, attempts at evacuating the stomach via emesis
induction or gastric lavage should be avoided. There is a remote
possibility, however, that a nasogastric or orogastric tube may be
required for the reduction of severe distension due to gas formation.
FIRE FIGHTING MEASURES
Suitable Extinguishing Media
Water. Do not use any other substance.
Specific Hazards Arising from the Chemical
In closed unventilated containers, risk of rupture due to the
increased pressure from decomposition. Contact with
combustible material may cause fire.

Cr 2021-01-02 vs. 2.3 User Manual for VCS-100Cr 7
Hazardous Combustion Products
On decomposition product releases oxygen which may intensify
fire.
Possibility of hazardous reactions
Risk of explosion with: permanganates, hydrazines, hydrides,
metal oxides, metal salts, organic substances, alcohols,
methanol, vinyl acetate, non-metals, non-metal oxides, lithium,
magnesium, sodium, formaldehyde, acetic acid, combustible
substances according to
Explosion data
Sensitivity to Mechanical Impact
Not sensitive.
Sensitivity to Static Discharge
Not sensitive.
HANDLING AND STORAGE
Handling
Use only in well-ventilated areas. Keep/Store away from clothing/ combustible materials.
Wear personal protective equipment. Never return unused hydrogen peroxide to original
container. Contamination may cause decomposition and generation of oxygen gas which
could result in high pressures and possible container rupture. Empty drums should be
triple rinsed with water before discarding. Utensils used for handling hydrogen peroxide
should only be made of glass, stainless steel, aluminium or plastic. Pipes and equipment
should be passivated before first use. Hydrogen peroxide should be stored only in vented
containers and transferred only in a prescribed manner.
Storage
Keep containers in cool areas out of direct sunlight and away from combustibles. Provide
mechanical general and/or local exhaust ventilation to prevent release of vapor or mist
into work environment. Containers must be vented. Keep/store only in original container.
Store rooms or warehouses should be made of non-combustible materials with
impermeable floors. In case of release, spillage should flow to safe area. Containers
should be visually inspected on a regular basis to detect any abnormalities (swollen
drums, increases in temperature, etc.).

Cr 2021-01-02 vs. 2.3 User Manual for VCS-100Cr 8
Incompatible products
Combustible materials. Copper alloys, galvanized iron. Strong reducing agents. Heavy
metals. Iron. Copper alloys. Contact with metals, metallic ions, alkalis, reducing agents and
organic matter (such as alcohols or terpenes) may produce self-accelerated thermal
decomposition.
PERSONAL PROTECTION
Protection of eyes, face and respiratory: Whole face covering gas mask with category P3
NO-, CO-filter (EN143/14387).
Protection of hands: Gloves made of butyl rubber, natural rubber, nitrile rubber, neoprene
rubber or fluoro rubber.
Protection of skin: Protective full body suit. Compatible materials: (Viton®), Tychem® CPF
3, Tychem® BR/LV, Tychem® Responder® and Tychem® TK. (EN 14605 / category III / EN
14126 / class 6)
Pouring liquid hydrogen peroxide from the 20 litre canister into the 1 litre bottle
1. Safety
Make sure that you are wearing the proper safety wear: non-flammable clothing, rubber
boots, protective gloves and protective goggles.
Make sure that you have plenty of water available for rinsing in case the HP solution gets
spilled. It's a good idea to keep an emergency kit and eyewash pack nearby too.
2. Equipment’s
You will need a funnel with the maximum width of the funnel shaft of 4 cm to safely pour
the 50% hydrogen peroxide liquid solution from the 20 L canister into the 1 L bottle.
3. Pouring
Pour the HP solution carefully from the 20 L canister to the 1 L bottle with using the funnel.
When finished, make sure there isn't appearing any spilling of the HP solution. If so,
carefully dilute it with using plenty of water.
4. After
Make sure to close the caps properly and store again the HP
solution according the instructions.

Cr 2021-01-02 vs. 2.3 User Manual for VCS-100Cr 9
Accessories
SUCTION SET
Installed in a hydrogen peroxide
bottle that dispenses liquid
hydrogen peroxide into the
apparatus for evaporation.
SENSOR
Vaisala HPP 272 hydrogen
peroxide sensor.
HYDROGEN PEROXIDE BOTTLE
Hydrogen peroxide bottle, which is
placed to the device.
ETHERNET-CABLE
For connecting the catalytic
converter, master unit and
extension units.
POWER CORD
Power cord for the VCS devices.
TABLET
Tablet for remote controlling and
monitoring.
CATALYTIC CONVERTER
For vapor removal.
POWER CORD FOR CAT.C.
Power cord for the Catalytic
Converter.

Cr 2021-01-02 vs. 2.3 User Manual for VCS-100Cr 10
Technical Specification: VCS-100Cr
Cr 2021-01-02 vs. 2.3 User Manual for VCS-100Cr 11
Technical Specification: VCS-100Ext

Cr 2021-01-02 vs. 2.3 User Manual for VCS-100Cr 12
Prior to decontamination:
1. Make sure the room has been properly cleaned.
2. No loose items are accepted in the decontamination space.
3. Open drawers and reposition items to decontaminate as much as possible.
4. For optimal air circulation, use additional fans securing vapour distribution. It is
a good idea to place one additional fan next to the decontamination unit to blow
from the unit’s air input towards the vapour output. This will improve the
efficient vapour circulation and the ventilation of the unit especially in a warm
weather conditions.
5. Position indicators to places challenging for the hydrogen peroxide vapour to
reach.
6. Cover/close fire alarms (find out proper procedures).
7. Seal ventilation, possible valves and holes.
8. Make sure there is no vapour leaking outside.
9. Hydrogen peroxide sensing devices are used to monitor the surrounding area
during the decontamination cycle.
10. Keep the area clear from visitors.
11. Use warning signs in addition to upfront informing.
12. Position the device on a levelled surface in a central location so that the vapour
can spread freely into the space.
13. Remove cushion from the case, it absorbs hydrogen peroxide.
Power cord
Plug in the power cord by pressing and rotating the socket clockwise to lock to the desired
position. Power cord is detached by lifting the latch and turning the socket counter-clockwise
until it gets loose.
Sensor
Attach the hydrogen peroxide sensor to the unit so that the two red dots are facing each
other and press to lock. The sensor is detached by lifting it up with some force. Place the
sensor far enough from the unit. Remove the protective cap from the sensor.
Power
Turn on the device by pressing the power switch. The switch will lighten up.
Hydrogen peroxide bottle
Remove the cap of the hydrogen peroxide bottle and replace it with ventilated cap. Attach
the suction hoses properly to the bottle by pressing until you hear the sound of the locking
system.
Cleamix VCS-100Cr Operation

Cr 2021-01-02 vs. 2.3 User Manual for VCS-100Cr 13
Operating Cleamix decontamination unit with hose connector
Instructions how to use Cleamix hose connector coupled with VCS-100Cr and VCS-20 units
safely. Proper installation is especially important in close loop systems and should not be
neglected. Always have a H2O2 detector close by.
Installing the hose connector
Take four (4) of the screws, part A and corresponding gasket A and install them according
to the image 2 in the in- and outlets of the gas. Make sure to align the gasket A and part A
so that no gaps appear, and check that the installation is tight and secure.

Cr 2021-01-02 vs. 2.3 User Manual for VCS-100Cr 14
Installing the hose connector to wall
Install the wall mount to the predetermined location. Follow the instructions in 2.1 Installing
the hose connector for secure mounting of the hose connector. Image 3 for reference.
Installing hoses to the hose connector
Install the supplied hose to the connector with the bridge clamps supplied in the package
(Image 1) to part B. Install the hose as shown in image 5. Confirm that the hoses are tightly
secured by gently pulling them.
If you have not ordered hoses from Cleamix Oy and are using your own, Cleamix Oy is not
responsible if gas leakage occurs due to non-conforming materials used in the hoses or
improper installation.

Cr 2021-01-02 vs. 2.3 User Manual for VCS-100Cr 15
Additional information
Always have a Dräger X-am® 5100 handheld H2O2gas detector or other similar personal
protective equipment designed to detect low concentrations of H2O2close by in case of an
invalid installation. Dräger handheld detector can be purchased from Cleamix Ltd. together
with the VCS units or separately.
When placing the VCS unit in its desired location make sure to align the unit properly and so
that it is located in upright position and not in angle. Ideal location is on table or other flat
object so that the unit is not disturbed or moved by accident.
If you are not using Cleamix Ltd. supplied hoses, make sure that the used hoses are made
from non-porous materials, are designed for gas usage and the material is able to
withstand 50% hydrogen peroxide vapor.
Please refer to material compatibility sheets available online to confirm that the hose
material is suitable for the intended use to avoid personnel injury. Cleamix Ltd. takes no
responsibility if nonconforming hose material is used to connect the VCS unit and
decontaminated space and leakage occurs.

Cr 2021-01-02 vs. 2.3 User Manual for VCS-100Cr 16
Catalytic Converter can be used for dissolving the hydrogen peroxide vapour from the
treatment area. Catalytic Converter is an air circulating fan, which is included with HEPA-
filter and potassium permanganate filter that makes a chemical reaction with hydrogen
peroxide vapour where the vapour decomposes into water and oxygen immediately.
Connect the ethernet cable between Catalytic Converter and VCS-100Cr or VCS-100ExtU.
Switch the power on at Catalytic Converter.
Catalytic Converter

Cr 2021-01-02 vs. 2.3 User Manual for VCS-100Cr 17
Hydrogen Peroxide, Humidity and Temperature Sensor HPP272 provides measurement for
vaporized H2O2 concentration, relative saturation, relative humidity, and temperature.
Always remember to use the yellow transport cap when not operating. Protecting the
sensor during storage and transportation prolongs the lifetime of the sensor.
CAUTION! When there is H2O2 in the sensor's environment, the sensor must always be
powered on. When powered on, the PEROXCAP sensor is heated, which permits using the
sensor in condensing H2O2 conditions, maintains measurement performance, and
lengthens the sensor's lifetime. When the sensor is powered off, exposure to H2O2
condensation can cause the PEROXCAP sensor to fail within a day, and the sensor will not
recover.
CAUTION! Do not attempt to open the sensor body. There are no user serviceable parts
inside the sensor body.
Cleaning and Maintenance
You can clean the H2O2 and humidity sensor body and temperature sensor body and cable
by wiping them with a soft, lint-free cloth moistened with water or mild cleaning agent, such
as isopropanol. Do not wipe the filter: wiping the filter may block its pores and/or deposit
residue on the filter. If the filter is heavily contaminated, replace it.
When cleaning, follow these precautions:
• Avoid touching the filter. If you need to touch the filter, always wear clean gloves (cotton,
rubber, or similar material). Keep the filter free of any grease or oil.
• Do not scrape the sensor body.
• Do not immerse the sensor in liquid to clean it.
• Wipe cleaning agents off the sensor after cleaning. If needed, you can spray the sensor
surfaces with water. After cleaning the sensor, it is recommended to perform a chemical
purge.
The sensor must be calibrated regularly so that the measurement result is valid and the
sensor remains long-lasting. The sensor can be delivered to Cleamix for calibration.
HPP272 Sensor

Cr 2021-01-02 vs. 2.3 User Manual for VCS-100Cr 18
VCS-100Cr decontamination unit can be operated together with VCS-100Ext extension units
for bigger decontamination volumes. VCS-100Ext has the same efficiency as the VCS-100Cr
master unit. VCS-100Ext is controlled trough VCS-100Cr. VCS-100Ext can be operated with
or without HPP 272 probe. VCS-100Cr and Ext should be always operated inside the same
area, never in separated rooms.
Attaching the extension units
Attach extension unit either to master unit or to Cat by placing the ethernet
cable to the plug in the device.
Extension units should be connected like star-wired principle, i.e. the cords must
not generate a loop.
Master units must not be connected together.
Operating with Extension Units
Turn the power on the device using the power switch.
VCS-100Cr devices are equipped with Samsung Galaxy Active tablets for remote control.
Take the tablet and connect it with the VCS-100Cr device by entering to the tablet’s WiFi-
settings. Look for available WiFi-connections. Make sure the device has power on. You will
recognize the device you are connecting by the serial number. Select the available
connection that has the serie of numbers same as your devices serial number.
After connection is made, you can enter to the remote control application bVNC from the
start menu.
Get started

Cr 2021-01-02 vs. 2.3 User Manual for VCS-100Cr 19
User interface for VCS-100Cr is created with different access levels of user ID’s.
Organisations can define personal ID’s and this way control the users of the device. There is
possibility to login as a guest, but this function can be disabled.
User ID levels:
Users = ID that can operate the device with own personal ID’s and the name of the user will
be written on the report.
Admin = ID that can modify the User-level ID’s: create and delete users, edit passwords.
Service = ID for authorized service. This ID level can modify Admin- and User-level ID’s.
Settings
Login
When turning on the device, there will appear LOGIN PAGE.
Enter your user name and password. If you forget your password, you can enter using
Default User login by pressing GO.
Change password by selecting the user and adding the current password. Then press
Change Password. Admin-level user can Manage Users.
From login page it is possible to continue to Supply or to Selfcheck.
Self check
I In Self check the device will test all the
critical parts of the device. It is possible to
skip this phase with pressing Settings
button. However, the Sensor will do its
own 6 minutes start-up calibration
procedure.
Table of contents
Other Cleamix Laboratory Equipment manuals


