Cleanmate S400 User manual
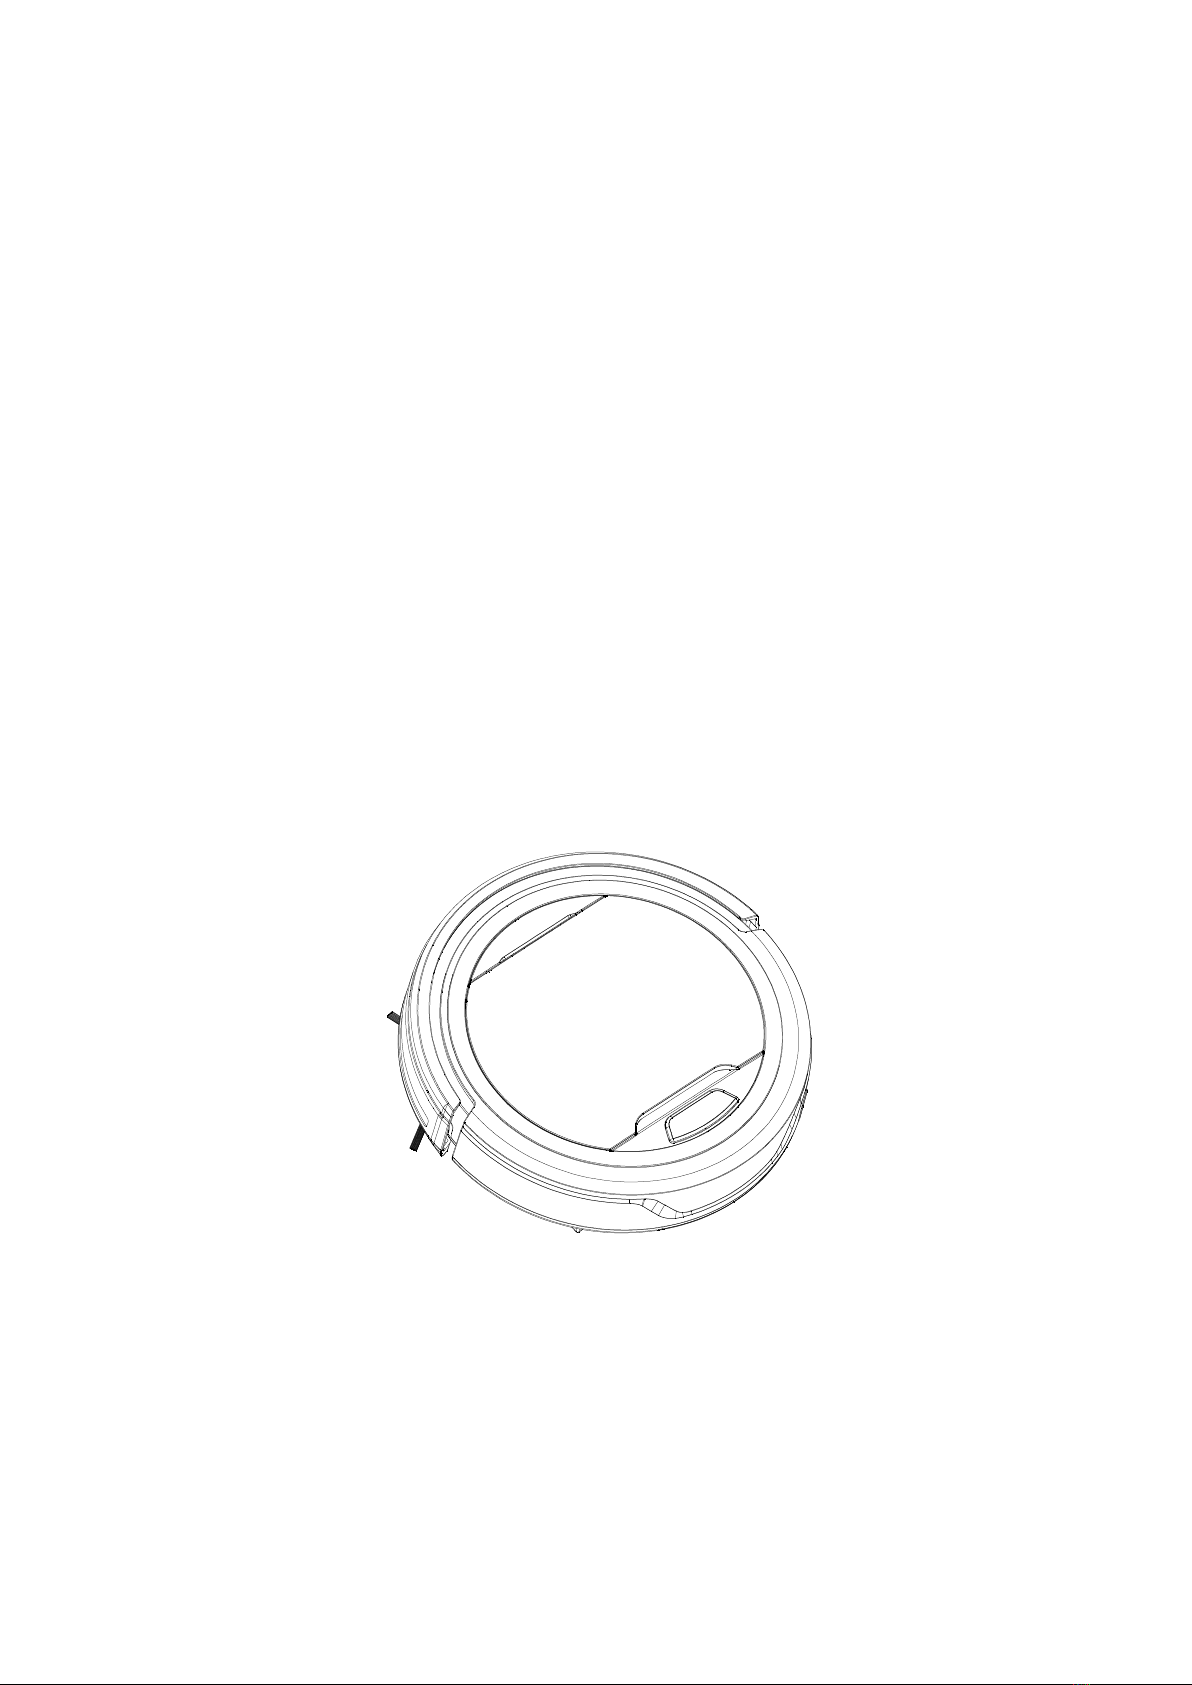
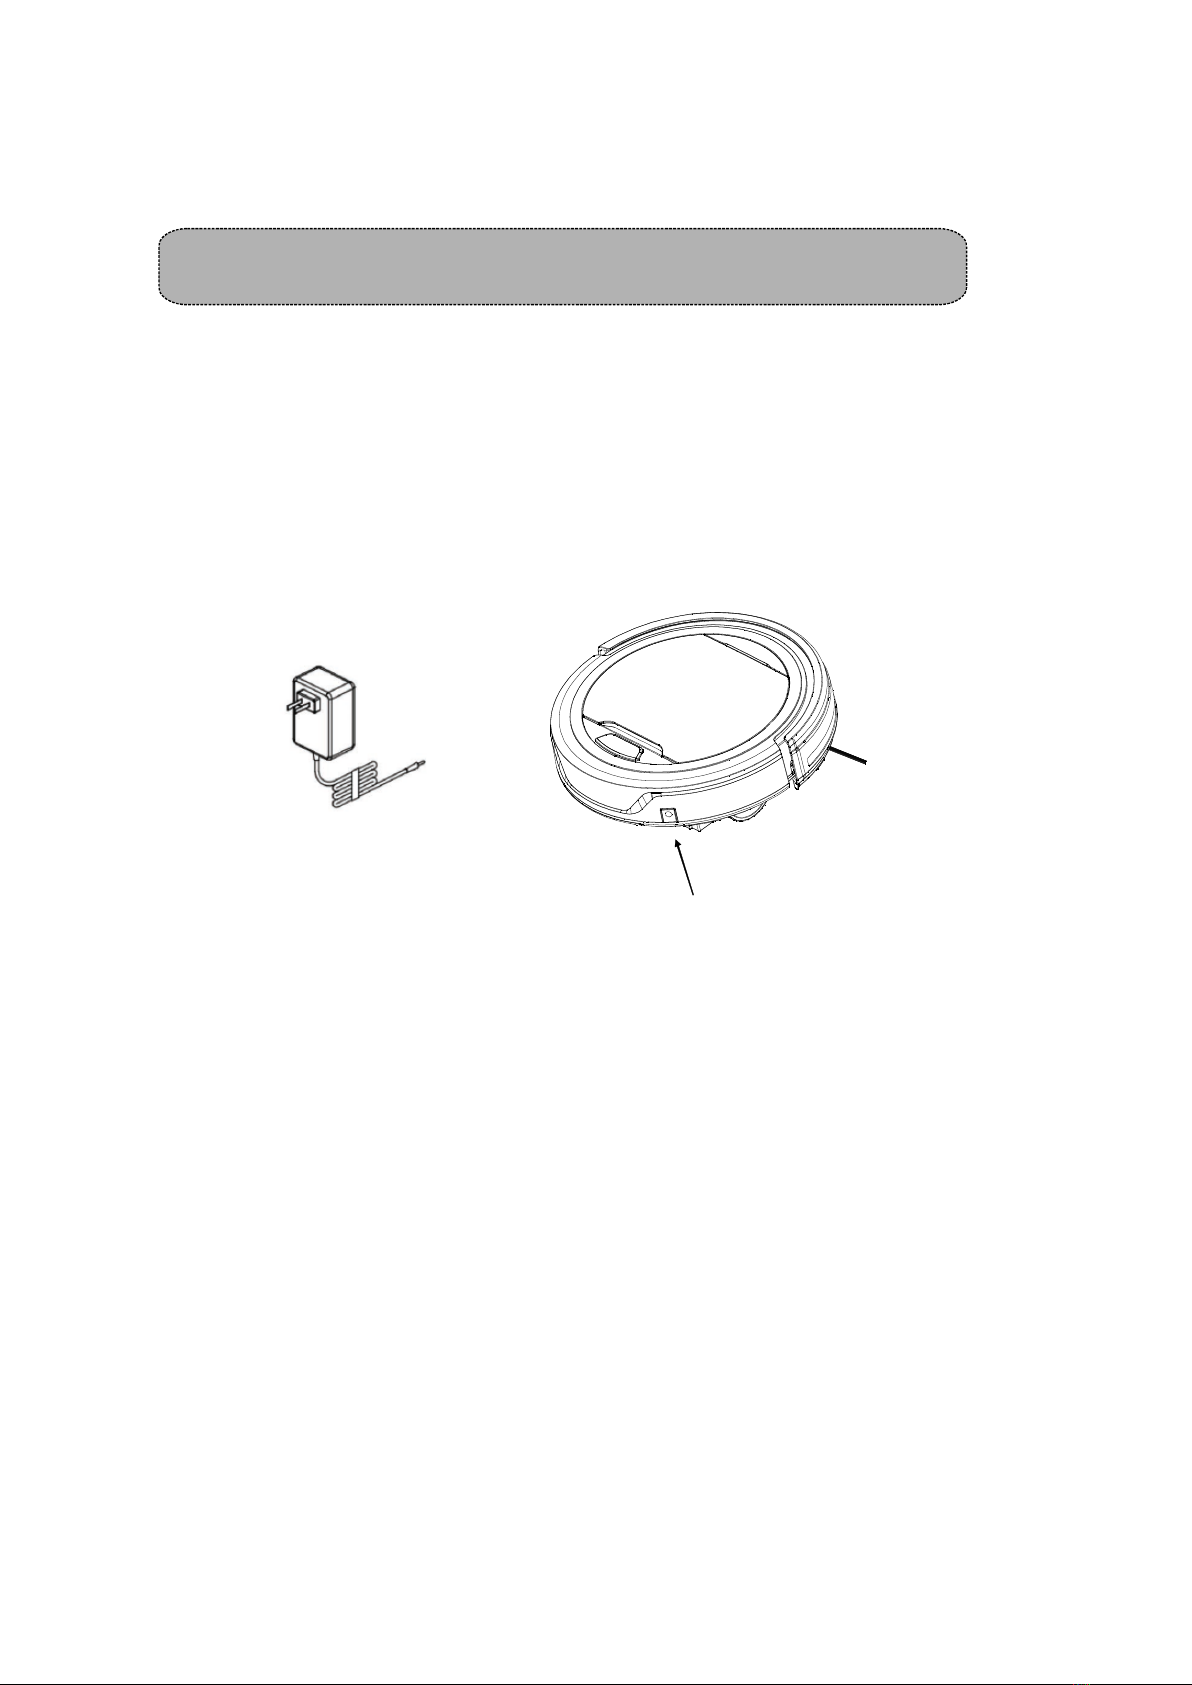
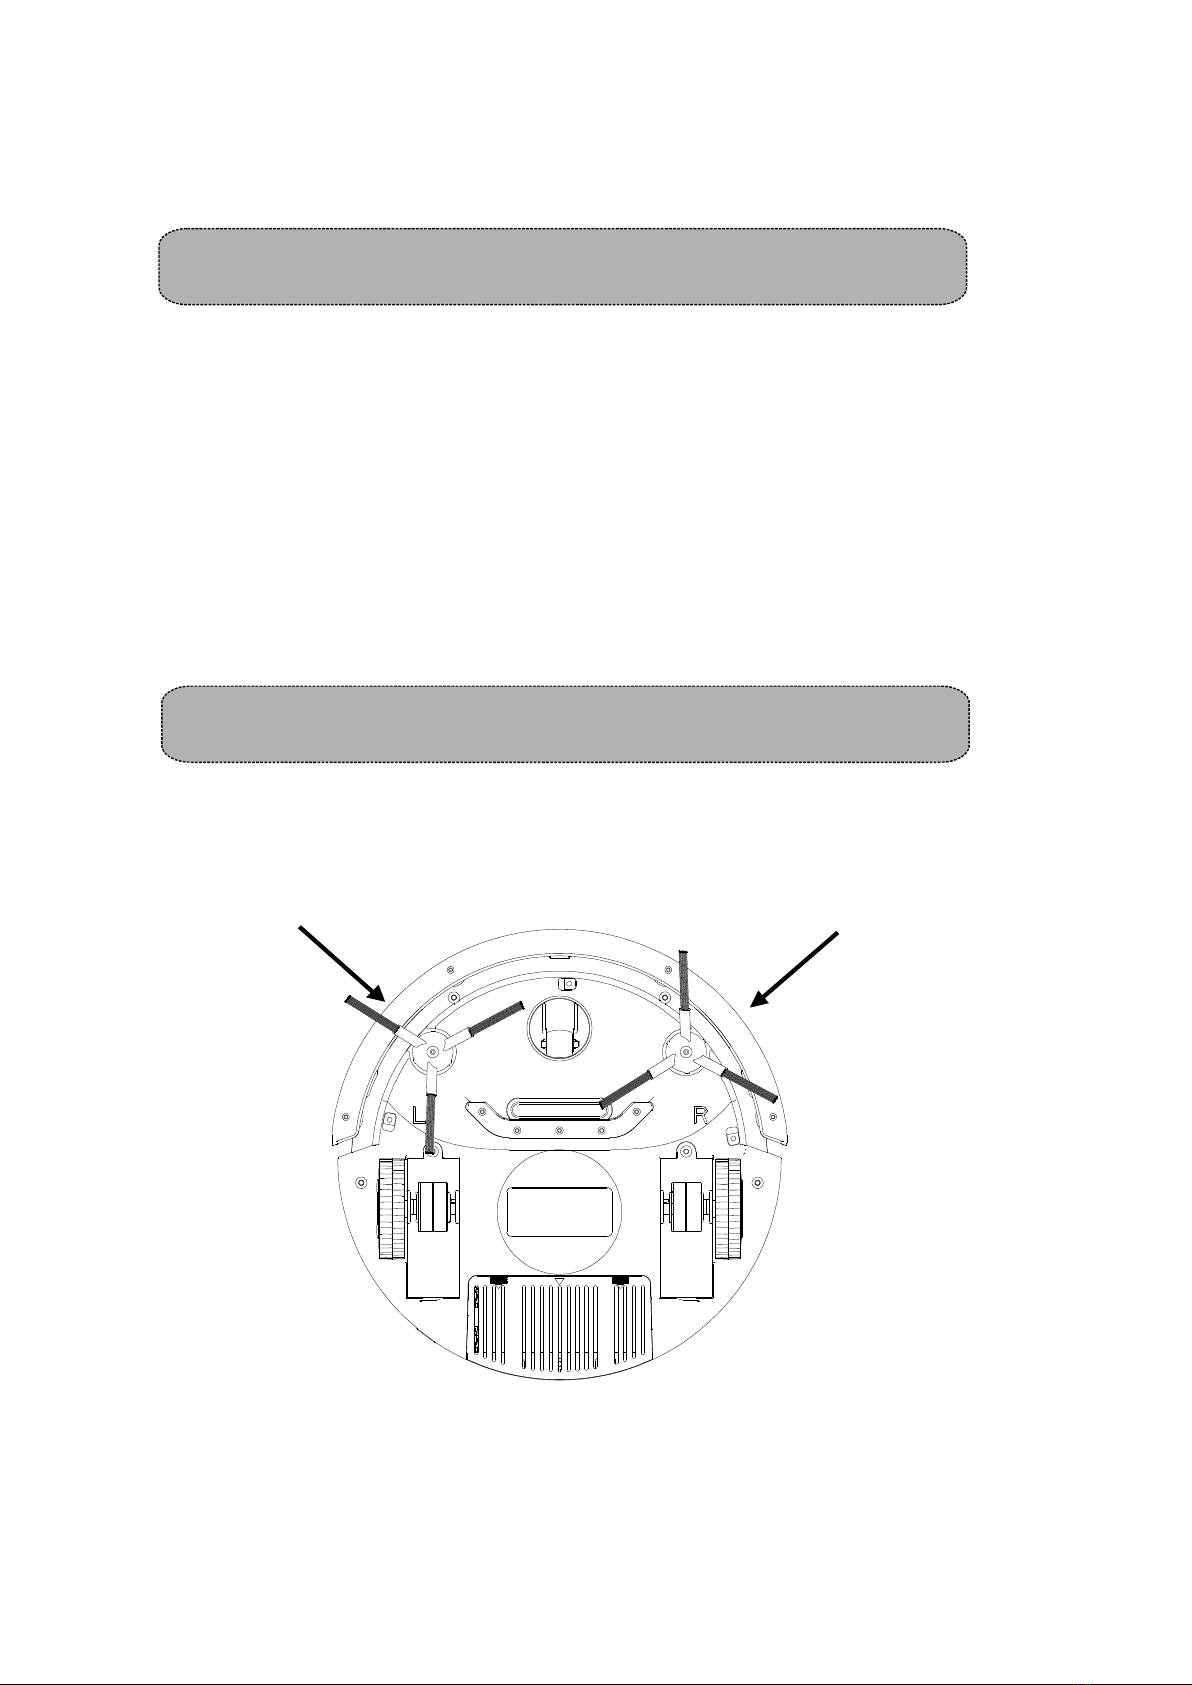
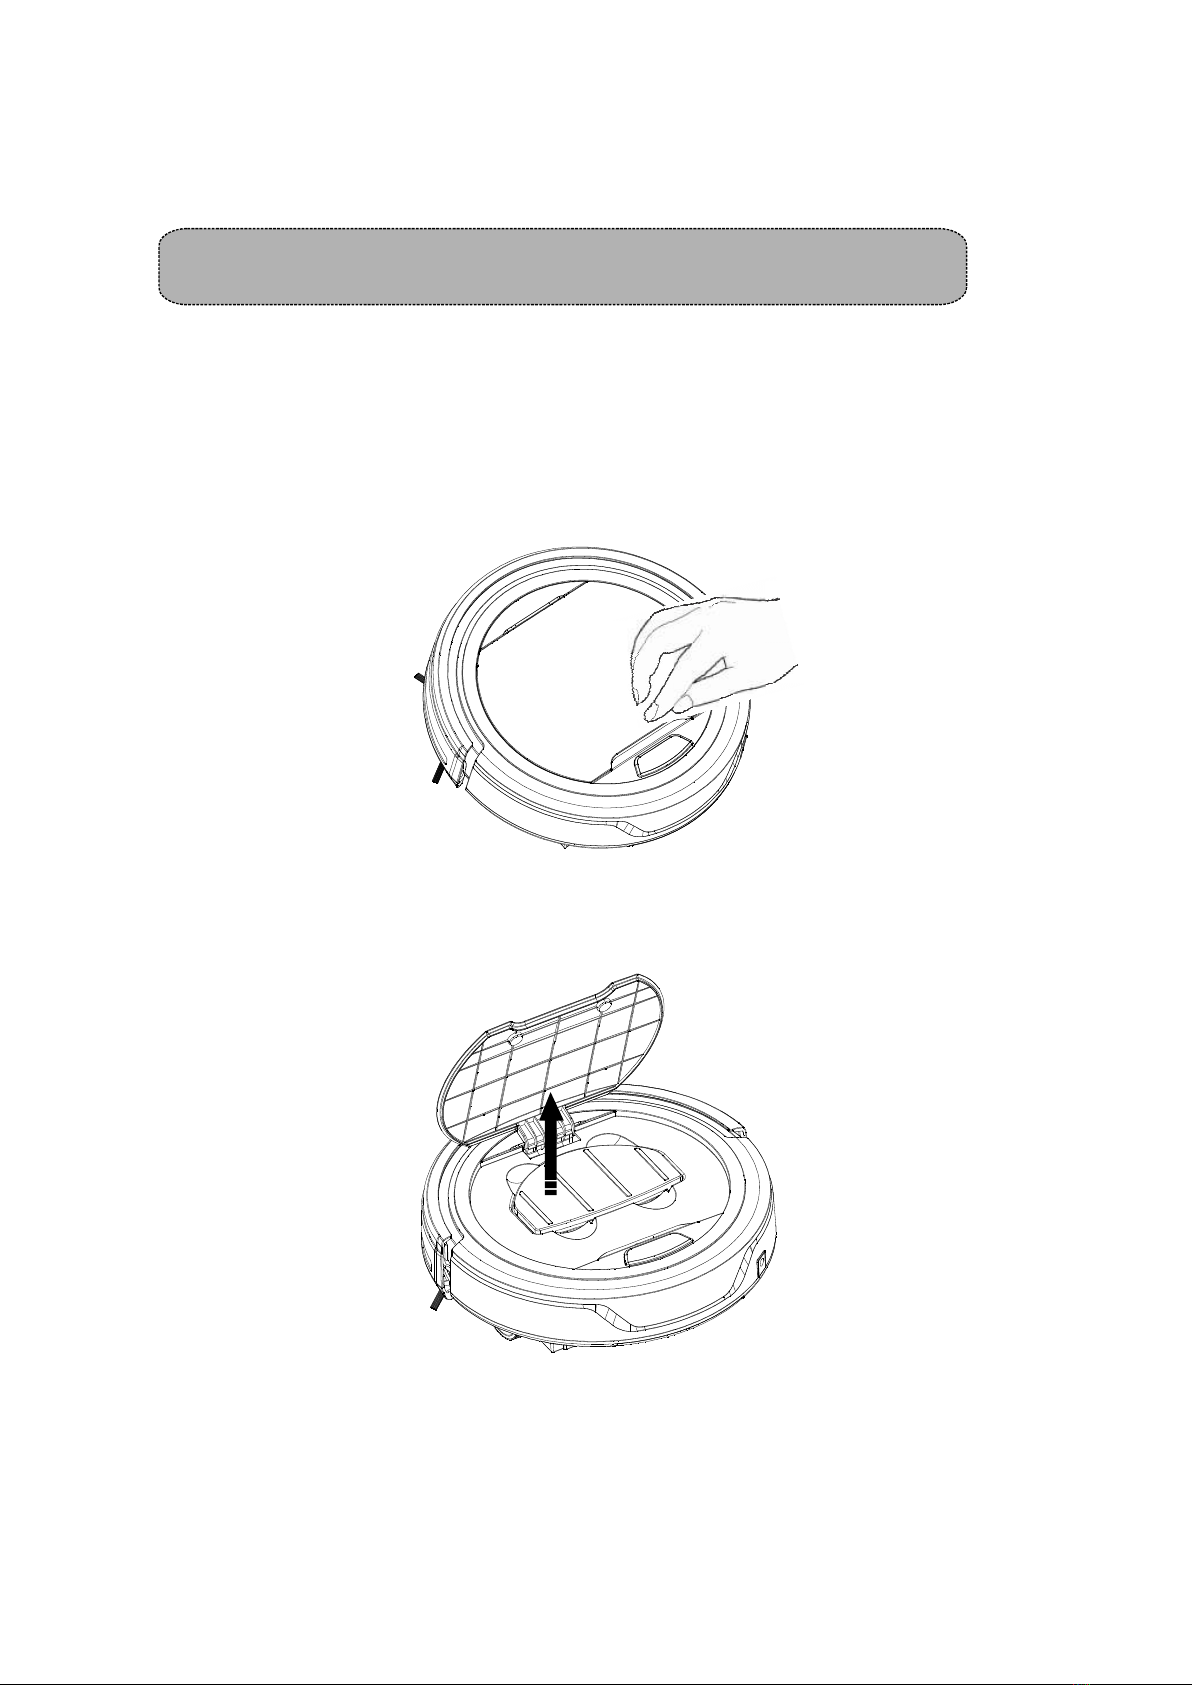
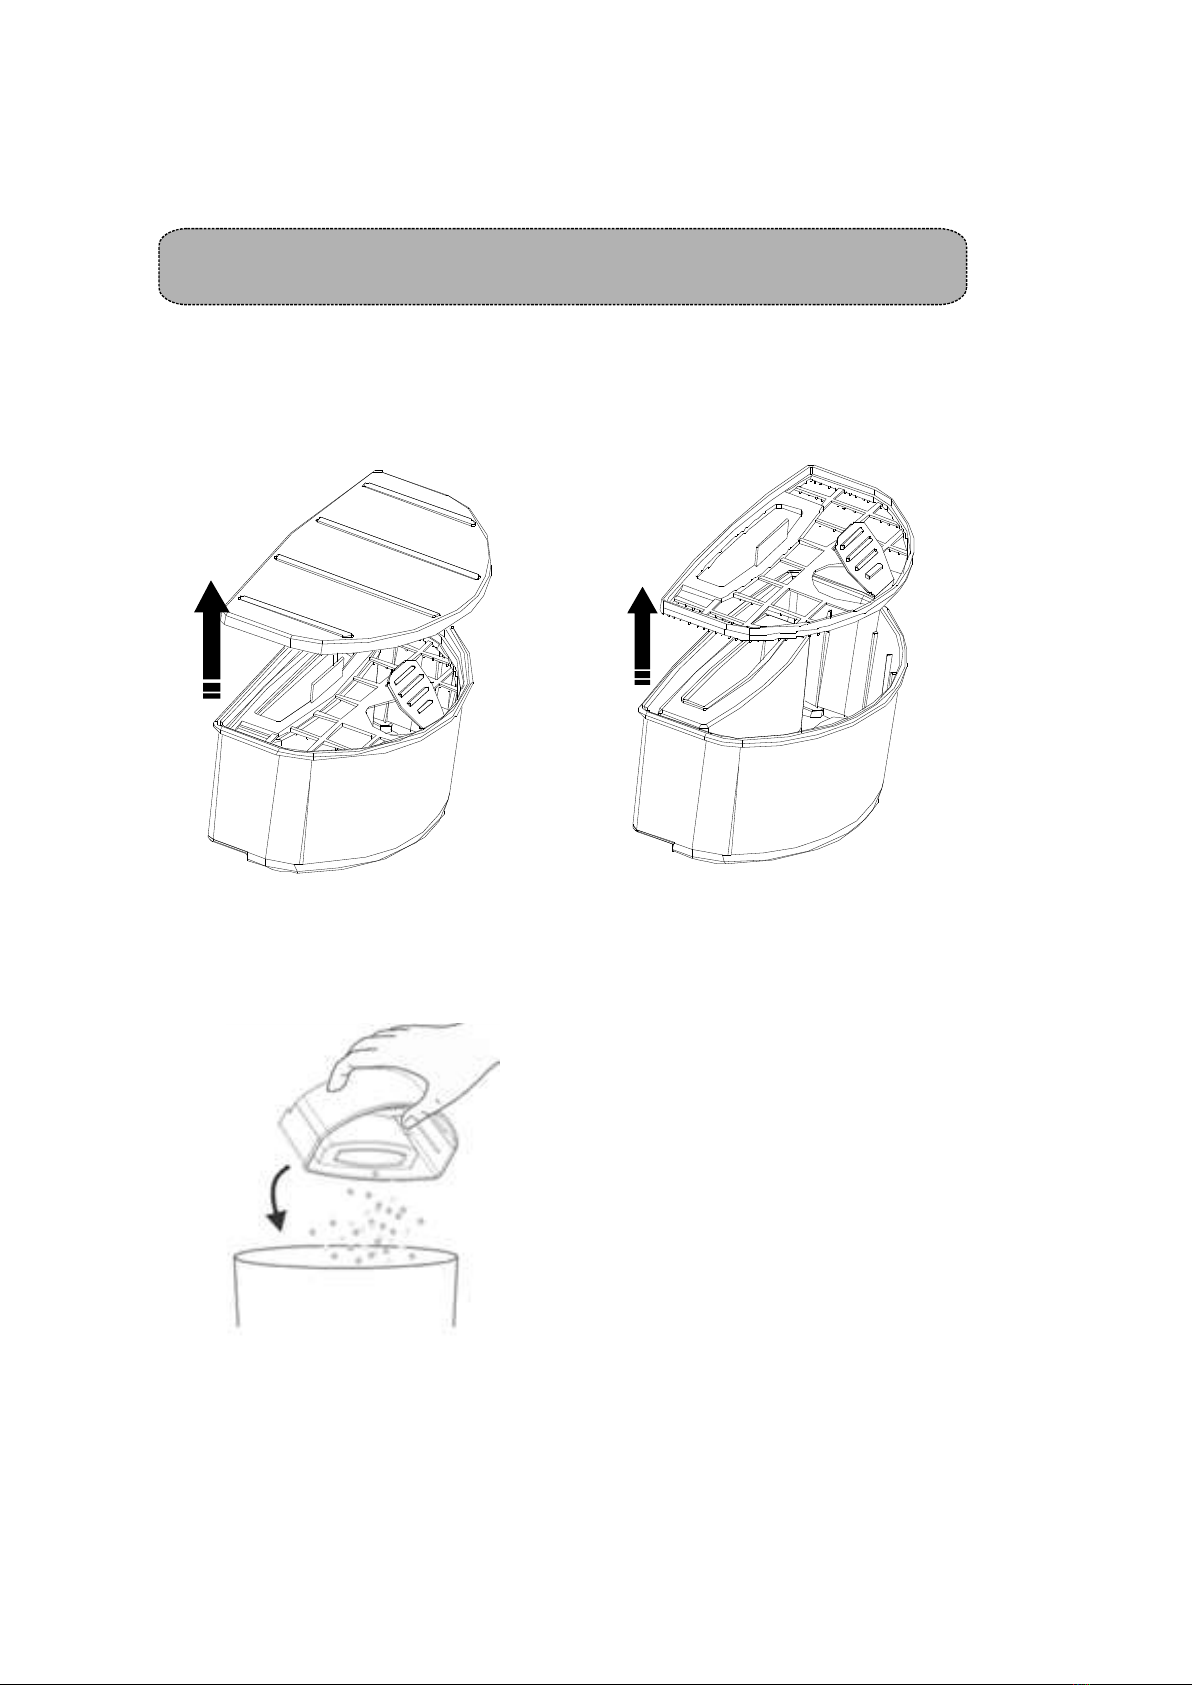
Mini Robotic
Vacuum Cleaner
_______________________
User Manual K5
User Manual Cleanmate S400

Safety instruction
Product features
Main body and accessories
Battery installation and removal
Recharging battery
General operation
Sidebrush installation
Cleaning and maintenance
• Cleaning dustbin
• Cleaning intake
Troubleshooting
1
7
8
9
10
11
11
12
12
15
16
Table of Contents

It indicates that any violations of instruction or improper operation are probably to
cause casualties or severe injuries.
Danger
It indicates that any violations of instruction or improper operation are probably to
cause casualties or severe injuries.
Caution
It indicates that any violations of instruction or improper operation are probably to
cause injuries to people and damage to property.
Notice
Warning Sign
It indicates prohibited behavior. Detailed content refer to the sign or the explanation of the sign.
It indicates enforcement behavior. Detailed content referto the sign or the explanation of the sign.
It indicates attention (including warning) content. Detailed content refer to the sign or the
explanation of the sign.
*1. Possible Severe injuries: Blindness, Burns, Electricity Injury, Fracture, Poisoning and other severe injuries that
leave sequela and lead to longterm hospitalization.
*2. Possible Injuries: Burns, and electricity wound that does not require hospitalization.
*3. Possible Property Damage : Damage to furniture, valuable objects and injuries to pets.
Graphic and Sign explanation
Safety Instructions
Before using this product, please read the safety instructions and follow all regular safety precautions.
Warranty service is not applicable to any damage caused by violation of instructions. S 400 sweeping robot
is a sophisticated product which is restricted for indoor cleaning only. DO NOT use the robot for non-cleaning
purpose. Please refer to user manual.
When the appliance is to be used by a child, the child must be of 8 years old and above. For person with
reduced physical, sensory or mental capabilities or lack of experience and knowledge, proper supervision or
instruction should be given concerning use of the appliance in a safe way to help them understand the hazards
involved. Children should not play with appliance. Cleaning and user maintenance should not be made by
children without supervision.
Warning
1

Safety Instructions
Safety Instructions of Product, Charging dock, virtual wall,
power adapter and other accessories.
No Disassembling
Prohibited
Prohibited
Prohibited
Prohibited
Clean Dirt
Alternating Current
Prohibited
Only authorized technicians should disassemble the product. Users are not allowed
to disassemble, repair or modify the product. Otherwise it may possibly cause
electric shock, malfunction and leading to injuries.
Prohibit dismantling the battery case
Dismantling the battery case may cause damage or leakage of battery that leads
to fire or explosion.
Prohibit using metal or other conducting substance to connect battery postive and
negative ends. It will lead to short circuit and cause explosion.
Do not use a power adapter with AC inverter. Otherwise it may lead to over
heating, malfunction or fire.
When there is dust accumulations on the metal terminals of the power plug and
surrounding, be sure to clean the dust with dry cloth.Otherwise it may lead to
electric shock, over temperature or re.
The adapter must use an alternating voltage from 100-240 Vac. Please plug in the
socket correctly.
Only use the original power adapter.
Do not break or modify the power cord. Do not over-bend, heat, and over-pull or
press the inflexible cord with heavy objects. Damage on the cable may cause
damage to cord and lead to fire or electric shock.
Warning
2

Prohibited
Only use the
product indoors
Prohibited
Prohibited
Prohibited
Prohibited
Do not touch
Do not touch
Do not touch the power cord, plug or adapter with wet hands. Otherwise, it may
cause electric shock.
Never use the product under environment with volatile substance to avoid
possibility of re and danger.
This product is a sophisticated machine for indoor use only.
DO NOT leave the product to children without supervision. Otherwise it may
cause injury.
Do not use this product under flammable or combustible environment. Using this
product next to propane gas, gasoline and other flammable gas in dusty
environment may lead to explosion or fire.
Do not wash and do not leave this product in wet or damp environment.
Do not wash main body, charging device.Washing or soaking it will cause
internal short circuit.
Do not sit on top of this product. Do not allow adults, children or animals to sit on
this product in order to avoid damage to the product.
To avoid stumbling on the robot, all people in the house should be noticed when
this product is on. Do not touch the wheels or brushes while the product is in
operation to avoid being stumbled by the machine, especially children.
Notice
3

Prohibited
Turn off the power
Prohibited
Prohibited
Prohibited
Prohibited
Prohibited
Safety Instructions
Unplug the robot from the power outlet when the battery is fully charged.
Do not have the product covered or wrapped while using.
This product is for indoor use only,Do not use this product to clean bathroom,
warehouse, factory and bed etc.
Putting sharp objects into air outlet will damage the product.
Do not wash this product.
Only the dust bin is washable. Do not wash other parts or filter. Put
the dust bin back to the main body when fully dry. Do not expose the
product under the sun.
Use the dedicated battery and charger only. Use of other batteries or charger
may cause leakage, overheating and explosion.
Charging Notice
Danger
4

Unplug when not using the product to avoid over charging. Do not
dissassemble the battery.
Attention
No Disassembling
Prohibited
Prohibited
Prohibited
Do not keep necklaces, hairpinsand other metal materials together with this
product during transportation.
Do not throw the battery into re or heat the battery.
If there is overheating during charging, stop using this product immediately.
To preserve the battery’s life, remove the battery when fully charged and put it in
a cool and dry place when not in use for an extended period of time.
Do not immerse or wash this product.
Do not use this product when there is signs of unusual (change of color or shape).
The battery mush be insulated with tape when recycling or disposal. Contact with
other metal will lead to heating, burst or fire. Bring the used battery to technical
service center or recycler authorized for disposal. Or dispose the battery
according to local laws.
5

Safety Instructions
Warning
Prohibited
Prohibited
Prohibited
Do not charge this battery on other devices. This chargeable battery is designed
for this robot only.
Do not put the battery back to main body or charge it if deformation, swelling and
electrolyte leakage are found from battery case.
Wash away the battery leakage immediately with clean water if there is contact
with skin or clothes.Do not crush or throw the battery.
It’s not allowed to copy, publish or record this user manual and related material in any searchable media or
translate to any other languages without our written authorization.
Damage caused by a Cleanmate will not be compensated.
We have made our best efforts to make sure the precision and completeness of this user manual. Any
mistakes or omission found, we sincerely thank you for giving us feedback through your local agent.
PRODUCT FEATURES
Thanks for purchasing the K5 Mini Robotic Vacuum Cleaner!
This revolutionary Mini Robotic Vacuum Cleaner is equipped with functions suitable for cleaning
up floor surfaces of home and office, such as wood, tile, and linoleum. The K6L Mini Robotic
Vacuum Cleaner is definitely a good household helper.
Random
Spiral Along the wall Spiral
MAIN BODY AND ACCESSORIES
Main body x 1 Rechargeable battery x 1 Adapter x 1
Filter x 1 User Manual x 1 Side brush x 2
2
Cleanmate S400
Cleanmate
Cleanmate S400
6
First time users are recommended to monitor the robot during the first couple of
cleaning sessions in order to ensure safe operation and to learn of the robots
features and functions.

PRODUCT FEATURES
Thanks for purchasing the K5 Mini Robotic Vacuum Cleaner!
Random
Spiral Along the wall Spiral
MAIN BODY AND ACCESSORIES
Main body x 1 Rechargeable battery x 1 Adapter x 1
Filter x 1 User Manual x 1 Side brush x 2
2
Cleanmate S400
This revolutionary Cleanmate robotic Vacuum Cleaner is equipped with functions suitable for
cleaning floor surfaces of home and office, such as wood, tile, and linoleum.
PRODUCT FEATURES
Thanks for purchasing the K5 Mini Robotic Vacuum Cleaner!
This revolutionary Mini Robotic Vacuum Cleaner is equipped with functions suitable for cleaning
up floor surfaces of home and office, such as wood, tile, and linoleum. The K6L Mini Robotic
Vacuum Cleaner is definitely a good household helper.
Random
Spiral Along the wall Spiral
MAIN BODY AND ACCESSORIES
Main body x 1 Rechargeable battery x 1 Adapter x 1
Filter x 1 User Manual x 1
2
Cleanmate S400
Cleanmate
Cleanmate S400
7
4

MAIN BODY AND ACCESSORIES
Bumper
Switch on/off
Top cover
Dustbin under lid
Bumper
Front wheel
Side brush
Wheel
Battery house
Vacuum
Intake
3
BATTERY INSTALLATION AND REMOVAL
1, Before installing or removing the battery, the product must be disconnected from the power
source.
2, Open the battery cover.
3, Insert the battery into the battery cabinet and close the cover. Make sure the cover clips well
located in its position.
4
Anti
fall-sensor
8

MAIN BODY AND ACCESSORIES
Bumper
Switch on/off
Top Cover
Inner dustbin
Bumper
Front wheel
Side brush
Wheel
Battery house
Vacuum
Intake
3
4
9
BATTERY INSTALLATION AND REMOVAL
1, Before installing or removing the battery, the product must be disconnected from the power
source.
2, Open the battery cover.
3, Insert the battery into the battery cabinet, connect the cable and close the cover. Make
sure the cover clips well in it position.

RECHARGING BATTERY
1, Before charging, make sure the battery is correctly installed.
2, The procedure of charging the product is as follows: firstly, connect the adapter output into
the DC jack, and then plug into power socket of the other end, then blue light will flash .
3, After fully charged, blue LED will keep on.
4, When the product runs out of power, LED indicator will turn red, which prompts the user to
charge the product.
5,
Adapter plug
Adapter plug inlet
5
GENERAL OPERATION
Starting Operation
1.Before operation, empty the dust bin and install the filter properly.
2.Place the product in a room with much free space, and then power it on to do cleaning work.
3,When the product runs out of power, the LED indicator in the illumination ring will turn red, and
the product will stop working.
Remove the dusting paper holder and side brushes before using the product on the carpet,
just to avoid wearing these parts.
This product is not suitable for long-pile carpets
Note:
*
*
SIDE BRUSH INSTALLATION
Just put the L side brush at L place and R side brush at R place on the bottom and then push to fix it.
And vice visa—to pull up, side brush will be taken out.
6
To ensure the best performance and life span of the battery, please charge the product for 3hours
hours continuously. After fully charged for 3 hrs, the blue LED will light up. Since the LED indicators
light color is depended on its charging-time, if the power is cut off during charging, when recharging
the product, it will always start counting from zero hours. Therefore, it is fully charged if the product
has been charged for 3 hours in total.
10

RECHARGING BATTERY
1, Before charging, make sure the battery is correctly installed.
2, The procedure of charging the product is as follows: firstly, connect the adapter output into
the DC jack, and then plug into power socket of the other end, then blue light will flash .
3, After fully charged, blue LED will keep on.
4, When the product runs out of power, LED indicator will turn red, which prompts the user to
charge the product.
5, To ensure the best performance and lift span of the battery, please chage the product for 4
hours continuously. After fully charged for 4 hrs, blue LED will keep on lighting. Since the
LED indicators light color is depended on its charging-time, if the power is cut off during
charging, when recharge the product, it will always timing from zero automatically. Therefore,
if the product has charged for 4 hours in total, it can be used to do cleaning work.
Adapter Plug Adapter Plug outlet
5
GENERAL OPERATION
Starting Operation
1.Before operation, empty the dust bin and install the filter properly.
2.Place the product in a room with much free space, and then power it on to do cleaning work.
3,When the product runs out of power, the LED indicator in the illumination ring will turn red, and
the product will stop working.
Remove the dusting paper holder and side brushes before using the product on the carpet,
just to avoid wearing these parts.
This product is not suitable for long-pile carpets
Note:
*
*
SIDE BRUSH INSTALLATION
Put the L side brush at L side and R side brush at R side on the underside and then push down to fixate it.
To remove the brushes, just pull up and side brushes will be removed.
6
Remove the side brushes before using the product on the carpet,
11

CLEAN AND MAINTENANCE
Cleaning the dust bin
1, Open the upper cover by lifting the lid as shown in the picture.
2, Lift the dust bin up by pulling in the grooves.
(1)
(2)
7
CLEAN AND MAINTENANCE
3, Open the lid of dust bin.
4, Take out the inner filter.
5, Empty the dirt in the dust bin.
(3) (4)
(5)
8
12

CLEAN AND MAINTENANCE
Cleaning Dust Bin
1, Open the upper cover by pressing the button as shown in the picture.
2, Put your finger into the dust bin groove and grip to take it out.
(1)
(2)
7
CLEAN AND MAINTENANCE
3, Open the lid of dust bin.
4, Take out the inner filter.
5, Empty the dirt in the dust bin.
(3) (4)
(5)
8
13

CLEAN AND MAINTENANCE
1.Rinse the dust bin with tap water.
2.Periodically clean the filter with a soft bristle brush.
3.Reinstall the filter and the dust bin lid once they have dried.
4.Put back the dust bin into the cleaner.
NOTE:
Before putting back the dust bin, please make sure the transparent film (functions as non-return
valve) in the dust bin is well placed. Recheck the filter also before operate the product. If
operate the product without filter, it might cause malfunction.
(6) (7)
(8)
(9)
9
CLEAN AND MAINTENANCE
Cleaning intake
After repeated use for some time, dirt and dust might accumulate around the intake of the product,
to ensure its best cleaning efficiency and constant airflow it should be cleaned periodically.
1.Remove the external power source.
2.Clean up the dirt and dust at the intake.
(10)
10
6.
7.
8.
9.
Do not rinse the dust lter with water.
14

CLEAN AND MAINTENANCE
1.Rinse the dust bin with tap water. Do not wash it in washing machine, dish-washing machine or
other machine.
2.Periodically clean the filter with a soft bristle brush.
3.Reinstall the filter and the dust bin lid once they get dried.
4.Put back the dust bin into the cleaner.
Before put back the dust bin, please make sure the PE pad (function as non-return valve) in the
dust bin is well located. Recheck the filter also before operate the product. If operate the product
without filter, it might cause malfunction.
NOTE:
(6) (7)
(8)
(9)
9
CLEAN AND MAINTENANCE
Cleaning intake
After repeated use for some time, dirt and dust might accumulate around the intake of the product,
to ensure its best cleaning efficiency and constant airflow it should be cleaned periodically.
1.Remove the external power source.
2.Clean up the dirt and dust at the intake.
(10)
10
15

TROUBLE SHOOTING
Problem Possible Cause Solution
1 Red LED stays after
power on
1. Battery Low condition
2. Main body is picked up
1. Recharge the battery
2. Re-place the robot on
the floor
2Vacuum on but can
not
collect dirt and hair
1. The dust bin is full
2. The filter is not installed
correctly
1. Clean the dust bin
2. Re-install the filter
correctly
3The product is
moving
backwards after
being started
1. The product is on dark
color floor
2. Anti-drop sensor light
was covered
1. Put the robot on light
color floor.
2. Clean anti-drop sensor
light.
4LED indicators flash
in blue after 4hrs
charging
Power supply might been
cut off during charging
The robot can be operated
if the battery has been fully
charged for 4hrs
5The side brushes
crooked, not good to
sweep
Being used for a long time If it becomes crooked,
please scald it in hot water
to recover it to its original
shape
6The product cannot
start
1. Battery is not installed
properly
2. Battery low
3. The robot is under
protection status
1. To install the battery
correctly
2. To have the battery fully
charged(turn off the
cleaner first)
3. To re-set the robot
7The product circles
around only, cannot
go straight
One of the wires of the
wheels might be loosened
1. Open the wheel cover
and connect the loosen
wire properly
2. Send the robot to seller
for repairing
*If all solutions given above don't work for you, please take actions below:
1)Re-set the robot by switching on the power button;
2)If re-set action doesn't work, please contact the re-seller or visit
Cleanmate.se for guidance.
Note: Particular specifications are subjected to change without prior notice.
11
16
Table of contents
Other Cleanmate Vacuum Cleaner manuals

Cleanmate
Cleanmate S 930 User manual

Cleanmate
Cleanmate S 970 User manual

Cleanmate
Cleanmate TRANSFORMERS Series User manual

Cleanmate
Cleanmate S 1000 User manual

Cleanmate
Cleanmate S 990 User manual

Cleanmate
Cleanmate S 950 User manual

Cleanmate
Cleanmate S 850 User manual

Cleanmate
Cleanmate QQ9 User manual

Cleanmate
Cleanmate S 600 User manual

Cleanmate
Cleanmate LDS700 User manual