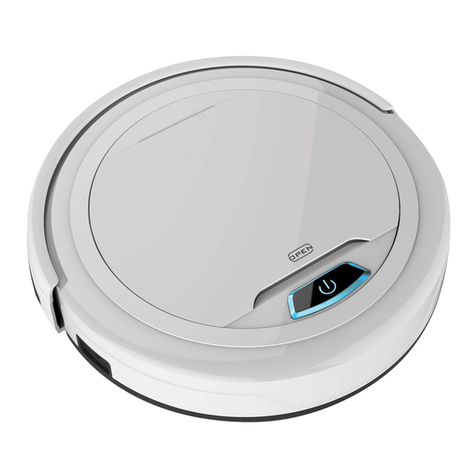
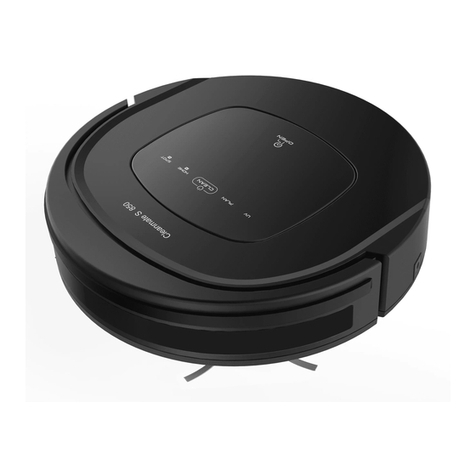
Cleanmate S2000 PRO MAX User manual

Robot Vacuum Cleaner
Please read through this user manual before using the product and keep the manual for future use.
Cleanmate S2000 PRO MAX
User Manual

When using the product, please maintain constant vigility and follow the following instructions: please read this user manual
carefully before using the product and keep it property.
1. The problems that may occur during the cleaning of the product should be eliminated as soon as possible. Clean the power cords and small
objects on the ground to prevent the product from being blocked during the cleaning process. Fold the fringe of the carpet under the carpet,
and make sure that the hanging curtains, tablecloths, etc. do not touch the ground.
2. If there is a suspended environment such as stairs, please test the product first to see if it can detect the edge of the suspended area without
falling. Guardrails should be installed at the edge of the suspended area to prevent the product from falling. It should be assured that the
protective device will not cause personal injury such as tripping.
3. Please follow the instructions in the manual to use the product. Only use accessories recommended or sold by the manufacturer.
4. Make sure that the power supply voltage matches the voltage marked on the charging stand.
5. Before using the product, make sure that the dust box and filter material have been installed in place.
6. If the power cord is damaged, in order to avoid danger, it must be replaced by professionals from the manufacturer, its maintenance
department or similar department.
7. Please turn off the product switch before cleaning and maintaining the product.
8. The plug must be unplugged from the power socket before cleaning and maintaining the product.
9. Before disposing of the product, the old batteries must be disposed of in accord with regulations.
10. If you do not use the product for a long time, please power off the product.
11. Before disposing of the product, the battery of the product must be removed and discarded in accord with local laws and regulations.
12. Please follow local laws and regulations to dispose of old batteries.
13. The product cannot be used by children under the age of 8 or people with mental disabilities. If you need to use it, please do it under the
supervision and guidance of a guardian. Please do not let children ride on the product or play with the product as a toy.
14. Only used in indoor home environment. Do not use in outdoor, commercial and industrial places.
15. Do not use the product in the room where infants and young children sleep.
16. Do not use the product with a damaged power cord or power socket. Do not use the product when it cannot work normally due
to falling, damage, outside use, or water ingress. To avoid injury, the product should be repaired by the manufacturer or its after- sales service.
17. Please use the product in accord with the instructions in the manual. The company is not responsible for any loss and damage caused by
improper use.
Security Specifications
NOTE:
1
!

1. Only applicable to the original charging stand specially equipped by the manufacturer. It is formerly for the user to replace the
battery privately. If the battery is suspended to be damaged, please contact the manufacturer, authorized dealer or a
professional in similar departments to replace it.
2. It is formidable to use the product in an environment with open flames or fragile objects.
3. It is forbid to use the product in an extreme hot (above 40 ° C) or extreme cold (below 0 ° C) environment.
4. It is formidable for the hair, cloths, fingers and other parts of the human body to be closed to the opening and operating parts
of the product.
5. It is formidable to use the product on wet or water-filled ground.
6. It is forbidden for the product to absorb anything that may block the product, such as stones, waste paper, etc.
7. It is formidable for the product to absorb any combinable materials, such as gasoline, toner and toner for printers or copies. It
is formidable to use the product in a clean area with flammable materials.
8. It is formidable for the product to absorb any burning items, such as cigarettes, matches, ashes and other items that may
cause a fire.
9. Do not place objects at the suction port. Do not use the product when the suction port is blocked. Clean up dust, cotton wool,
hair, etc. at the suction port to ensure smooth air circulation at the suction port.
10. Use the power cord carefully to avoid damage. It is forbidden to use the power cord to drag or lift products and product
charging seats, to use the power cord as a handle, to clamp the power cord in the crack of the door, and to pull the power
cord at sharp corners and corners. Do not run the product on the power cord, and keep the power cord away from the heat
source.
11. It is forbidden to use damaged charging seats. If the charging seats are damaged, in order to avoid danger, they must be
repaired or replaced by professionals from manufacturers, authorized distributors or similar departments.
12. Even if the product has been seriously damaged, it is forbidden to burn the product, and the battery of the product may
cause explosion.
Warnings:
2

1. If you want to discard the batteryin this machine, please do not discard them along with domestic garbage, but hand
them over to the nearest waste battery recycling station or after-sales service center for centralized treatment.
2. The following instructions are not for ordinary users, but for the disposal instructions of the final battery disposer.
3. The chemical substances contained in the built-in battery of this machine will pollute the environment. Please be sure to
take out the battery in the body before disposing of the robot. The battery should be taken out and handed over to a
professional battery recycling point for centralized treatment.
1. Leakage and exudation from batteries can cause human injury.
2. If there is any leakage or exudation from the battery, make sure to avoid contact with eyes or skin.
3. In case of inadvertent contact, wash hands with clean water and rinse eyes immediately. If you feel uncomfortable,
please see a doctor immediately.
Description of Obsolete Batteries:
Cautious:
3
Remove Battery:
!NOTE:
The following information is only applicable when discarding this robot, not daily operation instructions!
The battery can only be removed when the battery is completely exhausted. No matter under what circumstances, the
battery cannot come into contact with metal objects.
The procedure for removing the battery is as follows:
Let the robot run until there is no electricity without touching the charging seat;
Turn off the power switch of the robot;
Remove the screw on the battery cover plate;
Remove the battery cover plate;
Pull off the connector plug of the battery and remove the battery.

5
Front of the robot 6
Underside of the robot 7
Dust collector 8-10
Preparations
Organize spaces 11
Removing protective strips 12
Install the side brushes correctly 13
Check the status of dust collector 14
Remote control and the charging station 15
Operation charging 16
Indication and pairing with WiFi 17
Cleanmate-APP download 18
Robot Operation
First Use 19
Start cleaning/ Cleaning the Floor/ Mopping the Floor 20
Start cleaning with watertank 21
22
Various States of the Dust Collector indicator
Maintenance
Component Maintenance Frequency 23
Watertank Maintenance 24
Maintenance Mopfunction 25
Cleaning the Dust Box for the watertank 26
Cleaning the Dust Box (dustcollecting) 27
Maintenance roller brush and side Brushes 28
Maintenance Lidar, fall sensors, Anti-collision Board 29
Maintenance charging Pole Piece, Driving Wheel and Front Wheel 30
Change of the dust Bag 31
Troble Shooting
Trouble Shooting Dust channel 32
Preparation for long storage 33
Troubleshooting of the robot and the dust collector 34
Trouble shooting robot 35
Trouble shooting dust collector 36
Specifications
Specifications robot 37
Specifications robot and dustcollector 38
Directory
List of contents
Product composition
4

List of Contents
Machine
The pictures in this manual are for reference only. The actual appearance shall be subject to the physical item.
Dust bag Remote control Manual
Manual
Magnetic stripe 2 pcs
Electric Water tank
Mop cloth 2 pcs Dust box assembly
(for dust collector)
Side brush 2 pair HEPA-filter Dust brushes
Dust collector
5
Charging station
Power adapter
(for charging station)
Carpet brush
Suction mount

Product Composition - Front of the robot
Front of the robot
Dust box for watertank
(under the face cover)
Lidar
Infrared cushioning
anti-collision plate
Lidar unit
Voice broadcast
loudspeaker
Centrifugal fan
Air duct
Dust box lower cover
Dust box handle High efficiency
primary filter
Dust box upper cover
HEPA-filter
Power switch
6
Top panel Start/Pause button
WiFi-indicator

Product Composition - Underside of the robot
Dust box assembly
Watertank assembly
Side brush Front wheel
Underside of the robot
Charging plates
Battery compa-
rtment cover
Sensors
Bottom cover
Rolling brush
Driving wheel
Water tank
Mop holder
Primary filter
Dust box lower cover
Dust box upper cover
Dust suction port
Dust suction outlet
filling pipe end
Water tank plug
Washable Mop
Water tank
release button
7

Product Composition- Dust collector
Front of the dust collector
Back of the dust collector
Status indicator
Bump switch
Power cord storage
Air outlet
Signal transmitter
Button for dust
collector cover
Dust suction port
Charging pole piece
8

Product Composition - Dust collector
Dustcollecting station (open cover)Dustcollecting station (Under side)
Dust bag
insertion port
Air suction
bucket
Bottom cover screw
Air duct canal
Air duct cover screw
bottom cover
9

Dust bag handle
Product Composition - Dust collector
Dust bag
10

Storage of wires, rags, slippers
and other sundries on the ground
to improve the working efficiency
of the main engine.
Please ensure that the front lens
and LDS sensor of the robot are
clean and free from obstacles. Be
careful not to let the sensorlens of
the robot be coverd with
fingerprints, mechanical grease
stains, dust stains, etc. Please
wipe with a clean soft cloth. Do
not use lotions, laundry detergents or
sprayers.
In order to better help the robot explore the
whole space and create a furniture map,
please open the doors of each room before
using it for the first time.
Preparations
Organize spaces
Before use, please put furniture such
as tables and chairs before use, store
low-rise items such as weighing scale,
and sort out the maximum cleaning
space.
Organize the space to be cleaned
The robot senses large solid objects
through infrared sensors and LDS, so
please make sure to put way irregular
objects such as shoes, socks, wires, etc.
in the cleaning area, so as not to affect
the cleaning effect of the robot.
Open the door to help the host explore
Prevent the robot from falling
If the main engine performs tasks
within the stairs, the edge of steps,
etc., please place protective fences/
magnetic stripe to ensure its safety
and smooth operation.
11

Removing protective strips
Remove host guard strips
Removing protective film of dust collection station
Install the power cord on the back of the dust collector
12

Until a "click" hears to indicate that it is installed in place
Install the side brushes correctly
Install the sidebrushes L-and R on the current markning of the robot
13

Place the dust collectorand connect it to the
power supply (please place the charging stand
against the wall and place it on a flat ground,
keeping 0.5M on the left and right sides, and more
than 1.5M in the front)
Reminder: After the power is turned on, the status
indicator light of the dust collectoris green. If
the light of the dust collectioris red, please
reconfirm whether the dust bag is placed
correctly.
Check the status of dust collector
Open the cover of the dust collectorand check that
dust bags are placed in the correct way. (Continue to
the next step after packing the dust bag).
14

1. Start/turn of your robot
2. Operate the robot movement remotely
3. Recharging of the robot
Remote control and the charging
station
The remote control
1. ON/OFF -
switch
2. Direction
buttons for the
robot
3. Recharge the
robot
15
The charging station
Battery Charging with charging station and placing
of the station.
Select a suitable place, connect the power-adapter
and put the charging station against the wall and
place it with free space on both sides, 1.5 meters
left and 1.5 meters above the front.
Please note that the charging station can't be used
in combination with the dust collector
Note: if the robot is switched off, then switch on the
robot first before charging. 2, Charge the robot in
either way as shown:
You can use the remote
control to operate your robot
A, Plug one end of the
adapter into the robot and
the other end into the
power socket
B, Press “Re-charge”
button on APP to
operate the robot looking
for the charging
station automatically.

“ I ” -Indicates power on. “ O ”-Indicates shutdown
( please note that the host cannot be charged
with the power off)
Power-on
Power-off
Please place the machine on the dust collection
station to charge, make sure that the electrode
chip on the host is aligned with the chip on the
dust collection station, double-click “ ” to start
charging.
Tip: It takes more than 5 hours to charge for the first time
During charging, “ ” flashes; Charging ends,
“ ” goes out.
Operation charging
1 Turn on the side power switch on the robot 2 Charging
16
!
Power switch

White light flashing slowly, starting/charging Blue Flash: Host WI-FI Reset Successfully
White light is on for a long time: starting is
completed/charging is completed
Blue light flashing slowly: in network connection
Long blue light: successful network connection
Red light flashing slowly: network connection failed
Red light flashes slowly: power is low
Red Light Flash: Abnormal State (Host Failure)
Indication and pairing with WiFi
Indicator Status Wifi-Indicator
17

Tip:
* After the installation is completed, please complete the registration, login and distribution according to
the guidance of the mobile phone APP page.
* Please ensure that the mobile phone is connected to the home network before distribution.
Cleanmate-APP download
Download Cleanmate APP and experience more functions.
Methods: Open the mobile phone application store, search for "Cleanmate APP" to download and install.
18
iOS Android
Cleanmate APP
Scan the QR code below for
more information about
advanced APP-functions

First use
When building the map for the first time, please follow
behind the robot to see if the robot gets stuck.
For example, the main machine may get stuck in the low
part of furniture, which can be solved by referring to
the following methods.
1. If conditions permit, furniture can be raised;
2. Block the bottom of furniture and prevent the main machine
from entering;
3. Set up a virtual wall in APP to prohibit the host from entering.
After the robot finished working, it is recommended
not to shut down and keep the robot in the charging
state so as to better carry out the next work.
Double-click “ ” and the robot will automatically
return to the dust collection station.
Press “ ”
1 Start cleaning
For the first time to start the cleaning work, please
make sure that the robot is on the dust collection station
and is fully charged. Click “ ” , and the robot will start to
build the map according to the method of cleaning along the
edge first and then bow. (Zig-Zag-mode)
3 Wake up from standby
Pause for more than 10 minutes, all indicators on the
robots panel go out. If you need to start the work
again, please press “ ” to wake up the robot
first. After the indicator light is on, you can start
the robot to continue the original working.
4 Return to Dust Collection Station
When the robot is working, press “ ” briefly to
pause the robot.
2 Pause
Double-click “ ”
19
Table of contents
Other Cleanmate Vacuum Cleaner manuals

Cleanmate
Cleanmate S300 User manual

Cleanmate
Cleanmate S 950 User manual

Cleanmate
Cleanmate S400 User manual

Cleanmate
Cleanmate QQ9 User manual

Cleanmate
Cleanmate LDS800 User manual

Cleanmate
Cleanmate TRANSFORMERS Series User manual

Cleanmate
Cleanmate S 930 User manual

Cleanmate
Cleanmate S300 User manual

Cleanmate
Cleanmate LDS700 User manual

Cleanmate
Cleanmate S 970 User manual