Climote HUB User manual

climote HUB
Installation Guide
Special Instructions
This is a mains powered device. Observe safety precautions and isolate from
mains before commencing installation
Video Instructions
Additional video instructions are available from climote on request

Contents
Page
Details
3-5
Installation, Wiring and Power-up
6
Functional Tests and Commissioning
7 –8
Remote Access Test
9
Diagnostics
11 –13
Thermostat Options
14 –15
Customer Training
16
Safety Information
2

3
Attach Back-plate to Wall-box (1)
Inside the Box
Back-plate
climote HUB
Also included
1. Fixing screws.
2. Quick start guide.
3. Pocket guide.
4. Safety information.


5
Power-up Unit (5)
Power up Unit
1. Switch on power to the unit.
2. Check scroll-wheel illuminates and
unit enters start-up sequence –
display shows “Unit initialising” for
between 30 and 90 seconds.
3. Unit completes start-up and
displays 3 timer dials .
Note: in areas of poor signal quality, unit can take up to 5 minutes to complete
its start-up sequence. Refer to Diagnostics (12).
Attach Unit to Wall-plate (4)
Attaching the Unit
1. Ensure main body screws are fully
loosened.
2. Align unit directly above back-plate.
3. Twist down and engage hinge.
4. Push firmly to close and engage clip.
5. Tighten main body screws.
Removing the Unit
1. Isolate from mains.
2. Unscrew main body screws.
3. Remove scroll wheel.
4. Depress clip in recess and twist base of
unit away from wall.

6
Commission climote HUB (7)
1. Navigate to Zone Setup
Using the Menu/Back button and Scroll Wheel,
select :
1. Menu. 4. Commission Device.
2. Settings. 5. Zone Setup.
3. Installer Settings.
2. Set up Zones
1. Active zones –On or Off. Set One, two or three
zones to “On” to match the zone configuration.
Turn scroll wheel to change, push to select, then
select “Next”.
2. Thermostat Settings (see Thermostat Options)
Turn scroll wheel to change, push to select, finally
select “Next”.
3. Select Save –this communicates the settings to
climote ONLINE.
Carry Out Local Checks (6)
Local checks
1. Check unit shows correct time within 1 minute
of completing start-up sequence. If time does
not update, follow steps for “time” in
Diagnostics (12).
2. Press the Menu/Back button. Observe Menu
Options are displayed. Choose Settings, Signal
Strength. Note signal strength.
3. If signal strength is less than 25% follow steps
for “poor signal” in Diagnostics (12).
4. Press Menu/Back 3 times to exit.
5. Press “Boost” button for Living zone. Boost
menu is displayed, select Boost for 1 hour.
Observe Boost light glows orange and heating
is turned on in living zone.
6. Press Living Boost again and select Cancel
Boost. Boost light is extinguished and heating
is turned off in living zone.
7. Repeat for all active zones.

7
climote Website Test (9)
Log on with your installer
Username and
Password
1 . Log on to the climote Installer Site
Navigate to
https://climote.climote.ie/installer/login
in any common browser
1
1. All the climote website test functions can be carried out from a browser on any laptop, tablet or mobile
device. The installer site also supports temporary installer access to the user’s climote web site, but this
mode of access requires Flash to be supported by the device browser.
Send Test Phone Message (8)
1 - Text to: Device
Mobile Number
Boost Living 1
3 - Receive Text from:
Device Mobile Number
Climote Message:
Climote Hub
LIVING(<) 19.8C, ON
BED(<) OFF
WATER(<) OFF
Wed 16:24:36
2 - Observe unit
Living Zone Boost
is on
5 - Observe unit
Living Zone Boost
is off
4 - Text to: Device
Mobile Number
Cancel Living Boost
The Device Mobile Number is the phone number of the SIM in the unit. Ensure the
user is aware of their Device Mobile Number and ask them to save it to their phone
and repeat the above sequence –see Customer Training section.

8
climote Website Test (10)
An administrator may already have
pre-loaded your target device, in which
case it will already be displayed.
Select “View” to access
If the device is not displayed, enter
the Serial Number and Device
Mobile Number and press “Add”.
The device will be added to your
device list
climote Website Test (11)
1.
2.
3.
1 . Carry out standard checks
Carry out basic “Command” checks
using “Boost” and “Report”
Observe Boost is shown on the device
Check Zone settings reflect what you
set on the device. Adjust status and
rename zones if required.
“Other settings” grants temporary
access to the user’s climote web site,
but only until the user has registered
Be sure to “Save” changes on this page. They
will then be communicated to the device
At this stage the unit is commissioned and ready for user registration and training. See
Customer Training section.
1 . Set Device on Installer Site Home Page
1.
Once you have logged on your installer home page is displayed.
2.
Select “View” for the device you are installing

9
Climote HUB Diagnostics (12)
Item
Details
1
Start-up
If start-up takes significantly longer than 90 seconds, it is usually a
sign of a poor GSM signal or no coverage. The unit will finish its
retries after 5 minutes and exit to the “Set Time” display. Set the
time manually and complete manual checks, then follow “Poor
Signal” actions below.
2
Time
In some GSM connection conditions, unit can exit start-up showing
its default time. Press Reset to make one further start-up attempt
and if it still fails to get its time, use Menu/Back, Settings option to
set the time manually, then follow “Poor Signal” actions below.
3
Poor Signal
If the signal strength shows below 25% (even if start-up completes
normally) you may need to fit an external antenna. Check the signal
strength and if in doubt, contact climote.
4
Unable to
register to
Website
If manual SMS works but the Installer Website test rejects the unit,
first check the Device Mobile Number and Serial number have been
entered correctly. If it still fails, the unit may not have successfully
completed its connection to the Website. Press Reset and once the
unit dashboard is displayed, try again. If still unsuccessful, contact
climote.
5
Thermostat
Setting
A common issue during commissioning is that the thermostat may be
set too low, preventing the boiler from coming on. When testing the
heating (e.g. Boost), ensure that the thermostat set temperature is
well above the room temperature . E.g., temporarily set it to 30o.

10
Notes

11
climote HUB Installation Guide
Thermostat Options, including
climote DEGREE Remote Thermostat
Preparation (T1)
Serial Number
Reset button
Top
2. Climote DEGREE
1. Open climote DEGREE.
2. Select desired location and affix
climote DEGREE back-plate to wall
(see Location (T3)).
3. Note serial number (last 6 digits).
4. Remove Battery Tab
Battery Tab
Back-plate
1. Climote HUB
1. Ensure climote HUB is fitted and
installed in line with Installation Guide.

12
Choose location (T3)
2
M
e
t
r
e
s
1.5
1
0.5
0
Location
1. Approx 1.5 metres above floor height.
2. Ensure free air flow through housing.
3. Mount away from:
a. Draughts.
b. Direct sunlight.
c. Heat sources, eg Radiators, chimneys
etc.
Commission climote HUB (T2)
1. Navigate to Zone Setup
Using the Menu/Back button and Scroll
Wheel, select :
1. Menu.
2. Settings.
3. Installer Settings.
4. Commission Device.
5. Zone Setup.
2. Set up Zones and Thermostats
Select :
1. Active zones –On or Off (see Setup (T5))
Turn scroll wheel to change, push to
select, select “Next”.
2. Thermostat Settings (see Setup (T5))
Turn scroll wheel to change, push to select
“Next”.
3. Select Save –this communicates the
settings to climote ONLINE.
13
Thermostat Setup and Diagnostics (T5)
Item
Details
1
Zone set up
One, two or three zones may be set to “On”. Match the existing zone
configuration.
2
Thermostat
Settings
•Options are “Off”, “Rem” or “Int” (Zone 1 only).
•The climote HUB has an internal thermostat which may only be configured for
Zone 1 (select “Int”).
•Zones 1, 2 and 3 support a remote thermostat (select “Rem”).
•Leave all zones with no thermostat set to “Off”.
3
Pairing
Thermostats may be paired automatically (see (T4)) or manually. For manual
pairing, select “Edit” rather than “Search” and use the Scroll Wheel to match the
climote DEGREE serial number that is being paired. Press “OK” when complete.
4
Auto
Pairing fails
If the auto pairing fails:
1. Check the climote DEGREE has power and is functioning. Press the Reset
button and observe the LED. 2 or 3 flashes show batteries are OK.
2. Repeat the auto pairing process in (3). Check whether the climote HUB is
receiving data from the climote DEGREE. If in doubt, try manual pairing.
3. Check signal level is greater than 10%. If not, look for an alternative location
for climote DEGREE.
4. If problems persist, contact climote.
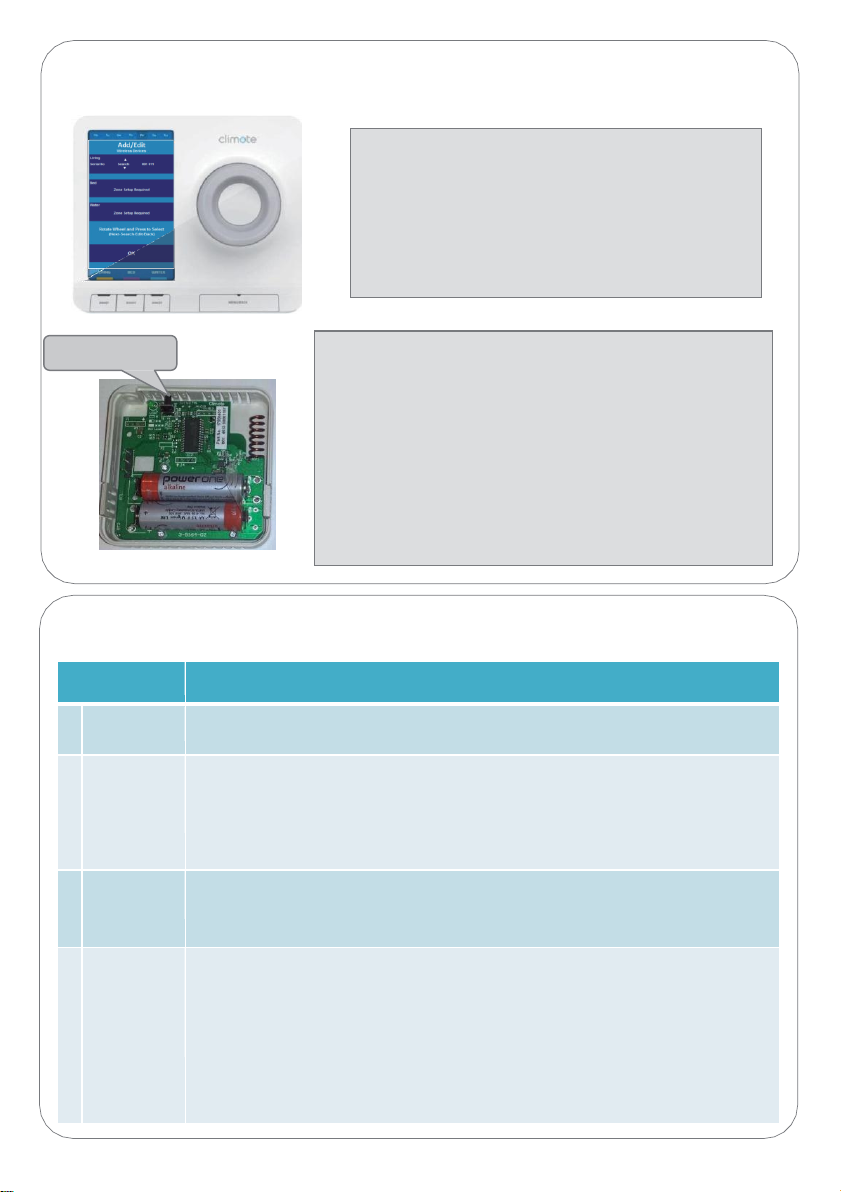
Pair climote DEGREE (T4)
Reset button
1 . Enable Pairing Mode
From the Commission Device menu, select :
1.
Add/Edit Wireless devices.
2.
From the Add/Edit Wireless Devices menu,
choose which Zone to add device to.
3.
Select “Search”.
4.
Press Scroll Wheel to enter Search Mode.
2. Pair climote Degree (see Setup (T5))
1.
On climote DEGREE press the Reset button, pairing
will commence automatically.
2.
Return to the climote HUB and observe progress /
confirm completion.
3.
Pairadditional zones as required.
4.
Finally, select “OK” using Scroll Wheel.
5.
Keep pressing “Exit” until you reach the climote
Dashboard. Zones will display “- -
o
C” until
temperature readings are received (1 –2 minutes).
14
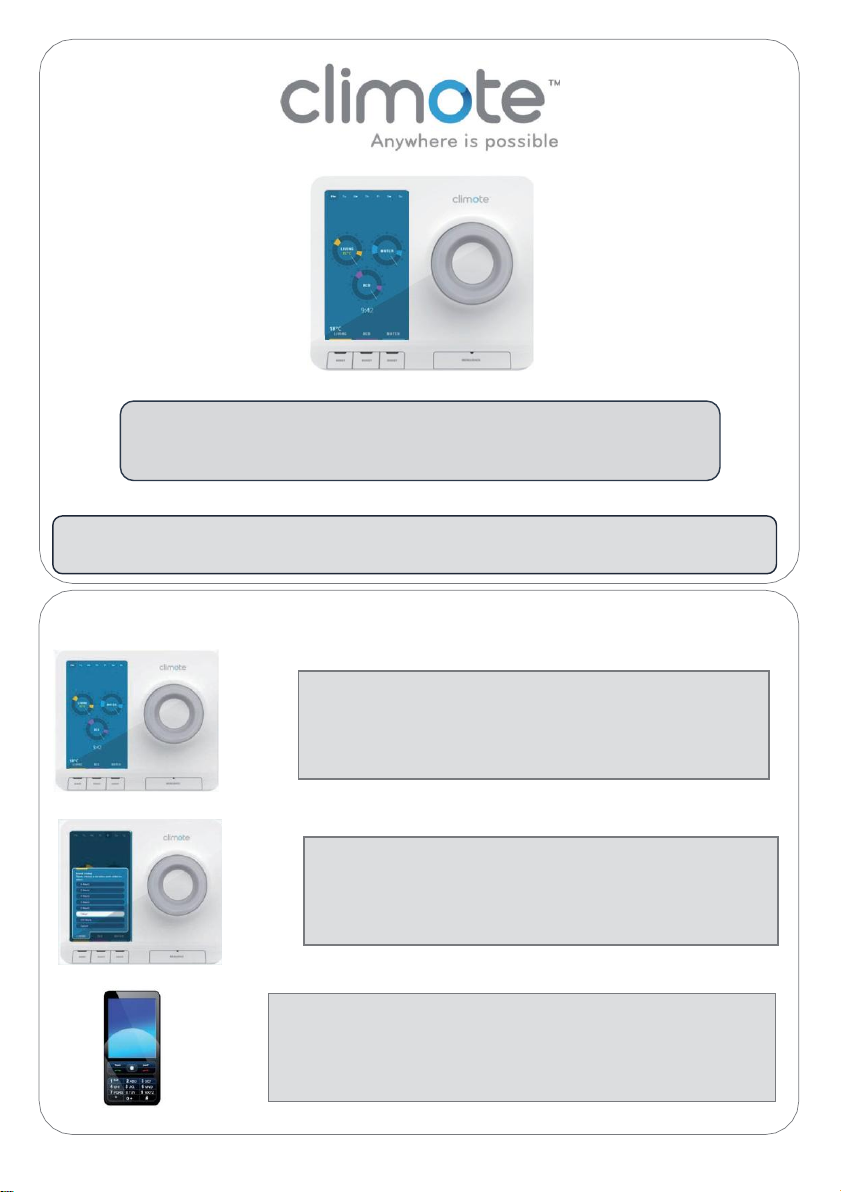
climote HUB Installation
Customer Training
climote HUB Installation
Customer Training
Basic customer training should be carried out at installation. This guide highlights the fundamental
user training elements. Additional video instructions are available at www.climote.com
Unit & Text Demonstration (1)
3. Text Demonstration (Boost)
1. Get customer to add Device Mobile Number to contacts
2. Show Customer Useful Text Functions card
3. Repeat SMS Boost from installation test
2. Boost Demonstration
1. Explain Boost
2. Do example Boost Living
3. Disable Boost
1. Explain the basic unit features
1. Zones and Dashboard
2. Boost and Menu/Back Buttons
3. Scroll wheel

15
Website Demonstration (3)
1 - Explain dashboard
4 - Use Edit to set up
heating times
2 - Explain Status
and indicators
3 –Show Boost
5 –Show Timers,
Always and Set
temp
1. After registration, the website displays the climote dashboard
2. Ask the customer to log out and log in again to confirm credentials
Customer Registration (2)
1 - Enter user’s email
address.
4 - Enter user’s mobile
contact number.
2 - Enter Device
Mobile Number.
5 –Optionally user can
add a password.
3 –Enter a first name
for this user
6 –Press submit to
Register.
1. Ask the customer to navigate to www.climote.ie
2. Select : Control my climote
3. From the climote log-in page choose the option to “please register here”
App Demonstration (4)
1 - Explain dashboard,
Menu button and
status indicators
3 –Press zone dial and
show App Edit
2 –Show Boost
1. Customers can download the climote app from the appropriate app store at any time.
2. After registration, ask the customer to log into the app with their credentials

16
!&
^
#
,N
)*
^
0-
L
&/
0*
!&^#,N )*^0-L&/0* _ $'%L0,# RG8
Power Supply
230VAC
+/-
10%,50Hz
Power Consump8on
0.7W / 6mA to 5W / 40mA
Model
Climote HUB (TEK648 / TEK648A)
2pera8ng Temperature
0 to 40 degrees C
Zone 1 Relay out
5(2)A
Zone 2 Relay out
5(2)A
Zone 3 Relay out
5(2)A
Unit conforms to
EN 60730-1:2000 & EN 60730-2-7
Sooware Classifica8on
Class A to EN 60730
Electric Shock Protec8on
Class II. The climote HUB is completely protected by
its enclosure
Installa8on
The unit must be installed by a qualified electrician
!&^#,N )*^0-L&/0* _ $'%L0,#
6[\K[[
Power Supply
3V DC (2AA Baderies supplied)
Power Consump8on
0.01W / 3mA
Model
Climote DEGREE (TEK676)
2pera8ng Temperature
0 to 40 degrees C
Unit conforms to
EN 60730-1:2000 & EN 60730-2-7
(when used with climote HUB)
climote limited
Telephone:
+353 (0) 42 9395 020
Finnabair Industrial Park
Fax:
+353 (0) 42 9394 059
Dundalk, Co. Louth
Email:
info@climote.ie
Ireland
Website:
www.climote.com
Other manuals for HUB
2
Table of contents
Other Climote Thermostat manuals

Popular Thermostat manuals by other brands


GENERAL LIFE
GENERAL LIFE HT100S RF user manual

Lux Products
Lux Products DMH100 Series Installation and operating instructions

Aprilaire
Aprilaire 8920W Safety & installation instructions

CIAT
CIAT 99DA-SEI-EC01 Wiring diagram

Danfoss
Danfoss ECtemp Touch installation guide

EWC Controls
EWC Controls EWT-3102 user manual