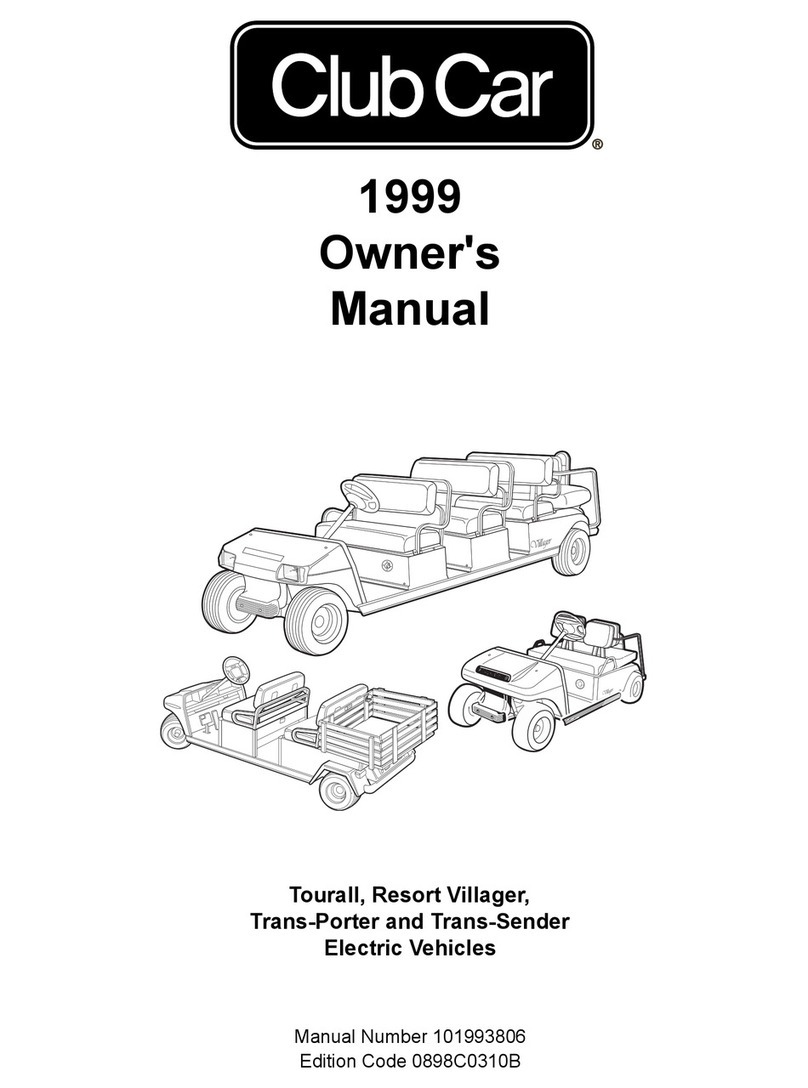
Club Car Carryall I 2000 User manual

2000
Owner’s
Manual
Electric
Vehicles
Carryall I
Carryall II
Carryall VI


2000 Carryall Electric Vehicle Owner’s Manual i
NOTICE
The Club Car Limited Warranties for 2000 Transportation and Utility Vehicles, 2000 PowerDrive 8-Volt Batter-
ies, 2000 PowerDrive Battery Chargers, and 2000 Onboard Computers and Solid State Controllers appear
on the last pages of this manual.No other warranties, express or implied, are contained herein. Please com-
plete and return the warranty registration card included in this manual.
Club Car is not liable for errors in this manual or for incidental or consequential damages that result from the
use of the material in this manual.
This manual contains proprietary information that is protected by copyright. All rights are reserved. No part of
this manual may be photocopied, reproduced, or translated to another language without the written consent
of Club Car, Inc.
The information contained in this document is subject to change without notice.
Club Car reserves the right to make design changes to vehicles without obligation to make these changes on
units previously sold.
These vehicles do not conform to Federal Motor Vehicle Safety Standards for automobiles or to FMVSS 500 for
low-speed vehicles, and are not equipped for operation on public streets, roads, or highways.
P.O. Box 204658
Augusta, Georgia 30917-4658 USA
Telephone: 1-800-ClubCar (258-2227)
www.clubcar.com
©1999 Club Car, Inc.
Club Car, Carryall, PowerDrive, and Armorflex
are registered trademarks of Club Car, Inc.
This manual effective July 26, 1999.

ii 2000 Carryall Electric Vehicle Owner’s Manual
FOREWORD
Thank you for choosing Club Car.You have chosen the finest utility vehicle on the market; the vehicle most
widely recognized as the industry leader in vehicle efficiency and long-lasting value. Please protect your
investment and ensure that your Carryall vehicle(s) provides years of reliable, superior performance by filling
out and returning your Warranty Registration Card (located between the last page and back cover of this
manual), and by reading and following the maintenance instructions in this manual.
Your comfort and safety are important to us as well, so we urge you to read and follow the step-by-step oper-
ating instructions and safety procedures in this manual.These instructions must be followed in order to avoid
the risk of severe personal injury. If you rent or loan your vehicle to others, we recommend that you ask them
to read this manual before they operate the vehicle.
Club Car products are backed by a customer support system designed to offer you fast, courteous service.In
the event that your Carryall vehicle needs repairs or service, we recommend that your local authorized Club
Car representative perform them. For the name and address of the Club Car representative nearest you, logon to
our web site at www.clubcar.com or call 1-800-ClubCar (258-2227). If you would prefer to write to us, direct your
letter to: Club Car, Attention: Marketing Services, P.O. Box 204658, Augusta, Ga. 30917-4658 USA. Your
local authorized Club Car representative can also provide technical advice, parts, and service manuals.
We hope you will consider this owner’s manual a permanent part of your Carryall vehicle.If you sell the vehi-
cle, please include the manual so that the next owner will have the important operating, safety, and mainte-
nance information it contains.

2000 Carryall Electric Vehicle Owner’s Manual iii
TABLE OF CONTENTS
Safety Details . . . . . . . . . . . . . . . . . . . . . . . . . . . . . . . . . . . . . . . . . . . . . . . . . . . . . . . . . . . . . . . . . . . . . . 2
General Warnings . . . . . . . . . . . . . . . . . . . . . . . . . . . . . . . . . . . . . . . . . . . . . . . . . . . . . . . . . . . . . . . . . . . 3
Vehicle Feature Identification—Carryall I and Carryall II . . . . . . . . . . . . . . . . . . . . . . . . . . . . . . . . . . . . . 4
Vehicle Feature Identification—Carryall VI . . . . . . . . . . . . . . . . . . . . . . . . . . . . . . . . . . . . . . . . . . . . . . . . 6
General Information . . . . . . . . . . . . . . . . . . . . . . . . . . . . . . . . . . . . . . . . . . . . . . . . . . . . . . . . . . . . . . . . . 8
Model Identification . . . . . . . . . . . . . . . . . . . . . . . . . . . . . . . . . . . . . . . . . . . . . . . . . . . . . . . . . . . . . . . . . . 8
Pre-Operation Checklist . . . . . . . . . . . . . . . . . . . . . . . . . . . . . . . . . . . . . . . . . . . . . . . . . . . . . . . . . . . . . . 8
Controls . . . . . . . . . . . . . . . . . . . . . . . . . . . . . . . . . . . . . . . . . . . . . . . . . . . . . . . . . . . . . . . . . . . . . . . . . . 9
Driving Instructions . . . . . . . . . . . . . . . . . . . . . . . . . . . . . . . . . . . . . . . . . . . . . . . . . . . . . . . . . . . . . . . . . . 12
Bed Latch . . . . . . . . . . . . . . . . . . . . . . . . . . . . . . . . . . . . . . . . . . . . . . . . . . . . . . . . . . . . . . . . . . . . . . . . . 14
Prop Rod . . . . . . . . . . . . . . . . . . . . . . . . . . . . . . . . . . . . . . . . . . . . . . . . . . . . . . . . . . . . . . . . . . . . . . . . . 14
Loading and Unloading . . . . . . . . . . . . . . . . . . . . . . . . . . . . . . . . . . . . . . . . . . . . . . . . . . . . . . . . . . . . . . . 15
Towing with the Vehicle . . . . . . . . . . . . . . . . . . . . . . . . . . . . . . . . . . . . . . . . . . . . . . . . . . . . . . . . . . . . . . 16
Transporting on a Trailer . . . . . . . . . . . . . . . . . . . . . . . . . . . . . . . . . . . . . . . . . . . . . . . . . . . . . . . . . . . . . 17
Storage . . . . . . . . . . . . . . . . . . . . . . . . . . . . . . . . . . . . . . . . . . . . . . . . . . . . . . . . . . . . . . . . . . . . . . . . . . . 17
Maintenance . . . . . . . . . . . . . . . . . . . . . . . . . . . . . . . . . . . . . . . . . . . . . . . . . . . . . . . . . . . . . . . . . . . . . . . 18
Daily Pre-Operation Safety Checklist . . . . . . . . . . . . . . . . . . . . . . . . . . . . . . . . . . . . . . . . . . . . . . . . . . . . 19
Periodic Service Schedule . . . . . . . . . . . . . . . . . . . . . . . . . . . . . . . . . . . . . . . . . . . . . . . . . . . . . . . . . . . . 19
Periodic Lubrication Schedule . . . . . . . . . . . . . . . . . . . . . . . . . . . . . . . . . . . . . . . . . . . . . . . . . . . . . . . . . 20
Vehicle Capacities . . . . . . . . . . . . . . . . . . . . . . . . . . . . . . . . . . . . . . . . . . . . . . . . . . . . . . . . . . . . . . . . . . 22
Vehicle Controller . . . . . . . . . . . . . . . . . . . . . . . . . . . . . . . . . . . . . . . . . . . . . . . . . . . . . . . . . . . . . . . . . . . 22
Batteries . . . . . . . . . . . . . . . . . . . . . . . . . . . . . . . . . . . . . . . . . . . . . . . . . . . . . . . . . . . . . . . . . . . . . . . . . . 22
Battery Charger . . . . . . . . . . . . . . . . . . . . . . . . . . . . . . . . . . . . . . . . . . . . . . . . . . . . . . . . . . . . . . . . . . . . 24
Accessories . . . . . . . . . . . . . . . . . . . . . . . . . . . . . . . . . . . . . . . . . . . . . . . . . . . . . . . . . . . . . . . . . . . . . . . 28
Subsequent Owner Registration . . . . . . . . . . . . . . . . . . . . . . . . . . . . . . . . . . . . . . . . . . . . . . . . . . . . . . . . 28
Vehicle Specifications . . . . . . . . . . . . . . . . . . . . . . . . . . . . . . . . . . . . . . . . . . . . . . . . . . . . . . . . . . . . . . . . 29


2000 Carryall Electric Vehicle Owner’s Manual 1
Safety signs like you see above may at first seem shocking, but their impact is mild
compared with the reality of severe personal injury.
Your safety and satisfaction are of the utmost importance to Club Car. That is why
before operating the vehicle, we urge you to review the information in this manual.
Understand and become familiar with the DANGER, WARNING and CAUTION state-
ments and procedures it contains, along with the safety decals that are affixed to
your vehicle.
Take time to understand the language of safety. It is a language that can save your life.
!WARNING
Moving Parts
Practice Safety

Safety Details
2 2000 Carryall Electric Vehicle Owner’s Manual
SAFETY DETAILS
It is important to note that some vital statements throughout this manual and on the decals affixed to the
vehicle are preceded by the words DANGER, WARNING, CAUTION, or NOTE. For your protection, we rec-
ommend that you take special notice of these safety procedures. Safety procedures are essential and must
be followed.
If any of the operation or warning decals on the vehicle become damaged, have been removed, or cannot be
easily read, they should be replaced immediately to avoid possible property damage, personal injury, or
death. Contact your Club Car distributor/dealer.
•
THIS OWNER’S MANUAL SHOULD BE READ COMPLETELY BEFORE ATTEMPTING TO DRIVE
OR SERVICE THE VEHICLE. FAILURE TO FOLLOW THE INSTRUCTIONS IN THIS MANUAL
COULD RESULT IN PROPERTY DAMAGE, SEVERE PERSONAL INJURY, OR DEATH.
• A DANGER INDICATES AN IMMEDIATE HAZARD WHICH WILL RESULT IN SEVERE
PERSONAL INJURY OR DEATH.
•
A WARNING INDICATES AN IMMEDIATE HAZARD WHICH COULD RESULT IN SEVERE
PERSONAL INJURY OR DEATH.
•
A CAUTION INDICATES HAZARDS OR UNSAFE PRACTICES WHICH COULD RESULT IN MINOR
PERSONAL INJURY OR PRODUCT OR PROPERTY DAMAGE.
•
A NOTE PROVIDES KEY INFORMATION TO MAKE PROCEDURES MORE EASILY
UNDERSTOOD.
Figure 1 PowerDrive Battery Configuration
WARNING
DANGER
WARNING
CAUTION
NOTE
BATTERY BANK FOR
CARRYALL I
1
2
3
4
6
5
BATTERY BANK FOR CARRYALL II AND CARRYALL VI
1
2
3
4
6
5
FRONT
OF VEHICLE
FRONT
OF VEHICLE
REMOVE
NEGATIVE
CABLE FIRST
REMOVE
NEGATIVE
CABLE FIRST
DISCONNECT
BATTERY CABLES HERE DISCONNECT
BATTERY CABLES HERE

General Warnings
2000 Carryall Electric Vehicle Owner’s Manual 3
GENERALWARNINGS
The safety procedures listed must be followed whenever the vehicle is being operated, repaired, or serviced.
Other specific warnings appear throughout this manual and on the vehicle.
• BATTERY VAPORS – FLAMMABLE! EXPLOSIVE! DO NOT SMOKE. KEEP SPARKS AND
FLAMES AWAY FROM THE AREA OF THE VEHICLE. SERVICE ONLY IN WELL-
VENTILATED AREAS.
• A UTILITY VEHICLE WILL
NOT
PROVIDE PROTECTION FROM LIGHTNING, FLYING
OBJECTS, OR OTHER STORM RELATED HAZARDS. IF CAUGHT IN A STORM WHILE
DRIVING A CARRYALL UTILITY VEHICLE, EXIT THE VEHICLE AND SEEK SHELTER IN
ACCORDANCE WITH APPLICABLE SAFETY GUIDELINES FORYOUR LOCATION.
•
NEVER LEAVE CHILDREN UNATTENDED IN VEHICLE.
•
WHEN STOPPING AND LEAVING THE VEHICLE, ALWAYS:
-
TURN THE KEY SWITCH TO
OFF
AND REMOVE THE KEY.
-
PLACE THE FORWARD/REVERSE HANDLE IN
NEUTRAL
.
-
ENGAGE THE PARK BRAKE.
•
ONLY TRAINED TECHNICIANS SHOULD REPAIR OR SERVICE THE VEHICLE. ANYONE DOING
EVEN SIMPLE REPAIRS OR SERVICE SHOULD FOLLOW THE PROCEDURES EXACTLY AS
STATED IN THIS MANUAL, AND FOLLOW ALL
DANGER
,
WARNING
, AND
CAUTION
PROCEDURES LISTED IN THIS MANUAL AS WELL AS THOSE AFFIXED TO THE VEHICLE.
•
WEAR SAFETY GLASSES OR APPROVED EYE PROTECTION WHEN SERVICING THE
VEHICLE.WEAR A FULL FACE SHIELD WHEN WORKING WITH BATTERIES.
•
USE INSULATED TOOLS WHEN WORKING AROUND BATTERIES OR ELECTRICAL CONNECTIONS.
•
IMPROPER USE OF THE VEHICLE OR FAILURE TO PROPERLY MAINTAIN IT COULD RESULT
IN DECREASED VEHICLE PERFORMANCE OR SEVERE PERSONAL INJURY.
•
FOLLOW ALL PROCEDURES LISTED IN THIS MANUAL FOR LOADING AND UNLOADING THE
VEHICLE. DO NOT EXCEED VEHICLE RATED WEIGHT CAPACITY.
•
PRIOR TO SERVICING THE VEHICLE:
-
CHOCK THE WHEELS.
-
TURN THE KEY SWITCH TO
OFF
AND REMOVE THE KEY.
-
PLACE THE FORWARD/REVERSE HANDLE IN
NEUTRAL
.
-
DISCONNECT THE BATTERY CABLES, NEGATIVE (–) FIRST.
•
TO AVOID UNINTENTIONALLY STARTING THE VEHICLE, DISCONNECT THE BATTERIES AS
SHOWN
(FIGURE 1, PAGE 2)
AND DISCHARGE THE CONTROLLER AS FOLLOWS:
-
TURN THE KEY SWITCH TO
ON
AND PLACE THE FORWARD/REVERSE HANDLE IN THE
REVERSE
POSITION.
-
SLOWLY DEPRESS THE ACCELERATOR PEDAL AND KEEP IT DEPRESSED UNTIL THE
REVERSE WARNING BUZZER CAN NO LONGER BE HEARD. WHEN THE BUZZER STOPS
SOUNDING, THE CONTROLLER IS DISCHARGED.
•
ANY MODIFICATION OR CHANGE TO THE VEHICLE WHICH AFFECTS THE STABILITY OR
HANDLING OF THE VEHICLE, OR INCREASES MAXIMUM VEHICLE SPEED BEYOND FACTORY
SPECIFICATIONS COULD RESULT IN SEVERE PERSONAL INJURY OR DEATH.
DANGER
WARNING

Vehicle Feature Identification
4 2000 Carryall Electric Vehicle Manual
CARRYALL I AND CARRYALL II
OPERATING INSTRUCTIONS
SERIAL
NUMBER
BRAKE
PEDAL
PARK BRAKE
PEDAL
ACCELERATOR
PEDAL
DRIVER/PASSENGER
WARNING DECAL
VEHICLE LOADING DECAL
(FOR CARRYALL I ONLY)
BED/LATCH
WARNING DECAL
BED LOAD
WARNING DECAL
(FOR CARRYALL II ONLY)
•
Operation from driver side by authorized persons only
and only in designated areas - not on public roads.
•
DO NOT start vehicle until all occupants (two (2) per seat
maximum) are seated.
•
Remain seated with entire body inside vehicle and hold
on to seat handle or handrail at all times.
•
Drive slowly in turns and straight up and down slopes.
•
Never stand in front of or behind vehicle.
•
DO NOT operate while under the influence of alcohol or
drugs.
•
DO NOT leave children unattended on vehicle at any time.
WARNING
READ AND FOLLOW THESE WARNINGS AND THE OPERATING
INSTRUCTIONS BEFORE USING VEHICLE. FAILURE TO DO SO CAN
CAUSE SEVERE INJURY OR DEATH.
CCI 1019606-01
!
OPERATING INSTRUCTIONS
•
Read Owner's Manual and safety warnings located on dash panel prior to driving.
•
Study and understand controls.
•
Make sure wheels are turned in desired direction.
•
Turn key to “ON” position and be sure nothing is in your path.
•
While vehicle is stopped, select direction by placing
shift lever or switch in desired position:
F – Forward N – Neutral R – Reverse (Buzzer will sound)
•
Vehicle will start moving when accelerator pedal is depressed.
•
Slowly depress accelerator pedal to increase speed. Park brake will
release when accelerator pedal is depressed.
•
To stop, release accelerator pedal and depress brake pedal.
•
After stopping, firmly depress park brake until it locks.
•
Place forward and reverse switch in neutral position.
Turn key “OFF” and remove key when not in use.
CCI 1016216-01
•Vehicle rated capacity - 800 lbs. on level surface only.
Weight to include passengers, cargo bed load, and
gross trailer weight. See Owner's Manual.
•Maximum cargo load - 300 lbs. Weight to include cargo
bed load and gross trailer weight.
•Maximum trailer hitch tongue weight - 150 lbs.
•Cargo should be evenly spread over the floor of the
cargo bed as far forward as possible and secured.
•For vehicle stability, when fully loaded, drive slowly
and avoid stopping on or backing down steep hills.
•Avoid top heavy loads. See Owner's Manual.
•When driving on uneven terrain or down steep hills,
reduce speed and load.
VEHICLE
LOADING
ReadOwner's Manual
andwarnings ondash. CCI 1019601-01
•Vehicle rated capacity - 1200 lbs. on level surface only.
Weight to include passengers, cargo bed load, and
gross trailer weight. See Owner's Manual.
•Maximum cargo load - 800 lbs. Weight to include cargo
bed load and gross trailer weight.
•Maximum trailer hitch tongue weight - 150 lbs.
•Cargo should be evenly spread over the floor of the
cargo bed as far forward as possible and secured.
•For vehicle stability, when fully loaded, drive slowly
and avoid stopping on or backing down steep hills.
•Avoid top heavy loads. See Owner's Manual.
•When driving on uneven terrain or down steep hills,
reduce speed and load.
VEHICLE
LOADING
ReadOwner's Manual
andwarnings ondash. CCI 1019602-01
BATTERY WARNING
LIGHT
KEY SWITCH
CRUSH AREA
DECAL
WARNING
STAY CLEAR
CRUSH AREA
CCI 1016094-01
OFF ON

Vehicle Feature Identification
2000 Carryall Electric Vehicle Owner’s Manual 5
CARRYALL I AND CARRYALL II
CARRYALL I
DANGER / POISON
!
FLUSH EYES
IMMEDIATELY
WITH WATER
GET
MEDICAL
HELP
FAST
SULFURIC
ACID
CAN CAUSE
BLINDNESS OR
SEVERE BURNS
NO
• SPARKS
• FLAMES
• SMOKING
KEEP OUT OF THE REACH OF CHILDREN – DO NOT TIP – KEEP VENT CAPS TIGHT AND LEVEL
SHIELD
EYES
EXPLOSIVE
GASES
CAN CAUSE
BLINDNESS OR INJURY
CHARGER
RECEPTACLE
FNR
BED LATCH
POTENTIOMETER CAUTION DECAL
(ON WIPER SWITCH COVER INSIDE
BATTERY COMPARTMENT)
(CARRYALL I ONLY)
FORWARD/REVERSE
HANDLE
BATTERY DANGER DECAL
(ON BODY UNDER SEAT)

Vehicle Feature Identification
6 2000 Carryall Electric Vehicle Manual
CARRYALL VI
CARRYALL-VI
DANGER / POISON
!
FLUSH EYES
IMMEDIATELY
WITH WATER
GET
MEDICAL
HELP
FAST
SULFURIC
ACID
CAN CAUSE
BLINDNESS OR
SEVERE BURNS
NO
• SPARKS
• FLAMES
• SMOKING
KEEP OUT OF THE REACH OF CHILDREN – DO NOT TIP – KEEP VENT CAPS TIGHT AND LEVEL
SHIELD
EYES
EXPLOSIVE
GASES
CAN CAUSE
BLINDNESS OR INJURY
DRIVER/PASSENGER
WARNING DECAL
BATTERY
CONDITION
INDICATOR
•
Operation from driver side by authorized persons only
and only in designated areas - not on public roads.
•
DO NOT start vehicle until all occupants (two (2) per seat
maximum) are seated.
•
Remain seated with entire body inside vehicle and hold
on to seat handle or handrail at all times.
•
Drive slowly in turns and straight up and down slopes.
•
Never stand in front of or behind vehicle.
•
DO NOT operate while under the influence of alcohol or
drugs.
•
DO NOT leave children unattended on vehicle at any time.
WARNING
READ AND FOLLOW THESE WARNINGS AND THE OPERATING
INSTRUCTIONS BEFORE USING VEHICLE. FAILURE TO DO SO CAN
CAUSE SEVERE INJURY OR DEATH.
CCI 1019606-01
!
PARK BRAKE
PEDAL
BRAKE
PEDAL ACCELERATOR
PEDAL
SERIAL
NUMBER
BATTERYWARNING
LIGHT
BED LOAD
WARNING DECAL
BATTERY DANGER
DECAL
(ONFRAME)
CRUSH AREA
DECAL
WARNING
STAY CLEAR
CRUSH AREA
CCI 1016094-01
VEHICLE LOADING DECAL
•Vehicle rated capacity - 1500 lbs. on level surface only.
Weight to include passengers, cargo bed load, and
gross trailer weight. See Owner's Manual.
•Maximum cargo load CARRYALL VI - 1000 lbs.,
TRANSPORTER - 300 lbs. Weight to include cargo bed load
and gross trailer weight.
•Maximum trailer hitch tongue weight - 150 lbs.
•Cargo should be evenly spread over the floor of the
cargo bed as far forward as possible and secured.
•For vehicle stability, when fully loaded, drive slowly
and avoid stopping on or backing down steep hills.
•Avoid top heavy loads. See Owner's Manual.
•When driving on uneven terrain or down steep hills,
reduce speed and load.
VEHICLE
LOADING
ReadOwner's Manual
andwarnings ondash. CCI 1019600-01

Vehicle Feature Identification
2000 Carryall Electric Vehicle Owner’s Manual 7
CARRYALL VI
OPERATING
INSTRUCTIONS
ELECTRICAL COMPONENT
COVER CAUTION
(ON COVER)
KEY SWITCH
BED HOLD
DOWN BOLTS
FNR
ONBOARD
CHARGER
AC CORD REEL
FORWARD - REVERSE
LEVER
FORWARD/REVERSE
HANDLE
BED BOLT
WARNING LABEL
ELECTRICAL COMPONENT
MOUNTING PLATE NOTICE
(ON PLATE)
OPERATING INSTRUCTIONS
•
Read Owner's Manual and safety warnings located on dash panel prior to driving.
•
Study and understand controls.
•
Make sure wheels are turned in desired direction.
•
Turn key to “ON” position and be sure nothing is in your path.
•
While vehicle is stopped, select direction by placing
shift lever or switch in desired position:
F – Forward N – Neutral R – Reverse (Buzzer will sound)
•
Vehicle will start moving when accelerator pedal is depressed.
•
Slowly depress accelerator pedal to increase speed. Park brake will
release when accelerator pedal is depressed.
•
To stop, release accelerator pedal and depress brake pedal.
•
After stopping, firmly depress park brake until it locks.
•
Place forward and reverse switch in neutral position.
Turn key “OFF” and remove key when not in use.
CCI 1016216-01
CARRYALL-VI
OFF ON

General Information
8 2000 Carryall Electric Vehicle Owner’s Manual
GENERAL INFORMATION
There are three electric Carryall models: the Carryall I, Carryall II, and Carryall VI.Throughout this manual,
important features unique to each model are highlighted. We urge the owner/operator to read and under-
stand this manual, and to pay special attention to the features specific to their vehicle(s).
MODEL IDENTIFICATION
The serial number of the vehicle is printed on a bar code decal mounted on the frame directly above the accel-
erator pedal (Example:F0001-123456)
(Figure 2, Page 8)
.There is a second serial number decal mounted on
the front body frame behind the center dash panel.The center dash panel must be removed to access it.
PRE-OPERATION CHECKLIST
All Carryall vehicle(s) are thoroughly inspected and adjusted at the factory, and by a Club Car dealer.However,
upon arrival of your new Carryall vehicle(s), you should become familiar with its controls and operation, and
carefully inspect each vehicle to be satisfied that it is in proper working condition before accepting delivery.
Use the following checklist as a guide to inspect your new vehicle.It may also be used in conjunction with the
Periodic Service Schedule (pages 19-20). Any problems should be corrected only by a Club Car dealer or a
trained technician.
• General:
All the parts should be in place and properly installed. Be sure all nuts, bolts, and screws are tight.
• Warning Decals:
Check to ensure that all warning and operation decals are in place.
See Pages 4
through 7.
• Tires:
Check for proper tire pressure.
SeeTire Capacities, Page 22
.
• Batteries:
Check electrolyte to ensure that it is at its proper level
(Figure 13, Page 23)
. Check battery
posts.Wires should be tight and free of corrosion. Charge batteries fully before first use of vehicle.
• Multi-Step Potentiometer (Carryall I electric vehicles):
Be sure potentiometer cover is properly
secured prior to operating the vehicle.
•
ALWAYS HAVE THE VEHICLE SERIAL NUMBER AT HAND WHEN ORDERING PARTS OR
MAKING INQUIRIES.
SEE FIGURE 2, PAGE 8
.
Figure 2 Serial Number
NOTE
This vehicle is covered by one or more of the
following U.S. Patents as applicable: D271008
D292899, 4343503, 4539162, 4637270, 4821827
4826467, 5042519, 5083736 and other
patents pendings.
Cl b
GO
GO
SERIAL NUMBER
F0001-123456
P O BOX 204658
AUGUSTA GA 30917
Club Car R
SERIAL NUMBER
DECAL

Controls
2000 Carryall Electric Vehicle Owner’s Manual 9
PERFORMANCE INSPECTION
After you have familiarized yourself with the vehicle’s controls and have read and understood the driving
instructions, take the vehicle for a test drive. Use the following checklist as a guide to inspect your new vehi-
cle.Any problems should be corrected only by a Club Car dealer or a trained technician.
All vehicles
• Brakes:
Be sure the brakes function properly. When brake pedal is fully depressed under moderate
pressure, it should
not
go more than halfway to the floor, and vehicle should come to a smooth, straight
stop; Carryall I vehicles should stop within 14 feet, and all other Carryall vehicles should stop within 16
feet. If the brake pedal goes more than halfway to the floor, or if the vehicle swerves or fails to stop
within the appropriate braking distance for your vehicle (see preceding sentence), have the brake sys-
tem checked and adjusted as required. Brake adjustment must be maintained so that the brake pedal
cannot
be depressed to the floor under any circumstance.
• Park Brake:
When latched, the park brake should lock the wheels and hold the vehicle stationary (on
incline of 20% or less). It should release when either the accelerator or brake pedal is depressed.
• Reverse Buzzer:
The reverse buzzer should sound as a warning when the vehicle is in reverse.
• Steering:
The vehicle should be easy to steer and should not have any play in the steering wheel.
• Accelerator:
With the key switch ON and the Forward/Reverse handle in the FORWARD position; as
the accelerator pedal is depressed, the motor should start and the vehicle should accelerate smoothly
to full speed. When the pedal is released it should return to the original position and the motor should
stop. All Club Car vehicles should run at reduced speed in REVERSE.
• General:
Listen for any unusual noises such as squeaks or rattles. Check the vehicle ride and perfor-
mance.Have a Club Car distributor/dealer or a trained technician investigate anything unusual.
CONTROLS
KEY SWITCH
The key switch is mounted on the dash to the right of the steering column
(Figure 3, Page 10)
. It has two
positions, OFF and ON, which are clearly labeled.
•
BE SURE THE PLASTIC HAS BEEN REMOVED FROM THE SEAT BOTTOM BEFORE
OPERATING THE VEHICLE. FAILURE TO DO SO MAY RESULT IN A FIRE, PROPERTY
DAMAGE, PERSONAL INJURY, OR DEATH.
•
BEFORE ALLOWING THE VEHICLE TO BE DRIVEN, MAKE SURE THE DRIVER IS FAMILIAR
WITH ALL CONTROLS AND OPERATING PROCEDURES.
•
DO NOT MODIFY OR CHANGE THE VEHICLE IN ANY WAY WHICH MIGHT AFFECT ITS
STABILITY OR HANDLING, OR INCREASE MAXIMUM VEHICLE SPEED BEYOND FACTORY
SPECIFICATIONS.PROPERTY DAMAGE, PERSONAL INJURY, OR DEATH COULD RESULT.
•
DO NOT SHIFT THE FORWARD/REVERSE HANDLE WHILE THE VEHICLE IS IN MOTION. TO
AVOID INJURY TO AN UNSUSPECTING PASSENGER OR DAMAGE TO THE VEHICLE, ALWAYS
BRING THE VEHICLE TO A FULL STOP BEFORE SHIFTING THE HANDLE.
•
RELEASE THE ACCELERATOR PEDAL AND THEN DEPRESS THE BRAKE PEDAL FIRMLY UNTIL THE
VEHICLESTOPS.TOAVOIDUNINTENTIONALLYSTARTINGORROLLINGTHEVEHICLE,SETTHE PARK
BRAKE, TURN THE KEY SWITCH TO
OFF
, AND REMOVE THE KEY WHEN LEAVING THE VEHICLE.
•DO NOT EXCEED VEHICLE RATED WEIGHT CAPACITY.
WARNING
WARNING

Controls
10 2000 Carryall Electric Vehicle Owner’s Manual
FORWARD/REVERSE CONTROL
The Forward/Reverse handle is located on the seat support panel, below and to the right of the driver’s right
knee (Figure 4, Page 10). The handle has three distinct positions: F(forward), N(neutral), and R(reverse).
Rotate the handle towards the driver, F(forward), to operate the vehicle in the FORWARD direction, or
towards the passenger, R(reverse), to operate vehicle in REVERSE.When the handle is in the straight up, or N
(neutral) position, vehicle will not operate.Club Car vehicles operate at reduced speed in REVERSE.
ACCELERATOR PEDAL
The accelerator pedal is the pedal on the right, with the word GO molded into it (Figure 5, Page 10). The
operation of the accelerator pedal differs from that of an automobile.When the key switch is ON, and the shift
handle is in either FORWARD or REVERSE, depressing the accelerator pedal will automatically release the
park brake and start the vehicle moving in the direction selected (forward or reverse).The reverse buzzer will
sound as a warning when the vehicle is in reverse. As the accelerator pedal is depressed, speed will
increase until full speed is reached.When the accelerator is released, power will be cut off and the motor will
stop running.
•THE KEY CAN BE REMOVED WHEN THE KEY SWITCH IS IN THE OFF POSITION ONLY.
Figure 3 Key Switch Figure 4 Forward/Reverse Handle
Figure 5 Accelerator Pedal
NOTE
OFF ON

Controls
2000 Carryall Electric Vehicle Owner’s Manual 11
BRAKE PEDAL
The brake pedal is the large pedal on the left with the word STOP molded into it (Figure 6, Page 11).To slow
or stop the vehicle, depress the brake pedal with your right foot (Figure 6, Page 11).
PARK BRAKE PEDAL
The park brake pedal is the small raised portion in the upper left corner of the brake pedal. It has the word
PARK molded into it and the words PARK BRAKE marked on top of it (Figure 6, Page 11). To set the park
brake, depress the brake pedal firmly and tilt the park brake portion of the pedal forward with your foot
(Figure 6, Page 11). See following WARNING.
BATTERY WARNING LIGHT
PowerDrive System 48 vehicles feature a dash mounted warning light (above steering column) that, when
the vehicle is in operation, indicates low battery voltage, or, when the vehicle is being charged, indicates a
charging problem.The battery warning light is controlled by the PowerDrive onboard computer.
When the vehicle is in operation, the warning light will illuminate and remain illuminated if:
•Batteries voltage drops below 48 when there is no load on the batteries (the vehicle is stopped and
there are no accessories on).
•Batteries have discharged to less than 25% of rated capacity.
If the warning light illuminates when the vehicle is operating, there will be enough power remaining to drive
the vehicle for approximately 30 minutes. However, the vehicle should be charged at the first opportunity. If
the warning light illuminates and the vehicle is unable to operate for 30 minutes, have your Club Car distribu-
tor/dealer check the vehicle for a possible battery or electrical system problem.
When the batteries receive an incomplete charge because 1) the DC power cord is disconnected, 2) AC
power to the charger is interrupted, 3) automatic charger shut-off occurs after 16 hours of operation, or 4) the
charger malfunctions, the warning light will indicate as follows:
Figure 6 Brake Pedal Figure 7 Park Brake
•THE PARK BRAKE WILL RELEASE AUTOMATICALLY WHEN EITHER THE ACCELERATOR OR
BRAKE PEDAL IS DEPRESSED. THE PARK BRAKE HAS MULTIPLE LOCKING POSITIONS AND
SHOULD BE FIRMLY PRESSED AND LOCKED TO PREVENT THE VEHICLE FROM ROLLING.
WARNING

Driving Instructions
12 2000 Carryall Electric Vehicle Owner’s Manual
•The warning light will not come on if the charge is 90% or more complete.The onboard computer will
retain in memory the amount of charge needed to fully replenish the batteries and will complete the
charge during the next charge cycle.
•When the charger is unplugged, the warning light will illuminate and remain illuminated for 10 seconds if the charge
is less than 90% complete but the vehicle has enough power for approximately 30 minutes of operation.This will
alert the operator that the vehicle may be used, but that it must be charged to completion as soon as possible.
•The warning light will repeatedly illuminate for 10 seconds, with 4 second intervals if the charger times out at 16
hours and the batteries are not sufficiently charged (see PowerDrive Charger Owner’s Manual).This indicates
an abnormal charge cycle.The charger and batteries should be checked by your Club Car distributor/dealer.
•The warning light will repeatedly illuminate for 10 seconds, with 4 second intervals during a charge cycle (DC
plug is still connected) if AC power to the charger is interrupted.The light will go out when AC power is restored.
LED Light: In addition to the warning light, there is an infrared LED in the dash light assembly which trans-
mits an infrared signal from the OBC.This signal is received by the optional Communication Display Module
which provides information on the condition of the vehicle and batteries.
DRIVING INSTRUCTIONS
No one should drive the vehicle without first being instructed in the proper operation and use of the vehicle’s
controls. An experienced operator should accompany each first-time driver on a test drive before allowing
them to operate the vehicle alone.
To ensure safe operation of the vehicle, follow exactly and in order, all of the following procedures. Read and
understand all instructions prior to driving the vehicle.
STARTING THE VEHICLE
1. Be sure load, if any, is secure.
2. Study and understand controls.
3. Be sure everyone is seated and holding onto seat handles or handrails. Driver should have both hands
on the steering wheel.
4. Read safety warnings located above pedals.
5. Make sure wheels are turned in desired direction.
6. Turn key to the ON position and be sure nothing is in your path.
7. Select direction by placing shift handle in desired position (F = forward or R = reverse). A buzzer will
sound as a warning when the vehicle is in REVERSE.
8. Slowly depress accelerator pedal.The park brake will release automatically and the vehicle will start to
move.As the accelerator pedal is depressed, speed will increase until full speed is reached.
•ONLY LICENSED DRIVERS SHOULD BE ALLOWED TO DRIVE THIS VEHICLE.
•BEFORE ALLOWING THE VEHICLE TO BE DRIVEN, MAKE SURE THE DRIVER IS FAMILIAR
WITH ALL CONTROLS AND OPERATING PROCEDURES.
•NO MORE THAN TWO PEOPLE SHOULD BE ON THE VEHICLE AT ONE TIME.
•DO NOT ALLOW RIDERS IN THE CARGO BED.
•THE VEHICLE IS NOT SPECIALLY EQUIPPED FOR HANDICAPPED PERSONS:
-BE SURE ALL PASSENGERS ARE CAPABLE OF SECURING THEMSELVES IN A MOVING
CARRYALL VEHICLE BEFORE ALLOWING THEM TO RIDE IN ONE.
-BE SURE ALL PERSONS CAN PROPERLY OPERATE THE VEHICLE PRIOR TO ALLOWING
THEM TO DRIVE THE VEHICLE.
WARNING CONTINUED ON NEXT PAGE...
WARNING

Driving Instructions
2000 Carryall Electric Vehicle Owner’s Manual 13
STOPPINGTHEVEHICLE
To stop vehicle, release the accelerator pedal and depress the brake pedal until vehicle comes to a complete
stop.
•FOR NIGHT USE, THE VEHICLE MUST BE EQUIPPED WITH HEADLIGHTS, TAILLIGHTS, AND
REFLECTORS.
•STOP THE VEHICLE BEFORE SHIFTING THE FORWARD/REVERSE HANDLE. FAILURE TO DO
SO MAY RESULT IN INJURY TO INATTENTIVE PASSENGERS AND (OR) DAMAGE TO THE
VEHICLE.
•DO NOT LEAVE CHILDREN UNATTENDED IN THE VEHICLE.
•TO AVOID BEING STRUCK, DO NOT STAND IN FRONT OF OR BEHIND THE VEHICLE.
WHEN DRIVINGTHE VEHICLE:
•OPERATE THE VEHICLE FROM THE DRIVER SEAT ONLY.
•TO PREVENT FALLS FROMTHE VEHICLE, REMAIN SEATED IN A MOVING VEHICLE AND HOLD
ON TO SEAT HANDLES OR HANDRAILS AT ALL TIMES. DRIVER SHOULD KEEP BOTH HANDS
ON THE STEERING WHEEL WHEN THE VEHICLE IS IN MOTION.
•TO PREVENT THE POSSIBILITY OF SERIOUS INJURY, KEEP ENTIRE BODY INSIDE THE
VEHICLE.
•TO PREVENT OVERTURNING THE VEHICLE, DRIVE SLOWLY AROUND TURNS.
•TO PREVENT OVERTURNING THE VEHICLE, DRIVE SLOWLY STRAIGHT UP AND DOWN
SLOPES. AVOID DRIVINGTHE VEHICLE ON SLOPES EXCEEDING 20% INCLINE.
•AVOID STOPPING A LOADED VEHICLE ON A HILL.IF A LOADED VEHICLE MUST BE STOPPED
ON A HILL, AVOID SUDDEN STARTS OR ROLLING BACKWARDS AND STOPPING SUDDENLY.
FAILURE TO HEED THIS WARNING COULD RESULT IN OVERTURNING THE VEHICLE.
•TO AVOID POSSIBLE INJURY TO INATTENTIVE PASSENGERS AND (OR) DAMAGE TO THE
VEHICLE, AVOID SUDDEN STARTS, SUDDEN STOPS, AND ABRUPT TURNS.
•TO AVOID THE POSSIBILITY OF LOSING CONTROL OF OR OVERTURNING THE VEHICLE,
REDUCE SPEED FOR ADVERSE DRIVING CONDITIONS SUCH AS WET GRASS OR ROUGH
TERRAIN.
•DO NOT USE THE VEHICLE ON PUBLIC ROADS. IT IS NEITHER DESIGNED NOR INTENDED
FOR STREET USE AND SHOULD NOT BE LICENSED FOR USE ON PUBLIC ROADS.
•THE VEHICLE SHOULD BE DRIVEN IN ONLY SPECIFIED AREAS BY TRAINED DRIVERS.
•DO NOT DRIVE WHILE UNDER THE INFLUENCE OF ALCOHOL, DRUGS, OR MEDICATIONS.
•OPERATOR MUST CONTROL VEHICLE SPEED WHEN GOING DOWNHILL.
•DRIVING THROUGH WATER MAY AFFECT THE BRAKES. AFTER DRIVING THROUGH WATER,
CHECK EFFECTIVENESS OF THE BRAKES BY GENTLY DEPRESSING THE BRAKE PEDAL. IF
THE VEHICLE DOES NOT SLOW DOWN AT THE NORMAL RATE, CONTINUE TO DEPRESS THE
BRAKE PEDAL UNTIL THE BRAKES DRY OUT AND NORMAL PERFORMANCE RETURNS.
•WHEN STOPPED ON A HILL, USE THE BRAKE PEDAL TO HOLD YOUR POSITION. DO NOT
USE THE ACCELERATOR PEDAL.
WARNING
WARNING
CAUTION

Bed Latch
14 2000 Carryall Electric Vehicle Owner’s Manual
PARKING AND LEAVINGTHEVEHICLE
1. After stopping vehicle, firmly depress park brake pedal until it locks.This will prevent vehicle from rolling.
2. Turn the key switch to OFF and place the shift handle in the NEUTRAL position. Remove the key when
the vehicle is not in use.
BED LATCH
The Carryall I and II are equipped with a bed latch on the driver side of the vehicle as standard equipment
(Figure 8, Page 14).To lift bed, pull latch handle toward back of the vehicle and lift the bed (Figure 9, Page 14).
To close the bed, lower it gently until the bed latch engages. DO NOT drop the bed.
PROP ROD
Read DANGER and WARNING on page 3.
The Carryall II is equipped with an automatically engaging prop rod and prop rod track on the driver side of
the rear body (Figure 10, Page 15). When pulling the bed latch handle and lifting the bed, the prop rod will
come to rest in one of the notches in the prop rod track.
The Carryall VI is equipped with a manual prop rod.When lifting the bed of a Carryall VI vehicle, remove the
prop rod from the clip and engage the prop rod.
•KEEP HANDS AND FINGERS CLEAR OF CRUSH AREA BETWEEN THE BED AND THE SEAT
BACK SUPPORT.
•THE CARRYALL II IS EQUIPPED WITH AN AUTOMATICALLY ENGAGING PROP ROD, UNLESS
EQUIPPED WITH AN ELECTRIC BED LIFT OPTION (FIGURE 10, PAGE 15).
Figure 8 Bed Latch Figure 9 Lift Bed
WARNING
NOTE
SEAT BACK
BED LATCH
This manual suits for next models
2
Table of contents
Other Club Car Electric Vehicle manuals

Club Car
Club Car DS Villager 4 Manual

Club Car
Club Car IQ PLUS 2008 Manual

Club Car
Club Car TransPorter 4 Manual

Club Car
Club Car Tempo 2020 Manual

Club Car
Club Car Tourall 1999 User manual

Club Car
Club Car CARRYALL 300 GASOLINE User manual

Club Car
Club Car Tempo 2020 Manual

Club Car
Club Car Villager 2000 User manual