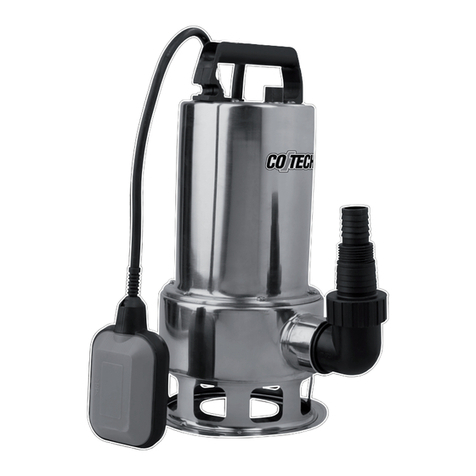
CO/Tech IE40F-5A User manual

Important!
Read the entire instruction manual
carefully and make sure that you fully
understand it before you use the equipment.
Keep the manual for future reference.
Viktig information:
Läs hela bruksanvisningen noggrant
och försäkra dig om att du har förstått
den innan du använder utrustningen.
Spara bruksanvisningen för framtida bruk.
Viktig informasjon:
Les disse anvisningene nøye og forsikre deg om
at du forstår dem, før du tar produktet i bruk.
Ta vare på anvisningene for seinere bruk.
Tärkeää tietoa:
Lue nämä ohjeet huolellisesti ja varmista
että olet ymmärtänyt ne, ennen kuin alat
käyttää laitetta. Säilytä ohjeet myöhempää
tarvetta varten.
ENGLISHSVENSKANORSKSUOMI
Pump
Pumpe
Pumppu
Art.no Model
30-9529 IE40F-5A
Pump
Ver. 201106
Original instructions
Bruksanvisning i original
Original bruksanvisning
Alkuperäinen käyttöohje

2

ENGLISH
3
Pump
Art.no 30-9529 Model IE40F-5A
Please read theentire instruction manual before use and save it for future reference. Wereserve
theright for any errors in text or images and for making any necessary technical changes to this
document. Ifyou should have any questions concerning technical problems please contact our
Customer Services.
1. Safety symbols on the machine
Warning! Hotsurface.
Warning! Highlyflammable.

ENGLISH
4
2. Important safety information
Note! Alwaysturn off theengine before servicing, adjusting or cleaning thepump.
The pump is only intended for pumping water (not drinking water); other applications may harm
theuser or thepump.
Most accidents can be prevented if you follow thedirections in this manual and on thepump.
Themost common hazards are described below, together with instructions on how to protect
yourself and others.
2.1 The user’s responsibility
It is theresponsibility of theuser to make sure that all safety regulations are being followed, in
order to protect people and property. Youhave to be able to turn off theengine quickly, in case
of danger. Neverleave thepump operating without supervision, turn off theengine if you have to
leave it out of sight. Learnhow all thecontrols and connections work.
Everyone operating thepump must read themanual and be given all necessary information.
Neverlet minors operate thepump. Keepchildren and animals away from thepump when it
isrunning.
2.2 Range of application
Only pump water that is not intended for drinking. Pumpingflammable liquids, such as petrol
or fuel oil, may lead to explosion or fire, resulting in heavy damage. Pumpingseawater, acid,
chemicals or other corrosive fluids may damage thepump.
2.3 Refuelling
Petrol is highly flammable, and petrol fumes may explode. Onlyrefuel outdoors, in awell
ventilated place, on aflat surface, with theengine turned off. Donot overfill thefuel tank.
Donot smoke while refuelling, and remove all ignition sources, sparks, open flames and so
onfrom places where fuel is mixed, handled or stored. Alwaysstore fuel in approved cans.
Wipeup all spillage from theplace of refuelling before starting theengine.
2.4 Hot surfaces
The silencer becomes very hot during operation, and it remains hot for awhile after being turned
off. Keephands and other body parts clear of thesilencer during, and immediately after use.
Lettheengine cool off before transportation or indoor storage.
Prevent therisk of fire by only using thepump more than 1 metre away from houses, buildings
and other equipment, do not place flammable objects close to theengine.
2.5 Carbon monoxide, risk of poisoning
The exhaust fumes are dangerous to inhale, they contain poisonous carbon monoxide.
Neverstart theengine in an enclosed room or in any building that is not well ventilated.

ENGLISH
5
1
2
3
4
5
6
7
8
12
11
10
9
13
14
3. Description
Right side
1. Filler cap
2. Throttle lever
3. Air filter cover
4. Spark plug
screened terminal
5. Choke
6. Silencer
7. Recoil starter handle
8. Fuel tank
9. Draining plug
10. Inlet
11. Filling plug
12. Outlet
13. Stop button
14. Primer pump
(under thecarburettor)
Left side

ENGLISH
6
STOP
3.1 Controls
Stop button
Press and hold thestop button to stop theengine.
Choke
Opens and closes thechoke in thecarburettor.
In closed position (upwards) it gives aricher fuel
mixture to start acold engine.
In open position (downwards) it gives theright
fuelmixture for normal operation and to start
awarm engine.
Primer pump
Push theprimer pump (under thecarburettor)
about 8 times before start, to give theengine
extrafuel for an easier start.
Throttle lever
The throttle lever controls therotation speed of
theengine.
Push thethrottle lever downwards to increase
therotation speed of theengine and upwards to
lower it (vertical = idling and horizontal = maximum
rotation speed).
The capacity of thepump is controlled by
changing therotation speed of theengine
with thethrottle lever (horizontal = maximum
volume and continuous adjustment to vertical =
minimumvolume).
Recoil starter handle
Note! Pullthehandle upwards and out, if
theangle is wrong thefriction against theedge
of thesleeve will wear out thestarting cord and
break it prematurely. Holdon to thehandle after
attempting to start and slowly release it back,
never let go of thehandle entirely after thepull,
it might get entangled or break something on
thepump.

ENGLISH
7
4. Before use
• Read through thewhole manual and make sure you understand it, learn where thecontrols
are and how they work.
• Acquaint yourself with thepump and its functions before you start using it; learn what to do
to quickly minimize potential risks that may arise.
• Be completely sure about what kind of fluid you will be pumping. Thispump is only intended
for pumping clean water that is not to be used as drinking water.
• Check that all nuts, screws, bolts, hose couplings and plugs are secure.
• Check thecondition of thehoses before connecting them to thepump; remember that
thesuction hose must be reinforced so that it does not implode from thesuction when
thepump is operating.
• Check that thegasket where thesuction hose is attached is undamaged and intact.
• Check that theconnections and any hose clips are tightened.
• Check that afunctioning inlet filter is fitted on thesuction hose.
• Check that theair filter is intact and clean. Adirty air filter reduces theinduction air, and
theengine loses power.
5. Operation
5.1 Safe operation
Before using thepump for thefirst time you have to read: 2. Importantsafety information and
4. Beforeuse.
For your own safety, avoid starting theengine in anon-ventilated space. Theexhaust fumes
are very dangerous to inhale, they contain poisonous carbon monoxide that may lead to
unconsciousness or death.
Only pump water that is not intended for drinking. Pumpingflammable fluids, such as petrol
or fuel oil, may lead to explosion or fire, resulting in heavy damage. Pumpingseawater, acid,
chemicals or other corrosive fluids may damage thepump.
5.2 Placement of the pump
The highest capacity and theshortest suction time at start-up will be achieved when thepump is
placed near thesurface of thewater. Donot use a longer hose than necessary.
If thetotal head is increased, thecapacity of thepump is reduced. Thetype, length and diameter
of thehose used also noticeably affects thecapacity.
The pressure head for thepump is always larger than thesuction head, so thesuction hose
should be as short as possible.
Low suction head is also very important in order to reduce thesuction time at start-up
(the time it takes before theentire pump housing and suction hose is filled with water).
5.3 Fitting the suction hose
The suction hose must be equipped with an inlet filter, and ideally with anon-return valve
(the non-return valve reduces thesuction time at up-start).
The suction hose should not be longer than necessary, theoptimal pump capacity is achieved
when thepump is placed near thesurface of thewater and thesuction hose is short.
Never use asuction hose with an inner diameter smaller than 25 mm (1″).

ENGLISH
8
Use ahose clip to fix thesuction hose to theinlet, secure tightly to avoid aleak. Checkthat
theinlet gasket is intact.
Fit theenclosed suction filter on theother end of thesuction hose and secure it by using ahose clip.
Theinlet filter reduces therisk of thepump becoming clogged or damaged by contamination.
5.4 Fitting the pressure hose
Attach apressure hose (not enclosed) to theoutlet on thepump. It should be as short as
possible and have as large adiameter as possible. This reduces theresistance and increases
thecapacity, while theopposite (a long and narrow hose) greatly reduces thecapacity.
If thepressure hose is equipped with ashut-off valve or anozzle that can be closed, do not use
it to shut off theflow for longer periods of time, thepump may become overheated.
Do not tighten theoutlet adapter too hard, it may damage thethreads.
5.5 Refilling the pump housing with water
Remove thefilling plug on top of thepump housing before starting theengine, and fill theentire
pump housing with water, put thefilling plug back in its place and tighten it securely.
Running thepump dry harms theseals.
If thepump has been run dry after all: immediately turn off theengine and let thepump cool off,
then refill thepump housing with water.
5.6 Start the engine
1. When starting acold engine: close thechoke (upwards).
2. When starting awarm engine: open thechoke (downwards).
3. Set thethrottle lever to half way.
4. Push theprimer pump about 8 times, until there is fuel coming through thetransparent return
tube on thecarburettor.
5. Hold on to thecarrying handle with one hand; pull out therecoil starter handle until
resistance is felt, then jerk therecoil starter handle. Holdon to thehandle after theattempt to
start and slowly release it back, never let go of thehandle entirely after thepull, it might get
entangled or break something on thepump.
6. Carefully switch thechoke to theopen position (downwards) once theengine becomes warm.
5.7 Set the required rotation speed of the engine
Turn thethrottle lever to full throttle to let thepump begin suction, control theflow
in thepressure hose.
The flow of thepump is adjusted by changing therotation speed of theengine.
Increase thegas to increase theflow, and reduce it to reduce theflow.
5.8 Turn off the engine
Quick shut off in case of danger: Press thestop button and hold until theengine has
stopped completely.
Normal shut off: 1. Turnthethrottle lever to idling and let theengine
wind down.
2. Pressthestop button.
Open thedraining plug and let thewater out of thepump housing, rinse thepump housing with
clean water and let it drain out, replace thedraining plug and tighten it.

ENGLISH
9
6. Service and maintenance
Warning! Notfollowing all thesafety regulations and instructions may lead to you getting hurt
orkilled. Alwaysfollow all thesafety regulations and instructions.
6.1 Safety regulations
Make sure that theengine is turned off before you carry out any service or maintenance, this will
eliminate thefollowing risks:
• Carbon monoxide poisoning from exhaust fumes
The place where you start theengine must have good ventilation.
• Burn injury
Let theengine and thesilencer cool off completely before you touch them.
• Injury caused by rotating parts
Do not run theengine unless it is absolutely necessary.
Read all theinstructions before carrying out service or maintenance; make sure that you have
thenecessary knowledge and theright equipment.
Prevent fire or explosions by being careful when handling fuel. Neveruse petrol or other
flammable liquids for cleaning.
Remove all ignition sources, sparks, open flames and so on from places where fuel is mixed,
handled or stored. Donot smoke near thefuel.
6.2 Maintenance
• For your own safety, and to make thepump last as long as possible, it is important to
check thecondition of thepump before use. Correctany defects yourself, or let aqualified
technician make reparations before use.
• Remove dirt, leaves or other contaminations, especially around thesilencer, thestarter
apparatus and thecooling flanges.
• Check for signs of damage on thepump housing and theengine.
• Check that all nuts, screws, bolts, hose couplings and plugs are secure.
• Check thecondition of thehoses before connecting them to thepump; remember that
thesuction hose must be reinforced so that it does not implode from thesuction when
thepump is operating.
• Check that thegasket where thesuction hose is attached is undamaged and intact.
• Check that theconnections and any hose clips are tightened.
• Check that afunctioning inlet filter is fitted on thesuction hose.
• Check that theair filter is intact and clean. Adirty air filter reduces theinduction air,
andtheengine loses power.
6.3 Refilling fuel
Note! Onlyrefuel if you are completely sure that thecan contains two-stroke fuel!
The fuel level is visible in thetransparent fuel tank. Whenyou see that thelevel is low, turn off
theengine, let it cool down and then refuel in awell-ventilated place.

ENGLISH
10
Warning!
• Petrol is highly flammable and explosive.
• You may get burnt or get seriously injured when handling fuel. Stoptheengine and remove
all ignition sources such as sparks, open flames and so on. Donot smoke. Onlyhandle fuel
outdoors. Wipeup any spilled fuel immediately.
• Place thepump on aflat surface. Removethefiller cap and carefully refill thetank with petrol,
do not over fill it! Tightenthefiller cap securely.
• Never refill fuel indoors, where thefumes may ignite from sparks or open flames.
Keepthefuel away from grills, electrical equipment, candles and so on.
• Spilled fuel is not only afire hazard; it is also an environmental hazard. Wipeup any
spillageimmediately.
6.4 Fuel
Mix petrol (unleaded 95 octane, no added ethanol) with agood quality two-stroke oil, intended
for an air-cooled two-stroke engine.
Recommended ratio of mixture: petrol/oil 50:1 (2 %).
Note! Beprecise when mixing.
1. Carefully measure petrol and oil before mixing them.
2. Pour some of thepetrol into aclean can, approved for fuel.
3. Pour in all of theoil and shake thecan.
4. Pour in therest of thepetrol and shake thecan for at least aminute. Someoils are hard to
mix, so it is important to shake thecan to mix oil and petrol. Theengine will last longer if
thefuel has been mixed well. Ifthefuel has not been mixed right, theengine might run on too
lean amixture, which increases therisk for engine damage.
5. Mark thecan so that there can be no misunderstanding regarding thecontent.
6. Oil-mixed fuel is only intended for two-stroke engines, and pure petrol for four-stroke
engines, therefore it is very important to mark thefuel cans.
Note! Donot mix too much fuel; themixed fuel should be used within 90 days.
Warning! Useonly oil-mixed fuel for two-stroke engines, using pure petrol without any oil mixed
in quickly leads to engine damage not covered by theguarantee.
• Use only unleaded petrol 95 octane (minimum 86 octane).
• The engine was designed to be used with unleaded fuel.
• Use unleaded fuel to protect theenvironment and your own health.
• Bad quality fuel or oil may harm theseals, thefuel lines or thefuel tank.
6.5 Inspecting the air filter
Unfasten thescrew that holds theair filter cover (above thefiller cap); check that theplastic foam
filter is clean and intact. Dothis frequently if you use thepump in dusty environments.

ENGLISH
11
Clean the filter this way
1. Remove theplastic foam filter and thecover plate; use amoist cloth to remove dirt from
thecover plate and theair filter cover.
2. Wash thefilter in soapy water. Donot use petrol!
3. Squeeze thefilter and then let it air dry.
4. Dip thefilter into motor oil and then squeeze out superfluous oil.
5. Put back thefilter and thecover plate (note that theescutcheon plate is fastened by
twosprints), and then fit theair filter cover.
6. Make sure that theair filter cover is securely fastened so that it won’t shake loose.
Note! Neverrun theengine without an air filter (or with adamaged air filter); contaminants may
be pulled into theengine and cause wear not covered by theguarantee.
6.6 Inspecting and cleaning the fuel tank, fuel filter and fuel lines
Warning!
You may get burnt or get seriously injured when handling fuel.
• Remove all ignition sources such as sparks and open flames. Donot smoke.
• Only handle fuel outdoors.
• Wipe up any spilled fuel immediately.
1. Carefully open thefiller cap and let out any pressure that might have built up inside thetank.
Wipeup any spillage and pour theremaining fuel into apetrol can.
2. Pull out thefuel line/fuel filter, using for instance abent piece of iron wire.
3. Inspect thefuel filter and change it if clogged.
4. Change thefuel filter by pulling it loose (it is easier if you twist thefilter).
5. Put in anew fuel filter.
6. Remove dirt and precipitation from thebottom of thetank, do not use flammable solvents.
7. Check thetwo fuel lines between thecarburettor and thefuel tank, look for leaks or cracks,
change if necessary.

ENGLISH
12
7. Storage
It is very important that thepump is stored properly, in order for it to work well and be in
good shape for along time. Followthese instructions to protect thepump against rust and
other things that may impair function and appearance, it will also be easier to start theengine
thenexttime.
1. Pour theremaining fuel from thetank into apetrol can.
2. Put clean water in thepump housing (note that thepump must not be run dry).
3. Start theengine.
4. Let theengine idle until it stops, to empty thecarburettor of fuel.
5. Clean theoutside of thepump and rinse out thepump housing with clean water.
6. Wipe off all surfaces on theengine and thepump housing so that they become completely dry.
7. Use aspark plug tube to remove thespark plug.
8. Pour one teaspoon of pure two-stroke oil into thecylinder through thespark plug hole, slowly
pull therecoil starter handle afew times to distribute theoil inside theengine, put back
thespark plug.
9. Store thepump somewhere dry and well ventilated.
7.1 Fuel
Petrol is aperishable product that deteriorates when stored, volatile substances in petrol
evaporates and precipitation from theremaining petrol may clog thecarburettor so that it must
be cleaned at aservice shop.
The storage time of thefuel depends on: thequality of thefuel, thestorage temperature and
if thetank is half full or completely full. Theair in ahalf full or almost empty tank accelerates
thedeterioration of thefuel; lots of warm air will also accelerate thebreaking down of thefuel.
Mixed two-stroke fuel should be used within 3 months of purchase. Rememberthat thepetrol
you use to mix with oil might have been stored in acan for along time.
It is possible to prolong thedurability of thefuel by adding “Fuel stabilizer” specially developed to
prevent thebreakdown of thefuel.
1. Fill thetank all theway up with new petrol and add “Fuel stabilizer” according to
thesupplier’s instructions.
2. Run theengine for ten minutes so that thefuel with theadded ingredient has passed through
thelines and thecarburettor. (Remember that thepump must not be run dry).
3. Turn off theengine.

ENGLISH
13
7.2 Empty the fuel tank and the carburettor
1. Carefully open thefilling cap and let out any pressure that might have been building up inside
thetank. Wipeup all spillage and pour theremaining fuel into apetrol can.
2. Press theprimer pump several times until petrol is no longer visible in thetransparent return tube.
3. Tip thepump and pour any remaining fuel into apetrol can.
4. Tighten thefilling cap securely.
Warning!
You may get burnt or get seriously injured when handling fuel.
• Remove all ignition sources such as sparks and open flames. Donot smoke.
• Only handle fuel outdoors.
• Wipe up any spilled fuel immediately.
If thepump is stored with fuel in thetank, it is important to reduce therisk of evaporating petrol
fumes being ignited. Storethepump in awell ventilated place, far from boilers, stoves or electric
motors that may give off sparks, electric tools/machines being used, and so on.
Avoid storing thepump somewhere with high atmospheric humidity, to prevent rust and corrosion.
Place thepump on aflat surface.
Cover thepump when it is completely cooled down, but do not use too tightly woven materials
that will lock in any condensation, which may lead to rust and corrosion.
7.3 To use the pump after storing it for a longer period of time
1. Start by following all thesteps under 4. Beforeuse.
2. Refill with new fuel.
If thecylinder has been preserved with oil before storage, theengine will cause more smoke than
usual thefirst time it is started again after being stored. Thisis completely normal.
8. Transport
Let thepump cool off for at least 15 minutes before loading it into avehicle for transportation,
orthewarm silencer might melt or ignite materials.

ENGLISH
14
9. Trouble shooting
9.1 Engine
The engine won’t start. Likely cause Solution
Check theposition of
thecontrols.
Choke is open. Close thechoke, unless theengine
is warm.
Throttle lever is in
wrong position.
Put throttle lever into starting position.
Fuel fault. Ran out of fuel. Refill with new fuel.
Bad/old fuel. Empty thetank and carburettor and
refill with new fuel.
Check thespark plug. Something wrong with
thespark plug, or wrong
electrode spacing.
Change thespark plug.
The spark plug is moist. Wipe off thespark plug and put
it back. Turnthethrottle lever to
the“Full throttle” position and
thechoke to “Open” (downwards).
The engine has
no power.
Likely cause Solution
Check theair filter. The filter is clogged. Wash theair filter.
Check thefuel. Old/bad fuel. Empty thetank and carburettor and
refill with new fuel.
Engine fault. Engine fault. Take thepump to an authorised
machine shop.
9.2 Pump
There is no water
coming from thepump.
Likely cause Solution
Check thepump housing. The pump housing is not
filled with water.
Put in water.
Check thesuction hose. The suction hose is
damaged or leaking.
Change thesuction hose.
The inlet filter is not
completely under
thesurface of thewater.
Lower theinlet filter under
thesurface and make sure
it stays there.
The suction connection
isleaking.
Check that thegasket is fitted and
intact, tighten theconnection and
thehose clip.
The inlet filter is clogged. Clean theinlet filter.
Measure thesuction/
pressure head.
The total head is too high. Change theplacement of
thepumpand/or hoses.

ENGLISH
15
The flow of thepump is
too low.
Likely cause Solution
Check thethrottle lever. The throttle lever is
positionedwrong.
Put throttle lever to “Full throttle”.
Check thesuction hose. The suction hose may be
damaged, leaking, or too
long, or thediameter is
toosmall.
Check thesuction hose.
Leaking suction connection. Check that thegasket is fitted and
intact, tighten theconnection and
thehose clip.
The inlet filter is
partlyclogged.
Clean theinlet filter.
Check thepressure hose. The hose is damaged, too
long or thediameter is
toosmall.
Change thehose.
Measure thesuction/
pressure head.
The total head is almost at
maximum.
Change theplacement of
thepump and/or hoses.
10. Disposal
Follow local ordinances when disposing of this product. If you are unsure about how to dispose
of this product contact your municipality.
11. Specifications
Model IE40F-5A
Engine Air-cooled two-stroke engine
Cubic capacity 42.7 cc
Maximum engine power 1.5 hp
Fuel Mixture of petrol & oil 50:1 (2 %)
Tankage 1.2 litres
Spark plug TORCH: L7T
Champion: CJ6Y & CJ6RY
NGK: BPM6A & BPMR6A
Pump capacity 135 l/min
Maximum suction head 7 m
Maximum pressure head 30 m
Maximum water temp. 35 °C
Connection inlet/outlet 1″ external thread or hose nipple 25 mm (1″)
Idling speed 2500 rpm
Sound power level LwA 85 dB(A)
Sound pressure level LpA 70 dB(A)
Weight 8 kg

SVENSKA
16
Pump
Art.nr 30-9529 Modell IE40F-5A
Läs igenom hela bruksanvisningen före användning och spara den sedan för framtida bruk.
Vireserverar oss för ev. text- och bildfel samt ändringar av tekniska data.
Vid tekniska problem eller andra frågor, kontakta vår kundtjänst (se adressuppgifter på baksidan).
1. Produktmärkning med säkerhetssymboler på maskinen
Varning! Hetyta.
Varning! Mycketbrandfarligt.

SVENSKA
17
2. Viktig säkerhetsinformation
Obs! Stängav motorn innan service, justering och rengöring av pumpen.
Pumpen är endast avsedd för att pumpa vatten (ej dricksvatten), annan användning kan skada
användaren eller pumpen.
De flesta olyckor kan förhindras om du följer de anvisningar som finns ibruksanvisningen och på
pumpen. De vanligaste riskerna beskrivs nedan tillsammans med anvisningar för att skydda dig
och andra.
2.1 Användarens ansvar
Det är användarens ansvar att se till att alla säkerhetsregler följs för att skydda människor och
egendom. Dumåste kunna stänga av motorn snabbt vid fara. Lämnaaldrig pumpen idrift utan
tillsyn, stäng av motorn om du måste lämna området utom synhåll. Lärdig hur alla reglage och
anslutningar fungerar.
Alla som använder pumpen måste läsa bruksanvisningen och ges all nödvändig information.
Låtaldrig minderåriga använda pumpen. Hållundan barn och djur från pumpens närhet när
denär idrift.
2.2 Användningsområde
Pumpa endast vatten som ej är avsett som dricksvatten. Användningav pumpen för pumpning
av brandfarliga vätskor, t.ex. bensin eller eldningsolja, kan leda till explosion eller brand med
mycket svåra skador som följd. Pumpningav havsvatten, syra, kemikalier och andra korrosiva
vätskor kan skada pumpen.
2.3 Påfyllning av bränsle
Bensin är mycket brandfarligt, bensinångor kan explodera. Fyllendast på bränsle utomhus på
enplan och väl ventilerad plats med motorn avstängd. Överfyllinte bränsletanken. Rökinte
under tankning och avlägsna alla antändningskällor, gnistor, öppna lågor, tobaksrökning etc. från
platser där bränsle blandas, hanteras eller förvaras. Förvaraalltid bränsle ien godkänd dunk.
Torkaupp allt spill från tankningsplatsen innan motorn startas.
2.4 Heta ytor
Ljuddämparen blir mycket het under användning och förblir varm enstund även efter avstängning.
Hållundan händer och andra kroppsdelar från ljuddämparen under drift och strax därefter.
Låtmotorn svalna innan transport eller förvaring inomhus.
Förebygg brandfara genom att endast använda pumpen minst 1 meter från hus, byggnader och
annan utrustning. Placera inte brännbara föremål nära motorn.
2.5 Koloxid, risk för förgiftning
Avgaserna är farliga att andas in, de innehåller giftig koloxid. Starta därför aldrig motorn
iettstängt rum eller annan byggnad som inte är väl ventilerad.

SVENSKA
18
1
2
3
4
5
6
7
8
12
11
10
9
13
14
3. Beskrivning
Höger sida
1. Tanklock
2. Gasreglage
3. Luftfilterkåpa
4. Tändstiftshatt
5. Choke
6. Ljuddämpare
7. Starthandtag
8. Bränsletank
9. Avtappningsplugg
10. Inlopp
11. Påfyllningsplugg
12. Utlopp
13. Stoppknapp
14. Primerpump
(under förgasaren)
Vänster sida

SVENSKA
19
STOP
3.1 Reglage
Stoppknapp
Tryck och håll in stoppknappen för att
stoppamotorn.
Chokereglage
Chokereglaget öppnar och stänger chokespjället
iförgasaren.
I stängt läge (uppåt) ger det enfetare bränsle-
blandning för start av kall motor.
I öppet läge (nedåt) ger det rätt bränsleblandning
för normal drift och start av varm motor.
Primerpump
Tryck in primerpumpen (under förgasaren)
ca8gånger innan start för att ge motorn
överskottsbränsle så att den startar lättare.
Gasreglage
Gasreglaget styr motorns varvtal.
För gasreglaget nedåt för att öka motorns varvtal
och uppåt för att sänka (lodrät = tomgång och
vågrät = maxvarvtal).
Pumpens kapacitet kontrolleras genom att
ändra motorns varvtal med gasreglaget (vågrät =
maxvolym och steglöst till lodrät = min. volym).
Starthandtag
Obs! Drastarthandtaget snett uppåt. Omdraget
är ifel vinkel gör friktionen mot kanten av
bussningen att startsnöret slits och går av iförtid.
Håll kvar starthandtaget efter startförsöket
och släpp tillbaka det sakta. Släpp aldrig
starthandtaget helt efter rycket eftersom det kan
trasslasig eller slå sönder något på pumpen.

SVENSKA
20
4. Komma igång
• Läs igenom och förstå hela bruksanvisningen, lär dig var reglagen finns och hur de fungerar.
• Gör dig bekant med pumpen och dess funktion innan du börjar använda den. Lär dig vad
som ska göras för att snabbt minska ev. risker som kan uppkomma.
• Försäkra dig om vilken vätska som ska pumpas. Pumpenär endast avsedd för att pumpa
rent vatten som inte används som dricksvatten.
• Kontrollera att alla muttrar, skruvar, bultar, slangkopplingar och pluggar sitter fast.
• Kontrollera slangarna innan de ansluts till pumpen. Tänk på att sugslangen måste vara av
förstärkt typ så att den inte sugs ihop när pumpen börjar användas.
• Kontrollera att packningen vid anslutningen till sugslangen är oskadad och hel.
• Kontrollera att anslutningar och ev. slangklämmor är åtdragna.
• Kontrollera att ettväl fungerande inloppsfilter är monterat på sugslangen.
• Kontrollera att luftfiltret är helt och rent. Ettsmutsigt luftfilter minskar insugningsluften, och
motorn tappar effekt.
5. Användning
5.1 Säker användning
Innan pumpen används för första gången, läs noggrant igenom denna bruksanvisnings
samtliga delar.
Undvik att starta motorn ien lokal utan ventilation. Avgasernaär mycket farliga att andas in,
deinnehåller giftig koloxid som kan leda till medvetslöshet eller dödsfall.
Pumpa endast vatten som inte är avsett som dricksvatten. Användningav pumpen för pumpning
av brandfarliga vätskor, t.ex. bensin eller eldningsolja, kan leda till explosion eller brand med
mycket svåra skador som följd. Pumpningav havsvatten, syra, kemikalier och andra korrosiva
vätskor kan skada pumpen.
5.2 Placering av pumpen
Den högsta kapaciteten och kortaste sugtiden vid uppstart ger pumpen om den placeras nära
vattenytan. Användinte längre slangar än vad som behövs.
Med ökande uppfodringshöjd minskar pumpens kapacitet. Slangarnastyp, längd och diameter
påverkar också kapaciteten markant.
Tryckhöjden för pumpen är alltid större än sughöjden, vilket gör att sugslangen bör vara så kort
sommöjligt.
Låg sughöjd är också mycket viktigt för att minska sugtiden vid uppstart (den tid som det tar
innan hela pumphuset och sugslangen är fyllda med vatten).
5.3 Montering av sugslang
Sugslangen ska vara försedd med ettinloppsfilter och gärna med enbackventil (backventilen
minskar sugtiden vid uppstart).
Sugslangen ska inte vara längre än vad som behövs, pumpens kapacitet är bäst när pumpen är
nära vattenytan och sugslangen är kort.
Använd aldrig ensugslang som har mindre innerdiameter än 25 mm (1″).
Använd enslangklämma före att fixera sugslangen på inloppet, dra åt hårt så att ingen läcka
finns. Kontrolleraatt inloppets packning är hel.
Montera det bifogade sugfiltret isugslangens andra ände och fixera det med enslangklämma,
inloppsfiltret minskar risken för att pumpen blir igensatt eller skadad av föroreningar.
Table of contents
Languages:
Other CO/Tech Water Pump manuals
Popular Water Pump manuals by other brands

SKC
SKC AirChek 3000 operating instructions

Graco
Graco E-Flo EP G Series repair parts

K2 Pumps
K2 Pumps WPS07505PCK owner's manual

Samoa
Samoa LARIUS GHIBLI 3:1 Operating and maintenance manual

Hartell Pumps
Hartell Pumps LTA-1 Installation operation & maintenance

Gardner Denver
Gardner Denver RFL Series owner's manual

Pentair
Pentair Myers SX Series Installation and service manual

Protege Pumps
Protege Pumps B12 user manual

Goulds
Goulds e-SV instruction manual

GORMAN-RUPP
GORMAN-RUPP 0 SERIES Installation, operation and maintanance manual

Euromate
Euromate VP-280 Original instructions

DAB
DAB MICRA HS Installation and operating instructions