manuals.online logo
Brands
  1. Home
  2. •
  3. Brands
  4. •
  5. Coaguchek
  6. •
  7. Medical Equipment
  8. •
  9. Coaguchek XS System User manual

Coaguchek XS System User manual

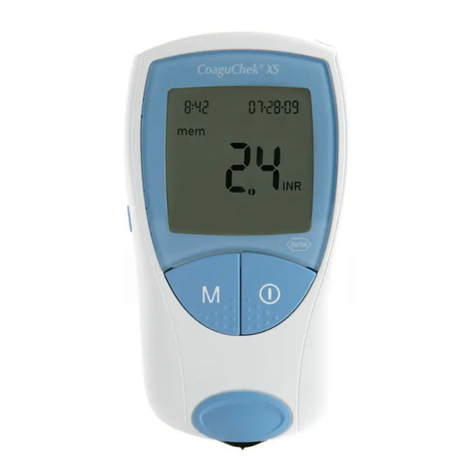
CoaguChek®XS
System
INS ALLING BA ERIES & SE UP
▼
GE ING S AR ED
▼
SE ING DA E AND IME
▼
PREPARING FOR A ES
▼
ES ING
▼
Open the battery compartment
on the back of the meter.
Insert 4 AAA batteries
according to the diagram
inside the battery
compartment.
1. Open Compartment 2. Insert Batteries
1. Start Setup 2. Set Date 3. Set ime 4. Check Display
• CoaguChek XS eter
• Container of test strips
• Test strip code chip
• ACCU-CHEK®Softclix lancet
device and white lancet
The code number on the test
strip container and the code
chip must match.
Each box of t st strips com s with
a matching cod chip. Ev ry tim
you op n a n w box of t st strips,
you must r plac th cod chip.
ake sure the meter is off.
With the code number facing
up, insert the code chip into
the code chip slot until it
snaps into place.
Pull off the cap of the lancet
device. Insert a new white
lancet. Twist off the lancet’s
protective cap. Put the cap
back on the lancet device.
Line up the notches for the
cap to fit.
Before continuing, review
these tips for getting a good
blood drop.
Increasing the blood flow in
your finger will help you get a
good drop of blood:
• Warm your hand. Hold it
under your arm, use a hand
warmer, and/or wash with
warm water.
• Let your arm hang by your side.
• assage your finger from
its base.
Us th s t chniqu s until your
fing rtip has good color.
To set the date and time, you’ll
use these buttons: to
change a setting or (SET)
to accept a setting.
If the meter is not already in
Setup mode, press .
Th dat format flash s in th
upp r right corn r.
Press . Th hour flash s.
to change the hour then .
to change the minutes
then .
Turn the meter off .
Press and hold the ON-OFF
button .
ake sure all the letters,
numbers, and symbols on
the display appear correctly.
S Th M t r’s Display s ction
in th User Manual to s th
full display.
Release .
Turn the meter off .
Wash your hands in warm,
soapy water.
Mak sur your fing rtip is
thoroughly dry.
Take a test strip out of the
container.
Close the container tightly.
You hav 10 minut s to us a
t st strip onc you r mov it
from th contain r.
1. Wash Hands 2. Get Ready
Press . Th y ar flash s.
to change the year then .
to change the month
then .
to change the day then .
Th tim format flash s in th
upp r l ft corn r.
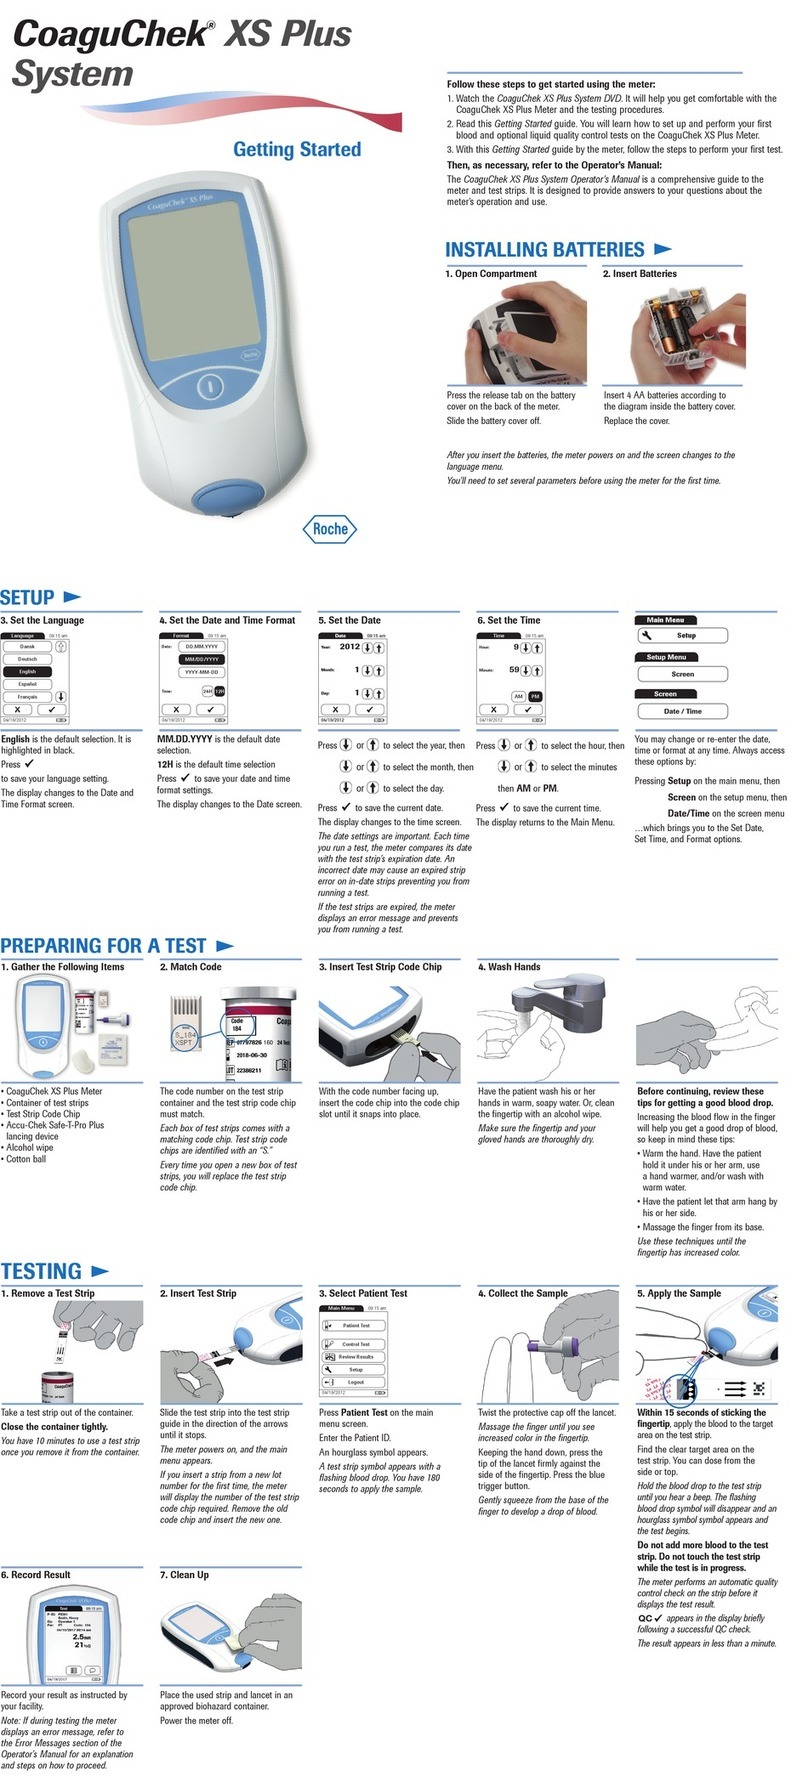
Follow these steps to get started using the meter:
1. Watch the CoaguChek XS System Training DVD. It will help you
get comfortable with the CoaguChek XS eter and the testing
procedure.
2. Read the ACCU-CHEK®Softclix lancet device package insert.
3. With this CoaguChek XS System Getting Started guide by the
meter, follow the steps to perform your first test.
hen, as necessary, refer to the User Manual or Package Insert:
The CoaguChek XS System User Manual is a comprehensive guide
to the meter and test strips. It is designed to provide answers to
your questions about the meter’s operation and use. Also, see the
test strip package insert for more information.
Right after you insert the batteries, you’ll need to set the
date and time.
The date and time settings are important. Each time you run a
test, the meter compares its date with the test strip’s expiration
date. If the test strip is expired, the meter displays an error
message and prevents you from running a test.
Whenever you put batteries in the meter, it automatically goes to
Setup mode (where you set the date and time). You can also go
to Setup mode at any time by pressing the SET button ( ).
Getting Started
1. Gather Items 2. Match Code 3. Insert Code Chip 4. Prepare Lancet Device
THE PANEL BELOW IS THE FRONT COVER.
270034 34685 CoagXS GSG 2G 2/28/07 11:36 AM Page 1
Slide the test strip into the
test strip guide in the
direction of the arrows until
it stops.
Th m t r turns on.
Th cod numb r of th ins rt d
cod chip flash s on th display.
Confirm that the number
displayed matches the
number on the test strip
container, then press .
If th numb rs ar diff r nt, first
mak sur that th corr ct cod
chip is ins rt d. If th numb rs
still don’t match, call th Roch
Diagnostics T chnical S rvic
Cnt r at 1-800-428-4674.
An hourglass app ars as th
mt r warms up. Wh n th m t r
is warm d up, a flashing t st strip
and blood drop app ar and th
mt r b gins a countdown.
You hav 120 s conds to run
th t st.
Set the penetration
depth to 5.
Press the plunger. A yellow
dot appears in the release
button.
Massag your fing r until you
s incr as d color in your
fing rtip.
Keeping your hand down,
press the tip of the lancet
device firmly against the side
of your fingertip. Press the
release button.
G ntly squ z from th bas of
th fing r to d v lop a hanging
drop of blood.
After sticking your fingertip,
you have 15 seconds to apply
the blood to the side of the
test strip.
3. Insert est Strip 4. Match Code 5. Collect Sample 6. Get a Good Blood Drop
Find the target area on the
test strip. Dose the test strip
from the side.
It’s important to hold th
blood drop to th t st strip until
you h ar a b p.
You’ll see the hourglass when
the blood test begins. Then,
pull your finger away from the
test strip.
Remember to apply only one
drop of blood—don’t add
more. Do not touch or remove
the test strip when a test is in
progress.
Th r sult app ars in about
1 minut .
Record the result on the
CoaguChek XS System
Prothrombin Time Self-Testing
Log Book.
Call your doctor with the test
result.
Not : If during t sting th
m t r displays an rror m ssag ,
r f r to th Error M ssag s
s ction of th User Manual for
what to do n xt.
Remove the lancet from the
lancet device. Place the used test
strip and lancet in a puncture-
proof container with a lid.
Turn the meter off.
If th m t r is dirty, wip it cl an
with a lint-fr tissu and an
approv d cl aning solution.
Not : S Cl aning th M t r in
th User Manual for mor
information.
7
. Apply Sample Until
Meter Beeps
8. Record Result 9. Clean Up
ACCU-CHEK, COAGUCHEK, and SOFTCLIX are trademarks of Roche. © 2007 Roche Diagnostics. All rights reserved. 04999037001-0207
If you have questions,
call Roche Diagnostics
Technical Service Center at
1-800-428-4674, 24 hours
a day, 7 days a week,
365 days a year.
270034 34685 CoagXS GSG 2G 2/28/07 11:36 AM Page 2

Other manuals for XS System

3

Other Coaguchek Medical Equipment manuals

Coaguchek XS System User manual

Coaguchek

Coaguchek XS System User manual

Coaguchek INRange User manual

Coaguchek

Coaguchek INRange User manual

Coaguchek XS System User manual

Coaguchek

Coaguchek XS System User manual

Coaguchek XS Plus System User manual

Coaguchek

Coaguchek XS Plus System User manual

Coaguchek XS Pro User manual

Coaguchek

Coaguchek XS Pro User manual

Popular Medical Equipment manuals by other brands

Abbott Tendyne TENDV-LP-29S Instructions for use

Abbott

Abbott Tendyne TENDV-LP-29S Instructions for use

Logiquip LOGICELL user guide

Logiquip

Logiquip LOGICELL user guide

mychway SR-AF1325 user manual

mychway

mychway SR-AF1325 user manual

Respironics Wee Sight 1017920 Instructions for use

Respironics

Respironics Wee Sight 1017920 Instructions for use

Dentatus ARH2 Instructions for use

Dentatus

Dentatus ARH2 Instructions for use

Dr. Clark VariZapper instruction manual

Dr. Clark

Dr. Clark VariZapper instruction manual

SmartLine Medical SmartPack Staff training manual

SmartLine Medical

SmartLine Medical SmartPack Staff training manual

IZI Medical Kiva Procedural Technique Guide

IZI Medical

IZI Medical Kiva Procedural Technique Guide

Rigel PatSim200 quick start guide

Rigel

Rigel PatSim200 quick start guide

Schiller AT-2plus Service handbook

Schiller

Schiller AT-2plus Service handbook

Sonoscape S60 Series quick start guide

Sonoscape

Sonoscape S60 Series quick start guide

COOK Medical I-IGTCFS-426-08 Instructions for use

COOK Medical

COOK Medical I-IGTCFS-426-08 Instructions for use

MICROPOINT qLabs ElectroMeter Q-3 Plus quick start guide

MICROPOINT

MICROPOINT qLabs ElectroMeter Q-3 Plus quick start guide

Sunbeam Products Standard Hot Cold Pack manual

Sunbeam Products

Sunbeam Products Standard Hot Cold Pack manual

Lightmed LightLas 532/670 Operator's manual

Lightmed

Lightmed LightLas 532/670 Operator's manual

Hologic Brevera user guide

Hologic

Hologic Brevera user guide

brewer Flex 5700 Installation & operation manual

brewer

brewer Flex 5700 Installation & operation manual

Sirona TiBase operating instructions

Sirona

Sirona TiBase operating instructions

manuals.online logo
manuals.online logoBrands
  • About & Mission
  • Contact us
  • Privacy Policy
  • Terms and Conditions

Copyright 2025 Manuals.Online. All Rights Reserved.