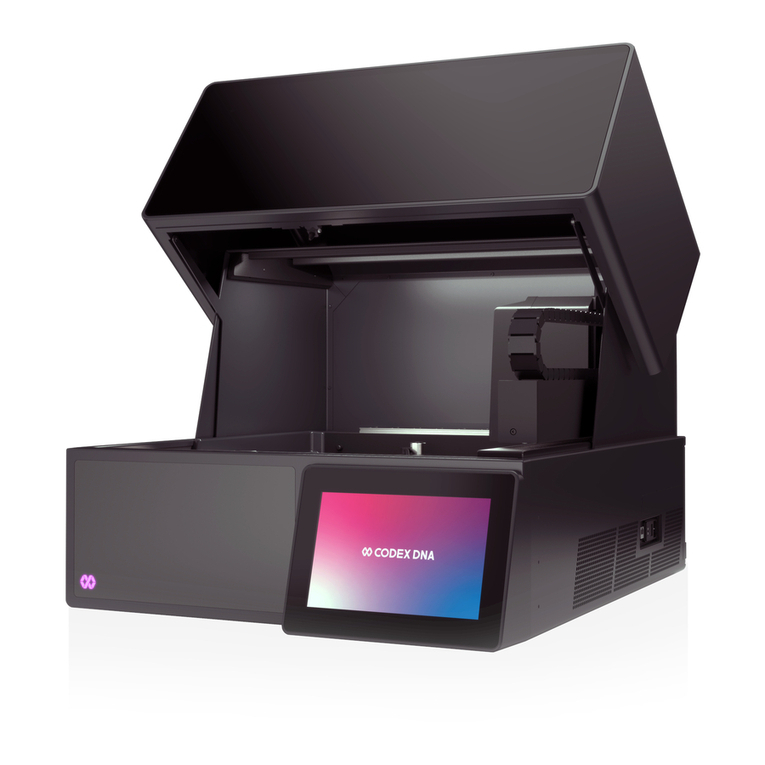
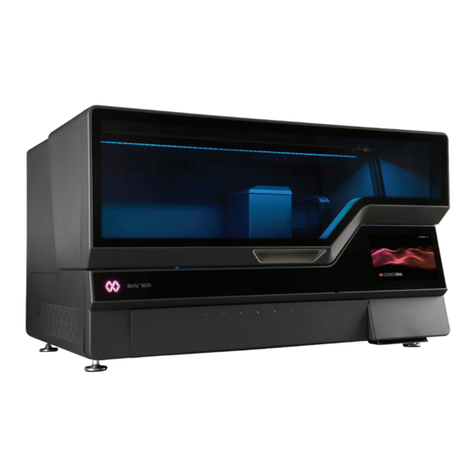
CODEX DNA BioXp 3200 system User manual

Page 2 of 14
Part number 43028 | Version 1.0 | Eective 31JUL2020
© 2020 Codex DNA, Inc. All rights reserved.
Congratulations on the purchase of your BioXp™ 3200 system. This install guide will help you run through the steps required to
set up your BioXp™ system and perform the qualication tests to ensure it’s working properly.
Please coordinate this install with your Codex DNA eld application specialist. Your eld application specialist can help you
through any areas of this procedure where you have questions or require additional help. CAUTION: Read the entire installation
guide before unpacking the BioXp™ system. Adhere to all safety warnings in Safety information and contact contact Codex DNA
customer service at 858.228.4115 or [email protected] immediately if you have any concerns or questions.
Pre-installation checklist
The BioXp™ 3200 system is a self-contained system requiring only power and internet connectivity.
The following checklist will help verify that the installation of the BioXp™ system in your laboratory will go smoothly.
Suitable base or bench space for the instrument:
Size (HxWxD): 86.4 cm x 76.2 cm x 76.2 cm [34”x30”x30”]
Weight capacity: 54.5 kg [120 pounds]
Grounded power source:
110–120 VAC 60 Hz (15A minimum) [220 VAC 50 Hz (7.5A minimum)]
Within 183 cm [6 feet] of the BioXp™ system installation point
Internet connection: It is essential to provide a fast internet connection for the BioXp™ system to support the
electronic transfer of job information between Codex DNA and your lab. Please note that the system can run locally
for installations where there are internet restrictions for instruments such as the BioXp™ system. However, we strongly
suggest you have your BioXp™ system connected to the internet, to take advantage of software updates and remote
troubleshooting, should issues arise. If your system can not connect to the internet, you must notify Codex DNA before
the instrument ships so the system can be set-up accordingly.
Yes: minimum 256 kilobits/sec upload speed (a typical broadband connection or business intranet)
No: Codex DNA customer service notied at hel[email protected]
Dedicated ethernet port: The BioXp™ system uses a web-based ordering system which can be accessed through any
internet browser. Once an order is placed in the system, the BioXp™ system will communicate directly to the Codex
DNA server to retrieve specic run parameters for your job. This connection requires an available ethernet cable
provided by your facility. Please coordinate with your IT department on the internet access, port accessibility, and
website whitelisting.
Standard 10/100/1000BASE-T port
Congured to allow for a port 80/443 connection to the Internet
Within 183 cm [6 feet] of the BioXp™ system installation point
Websites to be whitelisted:
drive.google.com
logmein.com
codexdna.com

Page 3 of 14
Part number 43028 | Version 1.0 | Eective 31JUL2020
© 2020 Codex DNA, Inc. All rights reserved.
Recommended separation distances
The recommended separation distances are based on equipment and systems that are not life-supporting. The BioXp™ system
is intended for use in the electromagnetic environment specied below. The customer or user of the BioXp™ system should
ensure that it is used in such an environment. The BioXp™ system is intended for use in the electromagnetic environment in
which radiated disturbances are controlled. The customer or user of the BioXp™ system can help prevent electromagnetic
interference by maintaining a minimum distance between portable and mobile RF communications equipment and the BioXp™
system as recommended below, according to the maximum output power of the communications equipment.
Rated maximum output
power of transmitter
W
Separation distance according to frequency of transmitter
m
150 kHz to 80 MHz
d = [3.5]√P
________
V1
80 MHz to 800 MHz
d = [3.5]√P
________
E1
800 MHz to 2.5 GHz
d = [3.5]√P
________
E1
0.01 0.12 0.12 0.23
0.1 0.38 0.38 0.73
11.2 1.2 2.3
10 3.8 3.8 7.3
100 12 12 23
For transmitters rated at a maximum output power not listed above, the recommended separation distance din meters (m)
can be estimated using the equation applicable to the frequency of the transmitter, where Pis the maximum output power
rating of the transmitter in watts (W) according to the transmitter manufacturer.
Note 1: At 80 MHz and 800 MHz, the separation distance for the higher frequency range applies.
Note 2: These guidelines may not apply in all situations. Electromagnetic propagation is aected by absorption and
reection from structures, objects, and people.

Page 4 of 14
Part number 43028 | Version 1.0 | Eective 31JUL2020
© 2020 Codex DNA, Inc. All rights reserved.
Safety precautions
Place the instrument on a clean, dry, at surface capable of holding the weight of the system.
Allow 10 cm of clearance on both sides of the instrument for proper ventilation.
Make certain that the power cord connection point is free and clear of obstructions so that it
is easily accessible.
The intended location must be stable so that the instrument will not move or vibrate
excessively when in use.
Avoid dusty areas.
Avoid areas where the instrument would sit in direct sunlight or near a heat source.

Page 5 of 14
Part number 43028 | Version 1.0 | Eective 31JUL2020
© 2020 Codex DNA, Inc. All rights reserved.
Do not set the instrument up where liquids or chemicals are used. Ensure that no liquids are
spilled into the instrument.
Unpacking, setup, and power up
WARNING! Using the BioXp™ system in a manner not specied by Codex may result in damage to the equipment and/or
personal injury.
1. Unfasten the four draw latches on the top and bottom of the crate. Lift and remove the lid and foam cap. Lift the sides
clear of the instrument.
2. Remove the foam packaging materials from the top of the instrument.
3. Carefully coordinate lifting the BioXp™ system o of the pallet with at least two people using proper lifting technique:
4. Making certain the path is clear, carry the instrument and place it on the site prepared according to the requirements
outlined in System site preparation.

Page 6 of 14
Part number 43028 | Version 1.0 | Eective 31JUL2020
© 2020 Codex DNA, Inc. All rights reserved.
5. After removing the power cord from packaging, connect it to the power inlet located on the right rear side panel of the
instrument.
6. Check that the power switch located above the power cord inlet is in the “o” position (0).
7. Connect the instrument to a grounded power outlet.
Note: We recommend connecting the instrument to a 1500 VA/900 W uninterruptible power supply.

Page 7 of 14
Part number 43028 | Version 1.0 | Eective 31JUL2020
© 2020 Codex DNA, Inc. All rights reserved.
Installation guide
This section describes the correct procedures for unpacking
the BioXp™ 3200 system and getting it ready and in position
for commissioning.
The following topics and procedures are described in this
section:
• Site selection
• Unpacking and initial inspection
• Uncrating, setup, and powering up
• Ethernet setup
• System startup self-check
• Installation qualication
Site selection
• The BioXp™ 3200 system has a compact footprint and is
designed to be used in the typical laboratory environment.
Install the instrument in a location that meets the following
requirements:
◦Available power outlet and internet connection through
a wired ethernet connection
◦An available AC power outlet present within 2 meters
of the instrument
◦Place the instrument at least 15 cm away from any wall
on a side to provide adequate ventilation. The unit may
be placed with the back against a wall.
◦The instrument must sit on a clean, dry, at, and level
surface capable of holding the weight of the machine
◦The intended location must be stable so that the
instrument will not move or vibrate excessively when in
use
◦Avoid dusty areas
◦Avoid areas where the instrument would sit in direct
sunlight or near a heat source
◦Avoid areas where accidental reagent spillage could
seep into or onto the instrument
Unpacking and initial inspection
WARNINGS
The BioXp™ 3200 system is heavy. Do not attempt to lift
or move the instrument without the assistance and/or
supervision of colleagues. Be certain to use appropriate
moving equipment and proper lifting techniques (including but
not limited to making certain that you have a secure grip on
the instrument before lifting, keeping your spine in a neutral
position while lifting with your legs, and coordinating lifting and
moving movements with all appropriate personnel). Improper
lifting can cause permanent back injury.
Figure 1

Page 8 of 14
Part number 43028 | Version 1.0 | Eective 31JUL2020
© 2020 Codex DNA, Inc. All rights reserved.
Uncrating, setup, and powering up
1. Remove the quarter turn latches from the crate and lift o
the sides and top.
2. Remove the plastic bag from the top of the unit and pull
down to expose the lower portion of the unit and remove
the accessory box and upper foam support.
3. If possible, lift the pallet approximately 24” o the ground
with a forklift and set it on a sturdy base.
4. Have a movable cart ready which is capable of holding
greater than 200 lbs.
5. Using two people, lift the unit clear of the base and set on
the movable cart.
6. Move the system using the cart to the prepared site.
7. Codex DNA recommends keeping the shipping materials
until installation and acceptance testing have been
completed.
8. Remove tape holding lid and open lid.
9. Remove any tape internal to the system holding the
thermal cycler door closed.
10. Remove the two white covers for the chillers from the
accessory box and place them in the storage locations
(see gure 2).
Figure 2: Thermal cover placement
11. Once in the nal location, the shipping screw needs to be
removed; it is located under the pipette head.
12. Caution: Use care when removing this screw as sharp
edges exist under the head (shown in gure 3). Place the
shipping screw in a safe location for future use.

Page 9 of 14
Part number 43028 | Version 1.0 | Eective 31JUL2020
© 2020 Codex DNA, Inc. All rights reserved.
Figure 3: Shipping screw location (shown with head cover removed)
13. After removing the power cord from packaging, connect
it to the power inlet on the system cart located on the
right rear side panel.
14. Check that the power switch located above the power
cord inlet is in the “o” position (0).
15. Connect the system to a grounded power outlet.
16. Switch on the power at the power inlet.
17. The system will boot up, perform a self-check, and
present the BioXp™ 3200 home screen once complete.
18. The system is now ready to operate.
Ethernet setup
The BioXp™ 3200 system requires an internet connection.
To set up the internet connection:
1. Connect an ethernet cable from the access panel located
on the right side of the unit to an available ethernet
connector located in your lab.
1. The BioXp™ system will need port 80/443 connections
opened on your network to access the Internet.
1. The following websites must be whitelisted for the BioXp™
system to communicate with the Codex DNA server and
for remote troubleshooting activities: drive.google.com,
logmein.com and codexdna.com
System startup self-check
The BioXp™ 3200 system contains a self-check process which
veries the correct functionality of motion control and other
internal systems of the instrument. You may notice the system
performing these tests when it starts up. If the system is
unable to perform a successful self-check, it will alert the user
to the problem and will prevent the system from operating until
the problem has been addressed.
The self-check process has been carefully developed to
ensure that the BioXp™ system is operating within optimal
calibration ranges, and that all systems are functioning
correctly.
Please check that the globe in the upper right is spinning;
this indicates that the system is connected to the internet
and to the Codex DNA server. If the globe is grayed out,
please check that internet connection requirements are met.
If the issue persists, contact Codex DNA customer service at

Page 10 of 14
Part number 43028 | Version 1.0 | Eective 31JUL2020
© 2020 Codex DNA, Inc. All rights reserved.
Installation qualication
You should have received two jobs in your install kit.
1. A non-biological test with the construct plate, in a white
carrier and black metal cover labeled DEMO. An empty
but sealed reagent block is also included, in addition to
an empty green output plate.
2. A biologic control test labeled 45PC. This kit includes the
construct plate with dried-down DNA, a reagent block, a
purication strip well, an empty green output plate, and a
set of three white- and one black-tip racks.
Demo run
After initial installation has been completed, the next step is to
run the DEMO kit.
1. Load the DEMO job Oligo Vault, including the
accompanying DEMO reagent block and empty output
plate as shown in gure 4 and close the door.
2. The job will take several minutes to run. It will test all of
the movement functions and plate location calibrations.
3. The following operations are performed during the
DEMO job:
• Plate press functions:
Output plate
Reagent plate
Construct Plate
• Construct plate functions
Placement of cover onto stand and back
Movement of construct plate to magnet stand and
back
• Thermal cycler
Door open and close
• Cover movement
Cover, reagent chiller from storage location to
reagent plate and back
Cover, output chiller from storage location to output
plate and back
BioXp™ DNA
Assembly Plate
P/N: BX1230-XX
Lot: 123
MFG date: 01/01/2020
BioXp™ 3200
Oligo vault
Reagent block
Oligo Vault™
Output plate
Figure 4: Correct placement of the DEMO job components
Conrm that all deck locations are correct as shown in gure
5, and that the machine displays no errors. Observe that all
plate captures and releases are clean and without any out-of-
the-ordinary sounds or sudden motions. Report any issues to
your Codex DNA eld application specialist.
BioXp™ DNA
Assembly Plate
P/N: BX1230-XX
Lot: 123
MFG date: 01/01/2020
BioXp™ 3200
Oligo vault
Oligo Vault™
Cover
Output plate
Figure 5: Correct placement of the DEMO components after the run

Page 11 of 14
Part number 43028 | Version 1.0 | Eective 31JUL2020
© 2020 Codex DNA, Inc. All rights reserved.
After successfully running the DEMO kit, please run the 45PC control.
Biological QC
Each BioXp™ system fragment kit includes module A (+4 °C) and module B (−20 °C).
1. If the door is closed, select Unlock Door from the instrument LCD screen and open the door.
2. Thaw the DNA assembly reagent plate (at 25 °C for 1 hour or on ice for at least 3 hours).
3. Load tips by aligning the tip tray notch with the upper left corner of each tip tray retainer.
Load 3 x 50 µL tips
Load 1 x 200 µL tips
4. Add a minimum of 12 mL freshly prepared 70% ethanol to the reusable ethanol reservoir.
Load ethanol reservoir in the right-most reservoir retainer position of the instrument deck.
Note: Do not discard the ethanol reservoir after the run; keep for future use.
5. Load plates stored at 4 °C:
Load the recovery plate onto the recovery chiller with the notch in the upper left corner.
Load the Oligo Vault™ plate so that the notch is positioned in the upper left corner of the thermocycler
6. Briey spin the DNA purication strip for 1 to 3 seconds.
Load the black DNA purication strip into the #1 position (left-most) with the strip pinhole closest to the front of the
instrument.
7. Secure strips with the spring-loaded arms while holding strips securely in place.
8. Visually inspect the wells to ensure they are completely thawed. Spin the thawed DNA assembly reagent plate for 1 minute
at 500 rpm.
Load DNA assembly reagent plate onto reagent chiller; notch in the lower left corner.
Note: Be certain that the plate is properly seated within the chiller and that the barcode is on the right.
9. Refer to the image on the following page. Conrm that all components are securely seated. Close the door.
10. After the deck inspection, press Start Now or Delay Start (no more than 2 hours) to begin the run. The run will take
approximately 13 hours.

Page 12 of 14
Part number 43028 | Version 1.0 | Eective 31JUL2020
© 2020 Codex DNA, Inc. All rights reserved.
Loaded deck at beginning of run Deck at run completion
. . . .
BioXp™ DNA
Assembly Plate
P/N: BX1230-XX
Lot: 123
MFG date: 01/01/2020
BioXp™ 3200
Oligo vault
. . . .
BioXp™ DNA
Assembly Plate
P/N: BX1230-XX
Lot: 123
MFG date: 01/01/2020
BioXp™ 3200
Oligo vault
Ethanol
reservoir
Thermal
cover
Oligo Vault™
Recovery
plate
DNA
assembly
reagent
plate
50 μL
tips 50 μL
tips
50 μL
tips 200 μL
tips
Oligo
Vault™
Recovery
plate
(keep)
Vector strips
45PC panel 32-construct panel post-run analysis
Use these steps to evaluate the success of the assembly
reaction following the 45PC test run.
45PC control panel expected results
Perform gel electrophoresis using 2% agarose of ~5 µL of the
BioXp™ fragments from zone 1 (positions A1–H4) of the recovery
plate shown in gure 6. The quality of the BioXp™ fragments
is a key indicator of overall assembly process and successful
results ensure the BioXp™ system is correctly installed and is
working properly.
Plate: 1.1.4.1418082298
Order: 4
Date: December 08, 2020
Customer: Codex DNA
Project STOCK 32
Sequences: Control + 31
1 2 3 4 5 6 7 8 9 10 11 12
A
B
C
D
E
F
G
H
A1: 1416 bp control
B1: 1416 bp control
C1: 1416 bp control
D1: 1416 bp control
E1: 1416 bp control
F1: 1416 bp control
G1: 1416 bp control
H1: 1416 bp control
A2: 1416 bp control
B2: 1416 bp control
C2: 1416 bp control
D2: 1416 bp control
E2: 1416 bp control
F2: 1416 bp control
G2: 1416 bp control
H2: 1416 bp control
A3: 1416 bp control
B3: 1416 bp control
C3: 1416 bp control
D3: 1416 bp control
E3: 1416 bp control
F3: 1416 bp control
G3: 1416 bp control
H3: 1416 bp control
A4: 1416 bp control
B4: 1416 bp control
C4: 1416 bp control
D4: 1416 bp control
E4: 1416 bp control
F4: 1416 bp control
G4: 1416 bp control
H4: 1416 bp control
Figure 6. 45PC product output map

Page 13 of 14
Part number 43028 | Version 1.0 | Eective 31JUL2020
© 2020 Codex DNA, Inc. All rights reserved.
These gel images show an example of a completed 45PC run
with the assembled fragment of interest clearly distinguishable
and similar quantity of product.
Verify the intensity of the bands on the gel is similar to the
above image.
All lanes veried
Yes
No
Initials: __________

Page 14 of 14
Part number 43028 | Version 1.0 | Eective 31JUL2020
© 2020 Codex DNA, Inc. All rights reserved.
Customer acceptance
This is to conrm that the BioXp™ 3200 system installation has been completed and that all the items on this acceptance form
have been achieved and demonstrated.
By signing this form, the customer accepts title or responsibility of this instrument and gives Codex DNA, Inc. the approval to
invoice the customer via the agreed upon terms of sale or placement.
Instrument install date
Serial number
Customer name
Company or institution
Customer address
Phone number
Fax number
Email address
Application
Customer signature
Date
Internet connection mode Local Online
Email a copy of the completed remote installation and sign-o, along with images of the gel from the 45PC test run, to
orders@codexdna.com. Retain the original for your records.
Table of contents
Other CODEX DNA Laboratory Equipment manuals
Popular Laboratory Equipment manuals by other brands

Endress+Hauser
Endress+Hauser CAT820 operating instructions

Sonic
Sonic Sonolator Operating instructions manual

Troxler
Troxler 4140 Manual of Operation and Maintenance

Hakko Electronics
Hakko Electronics FT-8003 instruction manual

vitro
vitro Vitrolux H V2 user manual

Witeg
Witeg Wisd WiseTherm HP-A operating manual

Flight Dental Systems
Flight Dental Systems Clave 23+ instruction manual

Milestone
Milestone HistoDream M Operator's manual

Agilent Technologies
Agilent Technologies 7200 Operation manual

SUSS
SUSS PM5 manual

Olympus
Olympus AL120-6 Series Operation manual

Thermo Scientific
Thermo Scientific TELESHAKE 1536-6 operating manual