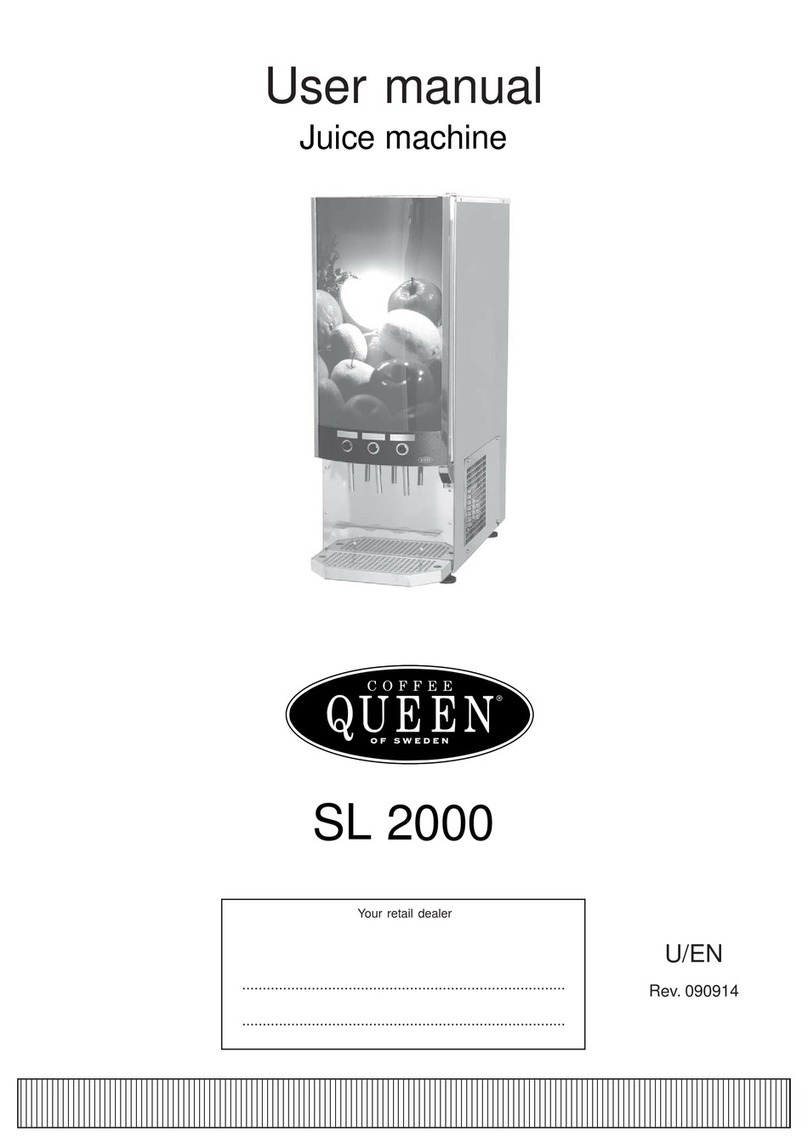
Coffee Queen SUNNY OUTSIDE User manual

Rev. 100426
U / GB
12345678901234567890123456789012123456789012345678901234567890121234567890123456789012345678901212345678901234567890123456789012123456789012345678901
12345678901234567890123456789012123456789012345678901234567890121234567890123456789012345678901212345678901234567890123456789012123456789012345678901
12345678901234567890123456789012123456789012345678901234567890121234567890123456789012345678901212345678901234567890123456789012123456789012345678901
12345678901234567890123456789012123456789012345678901234567890121234567890123456789012345678901212345678901234567890123456789012123456789012345678901
12345678901234567890123456789012123456789012345678901234567890121234567890123456789012345678901212345678901234567890123456789012123456789012345678901
12345678901234567890123456789012123456789012345678901234567890121234567890123456789012345678901212345678901234567890123456789012123456789012345678901
12345678901234567890123456789012123456789012345678901234567890121234567890123456789012345678901212345678901234567890123456789012123456789012345678901
12345678901234567890123456789012123456789012345678901234567890121234567890123456789012345678901212345678901234567890123456789012123456789012345678901
12345678901234567890123456789012123456789012345678901234567890121234567890123456789012345678901212345678901234567890123456789012123456789012345678901
12345678901234567890123456789012123456789012345678901234567890121234567890123456789012345678901212345678901234567890123456789012123456789012345678901
12345678901234567890123456789012123456789012345678901234567890121234567890123456789012345678901212345678901234567890123456789012123456789012345678901
User manual
Your retail dealer
...............................................................................
...............................................................................
SUNNY OUTSIDE

2.
List of contents
List of contents page 2
Dispenser description page 3
Dispenser description of parts page 4-8
Installation and users instruction page 9-10
Trouble shooting page 11
Spare parts list page 12
Technical datapage 13
Notes page 13
Maintenanceandcleaning
Handlingandcleaninginstructions
Electricalconnections
Explodedview

12345678901234567890123456789012123456789012345678901234567890121234567890123456789012345678901212345678901234567890123456789012123456789012345678901
12345678901234567890123456789012123456789012345678901234567890121234567890123456789012345678901212345678901234567890123456789012123456789012345678901
12345678901234567890123456789012123456789012345678901234567890121234567890123456789012345678901212345678901234567890123456789012123456789012345678901
12345678901234567890123456789012123456789012345678901234567890121234567890123456789012345678901212345678901234567890123456789012123456789012345678901
12345678901234567890123456789012123456789012345678901234567890121234567890123456789012345678901212345678901234567890123456789012123456789012345678901
12345678901234567890123456789012123456789012345678901234567890121234567890123456789012345678901212345678901234567890123456789012123456789012345678901
12345678901234567890123456789012123456789012345678901234567890121234567890123456789012345678901212345678901234567890123456789012123456789012345678901
12345678901234567890123456789012123456789012345678901234567890121234567890123456789012345678901212345678901234567890123456789012123456789012345678901
3.
Generally!
Read the instructions carefully before you start working with this equipment.
The equipment should be installed and serviced by trained staff
Dispenser
Dispenser description for Sunny outside
Sunny outside is a dispenser for cooling water and mixing juiceconcentrate
to a ready to drink product.The dispenser is for two non-carbonated
drinks and chilled water.
The dispenser is connected to the water mains by a pressurised tube and to
an electric wall socket by a power plug.
Thewater-pressureisadjusted with the water-regulator and thepressureis
displayedonthemanometer.
Thewater is chilled bythe cooling-block, which inits turn is chilledby the aircooled
compressor.
Thewater-temperatureisadjustablewithathermostat.
Themixingratioproduct/water is adjusted with theejectors.
Pushingoneofthefour buttons on the frontpaneldispensesthemixed
productorwater.

12345678901234567890123456789012123456789012345678901234567890121234567890123456789012345678901212345678901234567890123456789012123456789012345678901
12345678901234567890123456789012123456789012345678901234567890121234567890123456789012345678901212345678901234567890123456789012123456789012345678901
12345678901234567890123456789012123456789012345678901234567890121234567890123456789012345678901212345678901234567890123456789012123456789012345678901
12345678901234567890123456789012123456789012345678901234567890121234567890123456789012345678901212345678901234567890123456789012123456789012345678901
12345678901234567890123456789012123456789012345678901234567890121234567890123456789012345678901212345678901234567890123456789012123456789012345678901
12345678901234567890123456789012123456789012345678901234567890121234567890123456789012345678901212345678901234567890123456789012123456789012345678901
12345678901234567890123456789012123456789012345678901234567890121234567890123456789012345678901212345678901234567890123456789012123456789012345678901
12345678901234567890123456789012123456789012345678901234567890121234567890123456789012345678901212345678901234567890123456789012123456789012345678901
4.
Dispenser description
Picture description
Water-regulator with manometer
Thewater-regulatorcan be adjusted upto6 bar.
The minimum pressure is 2,2 bar.
Note!Whenadjustingthe pressure, dispense product.
Venturi ejector
Themixingratio is adjusted ontheejectors. When water
flowsthroughtheejector,theconcentratemixeswiththe
water.
Themixing ratio isregulated on theejector. There are
twokinds, one for productswith cells, and onefor
productswithoutcells.
Turn the adjustmentscrewsaccordingtothelabelonthe
ejector in order to increase or decrease the amount of
concentrate.

12345678901234567890123456789012123456789012345678901234567890121234567890123456789012345678901212345678901234567890123456789012123456789012345678901
12345678901234567890123456789012123456789012345678901234567890121234567890123456789012345678901212345678901234567890123456789012123456789012345678901
12345678901234567890123456789012123456789012345678901234567890121234567890123456789012345678901212345678901234567890123456789012123456789012345678901
12345678901234567890123456789012123456789012345678901234567890121234567890123456789012345678901212345678901234567890123456789012123456789012345678901
12345678901234567890123456789012123456789012345678901234567890121234567890123456789012345678901212345678901234567890123456789012123456789012345678901
12345678901234567890123456789012123456789012345678901234567890121234567890123456789012345678901212345678901234567890123456789012123456789012345678901
12345678901234567890123456789012123456789012345678901234567890121234567890123456789012345678901212345678901234567890123456789012123456789012345678901
12345678901234567890123456789012123456789012345678901234567890121234567890123456789012345678901212345678901234567890123456789012123456789012345678901
12345678901234567890123456789012123456789012345678901234567890121234567890123456789012345678901212345678901234567890123456789012123456789012345678901
5.
Dispenser description
Picture description
Water valve
TheWatervalveis connected to the ejectorand
opensthewater-flow.
Push-button
Thepushbuttonsonthefrontpanel
controlsthewater valves.
Useonlyonebutton at a time.

12345678901234567890123456789012123456789012345678901234567890121234567890123456789012345678901212345678901234567890123456789012123456789012345678901
12345678901234567890123456789012123456789012345678901234567890121234567890123456789012345678901212345678901234567890123456789012123456789012345678901
12345678901234567890123456789012123456789012345678901234567890121234567890123456789012345678901212345678901234567890123456789012123456789012345678901
12345678901234567890123456789012123456789012345678901234567890121234567890123456789012345678901212345678901234567890123456789012123456789012345678901
12345678901234567890123456789012123456789012345678901234567890121234567890123456789012345678901212345678901234567890123456789012123456789012345678901
12345678901234567890123456789012123456789012345678901234567890121234567890123456789012345678901212345678901234567890123456789012123456789012345678901
12345678901234567890123456789012123456789012345678901234567890121234567890123456789012345678901212345678901234567890123456789012123456789012345678901
12345678901234567890123456789012123456789012345678901234567890121234567890123456789012345678901212345678901234567890123456789012123456789012345678901
12345678901234567890123456789012123456789012345678901234567890121234567890123456789012345678901212345678901234567890123456789012123456789012345678901
6.
Dispenser description
Picture description
Transformer
The transformer is a 230 / 24 V (15 VA).
Thetransformersupplies24 V to the magnetic-valves.
Thermostat
Thethermostatkeepsthetemperaturewithincorrect
range.Factoryadjusteddo not adjust, thismaycause
damage and water leakage in the dispenser.
Illumination
Behindthefrontpanelthereisalow-energyfluorescent
lampwith theeffectoff7 W.

12345678901234567890123456789012123456789012345678901234567890121234567890123456789012345678901212345678901234567890123456789012123456789012345678901
12345678901234567890123456789012123456789012345678901234567890121234567890123456789012345678901212345678901234567890123456789012123456789012345678901
12345678901234567890123456789012123456789012345678901234567890121234567890123456789012345678901212345678901234567890123456789012123456789012345678901
12345678901234567890123456789012123456789012345678901234567890121234567890123456789012345678901212345678901234567890123456789012123456789012345678901
12345678901234567890123456789012123456789012345678901234567890121234567890123456789012345678901212345678901234567890123456789012123456789012345678901
12345678901234567890123456789012123456789012345678901234567890121234567890123456789012345678901212345678901234567890123456789012123456789012345678901
12345678901234567890123456789012123456789012345678901234567890121234567890123456789012345678901212345678901234567890123456789012123456789012345678901
12345678901234567890123456789012123456789012345678901234567890121234567890123456789012345678901212345678901234567890123456789012123456789012345678901
12345678901234567890123456789012123456789012345678901234567890121234567890123456789012345678901212345678901234567890123456789012123456789012345678901
7.
Dispenser description
Picture description
Front panel
Thefront panel is divided inthree parts.
Two plastic sheets (made off acrylic and opaque) and in
betweenthesea film.
Allparts are removable.
Drip-tray
The drip-tray is made of stainless steel with steel bars.
It is possible to connect drainage to the drip-tray.
Large particle-filter
A large particle-filter is fitted between the cooling block
andthewatervalves.
It is possible to rinse the filter if needed.

12345678901234567890123456789012123456789012345678901234567890121234567890123456789012345678901212345678901234567890123456789012123456789012345678901
12345678901234567890123456789012123456789012345678901234567890121234567890123456789012345678901212345678901234567890123456789012123456789012345678901
12345678901234567890123456789012123456789012345678901234567890121234567890123456789012345678901212345678901234567890123456789012123456789012345678901
12345678901234567890123456789012123456789012345678901234567890121234567890123456789012345678901212345678901234567890123456789012123456789012345678901
12345678901234567890123456789012123456789012345678901234567890121234567890123456789012345678901212345678901234567890123456789012123456789012345678901
12345678901234567890123456789012123456789012345678901234567890121234567890123456789012345678901212345678901234567890123456789012123456789012345678901
12345678901234567890123456789012123456789012345678901234567890121234567890123456789012345678901212345678901234567890123456789012123456789012345678901
12345678901234567890123456789012123456789012345678901234567890121234567890123456789012345678901212345678901234567890123456789012123456789012345678901
8.
Installation and users instruction
Picture description
Unpack dispenser from the packaging and ensure
that nothing is damaged.
Place the dispenser to it´s position. Note:
The dispenser weights about 30 kg.
Don’t lift by door/front panel.
Allow a space of min. 40mm around the
frame for air circulation.
Makesurethatthe dispenser level.
Adjustment can be made with the adjustable feet .
Dispenser description

12345678901234567890123456789012123456789012345678901234567890121234567890123456789012345678901212345678901234567890123456789012123456789012345678901
12345678901234567890123456789012123456789012345678901234567890121234567890123456789012345678901212345678901234567890123456789012123456789012345678901
12345678901234567890123456789012123456789012345678901234567890121234567890123456789012345678901212345678901234567890123456789012123456789012345678901
12345678901234567890123456789012123456789012345678901234567890121234567890123456789012345678901212345678901234567890123456789012123456789012345678901
12345678901234567890123456789012123456789012345678901234567890121234567890123456789012345678901212345678901234567890123456789012123456789012345678901
12345678901234567890123456789012123456789012345678901234567890121234567890123456789012345678901212345678901234567890123456789012123456789012345678901
12345678901234567890123456789012123456789012345678901234567890121234567890123456789012345678901212345678901234567890123456789012123456789012345678901
12345678901234567890123456789012123456789012345678901234567890121234567890123456789012345678901212345678901234567890123456789012123456789012345678901
12345678901234567890123456789012123456789012345678901234567890121234567890123456789012345678901212345678901234567890123456789012123456789012345678901
9.
Installation and users instruction
Picture description
Connect the water-hose from the dispenser to the
cold water mains (do not forget seals).
Turn on the water and check for leaks.
Note!
It is strongly recommended to use some sort of
water isolator in the water line in case of an
emergency leakage.
Connectthepower-plugtothewall socket.
Now the compressor starts and the front panel
lights up.
Thewaterpressure is factory adjusted to
2.5bar,which is the correct workingpressure.
Checkbypressing and holdingone product button and
readingthemanometer. If thereisvariationsadjustby
pullingblackknob and turn ituntilyou get a readingof
2.5 bar.

12345678901234567890123456789012123456789012345678901234567890121234567890123456789012345678901212345678901234567890123456789012123456789012345678901
12345678901234567890123456789012123456789012345678901234567890121234567890123456789012345678901212345678901234567890123456789012123456789012345678901
12345678901234567890123456789012123456789012345678901234567890121234567890123456789012345678901212345678901234567890123456789012123456789012345678901
12345678901234567890123456789012123456789012345678901234567890121234567890123456789012345678901212345678901234567890123456789012123456789012345678901
12345678901234567890123456789012123456789012345678901234567890121234567890123456789012345678901212345678901234567890123456789012123456789012345678901
12345678901234567890123456789012123456789012345678901234567890121234567890123456789012345678901212345678901234567890123456789012123456789012345678901
12345678901234567890123456789012123456789012345678901234567890121234567890123456789012345678901212345678901234567890123456789012123456789012345678901
12345678901234567890123456789012123456789012345678901234567890121234567890123456789012345678901212345678901234567890123456789012123456789012345678901
12345678901234567890123456789012123456789012345678901234567890121234567890123456789012345678901212345678901234567890123456789012123456789012345678901
10.
Installation and users instruction
Picture description
Place the bag-in-box underneth the dispenser and
connect it to the tube going up to the dispenser.
Place a cup under the outlet pipe.
Dispense a glass of product by pressing
the push-button.
Check that the brix-value (mixing ratio) is
okay, if not adjust.
Toadjustthebrix,usetheadjustmentscrewontheejector.
The dispenser is now ready to use

12345678901234567890123456789012123456789012345678901234567890121234567890123456789012345678901212345678901234567890123456789012123456789012345678901
12345678901234567890123456789012123456789012345678901234567890121234567890123456789012345678901212345678901234567890123456789012123456789012345678901
12345678901234567890123456789012123456789012345678901234567890121234567890123456789012345678901212345678901234567890123456789012123456789012345678901
12345678901234567890123456789012123456789012345678901234567890121234567890123456789012345678901212345678901234567890123456789012123456789012345678901
12345678901234567890123456789012123456789012345678901234567890121234567890123456789012345678901212345678901234567890123456789012123456789012345678901
12345678901234567890123456789012123456789012345678901234567890121234567890123456789012345678901212345678901234567890123456789012123456789012345678901
12345678901234567890123456789012123456789012345678901234567890121234567890123456789012345678901212345678901234567890123456789012123456789012345678901
12345678901234567890123456789012123456789012345678901234567890121234567890123456789012345678901212345678901234567890123456789012123456789012345678901
11.
Trouble shooting
Problem Probable cause Attend to
Mostlywateroronly
watercoming from
outletpipe
The bag is empty.Replace bag.
Theconcentratetubesisnot
cleanedproperly.
Nopower to the machine. Check that machine is
connectedtothewall socket
Flushtheconcentratetubes
withhotwater.
Nothinghappens
whenI pushthe
buttons,andthereis
no”clicking”sound. Thermofuseinthetransformer
hascut.(On older models, a fuse
hasblown).
Removepowerto the
dispenser and put it back
on after 10 sec.(Change
fuse).
Nothinghappenswhenyou
pushthebuttons,and
there is a ”clicking”sound.
Water supplyturnedoff. Checkwatersupply
Water regulator turned off
or failed.
(Manometer=0bar).
Checkwaterregulator
(changeneedlevalvein
waterregulator).
Thecooling coilhas
frozen.
(Manometer=max pressure)
Shutoffwatersupplyand
Call service.
Thetaste isto strong/ weak.
The dispenser is not
cleanedproperly.Flushconcentratetubesand
cleanoutletpipes.
Theejectoris not adjusted
correctly.Call service.
Itconstantlydripsfluidfrom
theoutletpipes. Dirtinthewater valve.
Troubleswithcooling
system.
Thedrinksare not cold. Failure in thermostat.
Failureincooling system.
Call service.
Call service.
Call service.
Call service.

12345678901234567890123456789012123456789012345678901234567890121234567890123456789012345678901212345678901234567890123456789012123456789012345678901
12345678901234567890123456789012123456789012345678901234567890121234567890123456789012345678901212345678901234567890123456789012123456789012345678901
12345678901234567890123456789012123456789012345678901234567890121234567890123456789012345678901212345678901234567890123456789012123456789012345678901
12345678901234567890123456789012123456789012345678901234567890121234567890123456789012345678901212345678901234567890123456789012123456789012345678901
12345678901234567890123456789012123456789012345678901234567890121234567890123456789012345678901212345678901234567890123456789012123456789012345678901
12345678901234567890123456789012123456789012345678901234567890121234567890123456789012345678901212345678901234567890123456789012123456789012345678901
12345678901234567890123456789012123456789012345678901234567890121234567890123456789012345678901212345678901234567890123456789012123456789012345678901
12345678901234567890123456789012123456789012345678901234567890121234567890123456789012345678901212345678901234567890123456789012123456789012345678901
12345678901234567890123456789012123456789012345678901234567890121234567890123456789012345678901212345678901234567890123456789012123456789012345678901
12.
Spare parts list
Pos. Article no Description.
1S302019 Push button
2S302081 Transformer
3S302022 Thermostat
4S302037 Water hose, 3m
5S124008 Gasket, 3/8", 15x9x2- fiber
6Relief nipple 3/8"- 1/4"
7S302318 Water regulator
8S302319 Manometer
9S302005 Venturi by-pass ejector 1/8"
10 S302004 Ejector 1/8"
11 180108 90 degress nippel for 8mm hose
12 S302157 Water valve 24V
13 S109043 Cobra-fit , an angle of 90 degrees with 5/16 - 3/8
14 S125001 Isolation6x8
15 S111013 TubeSyrup
16 S111013 TubeSyrup
17 S302109 Feet
18 S302011Onewayvalve
19 S302054 BagconnectorVITOP
20 S302031 Plugg for drip tray
21 S302075 CompressorElectroluxGL80TB

1234567890123456789012345678901212345678901234567890123456789012123456789012345678901234567890121234567890123456789012345678901212345678901234567890
1234567890123456789012345678901212345678901234567890123456789012123456789012345678901234567890121234567890123456789012345678901212345678901234567890
1234567890123456789012345678901212345678901234567890123456789012123456789012345678901234567890121234567890123456789012345678901212345678901234567890
1234567890123456789012345678901212345678901234567890123456789012123456789012345678901234567890121234567890123456789012345678901212345678901234567890
1234567890123456789012345678901212345678901234567890123456789012123456789012345678901234567890121234567890123456789012345678901212345678901234567890
1234567890123456789012345678901212345678901234567890123456789012123456789012345678901234567890121234567890123456789012345678901212345678901234567890
1234567890123456789012345678901212345678901234567890123456789012123456789012345678901234567890121234567890123456789012345678901212345678901234567890
1234567890123456789012345678901212345678901234567890123456789012123456789012345678901234567890121234567890123456789012345678901212345678901234567890
13.
Technical data
Electrical connection 230 V/50 Hz/ 2,5A
Water connection 3,0mTube with 3/8"internalthread(minimum 2,5bar
Compressor ElektroluxGL80
Cooling gas R134AAmount to fill 210 gram
Cooling capacity 379 W
Cooling system Dry block with stainless-steel pipes inside.
Front light 5WFluorescent-tube
Front sign size 265 x 130 mm
(17 mm must be transparent,Applies on the
bottom part of the sign.
Dispenser measurement Height 400mm With 250mm Depth 510mm
Weight 29,5 Kg
Note 1. Thethermostatisfactoryadjusted and improper adjustment
may cause the cooling system to freeze causing damage or
water leakage in the dispenser.
Note2. It is strongly recommended to use some sort of water
isolator in the water line in case of an emergency leakage.
Note 3. Maximumambienttemperaturein the room where thedispenser
is located should not exceed more then 25 C.
Note 4. Ifthedispenserhasfrozen,checkwater tubs and connections
inside the dispenser before running the dispenser again.
Notes

SUNNY OUTSIDESUNNY OUTSIDE
SUNNY OUTSIDE
Juice machine
COFFEE QUEEN
Art. nr. 1704454
FOR SERVICE
Please contact your retail dealer
Din återförsäljare
...............................................................................
...............................................................................
...............................................................................
COFFEE QUEEN AB, Box 960, 671 29 ARVIKA, besöksadress; Korpralsv 1B,
Tel vxl;+46 (0)570-47700, Fax; +46(0)570-47719
E-mail:info@coffeequeen.se www.coffeequeen.se
Table of contents
Other Coffee Queen Dispenser manuals