Comfort Blinds Cordless Roman User manual

BASICS
A few simple tools are required:
- Measuring tape
- Power drill, drill bits
- Hex head and/or Phillips driver bit
- Pencil
Additional fasteners other than those sent with your shade may be
required depending on the mounting surface. Wallboard and plaster
require the use of anchors such as expansion or toggle bolts. Brick,
tile or stone need special plugs and drill bits. Remember to always
pre-drill holes in wood to avoid splitting.
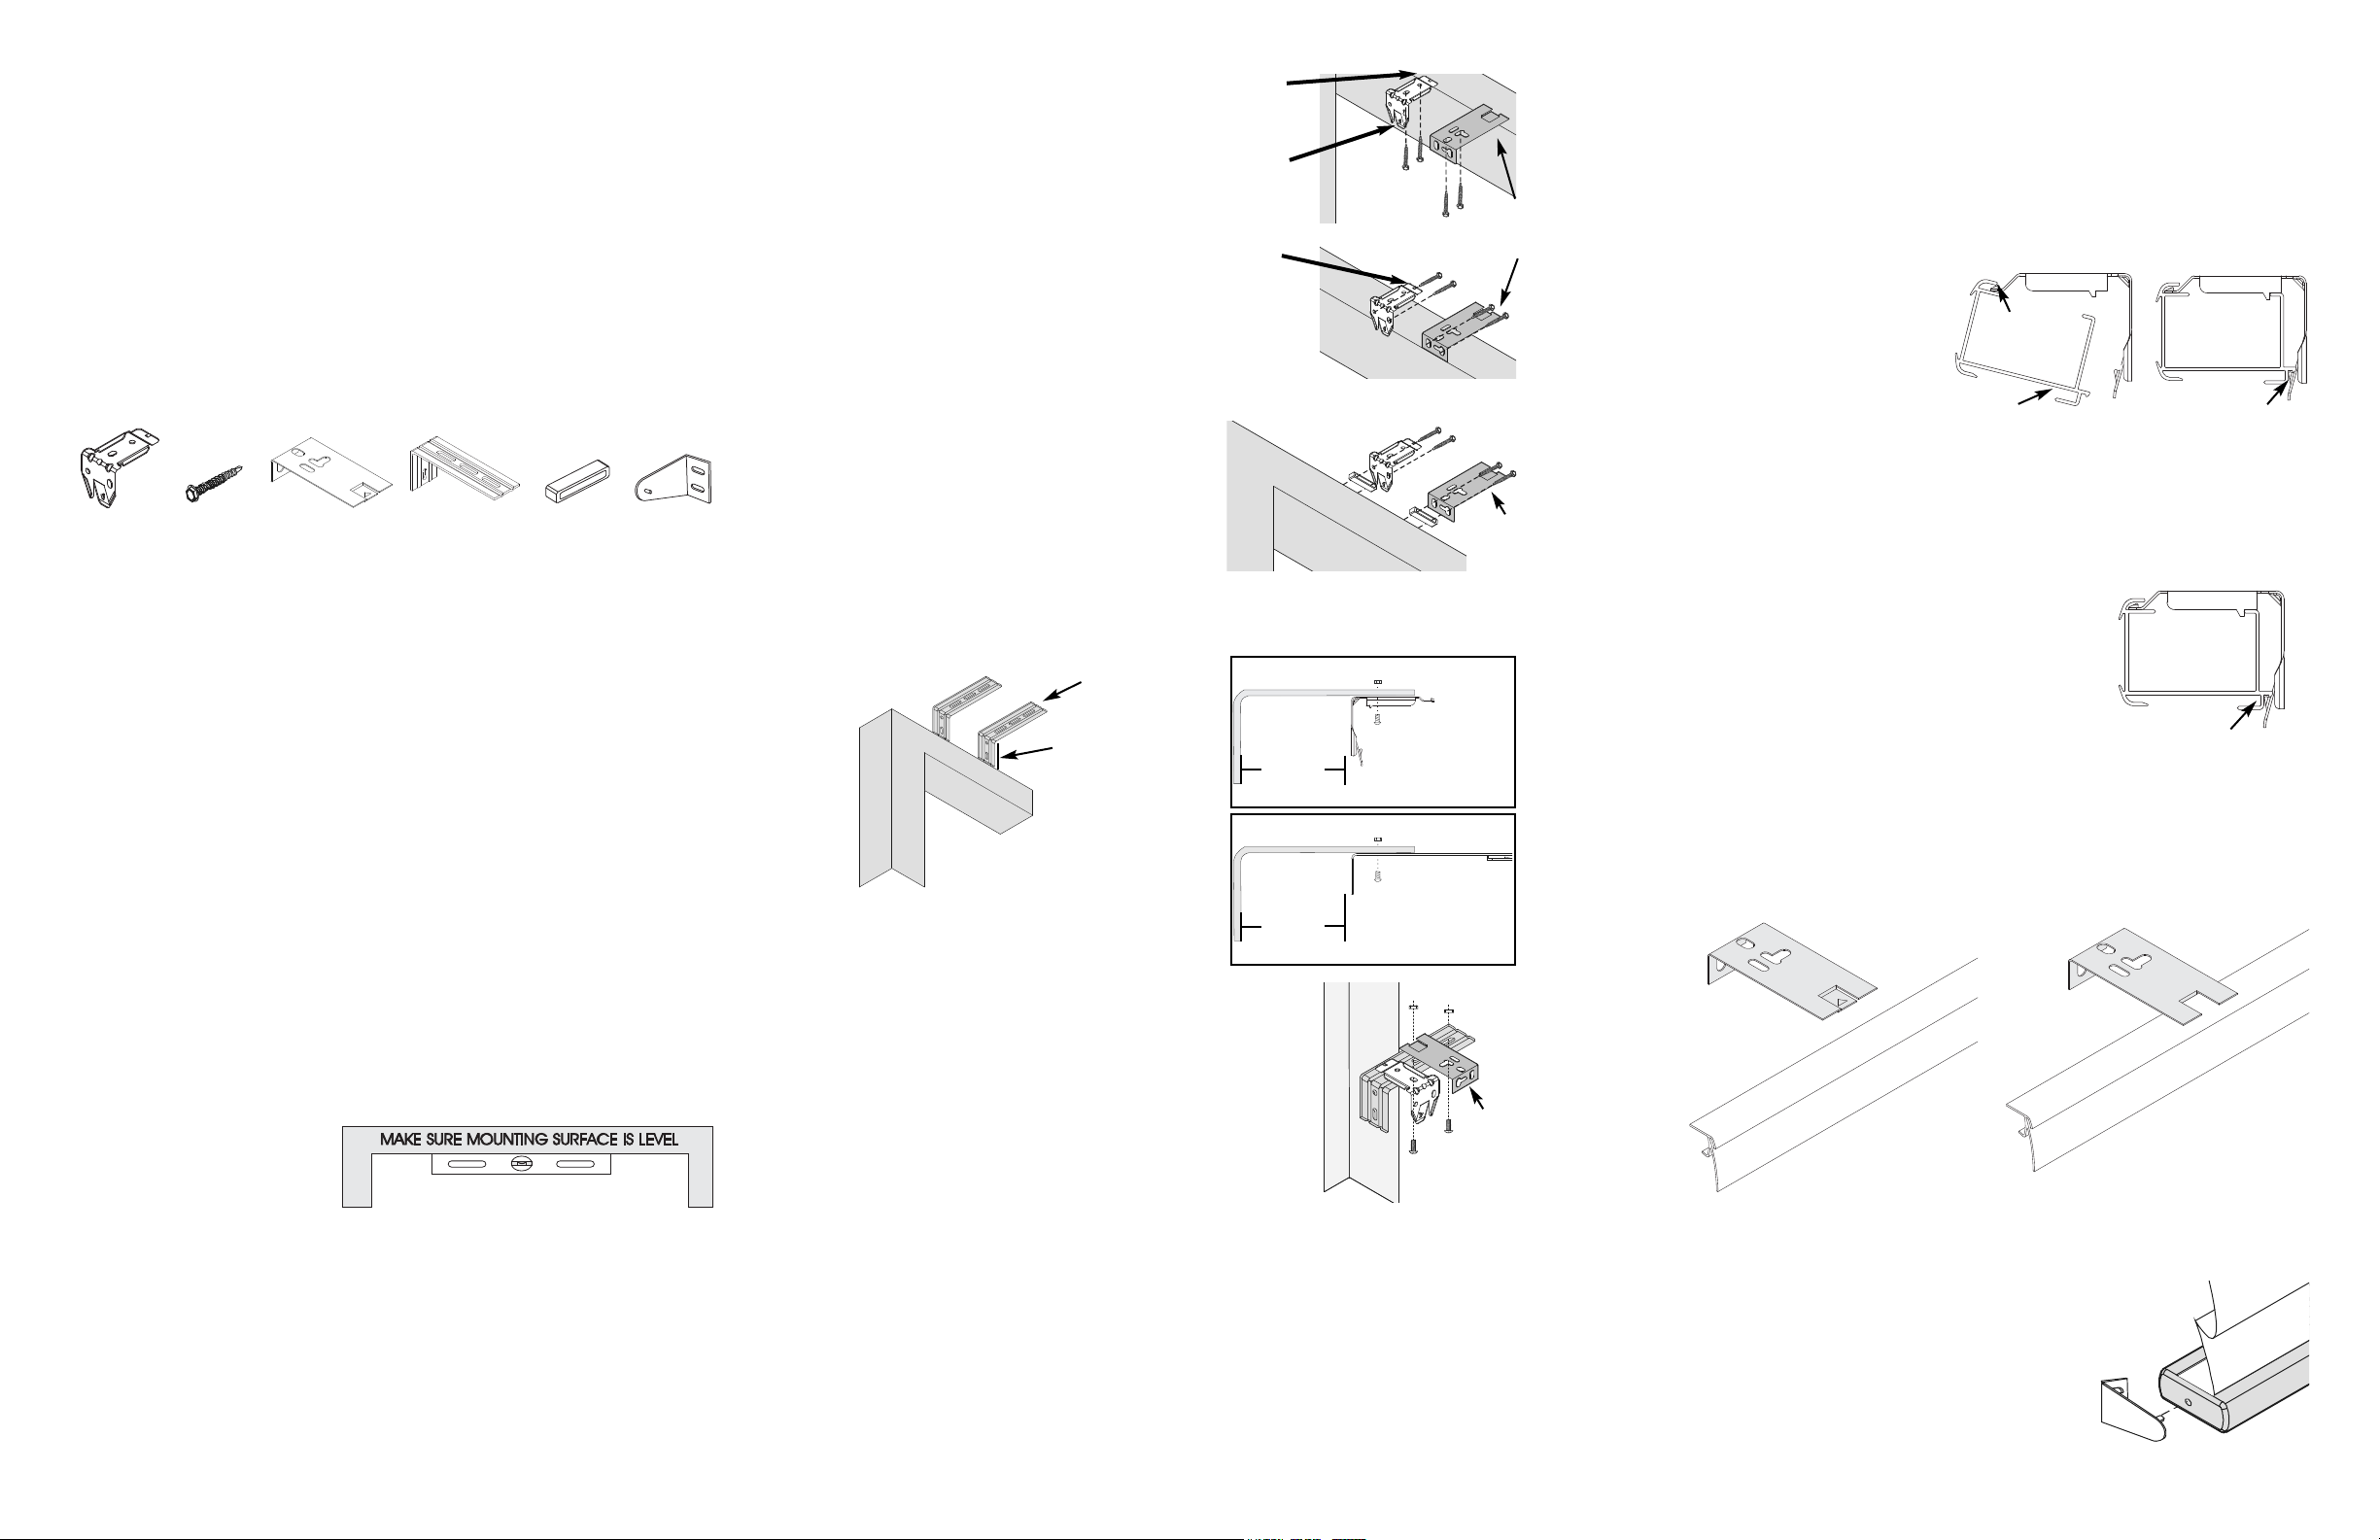
BRACKET INSTALLATION
Shades are shipped with the required number of brackets for proper
installation. End brackets should be located approximately 3” from
either end. Depending on the width of the shade, additional brackets
may be necessary, evenly spaced between the two end brackets.
Use this Number
For shade widths of: of brackets:
Up to 40" 2
40" - 72" 3
72" - 84" 4
84" and up 5
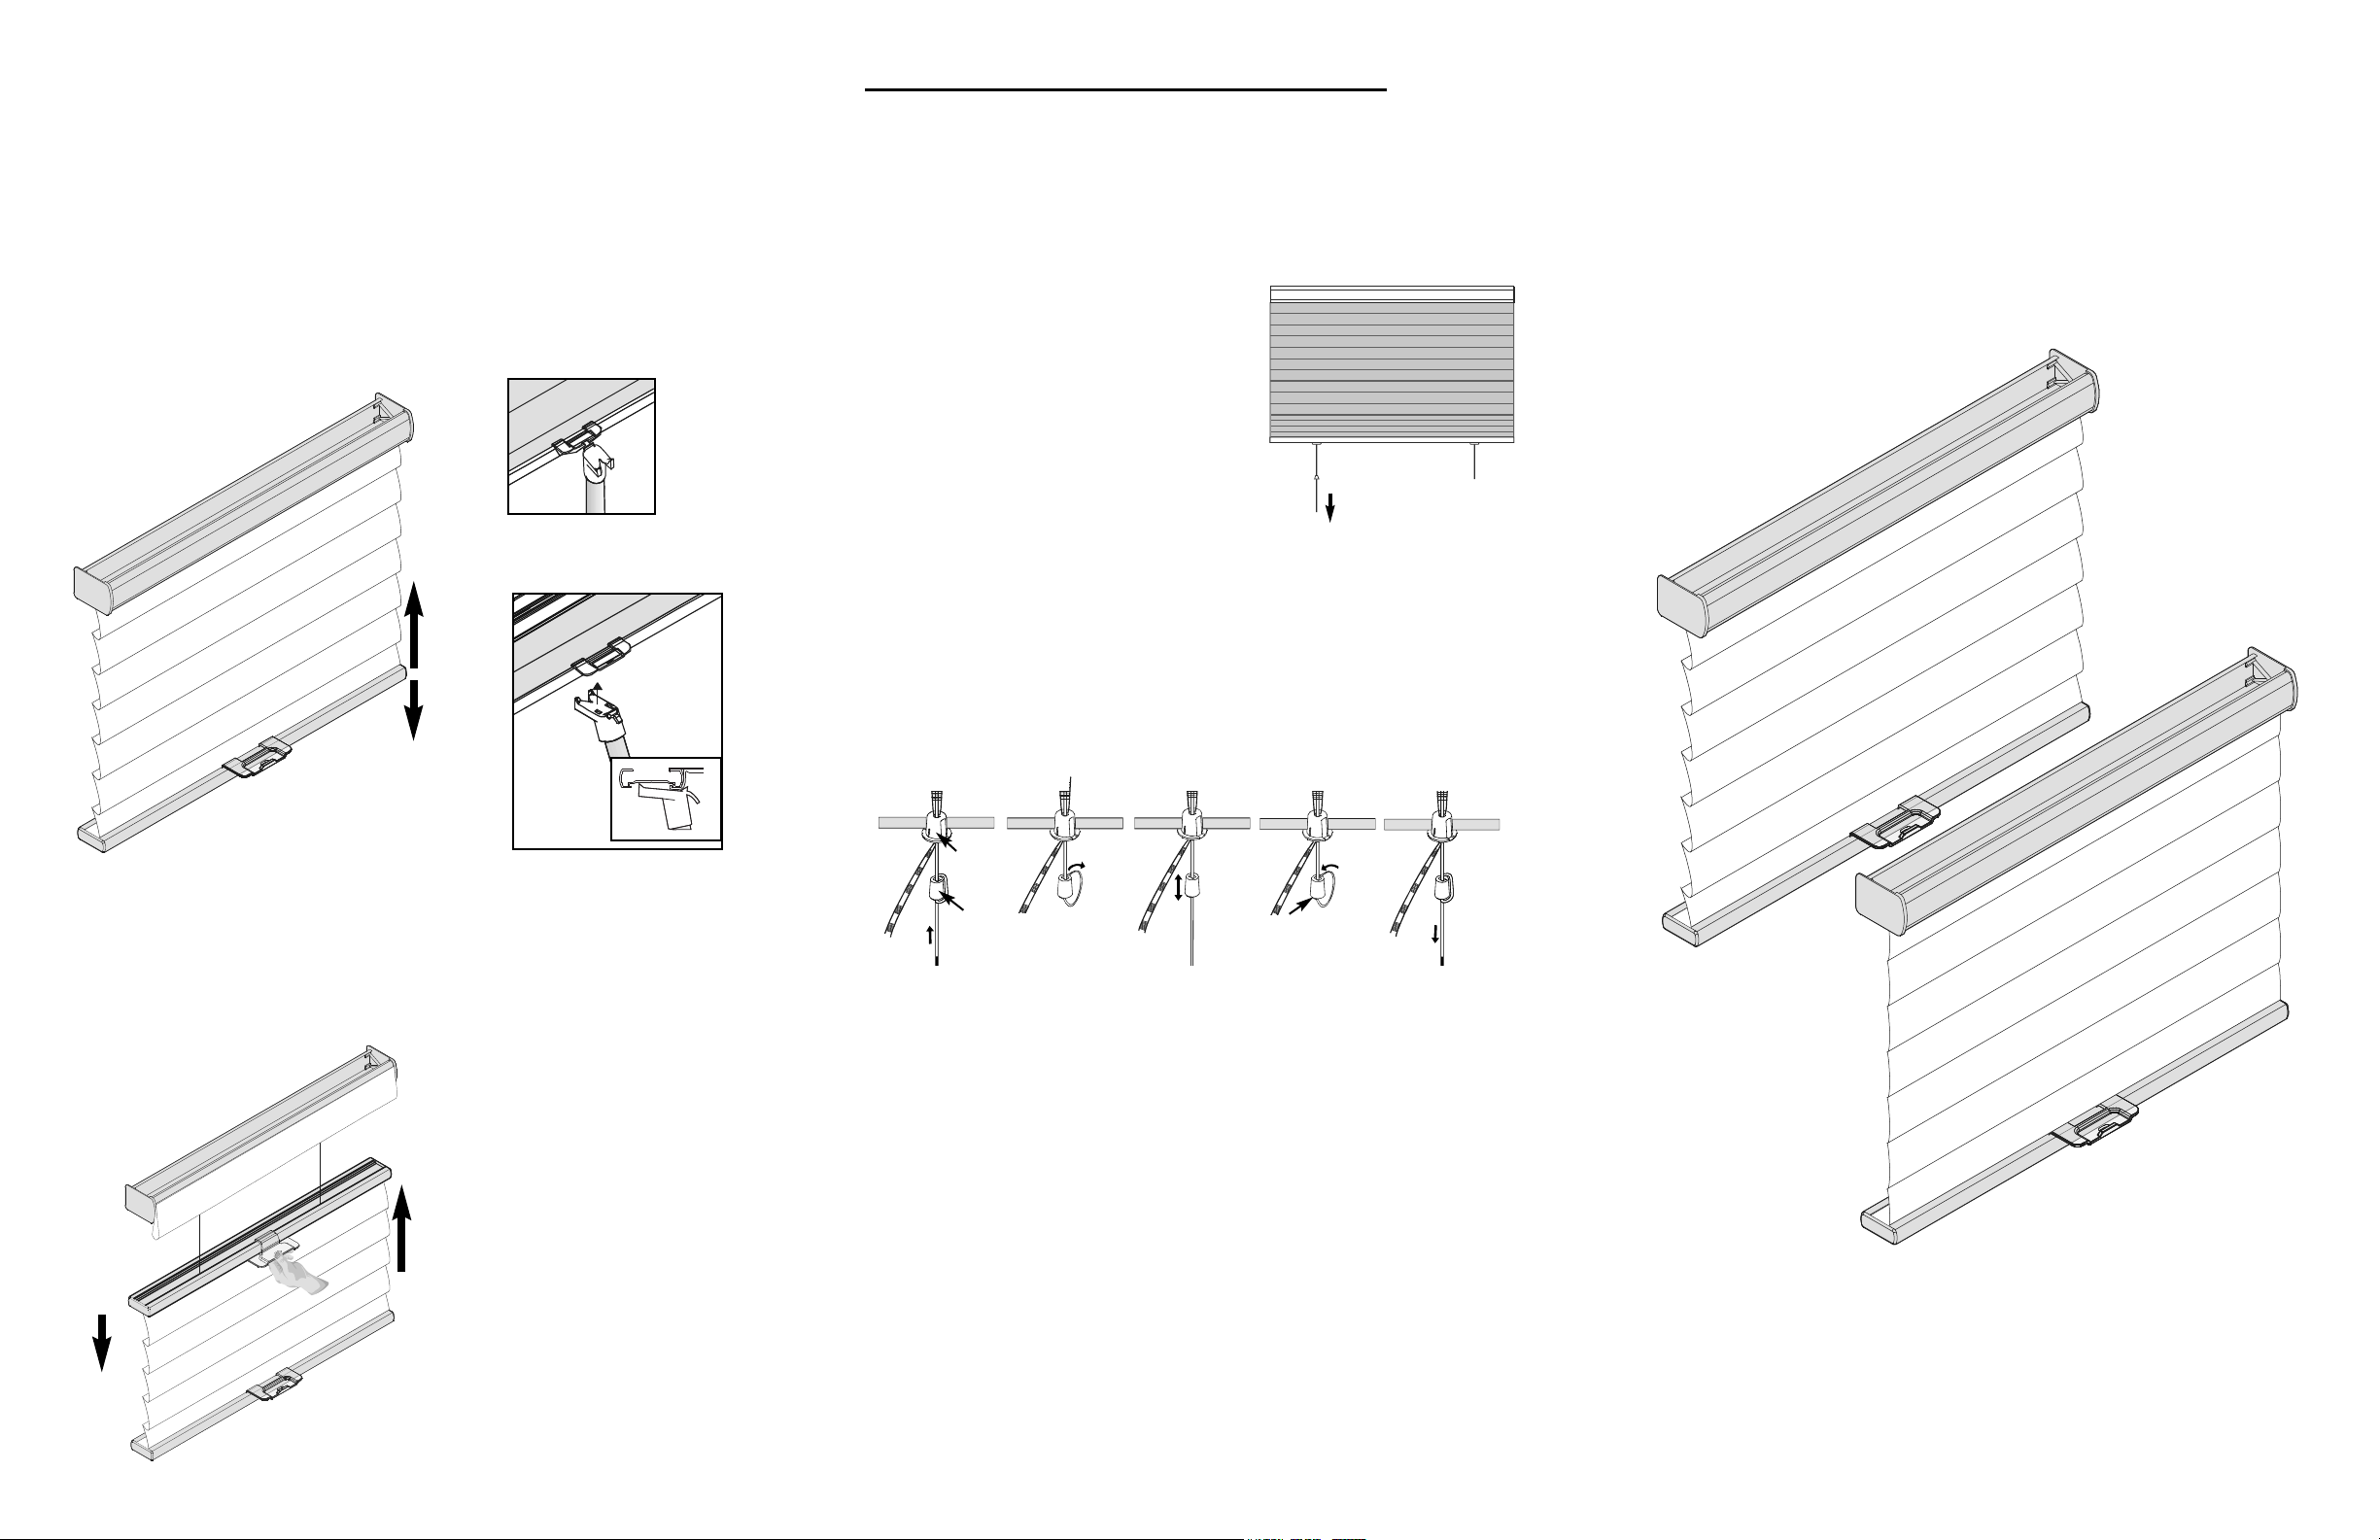
INSERTING THE HEADRAIL
Important - For top down / bottom up shades, remove the tie-wrap
that is around the headrail before installing the shade.
Position the headrail with the front lip (A) resting on the top hooks of
all the brackets. Make sure that no fabric is pinched between the
brackets and the headrail.
Push the bottom of the
headrail firmly upwards and
toward the window until the
leg at the bottom of the
headrail snaps into place,
(B) as shown.
Standard
Mounting
Bracket
Extension
Bracket
(optional)
Spacer
Block
(optional)
Hold Down
Bracket
(optional)
Using the Installation Bracket as a template, measure to the edge of
the bracket and mark the hole locations with a pencil. When
mounting brackets, make sure they are in line and level. Place
Valance Brackets to the inside of the Mounting Brackets.
Brackets must be in line and level. Shim brackets on inside
mounts if necessary. The
headrail must be level for
the shade to operate
properly.
Top Hook
Note: Release tab
is at the bottom of
the bracket
Top Hook
Inside or Ceiling Mounts
Use the top bracket holes.
Optional valance brackets
mount next to standard
mounting brackets.
Wall or Outside Mounts
Use the rear bracket holes.
Outside Mount with Spacer Block
Optional Spacer block will project
bracket 3/8”.
Push here upwards and
toward the window.
A
B
Outside Mount with Extension Bracket
2” minimum
surface required
REMOVING THE HEADRAIL
To remove a shade, insert a screwdriver between the headrail and
the bottom back of the bracket (tab which extends out slightly from
each bracket).
Gently pry the screwdriver to release the
bracket from the headrail. Take care not to
damage the painted finish of the headrail.
As you release the brackets, support the
headrail to keep it from falling. Insert screwdriver
here and gently pry.
Valance
Bracket
(optional for
standard)
Installation
Screw
(2 per Bkt)
Sidemount with Extension Bracket
Nut
Bolt
3 3/8” Valance
Bracket
Nut
Bolt
3 3/8” Installation
Bracket
121
2
OPTIONAL HOLD DOWN BRACKETS
Optional Hold Down Brackets are mounted
with the supplied screws. With the shade at
its proper drop, place the pin of each Hold
Down into the hole in each End Cap and mark
the screw holes. Make sure the pins are level
and aligned. Raise the shade, then screw the
Hold Down Bracket into the mounting surface.
INSTALLING THE VALANCE (Optional for Standard)
Align the valance with the Valance Brackets. Gently push at each
bracket location until the valance is fully seated.
optional
valance
bracket
optional
valance
bracket
used for optional
valance bracket
optional
valance
bracket

152088
Our window fashions represent a design breakthrough in style,
efficiency, and function. The unique hardware system is
designed to provide years of reliable service when properly
installed.
Please take a few minutes to read through these instructions
before beginning.
Cordless Roman
Standard and Top Down/Bottom Up
Installation Instructions
2/23/11Rev D
CHECK LENGTH AND EQUALIZATION ON SHADES
NOTE: Only adjust one cord at a time. Disconnecting more than
one cord may allow the cords to retract into the headrail.
If the shade length and equalization is satisfactory, simply trim the
excess cord and ladder braid hanging below the bottom rail. For top
down/bottom up shades also trim the excess cord from the middle
moving rail.
If adjustments are necessary, pull the
excess cord at the bottom of the shade
down until the Bottom Rail Plug is
released (fig. A). Push the cord up or
down through the Bottom Rail Plug (figs.
B & C).
If the cord needs to be longer, slide the
bottom end of the cord up into the plug
and slide the plug down to take up slack.
If the cord needs to be shorter, slide the top end of the cord down into
the plug and slide the plug up to take up slack.
Adjust the position of the plug as necessary (fig. D).
Feed the cord back through the Bottom Rail Clip (figs. E & F).
Push the Bottom Rail Plug back into the Bottom Rail Pocket.
Follow the same procedures for adjusting the middle moving rail on
a top down/bottom up shade.
When bottom rail adjustments have been made trim the excess cord
and ladder braid hanging below the bottom rail. For top down/bottom
up shades also trim the excess cord on the middle moving rail.
CLEANING AND CARE
The shades are as easy to clean as they are to operate. Roman
fabrics are anti-static and actually repel dust. Occasional vacuuming
with a soft bristle attachment is all that is needed. Also, the use of a
feather duster or dust buster at a low setting will help keep your
shades clean and fresh. Roman shades may also be cleaned
ultrasonically.
A
OPERATION - STANDARD SHADE
To lower the shade, pull down on the handle which is secured to the
bottom rail. To raise the shade, push the bottom rail up. The shade
will hold at any position when the bottom rail is released.
This product should be operated from the handle of the bottom rail.
To
Lower
Center pole
end under
bottom rail.
Be sure to raise the shade slowly and steadily to allow the shade
enough time to stack evenly.
Be sure to use the handle when raising and lowering shade for better
support and smoother operation.
To
Raise
For out-of-reach operations, an optional
extension pole should be used.
OPERATION - TOP DOWN / BOTTOM UP
To raise or lower the shade, push up or down on the handle of either
the middle or bottom rail.The shade will hold at any position when the
middle or bottom rail is released.
Be sure to raise the
shade slowly and
steadily to allow the
shade enough time to
stack evenly.
Be sure to use the
handle when raising and
lowering shade for better
support and smoother
operation.
To
Raise
To
Lower
BC D E F
Bottom
Rail Pocket
Bottom
Rail Plug Bottom
Rail Plug
Popular Window Blind manuals by other brands

ALTA
ALTA WOOD installation instructions

Creation Baumann
Creation Baumann PLITRIC PL 33 D Assembly instruction

Miller Edge
Miller Edge LC-K36 installation instructions

Velux
Velux RMM instructions

Roto
Roto ZJA M installation manual

Brading Fabrication
Brading Fabrication SolaraSky Skylight installation guide