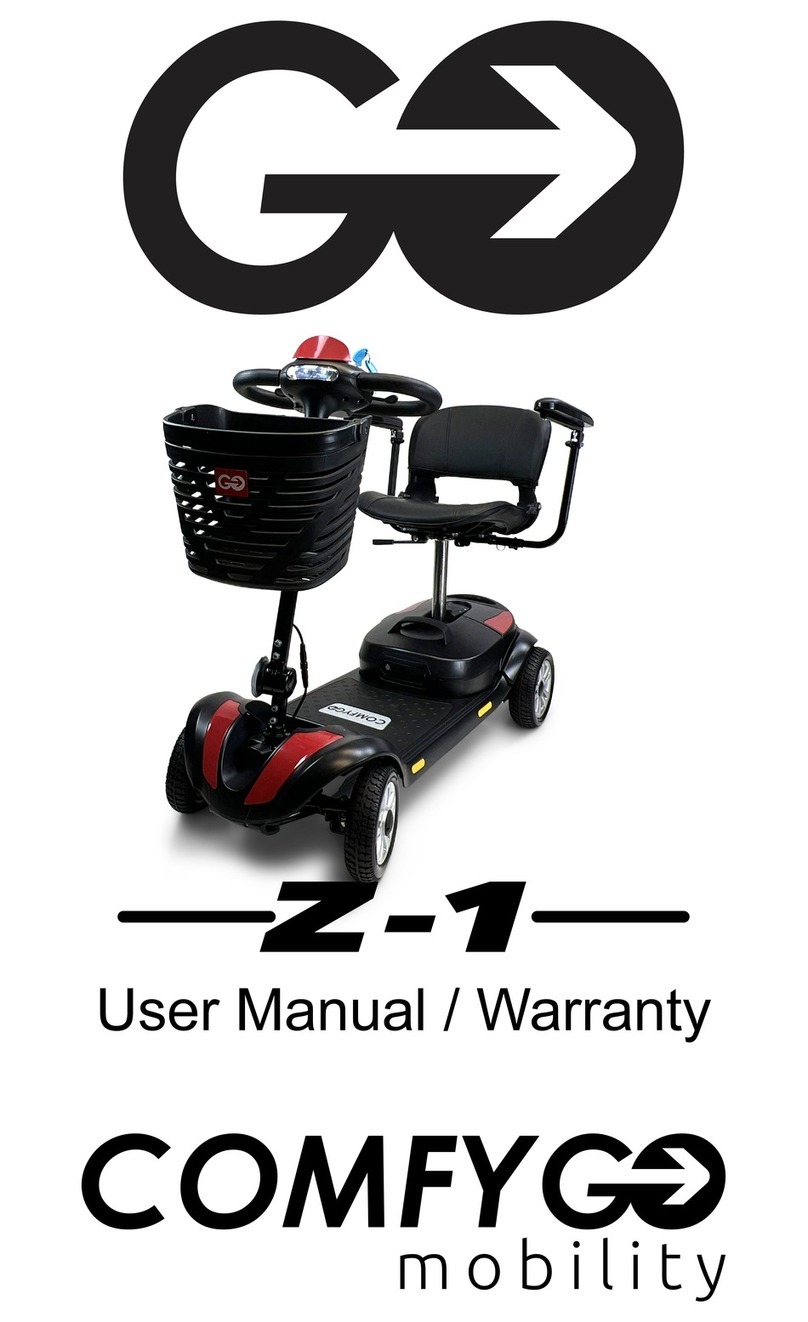
ComfyGo Mobility MS 3000 Guide

User Manual / Warranty

Table of Contents
1
Preface 2
Product Performance 3
Safety Instructions 5
Usage and Operation 9
Battery and Charger 14
Electrical Schematic Diagram 17
Controller 19
Maintenance 21
Tech Support 23
Warranty 24
Detail video explanation for Usage and Operations and Remote Pairing
please visit our Youtube Channel.
Detail information on page 9.
For all your spare part needs, please visit www.ComfyGoMobility.com
Don't forget to register your product to activate your warranty, details can be
found on page 23.
If you need technical support please contact our customer support team. De-
tailed information is on the back of the user manual and on page 23.
IMPORTANT NOTICE! BEFORE THE FIRST USE
Make sure battery is connected, and charge the battery at least 6 hours
Simply scan the QR code with your smartphone camera

Preface
2
- This manual contains the operation, assembly instructions, and
simple faults solutions for MS|3000 and MS|3000 PLUS.
- This manual contains both scooter maintenance tips and trouble-
shooting methods so please store it where you can access when
needed. If you decide to let anyone else use your scooter, please pro-
vide this manual for reference to them and ask that they read it before
using the product.
- The annotations and illustrations in this manual may vary slightly
from your actual model because we continuously improve and up-
grade our components and design.
- If you are uncertain about any aspect of operation, please contact
your dealer immediately to clarify.
- Improper use of this vehicle may lead to injury. Riding without paying
attention to points of safety could harm you as well as others.
- This electric scooter is intended to comfortably transport people with
walking difficulties or just for fun.

1. Product Performance
3
- This series of electric scooters is powered by Li-ion batteries and
uses DC motors. Users can control direction and adjust speed by
using the controls located on the handle bar. This scooter can be used
at low speeds, good road conditions and will handle low slope.
Performance Parameters and Technical Specs, MS|3000
Overall size 40” x 21“ x 35” (1016 x 534 x 890 mm)
Fold size 21.5” x 14.5“ x 29.5” (546 x 368 x 750 mm)
Net Weight w Battery 67 lbs. (30 kg)
Max Speed 3.7/7.5/12 mph (6/12/18 km/h)
Max loading weight 265 lbs (120 kg)
Max Child seat load 66 lbs. (30 kg)
Front wheel diameter 8 inch (200 mm)
Rear wheel diameter 10 inch (254 mm)
Battery 10AH or 15AH li-ion battery
Max distance* 16 mile (25 km) / 25 mile (40 km)
Motor x 2 cs DC 36V 250W x 2
Battery charge AC 100-240V, 50Hz,1.5-5A
Charging time 6-8 hours
Degree of protection IPX3
Max safe slope 12°
Turning radius ≤1.5m
Climbing angle 12°
Ground Clearance 3” (7.5 cm)
Option parts Child seat, baskets
* varies based on weight, incline, speed factors
- The actual range of driving range is affected by vehicle configuration, load, tempera-
ture, wind speed, road surface, operating habits, and other factors. The data in this
manual are for reference only.
- Actual product size and weight may vary slightly due to different measurement meth-
ods, assembly tolerances and configurations. The data in this manual are for reference
only.
- The technical parameters of MS|3000 will vary from country to country, and the data in
this manual are for reference only. For MS|3000 and MS|3000 PLUS technical parame-
ters, please refer to the information provided by the actual purchase office.
- This electric scooter is designed specifically to serve people weighing less than 286
lbs. (130 kg). Please do not use this unit on open highways.

1. Product Performance
4
Performance Parameters and Technical Specs, MS|3000 PLUS
Overall size 40” x 21“ x 35” (1016 x 534 x 890 mm)
Fold size 21.5” x 14.5“ x 29.5” (546 x 368 x 750 mm)
Net Weight w Battery 68 lbs. (31 kg)
Max Speed 3.7/7.5/12 mph (6/12/18 km/h)
Max loading weight 265 lbs (120 kg)
Front wheel diameter 8 inch (200 mm)
Rear wheel diameter 10 inch (254 mm)
Seat Area Width 16“ (406 mm)
Battery 10AH or 15AH li-ion battery
Max distance* 16 mile (25 km) / 25 mile (40 km)
Motor x 2 cs DC 36V 250W x 2
Battery charge AC 100-240V, 50Hz,1.5-5A
Charging time 6-8 hours
Degree of protection IPX3
Max safe slope 12°
Turning radius ≤1.5m
Climbing angle 12°
Ground Clearance 3” (7.5 cm)
Option parts Front baskets
* varies based on weight, incline, speed factors

2. Safety Instructions
5
2.1 Main Security Features
- Classified based on the type of protection: Against electric shock, Inter-
nal power.
- Classified based on the type of protection: Against electric shock, Type
B application.
- Classified based on the degree of inlet liquid protection: IPX3
- Classified based on the safe use of in a flammable anesthetic mixture
with air or gas mixed with oxygen or nitrous oxide flammable a esthetic
gases occurs: Non-AP/APG type.
- Classified based on operation mode: Continuous operation.
- Rating voltage: DC 24V.
- Have no protective effect on the application of defibrillator discharge
section.
- No signal output or input part.
- Safety of any non-permanent equipment installed.
2.2 Driving Notice
General Riding Cautions
- Please keep your arms and hands on the direction bar at all times to
properly control the scooter.
- To avoid injury, first practice using this scooter in a safe and open envi-
ronment, such as a park. Practice moving forward, backward, stopping,
and turning. As you gain skill and become comfortable with the controls,
you can begin to use this scooter in other suitable environments.
- Before riding on any roads, be sure to have a caregiver with you and
be sure to always ride safely.
- Please follow all pedestrian traffic rules, the scooter is not considered
an automobile.
- Please ride on the sidewalk and the zebra crossings only. Do not ride
on vehicle lanes.
- Ride at steady speeds and avoid sharp turns or zig zagging.
- If your model comes equipped with a seat belt, please fasten it while in
use
- Please maintain proper tire pressure. The lower or higher than recom-
mended pressures may cause unsafe conditions or excessive power
loss.

Avoid Riding in These Conditions Unless Accompanied by a
Caretaker
- Riding in inclement weather such as rain, heavy fog, strong winds,
snow, etc. If your scooter gets wet, electronic functions may be dam-
aged so please wipe off all water immediately.
- Riding in sub optimal conditions such as muddy areas, trails, sand,
gravel, etc.
- Riding in crowded areas, riding on unfenced roads, near ditches,
near bodies of water, or near any other dangerous areas.
- Riding over railroad tracks. If you must cross a railroad track, inspect
the tracks to confirm it is safe to cross. Turn the scooter off and disen-
gage the wheels from the motor so that you or your caregiver can
freely push the scooter across the tracks. Cross at an angle that en-
sures your tires will not get stuck in the track.
- Carrying people or cargo. This electric scooter is designed to be
used by only one person. It is not designed to carry additional people
or cargo.
Precautions for Uphill and Downhill
-Avoid riding on steep hills, uneven surfaces, high steps, channels or
any other steep areas.
- Avoid riding on steep slopes, the slope range should be less than 9
degrees.
- If possible, please keep the scooter moving forward during uphill
climbs. It may be difficult to restart an uphill climb from a stand still.
- Use slow speeds during downhill descent.
- Avoid driving sideways on steep areas.
- Avoid riding on or nearby stairs.
- Avoid crossing ditches.
- If you must cross a ditch, try to cross at a 90° angle.
Do not set the scooter to manual mode during uphill or
downhill use. If the scooter malfunctions at traffic crossing,
please immediately ask passersby for help. Set scooter to
manual mode by disengaging the wheels from the motor, then push
scooter to a safe location.
2. Safety Instructions
6
3.2 Direction bar and child seat adjustment
Adjust the freight of the direction bar
- First, open the quick release handle and rotate the loose nut. Adjust
the direction lever to the appropriate height according to your height.
After the adjustment is completed, tighten the nut and lock the quick
release handle. (Picture 7, 8, 9)
- When adjusting the steering bar, care should be taken not to expose
the safety marking the line of the directional tube riser.

Precautions for Caregivers
- Caregivers should confirm that the users’ feet are in the proper posi-
tion on the footrest.
- Caregivers should make sure the user is in the seat properly and
that the user is properly secured
- Caregivers should confirm that there are no loose clothing articles
that can get tangled by the wheels or drive motor.
- Caregivers should use caution while pushing the scooter and be
always mindful of the surrounding environment to avoid injury.
2.3 Other Important Notices
Repair and Refit
Repair and Reform: If a repair or modification is necessary, please
contact your dealer. Do not modify this scooter yourself, it may lead to
injury or malfunction.
Protect Environment: In order to protect environment, do not casual-
ly discard the wheelchair and/or discard the battery. If necessary,
please contact your local dealer for replacement battery.
Keep the Storage Environment Dry: Do not store the scooter in
damp conditions, such as near a bathroom. If the scooter gets wet,
wipe the water off immediately.
Pushing Someone Else in the scooter: When user is sitting on the
scooter, make sure the scooter is set to manual mode by disengaging
the motors. Do not push the scooter if the motors are engaged.
Do not replace parts or material randomly.
Do not add weight randomly, as it may cause an imbalance.
Do not use other vehicles to pull or push the scooter when
somebody is sitting on the scooter.
If there are abnormal sounds coming from the scooter, con-
tact service immediately.
2.4 Service Lifetime
- The service lifetime is 5 years from date of manufacture. To avoid
injury or accidents, users should not use this scooter for more than
the service lifetime.
2. Safety Instructions
7

2.5 Electromagnetic Compatibility
- The scooter should away from strong magnetic fields and large in-
ductive electrical equipment, such as radio station, TV stations, under-
ground radio stations, or cell phone transmitting radio stations. Please
avoid any strong electromagnetic fields. The electric scooter should
always avoid electromagnetic interference.
2.6 Compatibility with Other Devices
- Electric scooters should not be used together in conjunction with any
other devices. If you need to connect a device to it, please contact
ComfyGO Mobility, so that we may confirm that the scooter will not be
adversely affected.
When using the scooter, please do not exceed the rated
obstacle height. When crossing obstacles, please remain a
low speed and the angle between the vehicle body and
obstacles is 90°.
When using the scooter on the uneven ground, please slow
down. The scooter cannot wade into the water. If the water
level submerges the controller, electric motor or circuit, it
may lead to short circuit and damage the electrical
appliance.
Do not place the scooter in a car trunk during hot weather! At
high temperatures, the battery pack may be completely
ineffective or even cause burning!
Although this manual will help you better understand and use
the MS|3000, we cannot ensure that all types of emergencies
are included. Therefore, we recommended that you to drive
carefully and ensure your driving safety.
2. Safety Instructions
8

3. Usage and Operation
9
Please visit YouTube for detailed Usage and Operations explanation.
Simply search "ComfyGo MS|3000 Electric Scooter - Foldable Mo-
bility Scooters" on YouTube or scan the QR code with your smart-
phone's camera.
www.youtube.com/c/ComfyGO

3.1 Learning to Drive
- Practice in a safe and empty place before taking the scooter out on
public roads.
- There is a risk of falling and injury so please wear a safety helmet
and protective gear.
- Step 1: Check if the power tire pressure is sufficient, and braking
performance before using the scooter.
- Step 2: Insert the key into the power switch located on the light, turn
it to the "ON" position, make sure the power indicator light is on.
- Step 3: Use your right hand to engage the throttle on the handle bar.
- Step 4: To brake or slow down, release the throttle with your right
hand then grip the brake handle with your left hand and squeeze.
Once the scooter comes to a complete stop, then turn the key to the
off position.
- Step 5: When done using the scooter, plug it in to charge.
- The scooter has a top speed of 12 mph (18km/h). It can't be turned
sharply under high speed. If the direction is changed sharply, it will
become unstable, which will cause the scooter to overturn, causing
the driver to fall and other risks.
3. Usage and Operation
10

3.1 Folding and unfolding steps
Folding (MS|3000)
- The scooter is parked in a flat position, and the large red sphere on
the right side is pulled up to fold successfully. Picture (1, 2, 3)
- After folding, you can pull the scooter direction bar to drag. If you
need to put it into the car or transport it, you can open the directional
bar quick release handle and rotate the loose nut to adjust to the
lowest height.
- Make sure the child seat is not open before folding.
Unfolding (MS|3000)
- Pull the handle of the small red ball below to release the folding lock
and pull it back and forth to complete MS|3000 expansion. (Picture 4,
5, 6)
3. Usage and Operation
11
Picture 3Picture 2Picture 1
Picture 6Picture 5Picture 4

3. Usage and Operation
12
3.1 Folding and unfolding steps
Seat assembly and removal
Seat Assembly: Pick up the seat, first insert the slot behind the seat
into the bracket behind the seat, pull the bar under the seat, and insert
the groove in the front of the seat into the bracket in front of the seat.
The small bracket can be adjusted forward and backward. Seat posi-
tion.
Seat disassembly: Pull the bar under the seat and lift the seat up to
remove the seat
Folding (MS|3000 PLUS)
- Stop the MS|3000 PLUS on a flat place, remove the seat before
folding, and pull up the large red ball on the right to fold it successfully.
- After folding, you can pull the MS|3000 PLUS direction bar to tow it.
If you need to put it in the car or transport it, you can open the quick
release handle of the direction bar and rotate the loose nut to adjust to
the lowest height. (Check section 3.2)
Unfolding (MS|3000 PLUS)
- After pulling the lower small red ball to unlock the folding lock, pull
the back end away from the front to flatten out the scooter, then install
the seat.

3. Usage and Operation
13
3.2 Direction bar and child seat adjustment
Adjust the freight of the direction bar
- First, open the quick release handle and rotate the loose nut. Adjust
the direction lever to the appropriate height according to your height.
After the adjustment is completed, tighten the nut and lock the quick
release handle. (Picture 7, 8, 9)
- When adjusting the steering bar, care should be taken not to expose
the safety marking the line of the directional tube riser.
Child seat opening and folding (Only for MS|3000)
Open: pull the red sphere backward, with one hand and lift the seat
upward with the other hand to open the child seat. (Picture 10-11)
Close: Pull down the red ball and press down the seat with the other
hand to fold the child seat. (Picture 12)
3.2 Direction bar and child seat adjustment
Adjust the freight of the direction bar
- First, open the quick release handle and rotate the loose nut. Adjust
the direction lever to the appropriate height according to your height.
After the adjustment is completed, tighten the nut and lock the quick
release handle. (Picture 7, 8, 9)
- When adjusting the steering bar, care should be taken not to expose
the safety marking the line of the directional tube riser.
Picture 9Picture 8Picture 7
Picture 12Picture 11Picture 10

4. Battery and Charger
14
4.1 Charger Requirements
The charger should only be used for charging the batteries. Do not
use your scooter while it is charging.
Charger Technical Data
Input voltage: AC220V (110V) ±10%
Output voltage: 36V/DC Output current: 1.5~5A
Ingress protection level: IPX1
Meets requirement: GB 4706.1-2005 and GB 4706.18-2005
4.2 Charger Use and Care
IMPORTANT:
- A full charge requires between 5 to 8 hours, do not overcharge more
than 10 hours.
- To prevent shortening your battery’s life, charge the battery at least
once per month when the wheelchair is not being used.
- Do not stop charging until the charging process is finished.
- Repeat use of less than fully charged batteries will shorten the life
cycle of your battery.
- When battery is fully charged, the power indicator will turn green. Do
not stop charging before fully charged this indicator is lit.
- After charging is complete, ensure to turn off the power supply other-
wise the battery will discharge slowly.
- Do not charge more than 10 hours. Over-charging is dangerous.
Follow These Rules to Avoid Issues with Chargers
- The charger should be well ventilated at all times during charging.
- Do not expose the wheelchair to sunlight and humid environment.
- While charging, the temperature range should be between 10 to 40
degrees of celsius.
- If charged at temperatures outside of this range, the battery can be
damaged.
- Never use or sit on the electric scooter when charging.

4. Battery and Charger
15
- The charging port is under the left pedal of the MS|3000 body, and
the charging port cover is opened and the charging interface is dry.
(Picture 13)
- Please insert the positioning groove of the charging port of the char-
ger at the charging port of the car body first, and then connect the
charger plug to the ac power socket. After charging, unplug the AC
power supply, and then unplug the connector that is connected to the
charging port of the car.
- In order to ensure the safety of transportation, the MS|3000 battery
pack is not fully charged. Due to the self-consumption of electricity
during the transportation and storage cycle, it may cause low or no
power when first used. This is normal. Don't worry. Charge according
to the charging method.
- Please use the MS|3000 original charger for charging. Do not use
other chargers for charging. The company will not be responsible for
any consequences caused by not using the original charger.
- The MS|3000 charging time takes about 5 - 8 hours (depending on
the battery pack capacity). When charging, the indicator light on the
charger lights up red, indicating that the power is on and charging.
When the indicator changes from red to green, the battery is fully
charged. Stop charging at this time. The maximum charging time
should not exceed 10 hours. Long-term charging will affect the life and
safety of the battery pack.
- It is forbidden to disassemble the charger, As it has a high voltage
circuit.
- Do not connect the charger to the AC power supply without the char-
ger working, otherwise, it will damage the life of the charger and may
cause other dangers. When charging, the surrounding environment
should beer^.ply, ventilated, no fire, no flammable or explosive materi-
als around, and do not cover anything on the charger. Pay attention to
prevent liquid and metal particles from entering into the charger, pre-
vent falling and impact, so as to avoid damage

4. Battery and Charger
16
4.3 Battery Use and Maintenance
- Incorrect insertion of the battery may cause danger of explosion.
Only use batteries that are provided with this unit.
Visit www.ComfyGoMobility.com or contact with us via
support@ComfyGoMobility.com if you need replacement batteries.
- While inserting the battery, ensure that the battery poles are placed
correctly. Always refer to the charging instructions provided here in
order to maintain an optimal life cycle for your batteries.
Picture 13

5. Electrical Schematic Diagram
17
Controller 2
Controller 1
Motor 2
Motor 1
Charging Port
Power Supply
Throttle Hall Current Sensor
Breake Lever
Electric Lock with headlights on
Reversing - Third Gear
Breake Light
Horn

18
6. Controller
Speed Control
Gears Switch
Horn
Rear Gear Switch
LCD Display
Lock
- LCD instrument assembly, lock, LED headlights and power display.
Insert the key clockwise to turn on the power switch once, otherwise,
turn off the power switch, turn clockwise twice to turn on the LED
headlights.
- Horn switch, press the horn button to sound, to remind the passing
pedestrians and vehicles, to avoid some unnecessary traffic acci-
dents.
- Turn the speed control handle, tum the handle on the right hand, and
adjust the acceleration and deceleration according to the direction
shown in the f figure.
- Three-speed shift switch, I, II, III three gears respectively correspond
to 6/12/18km / h.
- The reverse switch "R", the pressed state is the reverse gear, and
then the rebound state is the forward gear.
- Parking system (two-speed adjustment of handbrake), parking in the
way to prevent uneven road slipping.

6. Function Controller
1919
Break
This manual suits for next models
1
Table of contents
Other ComfyGo Mobility Mobility Aid manuals
Popular Mobility Aid manuals by other brands

Aligned As Designed
Aligned As Designed 3rd Foot Cane quick start guide

Drive DeVilbiss Healthcare
Drive DeVilbiss Healthcare BTR22BLK Instructions for use

DEMARTA VIRGINIO
DEMARTA VIRGINIO 02.02.357U user manual

Pride Mobility
Pride Mobility TRAVEL SCOOTER Series owner's manual

Gate
Gate Bure Standard user manual

human care
human care 10652 Assembly instructions