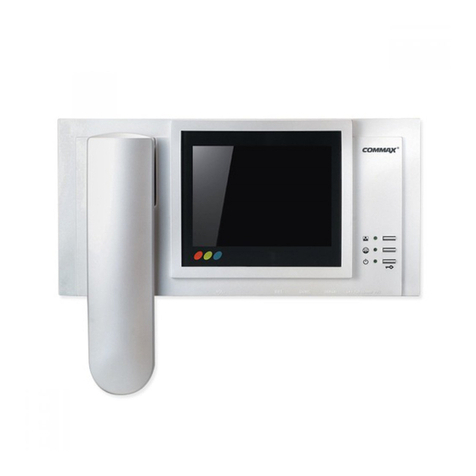
Commax DPV-2LH User manual

Model No. DPV-2LH/2LHS
V
V
i
i
d
d
e
e
o
o
D
D
o
o
o
o
r
r
p
p
h
h
o
o
n
n
e
e
•Thank you for purchasing our COMMAX product.
•Please carefully read this User’s Guide (in particular, precautions for safety)
before using the product and follow the instructions to use your productexactly.
•The company is not responsible for any safety accidents caused in abnormal oper-
ation of the product.
a513-11, Sangdaewon-dong, Jungwon-gu, Seongnam-si, Gyeonggi-do, Korea
Int’l Business Dept. : Tel.; +82-31-7393-540~550 Fax.; +82-31-745-2133
Web site : www.commax.com
Printed In Korea/ 2007.04

Table of Contents.
1
(%!%)%+*!&%
(*%$)%+%*!&%)
*+()%!%+%*!&%)
"&%*%*)
%)*##*!&%* &
!(!%
*!#)
##!%(&$&&($(+%!*
##!%%+!&*-'++%!*%,!&*-')++%!*
* (+%*!&%)
(&+#) &&*!%
'!!*!&%)
<9 1 @5

Make sure to follow the instructions to prevent any danger or property losses.
Do not put the plug in the socket
simultaneously.
It may generate abnormal heat
or cause a fire.
Do not connect to other products
while in use.
It may cause breakdown.
Do not forcibly bend the cord or
put a heavy object on the prod-
uct.
It may cause a fire.
Do not use water, thinner or a deter-
gent used to wash oil products when
you wash the exterior.
Make sure to wash it by using a dry cloth to
prevent any breakdown or electric shock.
Do not install the product in a
humid place.
It may cause an electric shock or
a fire.
Do not forcibly pull out the
cord from the socket.
If the cord is damaged, it may
cause a fire or an electric shock.
Do not put the plug in the sock-
et with a wet hand.
It may cause an electric shock.
Do not disassemble, repair or
modify the product.
It may cause a fire, an electric shock
or an injury due to malfunction of the
product.
Do not use AC circuit breaker.
It may cause an electric shock.
If the socket holes are larger
than normal, do not put the
plug.
It may cause an electric shock
or a fire.
Make sure that dust or foreign
substances are not gathered
on the product.
Make sure to prevent foreign
substances from entering the
product.
It may cause a breakdown.
Do not put a heavy object on
the product.
It may cause a breakdown.
Do not disassemble or give an
impact to the product.
Avoid direct rays of the sun or
heating devices at a time of
installation.
Install the product in a flat and
stable place.
Otherwise, it may not function
properly.
Pull the plug if the product is
not used for a long time.
If the product generates strange
sound, make sure to pull the
plug immediately and contact
Commax service center.
23
It indicates prohibition.
It indicates prohibition of disassembly.
It indicates prohibition of contact.
It indicates dos and don’ts.
It indicates that the plug should be pulled out from the socket.
It indicates prohibition.
It indicates prohibition of disassembly.
It indicates prohibition of contact.
It indicates dos and don’ts.
It indicates that the plug should be pulled out from the socket.
Warning
Death or serious
injury is expected.
Caution
An injury or property
losses are expected
45
No.
1
2
3
4
5
6
7
8
9
10
11
12
13
14
15
16
17
Name
Screen
Speaker
Ringer Volume Adjust
Call Volume Adjust
Screen Exposure Adjust
Power Switch
Talk Button
Door Open Button
Interphone Button
View Button
Power LED
CAM 2 Connection Terminal
CAM 1 Connection Terminal
Audio Type Sub Unit Connection Termina
l
Video Type Sub Unit Connection Terminal
MIC.
DC 17V / 1.3A Input Terminal
1. Features.
▷ B/W 4”FLAT CRT
▷ Surface-Type Installation
2. Main Function.
▷ Calling and Conversing with interphones
▷ Door Open
▷ Priority Calling (PPT)
3. System Diagram.
2. Part Names 3. Features and Main Function
No. Name

67
1. Installation method of monitor
♣ Note
○
Do not install near magnetic activity, humid temperatures, extreme heating conditions,
and under direct sunlight as these may damage the condition and performance of the product.
○
○
The position of the unit’s body should fit the standard height from the ground range which is
recommended to be from 1450~1500mm.
Adaptor for DPV-2LH (17V 1.3A)
Monitor
T4 X 18 M3 X 6 Connector
▒
4P : 1EA
▒
2P : 3EA
Monitor
Fixing Screw
Wall bracket
Mounting Screw
Wall bracket Manual
MANUAL
4. Package Contents. 5. Installation Method

89
DPV-2LH
SLAVE
PHONE
11 1122 2 234
INTER
PHONE
DOOR RELEASE POWER
DOOR RELEASE
CAMERA 1 CAMERA 2
1. Calling from a door Camera unit.
• When there is a visitor at the door, push the " " button
on the monitor (DPV-2LH) to view the visitor through the monitor
- Camera 1 LED will be on in Green / Camera 2 LED will be on in Orange.
• Pressing the ‘call’button on a door camera also allows the user to make calls.
• While a user talk with one of monitors, the other monitor can’t talk and a user
can hear only the “busy”sound through a speaker.
- Camera 1 LED will be on in Green / Camera 2 LED will be on in Orange.
- The duration of on-screen lasts for 90 seconds, which then the monitor
screen will automatically turn off .
- If you wish to recall the entrance, press the " " button and then " "
buttons.
• If a electric door lock is connected to this product, press the " " open
button to open the door.
• Pressing " " button again allows to end the talk.
• If you wish to see the entrance, press the " " button.
- Press the " " button one time to select camera #1 and press " "
button again in a row to select camera #2. If you wish to end seeing
the entrance, press the " " button again.)
• Priority Call Function.
When there is impeding noise that disturbs conversation from the door
camera, pressing and holding the " " button will deliver only the voice of
the speaker from the DPV- 2LH/2LHS to the door camera unit to help
clarify speech.
2. Calling an audio type Sub unit and a video type sub-unit.
• Press the " " button on the monitor (DPV-2LH) to call the audio
type Sub-unit or video type sub units. (All Call)
Once the Interphone unit responds to the call, conversation can occur.
(When talking with interphone, RED LED is ‘On’.)
If you wish to end the call with the interphone, press the " " button again.
6. Wiring diagram. 7. Details.

10 11
• While speaking with an Interphone unit, if there is an incoming call from
a door camera, you can hear ‘chime’from speaker and the talk with an inter-
phone is ended. Pressing the " " button on interphone or a monitor and
a sound will signify that the connection has been made.
Only either audio type or video type sub unit is available to converse with a
camera unit.
- The other monitors are not available to use, you can hear “busy”sound
• Press the " " button on the interphone to talk with either an audio or video type
sub unit. And chimes occur and press the " " button on the either
an audio or video type sub unit to talk with interphone.
(Press the " " button again to end this talk.)
• While speaking between a main monitor (DPV-2LH) and a sub monitor (DPV-
2LHS), if there an incoming call from a camera unit, press the " " button on
one of monitors to start talking with the camera. Conversation between two moni-
tors will be ended.
(But audio type sub unit is excluded in the above-case.)
3. Other Functions.
3-1. Ringer Volume Adjust.
•You can adjust the volume of the ring tones from calls.
- Adjusting the dial to the right raises the volume.
- Adjusting the dial to the left lowers the volume.
3-2. Call Volume Adjust.
•You can lower or raise the call volume when speaking with the entrance
and the interphone units.
- Adjusting the dial to the right raises the volume.
- Adjusting the dial to the left lowers the volume.
3-3. Screen Exposure Adjust.
•You can adjust the exposure of the screen from dark to light.
- Adjusting the dial to the right brightens the screen.
- Adjusting the dial to the left darkens the screen.
If you think that the product has trouble, please first check below
contents before you ask a repair.
The power supply is
not on.
All works are stopped
Troubles
1.The power supply
cord is missing or not.
2.The power supply switch
(down) is off or not.
Check Point
1. Please connect the
power supply cord
2. Please turn on the power
supply switch (down)
pushing to the right.
A Call operation is not
performed.
(Door, Interphone function)
1.The wiring between other
units is connected correctly
in good order or not.
2. The wiring is missing or not.
3. A Room id is set or not.
1. Please refer to connection
related page and manage.
2. Please connect correctly
to the terminal.
3. Please refer to Room id
setting related page.
The product does not
produce the sound.
(Call volume, Talk volume)
1. A sound volume lies
in minimum or not.
1. Please adjust the sound
volume properly turning
to the right, as you want.
The screen is dark.
The screen is strange.
1. There is a strong re-
flected light behind the
visitor or not.
2. The screen control is
adjusted correctly.
1. Please change the angle
of camera lens.
2. Please initialize the
screen control.
(Refer to setting related page)
We can see the visitor
image but no voice.
1. The connector on the
handset is properly
inserted to the product?
1.Please put the
connector properly again.
No stored image found 1. Auto recording is
assigned?
1.Please set the status of
“AUTO RECORD“
as “YES”
Actions

12
Wiring
Related Voltage
Screen
Call Sound
Power
Consumption
Distance
Operating
Temperature
Dimension
Weight
Description ( DPV-2LH )
From door Camera: 2 wires / Interphone: 4 wires /Slave Unit: 2 wires
DC 17V
4”B/W Flat CRT
From a door Camera : Electric chime – So Mi Do twice.
From Interphone : Electric melody
Standby: 3 W
Operating: (Max.) 15 W
Camera to Master : 50m/Φ0.65
Interphone to Master : 30m/Φ0.65
0℃ ~ +40℃
190(W)x226(H)x48(D)
1.2Kg
ITEM
Wiring
Related Voltage
Screen
Call Sound
Power
Consumption
Distance
Operating
Temperature
Dimension
Weight
Description ( DPV-2LHS )
2 wires between Master and slave units.
DC 17V
4”B/W Flat CRT
From a door Camera : Electric chime – So Mi Do twice.
From on Interphone : Electric melody
Standby: 3 W
Operating: (Max.) 15 W
A main monitor to a sub monitor : 30m/Φ0.65
0℃ ~ +40℃
190(W)x226(H)x48(D)
1.2Kg
ITEM
9. Specification
This manual suits for next models
1
Table of contents
Other Commax Intercom System manuals

Commax
Commax WDP-180D User manual

Commax
Commax CDV-72UM User manual

Commax
Commax DRC-4CPN2 User manual

Commax
Commax CDV-51AM User manual

Commax
Commax CDV-50A User manual

Commax
Commax CDV-1024MA User manual

Commax
Commax AP-2RAG User manual

Commax
Commax DP-3HP User manual

Commax
Commax CMP-2BCT User manual

Commax
Commax CAV-71BQ User manual

Commax
Commax AP-3SG User manual

Commax
Commax TP-6RC User manual

Commax
Commax DRC-GUM/RF1 User manual

Commax
Commax DR-2A2N User manual

Commax
Commax CIOT-L10M User manual

Commax
Commax CMV-43A User manual

Commax
Commax CMP-2BCS User manual

Commax
Commax CDV-70A User manual

Commax
Commax DRC-4FC User manual

Commax
Commax PI-10LN User manual