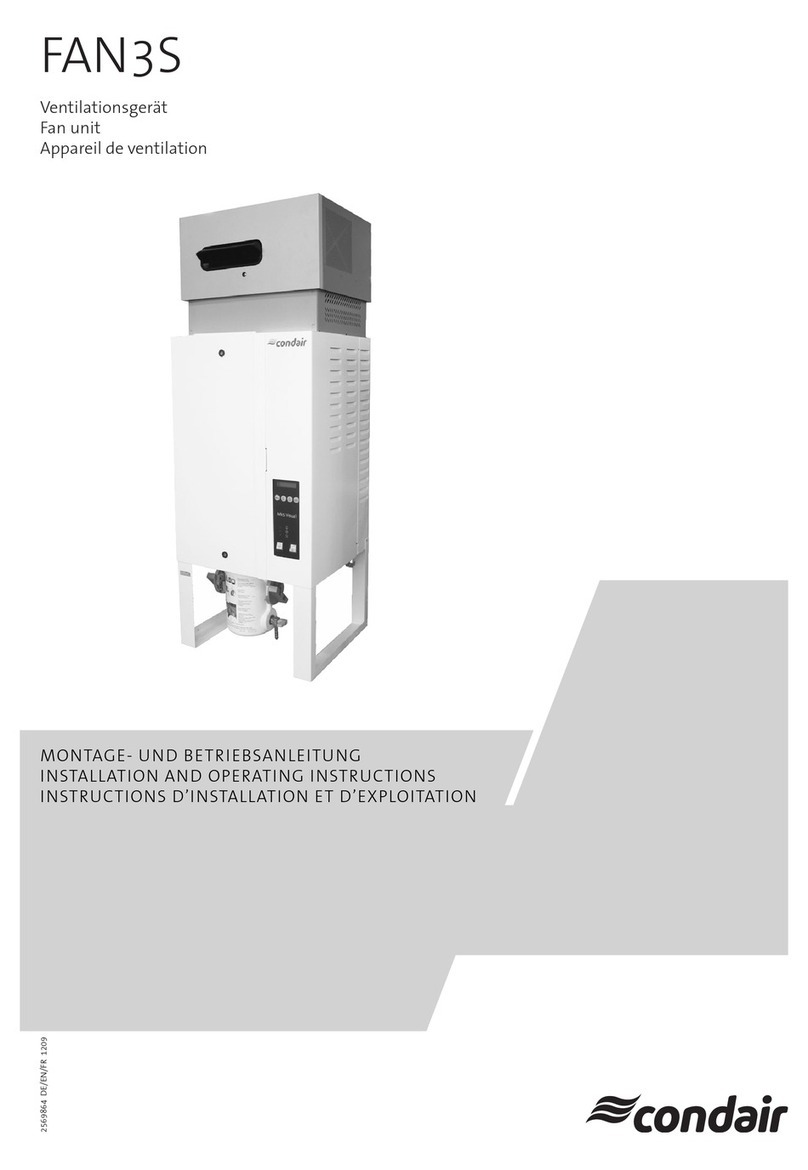
Condair FAN3S User manual

Ventilationsgerät
Fan unit
Ventilátorový nástavec
2570527 DE/EN/CZ 1211
FAN3S
MONTAGE- UND BETRIEBSANLEITUNG
INSTALLATION AND OPERATING INSTRUCTIONS
NÁVOD PRO MONTÁŽ A OBSLUHU


3
Inhaltsverzeichnis
1 Einleitung 4
1.1 Ganz zu Beginn 4
1.2 Hinweise zur Montage- und
Betriebsanleitung 4
2 Zu Ihrer Sicherheit 6
3 Produktübersicht 8
3.1 Typenübersicht 8
3.2 Aufbau FAN3S 9
3.3 Kennzeichnung des Produktes 10
3.4 Einsatzzweck 10
3.5 Lieferumfang 11
3.6 Zubehör Wandmontage 11
4 Installation 12
4.1 Dampf-Luftbefeuchter vorbereiten 12
4.2 Plazierungshinweise 14
4.3 Montage 16
4.3.1 Montageabbildungen 16
4.3.2 Montagehinweise 20
4.4 Elektroinstallation 21
5 Inbetriebnahme/Betrieb 22
6 Wartung 22
7 Störungsbehebung 22
8 Ausserbetriebsetzung/Entsorgung 23
8.1 Ausserbetriebsetzung 23
8.2 Entsorgung/Recycling 23
9 Produktspezikationen 24
9.1 Technische Daten 24
9.2 Abmessungen/Gewichte 25
Contents
1 Introduction 4
1.1 To the very beginning 4
1.2 Notes on the installation and
operating instructions 4
2 For your safety 6
3 Unit overview 8
3.1 Type overview 8
3.2 Construction of the FAN3S 9
3.3 Identicationoftheunit 10
3.4 Application 10
3.5 Delivery 11
3.6 Accessories wall mounting 11
4 Installation 12
4.1 Preparingthesteamairhumidier 12
4.2 Equipment location 14
4.3 Mounting 16
4.3.1 Mounting illustrations 16
4.3.2 Mounting notes 20
4.4 Electrical installation 21
5 Commissioning/Operation 22
6 Maintenance 22
7 Fault elimination 22
8 Taking out of service/Disposal 23
8.1 Taking out of service 23
8.2 Disposal/Recycling 23
9 Productspecications 24
9.1 Technical data 24
9.2 Dimensions/Weights 25
Obsah
1 Úvod 4
1.1 Na úvod 4
1.2 Poznámky k návodu pro
montážaobsluhu 4
2 ProVašibezpečnost 6
3 Přehledzařízení 8
3.1 Typovéřady 8
3.2 Konstrukce FAN3S 9
3.3 Identikacenástavce 10
3.4 Použití 10
3.5 Dodávka 11
3.6 Příslušenstvípřimontážinastěnu 11
4 Instalace 12
4.1 Přípravaparníhozvlhčovače 12
4.2 Umístěníventilátorovéhonástavce 14
4.3 Montáž 16
4.3.1 Přehledmontáže 16
4.3.2 Poznámkykmontáži 20
4.4 Elektrickézapojení 21
5 Uvedenídoprovozu/provoz 22
6 Údržba 22
7 Odstraňováníporuch 22
8 Vyřazenízprovozu/likvidace 23
8.1 Vyřazenízprovozu 23
8.2 Likvidace/recyklace 23
9 Specikace 24
9.1 Technická data 24
9.2 Rozměry/Hmotnost 25

4
1 Einleitung
1.1 Ganz zu Beginn
Wir danken Ihnen, dass Sie sich für ein Ventila-
tionsgerät FAN3S entschieden haben.
Die Ventilationsgeräte FAN3S sind nach dem
heutigen Stand derTechnik und den anerkannten
sicherheitstechnischen Regeln gebaut.Dennoch
können bei unsachgemässer Verwendung des
Ventilationsgerätes FAN3S, Gefahren für den
Anwender und/oder Dritte entstehen und/oder
Sachwerte beschädigt werden.
Um einen sicheren, sachgerechten und wirt-
schaftlichen Betrieb des Ventilationsgerätes
FAN3S zu gewährleisten,beachten und befolgen
Sie sämtlicheAngaben und Sicherheitshinweise
in dieser Montage- und Betriebsanleitung.
WennSie Fragenhaben,die indieserDokumen-
tation nicht oder nicht ausreichend beantwortet
werden, nehmen Sie bitte mit Ihrem Lieferanten
Kontakt auf. Man wird Ihnen gerne weiterhelfen.
1.2 Hinweise zur Montage- und
Betriebsanleitung
Abgrenzungen
Gegenstand dieser Montage- und Betriebs-
anleitung ist das Ventilationsgerät FAN3S in
seinen verschiedenen Ausführungen.
Die Ausführungen in dieser Montage- und Be-
triebsanleitung beschränken sich auf die Ins-
tallation, die Inbetriebnahme, den Betrieb,
die Wartung und die Störungsbehebung des
Ventilationsgerätes FAN3S und richtet sich an
entsprechend ausgebildetes und für die
jeweilige Arbeit ausreichend qualiziertes
Fachpersonal.
Diese Montage- und Betriebsanleitung wird
ergänztdurchverschiedene separateDokumen-
tationen (Montage- und Betriebsanleitungen zu
den Dampf-Luftbefeuchtern, Ersatzteilliste, etc.).
Wo nötig nden sich in dieser Montage- und
Betriebsanleitung entsprechende Querverweise
auf diese Publikationen.
1 Introduction
1.1 To the very beginning
We thank you for having purchased the fan
unit FAN3S.
The fan unit FAN3S incorporates the latest
technical advances and meets all recognized
safety standards. Nevertheless, improper use
of the fan unit FAN3S may result in danger to
the user or third parties and/or impairment of
material assets.
To ensure a safe, proper, and economical opera-
tion of the fan unit FAN3S, please observe and
comply with all informationand safety instructions
contained in the present installation and operat-
ing instructions as well as the instructions given
in the manuals for the components used in the
humidicationsystem.
If you have questions, which are not or insuf-
cientlyansweredinthisdocumentation,please
contact your supplier. They will be glad to assist
you.
1.2 Notes on the installation and
operating instructions
Limitation
The subject of these installation and operat-
ing instructions are the fan unit FAN3S in its
different versions.
These installation and operating instructions are
restricted to the installation, commissioning,
operation, servicing and trouble shooting of
the fan unit FAN3S and is meant for well trained
personnelbeingsufcientlyqualiedfortheir
respective work.
These installation and operating instructions
are supplemented by various separate items
of documentation (installation and operating
instructionssofthesteamhumidiers,spareparts
list, manuals for accessories, etc.). Where nec-
essary, appropriate cross-references are made
to these publications in the present installation
and operating instructions.
1 Úvod
1.1 Na úvod
DěkujemeVámzazakoupeníventilátorového
nástavceFAN3S.
Ventilátorový nástavec FAN3S byl vyvinut na
základě nejnovějších technických poznatků a
v souladu s platnými bezpečnostními předpi-
sy.Přestomůžepřineodbornémzacházenís
ventilátorovým nástavcem FAN3S vzniknout
nebezpečíprouživatele,třetíosobunebodojít
kpoškozenímajetku.
Kzajištěníbezpečného,správnéhoahospodár-
ného provozu ventilátorového nástavce FAN3S
věnujtepozornostvšempokynůmadodržujte
bezpečnostnípředpisyuvedenévtomtonávodu
promontážaobsluhuavmanuálechjednotlivých
komponentůpoužitýchvsystémuzvlhčování.
Pokud máte dotazy, které nejsou dostatečně
zodpovězeny v této dokumentaci, obraťte se
naVašehododavatele.RádiVámpomůžeme.
1.2 Poznámkyknávodupro
montážaobsluhu
Vymezenírozsahudokumentace
Tentonávodpromontážaobsluhuobsahuje
informaceoventilátorovémnástavciFAN3S
vrůznýchverzích.
Problematikatohotonávodupromontážaobslu-
hu se omezuje na instalaci,uvedenídoprovo-
zu,provoz,údržbuaodstraňováníproblémů
ventilátorového nástavce FAN3S. Tento návod
promontážaobsluhujeurčenškolenýmpracov-
níkůmkvalikovanýmvpříslušnémoboru.
Návodpromontážaobsluhudoplňujísamostatně
dokumentovanépoložky(Návodpromontáža
obsluhuparníchzvlhčovačů,seznamnáhradních
dílů,manuálykpříslušenství,atd.).Vpříslušných
pasážíchtétodokumentacenalezneteodkazy
nauvedenépoložky.

5
Symbols used in this manual
CAUTION!
The catchword “CAUTION” designates notes
in this documentation that, if neglected, may
cause damage and/or malfunction of the
unit or other material assets.
WARNING!
The catchword “WARNING” used in conjunc-
tion with thegeneral caution symboldesignates
safety and danger notes in this documenta-
tion that, if neglected, may cause to injury
to persons.
DANGER!
The catchword “DANGER” used inconjunction
with the general caution symbol designates
safety and danger notes in this documentation
that, if neglected, may lead to severe injury
or even death of persons.
Safekeeping
Please safeguard these installation and operat-
ing instructions in a safe place, where it can be
immediately accessed. If the equipment changes
hands, the documentation should be passed on
to the new operator.
If the documentation gets mislaid, please contact
your supplier.
Language versions
These installation and operating instructions are
available in various languages. Please contact
your supplier for information.
Copyright protection
The present installation and operating instruc-
tions are protected under the Copyright Act.
Passing-on and reproduction of the manual (or
part thereof) as well as exploitation and com-
munication of the contents are prohibited without
written permission by the manufacturer. Violation
of copyright terms is subject to legal prosecution
andarisesliabilityforindemnication.
The manufacturer reservesthe right to fullyexploit
commercial patent rights.
Symboly použité v této dokumentaci
POZOR!
Označení“POZOR”vtétodokumentacipo-
ukazujenapokyny,jejichžnedodrženímůže
vést k poškozeníčichybnéfunkcizařízení
anebodalšímmateriálnímškodám.
VAROVÁNÍ!
Symbol “VAROVÁNÍ” spolu s obecným upo-
zorněnímoznačenýmvykřičníkempoukazuje
na-bezpečnostnípokynyapoznámkyvtéto
dokumentaci,jejichžnedodrženímůževést
kezraněníosob.
NEBEZPEČÍ!
Symbol“NEBEZPEČÍ”spolusobecnýmupo-
zorněnímoznačenýmvykřičníkempoukazuje
nabezpečnostnípokynyapoznámkyvtéto
dokumentaci,jejichžnedodrženímůževéstk
vážnémuzraněníneboismrtiosob.
Uloženídokumentace
Tento návod pro montáž a obsluhu uložte na
bezpečnémmístětak,abybylavždykdispozici.
Při předání zařízení jinému uživateli předejte
zároveňitutodokumentaci.
Přiztrátědokumentace sivyžádejte náhradní
výtiskuVašehododavatele.
Jazykovéverze
Tentonávodpromontážaobsluhujekdispozici
vrůznýchjazykovýchverzích.Máte-lizájemo
jinou jazykovou verzi, obraťte se na Vašeho
dodavatele.
Ochranaautorskýchpráv
Uvedenýnávodpromontážaobsluhujechráněn
podleAutorskéhozákona. Jezakázáno postupo-
vatarozmnožovattutodokumentaci(ijednotlivé
části),stejnětakvyužívatapředávatjejíobsah
bezpísemnéhosouhlasuvýrobce.Porušením
autorskýchprávsevystavujetetrestnímustíhání
apovinnostiodškodnění.
Výrobcesivyhrazuje právoplněvyužívat pa-
tentové ochrany.
Verwendete Symbole
VORSICHT!
Das Signalwort “VORSICHT” kennzeichnet
Hinweise in dieser Dokumentation, deren
Missachtung eine Beschädigung und/oder
eineFehlfunktion desGerätesoderanderer
Sachwerte zur Folge haben können.
WARNUNG!
Das Signalwort “WARNUNG” zusammen mit
demallgemeinen Gefahrensymbolkennzeich-
net Sicherheits- und Gefahrenhinweise in
dieser Dokumentation, deren Missachtung
Verletzungen von Personen zur Folge ha-
ben können.
GEFAHR!
Das Signalwort “GEFAHR” zusammen mit dem
allgemeinen Gefahrensymbol kennzeichnet
Sicherheits- und Gefahrenhinweise in dieser
Dokumentation, deren Missachtung schwere
Verletzungen einschliesslich den Tod von
Personen zur Folge haben können.
Aufbewahrung
Die Montage- und Betriebsanleitung an einem
sicheren Ort aufbewahren, wo sie jederzeit zur
Hand ist. Bei einer Handänderung des Produk-
tes ist die Montage- und Betriebsanleitung dem
neuen Betreiber zu übergeben.
Bei Verlust der Dokumentation wenden Sie sich
bitte an Ihren Lieferanten.
Sprachversionen
Diese Montage- und Betriebsanleitung ist in
verschiedenen Sprachen erhältlich. Nehmen Sie
diesbezüglich bitte mit Ihrem Lieferanten Kon-
takt auf.
Urheberschutz
Diese Montage- und Betriebsanleitung ist im
Sinne des Urheberrechtsgesetzes geschützt.Die
Weitergabe und Vervielfältigung der Anleitung
(auch auszugsweise) sowie die Verwertung und
Mitteilung ihres Inhaltes sind ohne schriftliche
Genehmigung des Herstellers nicht gestattet.
Zuwiderhandlungensindstrafbarundverpich-
ten zu Schadenersatz.
Alle Rechte der Ausübung von gewerblichen
Schutzrechten behalten wir uns vor.

6
2 For your safety
General
Every person working with the fan unit FAN3S
must have read and understood the present
installation and operating instructions before
carrying out any work.
Knowing and understanding the contents of the
present installation and operating instructions
is a basic requirement for protecting the per-
sonnel against any kind of danger, to prevent
faulty operation, and to operate the unit safely
and correctly.
All ideograms, signs and markings applied to the
unit must be observed and kept in readablestate.
Qualicationofpersonnel
All actions described in the present Installation
and operating instructions (installation,operation,
maintenance, etc.) must be carried out only by
welltrainedandsufcientlyqualiedperson-
nel authorised by the owner.
For safety and warranty reasons any action
beyond the scope of this manuals must be car-
riedoutonlybyqualiedpersonnelauthorised
by the manufacturer.
It is assumed that all persons working with the
fan unit FAN3S are familiar and comply with the
appropriate regulations on work safety and the
prevention of accidents.
This unit may not be used by persons (including
children) with reduced physical, sensory or men-
tal abilities or persons with lacking experience
and/or knowledge, unless they are supervised
by a person responsible for their safety or they
received instructions on how to operate the unit.
Children must be supervised to make sure that
they do not play with unit.
Intended use
The fan unit FAN3S is intended exclusively
for the steam distribution in association
withthesteamhumidierCondairCP3and
DefensorMk5withinthespeciedoperating
conditions(seechapter9“Productspecica-
tions”). Any other type of application without the
express written consent of the manufacturer is
considered as not conforming with the intended
purpose and may lead to the fan unit FAN3S
becoming dangerous.
Operation of the equipment in the intended man-
ner requires that all the information in these
instructions as well as in the corresponding
installation and operating instructions of the
steamhumidierisobserved(inparticular
the safety instructions).
2 ProVašibezpečnost
Obecné
Každý,kdopracujesventilátorovýmnástavcem
FAN3S, je povinen si prostudovat tento návod
promontážaobsluhudříve,nežzahájíjakou-
koliv práci.
Znalost a porozumění obsahu tohoto návodu
jsoupovažoványzazásadníproochranuobsluhy
předjakýmkolivmožnýmnebezpečím,kzabrá-
něníchybnéfunkceventilátorovéhonástavcea
zvlhčovačea probezpečnýa správnýprovoz
ventilátorovéhonástavceazvlhčovače.
Všechnyznaky,symbolyaznačkypoužiténa
ventilátorovémnástavcimusíbýtrespektovány
amusíbýtčitelné.
Kvalikaceobsluhy
Veškeré úkony popsané v tomto návodu pro
montážaobsluhu(montáž,provoz,údržba,atd.)
smí provádět pouze školený a kvalikovaný
pracovníkautorizovanývlastníkemventilá-
torovéhonástavce.
Zbezpečnostníchdůvodůavrámcizáručních
podmínekmusíbýtjakýkolivúkonmimorámec
tohotomanuálu provedenkvalikovaným pra-
covníkemautorizovanýmvýrobcem.
Předpokládáse,ževšichnipracovníciobsluhující
ventilátorový nástavec FAN3S jsou seznámeni a
splňujípříslušnépředpisytýkajícísebezpečnosti
práce a prevence nehod.
Ventilátorový nástavec nesmí používat osoby
(včetně dětí), které mají omezené psychické,
senzorické nebo mentální schopnosti, nebo
osobysnedostatkemzkušenostía/neboznalostí,
ikdybybylypoddozoremosobyzodpovědnéza
jejichbezpečnost,nebokdybydostávalypokyny,
jakzacházetsezařízením.
Dětimusíbýtpoddozorem,abybylovždyzaru-
čeno,žesinebudouhrátsezařízením.
Vymezenípoužitíventilátorovéhonástavce
Ventilátorový nástavec FAN3S je určen vý-
hradněkdistribucipáryvespojenísparními
zvlhčovačiCondairCP3aDefensorMk5pro
účelyzvlhčovánívzduchuzaspecikovaných
provozních podmínek (viz kapitola 9 “Spe-
cikace ventilátorového nástavce”). Jakékoliv
jiné použití bez písemného souhlasu výrobce
jepovažovánozanepřiměřenéaventilátorový
nástavecpakmůžebýtnebezpečný.
Provoz zařízení v souladu s přiměřeným uži-
tímzvlhčovačevyžaduje,abybylydodrženy
všechnyinformaceobsaženévtomtonávodu
(obzvláštěbezpečnostnípokyny).
2 Zu Ihrer Sicherheit
Allgemeines
JedePerson,die mitArbeitenam Ventilationsge-
rät FAN3S beauftragt ist, muss die Montage- und
Betriebsanleitung vor Beginn der Arbeiten am
Gerät gelesen und verstanden haben.
DieKenntnissedes Inhaltsder Montage-und Be-
triebsanleitung ist eine Grundvoraussetzung,das
Personal vor Gefahren zu schützen, fehlerhafte
Bedienung zu vermeiden und somit das Gerät
sicher und sachgerecht zu betreiben.
Alleam GerätangebrachtenPiktogramme, Schil-
der und Beschriftungen sind zu beachten und in
gut lesbarem Zustand zu halten.
Personalqualikation
Sämtliche in dieser Montage- und Betriebsan-
leitung beschriebenen Handlungen (Installation,
Betrieb, Wartung, etc.) dürfen nurdurch ausge-
bildetesundausreichendqualiziertessowie
vom Betreiber autorisiertes Fachpersonal
durchgeführt werden.
Eingriffe darüber hinaus dürfen aus Sicherheits-
und Gewährleistungsgründen nur durch vom
Hersteller autorisiertes Fachpersonal durchge-
führt werden.
Es wird vorausgesetzt, dass alle Personen die
mitArbeiten am Ventilationsgerät FAN3S betraut
sind, die Vorschriften überArbeitssicherheit und
Unfallverhütung kennen und einhalten.
Dieses Gerät ist nicht dafür bestimmt durch Per-
sonen(einschließlichKinder), miteingeschränk-
ten physischen, sensorischen oder geistigen
Fähigkeiten oder mangels Erfahrung und/oder
mangels Wissen benutzt zu werden, es sei denn
sie werden durch eine für ihre Sicherheit zustän-
dige Person beaufsichtigt oder erhielten von ihr
Anweisungen wie das Gerät zu benutzen ist.
Kinder sollten beaufsichtigt werden, um sicher-
zustellen, dass sie nicht mit dem Gerät spielen.
Bestimmungsgemässe Verwendung
Die Ventilationsgeräte FAN3S sind aus-
schliesslich zur Dampfverteilung in Ver-
bindung mit den Dampfluftbefeuchtern
Condair CP3 oder Defensor Mk5 innerhalb
der spezifizierten Betriebsbedingungen
(siehe Kapitel 9 “Produktspezikationen”)
bestimmt. Jeder andere Einsatz ohne schriftli-
che Genehmigung des Herstellers gilt als nicht
bestimmungsgemäss und kann dazu führen,
dass das Ventilationsgerät FAN3S gefahrbrin-
gend wird.
Zur bestimmungsgemässen Verwendung gehö-
ren auch die Beachtung aller Informationen in
dieser Montage- und Betriebsanleitung und der
Montage- und Betriebsanleitung zum entspre-
chenden Dampf-Luftbefeuchter (insbesondere
aller Sicherheits- und Gefahrenhinweise).

7
Gefahren,dievom Ventilationsgerät ausgeh-
en können:
GEFAHR!
Das Ventilationsgerät FAN3S arbeitet mit
Netzspannung. Bei geöffnetem Gerät kön-
nen stromführende Teile berührt werden.
Die Berührung stromführender Teile kann zu
schweren Verletzungen oder zum Tod führen.
Daher:Vor Beginn von Arbeiten am Venti-
lationsgerät FAN3S, den Dampf-Luftbefeuch-
ter sowie das Ventilationsgerät ausser Betrieb
setzen, vom Stromnetz trennen und gegen
unbeabsichtigte Inbetriebnahme sichern.
WARNUNG!
Heisser Wasserdampf
Durch die Austrittsöffnung wird im Be-
trieb Dampf ausgeblasen. Bei Berührung
des austretenden Dampfes besteht Verbren-
nungsgefahr.
Daher:Ventilationsgerät so platzieren, dass
keine Personen durch den heissen Dampf-
strom verletzt werden können.
Verhalten im Gefahrenfall
Wenn anzunehmen ist, dass ein gefahrloser
Betrieb nicht mehr möglich ist, so ist der
Dampf-Luftbefeuchter und das Ventilationsgerät
FAN3S umgehend ausser Betrieb zu setzen
und gegen unbeabsichtigtes Einschalten
zu sichern. Dies kann unter folgenden Umstän-
den der Fall sein:
– wenn das Ventilationsgerät FAN3S beschä-
digt ist
– wenn das Ventilationsgerät FAN3S nicht
mehr korrekt arbeitet
– wenn Anschlüsse oder Leitungen undicht
sind
Alle mit Arbeiten am Ventilationsgerät FAN3S
betrautenPersonensindverpichtet,Verände-
rungen am Gerät, welche die Sicherheit beein-
trächtigen, umgehend der verantwortlichenStelle
des Betreibers zu melden.
UnzulässigeGerätemodikationen
Ohne schriftliche Genehmigung des Herstellers
dürfen am Ventilationsgerät FAN3S keine An-
oder Umbauten vorgenommen werden.
Für denAustausch defekter Gerätekomponenten
ausschliesslichOriginal Zubehör-und Ersatz-
teile vom Hersteller verwenden.
Danger that may arise from the fan unit:
DANGER!
The fan unit FAN3S is mains powered. One
may get in touch with live parts when the unit
is open. Touching live parts may cause severe
injury or danger to life.
Prevention:Before carrying out any work on
thefanunitFAN3Ssetthesteamhumidieras
well as the fan unit out of operation, disconnect
the units from the mains and secure the units
against inadvertent power-up.
WARNING!
hot water vapour
Duringoperationsteam isblown outvia the
outlet opening. There is danger of burning
whentouchingthesteamow.
Prevention: Locate the fan unit in such a way,
thatnopersonscanbehurtbythesteamow.
Behaviour in case of danger
If it is suspected that safe operation is no
longer possible, then the steam humidier
and the fan unit FAN3S should immediately be
shut down and secured against accidental
power-up. This can be the case under the fol-
lowing circumstances:
– if the fan unit FAN3S or its mains cable is
damaged
– if the fan unit FAN3S is no longer operating
correctly
– if connections and/or piping are not sealed
All persons working with the fan unit FAN3S must
report any alterations to the unit that may affect
safety to the owner without delay.
Prohibitedmodicationstotheunit
No modications must be undertaken on
the fan unit FAN3S without the express written
consent of the manufacturer.
For the replacement of defective components
useexclusivelyoriginal accessoriesand spare
parts available from your supplier.
Možnárizikaspojená sventilátorovým ná-
stavcem FAN3S:
NEBEZPEČÍ!
VentilátorovýnástavecFAN3Spracujesna-
pětímzelektrickésítě. Pokud je ventilátorový
nástavec otevřený, může dojít ke kontaktu
sčástmipodnapětím.Kontaktstěmitočástmi
můžezpůsobitvážnézraněníčiohrozitživot
.
Prevence:Předzapočetímprácenaventiláto-
rovémnástavciFAN3Smusítevypnoutparní
zvlhčovačaventilátorovýnástavec,odpojitje
od elektrického napájení a zabezpečit proti
opětovnémunechtěnémuzapnutí
.
VAROVÁNÍ!
Horkávodnípára
Během provozu pára proudí skrz výstupní
mřížku.Nebezpečípopálenípřikontaktusvy-
stupujícípárou.
Prevence: Umístěte ventilátorový násta-vec
tak,abyvystupujícípáraneohrožovalaosoby
.
Chovánívpřípaděvznikléhonebezpečí
Pokudjepodezření,žebezpečnýprovozventi-
látorovéhonástavceFAN3Sjižnenídálemož-
ný,musíbýtventilátorovýnástavecokamžitě
vypnutazabezpečenprotiopětovnémuza-
pnutí.Tomůženastatzanásledujícíchokolností:
– pokud je ventilátorový nástavecFAN3S nebo
kabelpřívoduelektrickéenergiepoškozen
– pokudventilátorovýnástavec FAN3S nepra-
cujesprávně
– pokudspojenebopotrubínejsoudostatečně
utěsněné
Obsluha ventilátorového nástavce FAN3S je
povinna bezodkladně oznámit vlastníku zaří-
zeníjakoukolivsituaci,kterábymohlaovlivnit
bezpečnostprovozu.
Nepovolenémodikaceventilátorovéhoná-
stavce
Bezpísemnéhosouhlasuvýrobcenenídovole-
noprovádětžádnéúpravy na ventilátorovém
nástavci FAN3S.
Jakonáhraduzanefunkčnídílyjepovoleno
používatvýhradněoriginálnípříslušenství
anáhradnídílyodVašehododavatele.

8
Beispiel / Example / Příklad:
FAN3S CP Basic M FC
Geräteversion/Unit version/Verze:
FAN3S CP Basic (CP3 Basic)
FAN3S CP Pro (CP3 Pro)
FAN3S Mk (Mk5)
Grösse(Dampeistung)/Size(steamcapacity)/Velikost(parnívýkon):
M (5...16 kg/h)
L (16...45 kg/h)
OptionFC/OptionFC/PříslušenstvíFC:
Frontblende für die Montage direkt über dem Dampf-Luftbefeuchter
Frontcoverformountingdirectlyabovethesteamairhumidier
Předníkrytpromontážnástavcepřímonadparnízvlhčovač
3 Produktübersicht
3.1 Typenübersicht
Die Ventilationsgeräte FAN3S sind in zwei Grö-
ssen (“FAN3S ... M ...” und “FAN3S ... L”) in un-
terschiedlichenAusführungsvariantenerhältlich,
abgestimmt auf die verschiedenen Versionen
der Dampf-Luftbefeuchter Condair CP3 und
Defensor Mk5.
FAN3S CP ... M FAN3S CP ... M FC FAN3S CP ... L FAN3S Mk M FAN3S Mk M FC FAN3S Mk L
Condair CP3 Basic
5...15 kg/h FAN3S CP Basic M FAN3S CP Basic M FC –––– –––– –––– ––––
16...45 kg/h –––– –––– FAN3S CP Basic L –––– –––– ––––
Condair CP3 Pro
5...15 kg/h FAN3S CP Pro M FAN3S CP Pro M FC –––– –––– –––– ––––
16...45 kg/h –––– –––– FAN3S CP Pro L –––– –––– ––––
Defensor Mk5 Visual / Process
5...16 kg/h –––– –––– –––– FAN3S Mk M FAN3S Mk M FC ––––
20...40 kg/h –––– –––– –––– –––– –––– FAN3S Mk L
Schlüssel Modellbezeichnung
3 Unit overview
3.1 Type overview
The fan units FAN3S are available in two sizes
(“FAN3S... M... “ and ” FAN3S... L”), and differ-
ent variants, adapted to the different versions
ofthesteamairhumidiersCondairCP3and
Defensor Mk5.
3 Přehledzařízení
3.1 Typovéřady
Ventilátorový nástavec FAN3S je k dispozici ve
dvou velikostech (“FAN3S... M...” a “FAN3S...
L...”) a různých variantách, které jsou přizpů-
sobenyjednotlivýmverzímparníchzvlhčovačů
Condair CP3 a Defensor Mk5.
Key model designation Identikační klíč ventilátorového nástavce

9
3.2 Aufbau FAN3S
1 Dampfanschluss
2 Kondensatanschluss
3 Frontblende
(nur FAN3S ... FC)
4 Dampfverteiler
5 Geräteabdeckung
6 Filterbox
7 Kabeldurchführung
8 Anschlussklemme
9 Typenschild mit Modellbezeichnung
3.2 Construction of the FAN3S
1 Steam connector
2 Condensate connector
3 Front cover
(FAN3S ... FC only)
4 Steam distributor
5 Unit cover
6 Filter box
7 Cable entry
8 Connecting terminal
9 Type plate
3.2 Konstrukce FAN3S
1 Připojenípáry
2 Připojeníkondenzátu
3 Předníkryt
(jen pro FAN3S ... FC)
4 Parnídistributor
5 Kryt
6 Filtračníkazeta
7 Kabelováprůchodka
8 Svorkovnice
9 Výrobníštítek
7
8
5
4
3
6
2
6
1 9

10
3.4 Einsatzzweck
Die Ventilationsgeräte FAN3S dienen in Ver-
bindungmitdenDampuftbefeuchternCondair
CP3 und Defensor Mk5 zur direkten Raum-
luftbefeuchtung. Das Ventilationsgerät wird
vorzugsweise eingesetzt, wenn nur ein Raum
zu befeuchten ist, wenn keine Lüftungs- oder
Klimaanlage vorhanden ist, wenn der Befeuchter
nachträglich eingebaut wird oder für spezielle
Befeuchtungsprobleme.
3.4 Application
The FAN3S fan units are used in association with
the Condair CP3 and Defensor Mk5 steam air
humidiersfordirectroomairhumidication.The
fanunitischieyusedwhenonlyoneroomisto
behumidied,whenthereisnoventilationorair-
conditioningplantinstalled,whenthehumidier
has been subsequently installed, or in the case
of special humidity problems.
3.4 Použití
Ventilátorový nástavec FAN3S se používá ve
spojení s parními zvlhčovači Condair CP3 a
DefensorMk5 propřímézvlhčování vzduchu.
Ventilátorový nástavec FAN3S se především
používátam,kdejepožadaveknazvlhčování
pouzejednémístnosti,kdeneníinstalovánsys-
témvzduchotechniky,případnětam,kdejenutné
zvlhčovačnainstalovatdodatečněnebopokud
jsounazvlhčovánívzduchuspeciálnípožadavky.
3.3 Kennzeichnung des Produktes
DieKennzeichnungdesProduktesndetsichauf
dem Typenschild (Platzierung des Typenschilds
siehe Abbildung oben):
3.3 Identicationoftheunit
The identication of the unit is found on the
type plate (for the location of the type plate see
gureabove):
3.3 Identikacenástavce
Identikacenástavcejemožnápodlevýrobního
štítku(umístěníštítkuvizobrázekvýše):
Condair AG CH - 8808 Pfäfkon
Type: FAN3S L
Serial: XXXXXXX 11.12
Connection voltage: 200...240V/1 50...60Hz Power: max. 70 W
Made in Switzerland
Typenbezeichnung
Type designation
Označenítypu
Serienummer
Serial number
Sériovéčíslo
Monat/Jahr
Month/Year
Měsíc/Rok
Anschlussspannung
Supply voltage
Napájecínapětí
Elektrische Leistung
Power consumption
Elektrickýpříkon
Feld mit Prüfzeichen
Fieldwithcerticationsymbols
Polescertikačnímisymboly

11
3.5 Lieferumfang
FAN3S CP Basic M **
FAN3S CP Basic M FC ***
Montageschiene mit Befestigungsset
Dampfanschluss ø22 mm
Ausblasstutzen ø22 mm
mit Schlauchklemmen
Dampfanschluss ø30 mm
Ausblasstutzen ø30 mm
mit Schlauchklemmen
Kondensatfalle ø45 mm
Set für interne Kondensatführung
Schlauchklemmenset FIT-UNO-S für
Dampfschlauch **
Set für Version mit Frontblende
(Dampf-Verbindungsstück, Konden-
sat-Siphon, Schlauchklemmen) ***
Mountingrailwithxingset
Steam connector ø22 mm
Outlet adapter ø22 mm
with hose clips
Steam connector ø30 mm
Outlet adapter ø30 mm
with hose clips
Condensate trap ø45 mm
Set for internal condensate line
Set hose clips FIT-UNO-S for steam
hose **
Set for version with front cover
(steam connecting piece, condensa-
te siphon, hose clips) ***
Montážnílištasespojovacímmate-
riálem
Výstup páry ø22 mm
Výstupníadaptérø22mmshadico-
vými sponami
Výstup páry ø30 mm
Výstupníadaptérø30mmshadico-
vými sponami
Jímačkondenzátuø45mm
Sadaprovnitřníodvodkondenzátu
Sada hadicových spon FIT-UNO-S
proparníhadici**
Sadaproverzisčelnímkrytem(kus
propřipojenípáry,sifonprokonden-
zát, hadicové spony) ***
FAN3S CP Pro M
FAN3S CP Pro M FC
Montageschiene mit Befestigungsset
Kondensatfalle ø45 mm
Set für interne Kondensatführung
Schlauchklemmenset FIT-UNO-S für
Dampfschlauch **
Set für Version mit Frontblende
(Dampf-Verbindungsstück, Konden-
sat-Siphon, Schlauchklemmen) ***
Mountingrailwithxingset
Condensate trap ø45 mm
Set for internal condensate line
Set hose clips FIT-UNO-S for steam
hose **
Set for version with front cover
(steam connecting piece, condensa-
te siphon, hose clips) ***
Montážní lišta se spojovacím mate-
riálem
Jímačkondenzátuø45mm
Sadaprovnitřníodvodkondenzátu
Sada hadicových spon FIT-UNO-S pro
parníhadici**
Sadaproverzisčelnímkrytem(kus
propřipojenípáry,sifonprokondenzát,
hadicové spony) ***
FAN3S CP Basic L Montageschiene mit Befestigungsset
Dampfanschluss ø45 mm
Ausblasstutzen ø45 mm
mit Schlauchklemmen
Kondensatfalle ø45 mm
Set für interne Kondensatführung
Schlauchklemmenset FIT-UNO-S für
Dampfschlauch
Mountingrailwithxingset
Steam connector ø45 mm
Outlet adapter ø45 mm
with hose clips
Condensate trap ø45 mm
Set for internal condensate line
Set hose clips FIT-UNO-S for steam
hose
Montážní lišta se spojovacím mate-
riálem
Výstup páry ø45 mm
Výstupníadaptérø45mmshadicovými
sponami
Jímačkondenzátuø45mm
Sadaprovnitřníodvodkondenzátu
Sada hadicových spon FIT-UNO-S pro
parníhadici
FAN3S CP Pro L Montageschiene mit Befestigungsset
Kondensatfalle ø45 mm
Set für interne Kondensatführung
Schlauchklemmenset FIT-UNO-S für
Dampfschlauch
Mountingrailwithxingset
Condensate trap ø45 mm
Set for internal condensate line
Set hose clips FIT-UNO-S for steam
hose
Montážní lišta se spojovacím mate-
riálem
Jímačkondenzátuø45mm
Sadaprovnitřníodvodkondenzátu
Sada hadicových spon FIT-UNO-S pro
parníhadici
FAN3S Mk M **
FAN3S Mk M FC ***
FAN3S Mk L **
Montageschiene mit Befestigungsset
Schlauchklemmenset FIT-UNO-S für
Dampfschlauch **
Set für Version mit Frontblende
(Dampf-Verbindungsstück, Konden-
sat-Siphon, Schlauchklemmen) ***
Mountingrailwithxingset
Set hose clips FIT-UNO-S for steam
hose **
Set for version with front cover
(steam connecting piece, condensa-
te siphon, hose clips) ***
Montážní lišta se spojovacím mate-
riálem
Sada hadicových spon FIT-UNO-S pro
parníhadici**
Sadaproverzisčelnímkrytem(kus
propřipojenípáry,sifonprokondenzát,
hadicové spony) ***
3.6 Zubehör Wandmontage
Zubehör/Accessory/Příslušenství Označení
Kondensatschlauch12/8mm/Condensatehose12/8mm/Kondenzátníhadice12/8mm KS10
Dampfschlauch57/45mm/Steamhose57/45mm/Parníhadice57/45mm--->CP3 DS80
Dampfschlauch53/42mm/Steamhose53/42mm/Parníhadice53/42mm--->Mk5 Z10
Schlauchbriden-Set zu DS80/Z10 / Hose clamp set for DS80/Z10 / Sada hadicových spon DS80/Z10 FIT-UNO-S
3.5 Delivery
3.6 Accessories wall mounting
3.5 Dodávka
3.6 Příslušenstvípřimontážina
stěnu

12
4 Installation
4.1 Dampf-Luftbefeuchter
vorbereiten
Defensor Mk5
Beim Defensor Mk5 sind keine Vorbereitungs-
arbeiten notwendig.
Condair CP3 Basic/CP3 Pro
Beim Condair CP3 Basic und CP3 Pro sind die
mitdemFAN3Smitgelieferten Komponentenge-
mässden nachfolgendenAbbildungeneinzubau-
en. Beachten Sie dazu auch die nachfolgenden
Umbauhinweise sowie dieAngaben zum Ein- und
Ausbau des Dampfzylinders in der Montage- und
Betriebsanleitung zum Condair CP3.
ø45 mm
Cyl. A3../D3..
CP3 Basic 5..8 CP3 Basic 9...15 CP3 Basic 16...45
Cyl. A4../D4..
Cyl. A4..
Cyl. A3..
Cyl. D3..
Cyl. D4.. Cyl. A6.. Cyl. D6..
ø45 mm
ø30 mm
ø22 mm
ø30 mm
ø22 mm
ø30 mm
ø22 mm
ø45 mm
ø45 mm
B
C
D
E
F
B
C
D
E
F
A
B
C
D
E
F
Cyl. A6../D6..
ø45 mm
A
ø45 mm
A
4 Installation
4.1 Preparing the steam air
humidier
Defensor Mk5
With the Defensor Mk5 no preparatory work is
necessary.
Condair CP3 Basic/CP3 Pro
With the Condair CP3 Basic and CP3 Pro the
components provided with the FAN3S must be
installedinaccordancewiththefollowinggures.
Pleaseobservealsothefollowingmodication
notes as wellas the information forinstallation and
removal of the steam cylinder in the installation
and operating instructions to the Condair CP3.
4 Instalace
4.1 Příprava
parníhozvlhčovače
Defensor Mk5
UzvlhčovačeDefensorMk5nenínutnéprovádět
žádnoupřípravu.
Condair CP3 Basic/CP3 Pro
U zvlhčovače Condair CP3 Basic a CP3 Pro
musítenainstalovatdílydodanéspolusventiláto-
rovýmnástavcemFAN3Spodlenížeuvedených
obrázků. Dodržte prosím také následující po-
známkykúpravězvlhčovačestejnějakoinforma-
ceomontážiademontážiparnívyvíjecínádoby
vinstalačnímaprovoznímnávoduCondairCP3.

13
ø45 mm
A3.../D3...
CP3 Pro 5..8 CP3 Pro 9...15 CP3 Pro 16...45
A4.../D4...
A6.../D6...
ø30 mm
ø22 mm
ø45 mm
E
F
B
E
F
B
E
F
A
B
ø45 mm
A
ø45 mm
A
Umbauhinweise
– Der Kondensatschlauch “E” ist in einem gro-
ssen Bogen hinter dem Dampfzylinder nach
unten zu führen und mit dem Ablaufstutzen
“F” am Ablaufbecher zu befestigen.
– Der Dampfanschluss “C” ist abhängig vom
verwendeten Zylinder (Cyl.A.. oder Cyl. B..)
über die langen oder die kurzen Gewinde-
büchsen im Gehäusedeckel zu befestigen.
– DerAusblasstutzen “D” und der Kondensat-
schlauch “E” sind mit den entsprechenden
Schlauchklemmen an den Anschlüssen zu
befestigen.
– Beim Einbau der Kondensatfalle “A” darauf
achten, dass der O-Ring “B” korrekt in der
Zentrierung des Dampfanschlusses “C” ein-
gelegt ist und nicht beschädigt wird.
Poznámkykúpravězvlhčovače
– Kondenzátníhadici“E”veďtevelkousmyč-
kouzaparnívyvíjecínádobousměremdolů
aupevnětejidonátrubku“F”vevypouštěcím
kalichuzvlhčovače.
– Výstuppáry“C”připevnětenaopláštěnízvlh-
čovačepřesdlouhounebokrátkourozpěrku
sezávitemvzávislostinatom,jakájepoužita
parnívyvíjecínádoba(Cyl.A..neboCyl.B..).
– Výstupníadaptér“D”akondenzátníhadice
“E”připevnětehadicovýmisponaminaod-
povídajícínátrubky.
– Přimontážijímačekondenzátu“A”seujistěte,
žeO-kroužek“B”jesprávněnasazenavy-
středěnnavýstupupáryaženenípoškozen.
Modication notes
– The condensate hose “E” isto be led ina large
curve behind the steam cylinder downwards
and be fastened with the socket “F” to the
drain cup.
– Thesteamconnector“C”istobexedtothe
housing via the long or the short threaded
bushes, depending on the cylinder in use
(Cyl. A.. or Cyl. B..).
– The outlet adapter “D” and the condensate
hose “E” are to be fastened with the ap-
propriate hose clips to the corresponding
connectors.
– When mounting the condensate trap “A”
make sure the O-ring “B” is correctly inserted
in the centring of the steam connector and
is not damaged.

14
4.2 Plazierungshinweise
Die Ventilationsgeräte FAN3S werden separat
über dem/den Befeuchtern an die Wand mon-
tiert. Bei der Platzierung des Ventilationsgerätes
ist darauf zu achten, dass die Vorschriften zur
Dampfschlauchführung und zur Kondensat-
schlauchführung eingehalten werden (siehe
Montage- und Betriebsanleitung zum Dampf-
Luftbefeuchter).
Damit sich der Dampfstrom des Ventilations-
gerätes ungehindert ausbreiten kann und nicht
an Hindernissen kondensiert (Decken, Unter-
züge, Pfeiler, etc.), sind bei der Plazierung des
Ventilationsgerätes folgende Mindestabstände
einzuhalten.
Hinweis: Die Mindestabstände in der Tabelle
gelten für einen Raumluftzustand von 15 °C und
ma x. 60 %rF. Bei tieferen Temperaturen und/
oder höherer Luftfeuchtigkeit sind die Werte
entsprechend zu erhöhen.
FAN3S ... M ... FAN3S ... L ...
mDmax. 8 kg/h 15/16 kg/h 30 kg/h 40/45 kg/h
A min. 4.0 m 6.0 m 8.0 m 10.0 m
B min. 1.0 m 1.0 m 1.0 m 1.5 m
C min. 2.2 m 2.2 m 2.2 m 2.2 m
D1.0 m 1.0 m 1.0 m 1.5 m
E min. siehe Montageabbildungen in Kapitel 4.3.1
see mounting illustrations in chapter 4.3.1
viz pokyny k montáži v kapitole 4.3.1
E max. 4.0 m (empfohlen/recommended/doporučeno: 2.0 m)
4.2 Equipment location
The fan units are mounted separately on thewall,
abovethehumidier/s.Whenpositioningthefan
units, care should be taken that the regulations
relating to the installation of steam hosing and
condensate hosing can be maintained (see
installation and operating instructions on steam
airhumidiers).
Inorderthatthefanunitsteamowcanexpand
unhindered and does not condense on objects
(such as ceilings, girders, pillars, etc.), the fol-
lowing minimum separation distances must be
complied with.
Note: The minimum separations in the table
apply to an ambient room air condition of 15 °C
and max. 60 %rh. At lower temperatures and/
or greater air humidity, the values should be
increased appropriately.
4.2 Umístěníventilátorového
nástavce
Ventilátorovýnástavecsemontujesamostatně
nastěnunadparnízvlhčovač.Přivolběumístění
ventilátorovéhonástavcedbejtenapožadavky
týkajícíseparníhadice,kterémusíbýtdodrženy
(viz.takéinstalačníaprovoznínávodkparním
zvlhčovačům).
Abymohlavystupujícípáravolněexpandovata
abynekondenzovalanapředmětechvmístnosti
(např.nastropě,nosnících,sloupechatd.),je
nutnédodržetnásledujícíminimálnírozptylovou
vzdálenost.
Poznámka: Minimální rozptylová vzdálenost
vtabulceplatíproteplotuvmístnostiod15°Ca
vlhkostvmístnostimax.60%.Přinižšíteplotěa/
nebovyššívlhkostivzduchujenutnévzdálenost
odpovídacímzpůsobemprodloužit.
A
C
B
D
D
A
C
B
E
D
D

15
VORSICHT!
Um Schäden zu vermeiden, sollten unter-
halb des Ventilationsgerätes und im Bereich
des Dampfstromes keine korrosions-/was-
serempndlichen Komponenten gelagert
werden.
WARNUNG!
Heisser Wasserdampf
Durch die Austrittsöffnung der Ventilati-
onsgeräte FAN3S wird im Betrieb Dampf
ausgeblasen. Bei Berührung des austreten-
den Dampfes besteht Verbrennungsgefahr.
Daher:Ventilationsgerät so platzieren, dass
keine Personen durch den heissen Dampf-
strom verletzt werden können.
CAUTION!
In order to avoid deterioration of components,
no corrosion/water-sensitive components
should be stored below the fan units and in
thevicinityoftheowofsteam.
WARNING!
hot water vapour
During operation steam is blown out via
the outlet opening of the fan units FAN3S.
There is danger of burning when touching
thesteamow.
Prevention: Locate the fan unit in such a way,
thatnopersonscanbehurtbythesteamow.
POZOR!
Abysezabránilopřípadnýmškodámnama-
jetku,předmětycitlivénavlhkostnesmíbýt
skladovány pod ventilátorovým nástavcem
případněvdosahuproudupáry.
VAROVÁNÍ!
Horkávodnípára
Běhemprovozupáraproudískrzvýstupní
mřížkuventilátorovéhonástavceFAN3S.
Nebezpečípopálenípřikontaktusvystupující
párou.
Prevence: Umístěteventilátorový nástavec
tak,abyvystupujícípáraneohrožovalaosoby.

16
4.3 Montage
4.3.1 Montageabbildungen
FAN3S Mk M FC
4.3 Mounting
4.3.1 Mounting illustrations
FAN3S Mk M FC
4.3 Montáž
4.3.1Přehledmontáže
FAN3S Mk M FC
171.5150
119 119
260
388
55
Z10
KS10
FIT-UNO-S
FIT-UNO-S
L= 127 mm
A
A
B
D
D
E
H
G
I
L
B
J
H
C
K
F
**
**
**
**
** im Lieferunfang enthalten
included in the delivery
součástdodávky
Massein[mm]/Dimensionsin[mm]/Rozměryv[mm]

17
FAN3S CP M FC FAN3S CP M FC FAN3S CP M FC
171.5186
95 95
260
340
FIT-UNO-S
H
D
KS10
FIT-UNO-S
G
L
H
K
A
A
B
D
E
B
C
F
I
55
**
**
**
**
J
** im Lieferunfang enthalten
included in the delivery
součástdodávky
Massein[mm]/Dimensionsin[mm]/Rozměryv[mm]

18
FAN3S Mk M und FAN3S Mk L FAN3S Mk M and FAN3S Mk L FAN3S Mk M a FAN3S Mk L
a
cc
d
e
A
A
B
D
G
B
C
F
b
KS10 J
FIT-UNO-S
H
FIT-UNO-S
H
IZ10
D
E
**
***
***
**
FAN3S MK M FAN3S MK L
a 171,5 mm 231,5 mm
b 68,5 mm 68,5 mm
c 119,0 mm 104,0 mm
d 260,0 mm 260,0 mm
e 388,0 mm 358,0 mm
** FIT-UNO-S im Lieferunfang enthalten
FIT-UNO-S included in the delivery
FIT-UNO-Ssoučástdodávky
*** Z10 und KS10 als Zubehör erhältlich
Z10 and KS10 available as accessories
Z10aKS10kdispozicijakopříslušenství
min Ø: 100 mm
max. 4.0 m (empfohlen/recommended/doporučeno:2.0m)

19
FAN3S CP M and FAN3S CP L FAN3S CP M a FAN3S CP L
a
cc
d
e
FIT-UNO-S
H
D
G
A
A
B
D
E
B
C
F
b
KS10 J
FIT-UNO-S
H
IDS80
**
***
***
**
FAN3S CP M FAN3S CP L
a 171,5 mm 231,5 mm
b 68,5 mm 68,5 mm
c 95,0 mm 104,0 mm
d 260,0 mm 260,0 mm
e 340,0 mm 358,0 mm
** FIT-UNO-S im Lieferunfang enthalten
FIT-UNO-S included in the delivery
FIT-UNO-Ssoučástdodávky
*** Z10 und KS10 als Zubehör erhältlich
Z10 and KS10 available as accessories
Z10aKS10kdispozicijakopříslušenství
FAN3S CP M und FAN3S CP L
min Ø: 100 mm
max. 4.0 m (empfohlen/recommended/doporučeno:2.0m)

20
4.3.2 Montagehinweise
Verwenden Sie für die Montage des Gerätes
ausschliesslich das im Lieferumfang enthaltene
Befestigungsmaterial. Ist in Ihrem speziellen Fall
die Befestigung mit dem mitgelieferten Material
nicht möglich, wählen Sie eine ähnlich stabile
Befestigungsart.
1. Schraube derGeräteabdeckung desVentila-
tionsgeräts “G” lösen und Geräteabdeckung
entfernen.
2. Befestigungspunkte “A” (Montageschiene)
und“B” gemässder entsprechendenMonta-
geabbildung und mit Hilfe einer Wasserwaa-
ge am vorgesehenen Standort anzeichnen.
Löcher ø10 mm bohren und die mitgeliefer-
ten Dübel einsetzen.
3. Montageschiene “C” mit den mitgelieferten
Unterlagsscheiben und Schrauben an der
Wand befestigen.
4. Nur bei Ventilationsgeräten mit Front-
blende FAN3S ... FC: Seitenbleche “K” mit
den mitgelieferten Schrauben von unten am
Ventilationsgerät befestigen.
5. Dampfschlauch “I” auf die benötigte Länge
zuschneiden (FAN3S Mk M FC: 127 mm).
Hinweis: Beim FAN CP M FC wird ein Ver-
bindungsstück mitgeliefert.
6. Dampfschlauch bzw. Verbindungsstück am
Dampfanschluss des Ventilationsgerätes mit
einer Schlauchklemme “H” befestigen.
7. Ventilationsgerät von oben in die Montage-
schiene einhängen.
Hinweis: Bei Geräten mit Frontblende
(FAN3S ... FC) beim Einhängen des Gerä-
tes gleichzeitig den Dampfschlauch bzw. das
Verbindungsstück mit der Schlauchklemme
auf denAnschlussam Dampf-Luftbefeuchter
aufstecken.
8. Ventilationsgerät horizontal ausrichten und
mit den mitgelieferten Unterlagsscheiben
undSchrauben“F”anderWandxieren.
9. Kondensatschlauch “I” auf denAnschluss am
Ventilationsgerät ausstecken und mit einer
Schlauchklemmebefestigen.Anschliessend
Kondensatschlauch mit einem Schlauchbo-
gen (Siphon min. Durchmesser 100 mm)
nach unten führen, auf die benötigte Länge
zuschneiden und auf den Kondensatan-
schluss im Dampf-Luftbefeuchter aufste-
cken. Schlauchbogen mit einemKabelbinder
am Gehäuse des Ventilationsgerätes befes-
tigen.
10. Anschlusskabel “D” durch Kabeltülle “E” in
den Steuerkasten des Dampf-Luftbefeuch-
ters und durch die Kabelverschraubung un-
ten am Ventilationsgerät ins Ventilationsgerät
führen.
11. Nur bei Ventilationsgeräten mit Front-
blende FAN3S ... FC: Frontblech “L” in die
Seitenbleche einhängen.
12. Geräteabdeckung des Ventilationsgerätes
“G” anbringen und mit der Schraube befes-
tigen.
4.3.2 Mounting notes
When installing the units, use exclusively the
xingmaterialscontainedinthedeliverypack-
age.Ifxingusingthematerialssuppliedisnot
possibleinyourspecicinstallation,choosea
similarlystablemethodofxing.
1. Undo the screw of the fan unit cover “G” and
remove the unit cover.
2. Mark the xing points “A” (mounting rail)
and “B” respectively at the desired location
inaccordancewith thecorrespondingmoun-
ting drawing an the help of a spirit level.
Drill ø10 mm holes and insert the dowels
provided.
3. Fix mounting rail “C” to the wall using the
washers and screws supplied.
4. Fan units with front cover only FAN3S ...
FC:xthesidepanels“K”tothebottomof
the fan housing using the screws supplied.
5. Cut steam hose “I” to the desired length
(FAN3S Mk M FC: 127 mm).
Note: with the FAN CP M FC a connecting
piece is provided.
6. Fix the steam hose or the connection piece
to the steam connector on the fan unit using
a hose clamp “H”.
7. Suspend the fan unit on the mounting rail.
Note: when suspending the unit with front
cover (FAN3S CP ... FC) attach the steam
hose with the hose clamp to the steam
connector on the steam humidier at the
same time.
8. Horizontallyalignthefanunitandxtheunit
to the wall using the washers and screws “F”
supplied.
9. Connect the condensate hose “I” to the
connector of the fan unit, then lead the con-
densate hose downwards forming a curve
(siphon min. diameter 100 mm) and connect
it to the condensate connector of the steam
humidier.Fixthehosecurvetothefanunit
housing using a cable strap.
10. Insert supply cable “D” into the control box
ofthesteamairhumidierandintothefan
unit through the cable grommet “E” and the
cable gland on the bottom of the fan unit.
11. Fan units with front cover only FAN3S ...
FC: hook in the front panel “L” into the side
panels.
12.Mountunitcover“G”tothefanunitandx
it with the screw.
4.3.2Poznámkykmontáži
Promontážventilátorovéhonástavcepoužívejte
výhradněmontážnímateriálobsaženývbalení.
PokudveVašemkonkrétnímpřípaděnenímožné
použít originální připevňovací materiál, zvolte
způsob,kterýposkytnesrovnatelnoustabilitu.
1. Odšroubujtešroubnakrytu„G“ventilátoro-
véhonástavceasejmětekryt.
2. Označtesikotevníbody“A”(montážnílišta)
a“B”vmístěmontážepodleodpovídajícího
rozměrovéhonáčrtkuavodováhy.Vyvrtejte
otvory ø10 mm a vložte do nich dodané
hmoždinky.
3. Dodanýmišroubyspodložkamipřipevněte
montážnílištu“C”.
4. Pouze ventilátorový nástavec s čelním
krytem FAN3S ... FC: Dodanými šrouby
připevněteboční panelykespodnístraně
opláštěníventilátorovéhonástavce.
5. Uřízněteparníhadici“I”napotřebnoudélku
(FAN3S Mk M FC: 127 mm). Poznámka: u
nástavce
FAN CP
M
FC je spojovací kus
hadice dodán
.
6. Hadicovýmisponami “H”připevněte parní
hadicenebospojovacíkuskpřipojenípáry
na ventilátorovém nástavci.
7. Zavěsteventilátorovýnástavecnamontážní
lištu.
Poznámka
:
přizavěšeníventilačníhonástav-
cesčelnímkrytem(FAN3S ... FC)připojte
kvýstupupáryzparníhozvlhčovačeparní
hadici hadicovou sponou.
8. Ventilátorový nástavec vyrovnejte do vo-
dorovné polohy a připevněte jej ke stěně
dodanýmšroubem“F”..
9. Připojtekondenzátníhadici“J”kpřipojení
na ventilátorovém nástavci, potom veďte
hadicidolůavytvořtesmyčku(sifonsmin.
průměrem100 mm)a připojteji domísta
připojeníkondenzátunaparnímzvlhčova-
či.Připevnětesmyčkunahadicistahovací
páskoukopláštěníventilátorovéhonástavce
10.Napájecíkabel “D”natáhněte zelektrické
svorkovniceparníhozvlhčovačedoventiláto-
rovéhonástavce.Použijtekabelovývstup“E”
aprůchodkuvespodníčástiventilátorového
nástavce.
11. Jenventilátorovýnástavecsčelnímkry-
tem
F
AN3S
...
FC
:
zaháknětečelníkryt“L”
dobočníchpanelů.
12. Namontujte kryt ventilátorového nástavce
“G”apřipevnětehošroubem.
Other manuals for FAN3S
1
Table of contents
Other Condair Fan manuals
Popular Fan manuals by other brands

Ebmpapst
Ebmpapst W3G800-GO84-01 operating instructions

Ebmpapst
Ebmpapst R3G310-BE90-N1 operating instructions

VES
VES AX315/4-1 Installation, operation & maintenance manual

ProKlima
ProKlima TFN-111449.2 instruction manual

Ebmpapst
Ebmpapst W3GZ50-FB02-01 operating instructions

Ebmpapst
Ebmpapst K3G220-CD17-01 operating instructions