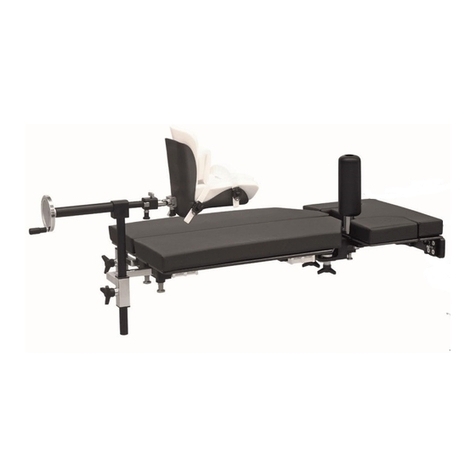
Condor MedTec RotexShoe RO.0162.2018 Guide

Instructions for Care and Use
of Traction boot
RO.0162.2018 | RO.0082.2019 | RO.0074.2018 | RO.0081.2019
RO.0073.2018 | RO.0110.2020 I RO.0110.2020 S
444.GA.RS.EN
Last updated on 13.07.22

Instructions for Care and Use Condor® Traction boot – Edition 2022-07-13 EN 11
Contents
I List of gures 2
II List of tables 2
1. Introduction..................................................................................................................... 3
1.1 About this manual........................................................................................................ 3
1.2 Symbols used in the text.................................................................................................. 3
1.3 General safety instructions................................................................................................ 3
1.4 Graphical symbols used .................................................................................................. 7
2. Basic requirements. ............................................................................................................. 8
2.1 Intended use ............................................................................................................. 8
2.2 Interfaces ................................................................................................................ 8
2.3 Variants .................................................................................................................. 8
2.4 Device description ....................................................................................................... 9
3. Storage.........................................................................................................................10
4. Operation ......................................................................................................................10
4.1 General information ....................................................................................................10
4.2 Positioning with disposable inlay incl. mounting brackets ................................................................12
4.3 Fastening and positioning the traction boot at extension device ..........................................................16
4.4 Removing traction boot .................................................................................................16
5. Hygiene ........................................................................................................................17
5.1 Safety information.......................................................................................................17
5.2 Cleaning ................................................................................................................18
5.3 Disinfection .............................................................................................................18
6. Service and Maintenance ......................................................................................................19
6.1 Spare parts..............................................................................................................19
6.2 Accessories. . . . . . . . . . . . . . . . . . . . . . . . . . . . . . . . . . . . . . . . . . . . . . . . . . . . . . . . . . . . . . . . . . . . . . . . . . . . . . . . . . . . . . . . . . . . . . . . . . . . . . . . . . . . . . 19
6.3 Inspection and Maintenance.............................................................................................19
6.4 Maintenance ............................................................................................................20
6.5 Repairs..................................................................................................................20
7. Disposal ........................................................................................................................21
8. Technical specications ........................................................................................................21
8.1 Working load and weight ................................................................................................21
8.2 Example of a nameplate .................................................................................................21
8.3 Classication ............................................................................................................21
8.4 Standards used..........................................................................................................21
8.5 Certicates..............................................................................................................21
9.Copyrights ......................................................................................................................21

Instructions for Care and Use Condor® Traction boot – Edition 2022-07-13 EN 2
I List of figures
Illustration 1 Wing screw ........................................................................................................... 8
Illustration 2 Quick-release fastener ................................................................................................ 8
Illustration 3 round Interface. ..................................................................................................... 8
Illustration 4 Device description I .................................................................................................... 9
Illustration 5 Device description II for single-use components ........................................................................ 9
Illustration 6 Lay the padding in the shell ........................................................................................... 12
Illustration 7 Shell with padding ................................................................................................... 12
Illustration 8 Traction boot with foot ............................................................................................... 12
Illustration 9 Traction boot with foot and padding . ............................................................................... 12
Illustration 10 Traction boot with padding and mounting bracket............ ....................................................... 13
Illustration 11 Mounting bracket xated on shin-bone. . . . . . . . . . . . . . . . . . . . . . . . . . . . . . . . . . . . . . . . . . . . . . . . . . . . . . . . . . . . . . . . . . . . . . . . . . . . . . . 13
Illustration 12 Padding for ankle .................................................................................................... 13
Illustration 13 Mounting bracket xations ........................................................................................... 13
Illustration 14 Fixated mounting bracket............................................................................................ 13
Illustration 15 Double padding at the shin-bone.................................................................................... 14
Illustration 16 Inserting mounting brackets in buckles............................................................................... 14
Illustration 17 Fixating the mounting brackets by pressing.......................................................................... 14
Illustration 18 Detailed image of quick-release lever................................................................................. 15
Illustration 19 Re-tigthening the mounting brackets................................................................................ 15
Illustration 20 Releasing the buckle to open the mounting bracket.................................................................. 15
Illustration 21 Example of sticker................................................................................................... 15
Illustration 22 Details of the interface with wing screw.............................................................................. 15
Illustration 23 Details of the interface with quick-release fastener.................................................................... 16
Illustration 24 Details of the attachable guide block ................................................................................. 16
Illustration 25 Traction boot with round interface . . . . . . ............................................................................. 16
Illustration 26 Buckle............................................................................................................... 19
Illustration 27 Padding set ......................................................................................................... 19
Illustration 28 Padding set S . ....................................................................................................... 19
II List of tables
Table 1 Graphical symbols used .................................................................................................... 7
Table 2 Storage ................................................................................................................... 10
Table 3 Spare Parts ................................................................................................................ 19
Table 4 Accessories................................................................................................................ 19
Table 5 Sample maintenance plann ................................................................................................ 20
Table 6 Working load and weight .................................................................................................. 21

Instructions for Care and Use Condor® Traction boot – Edition 2022-07-13 EN 3
1 Introduction
1.1 About this manual
These instructions for use encompass all the information relevant
to use of the traction boot traction boots with the item numbers
listed above including its accessories.
This section contains information about the structure of the user
manual as well as explanations of the signs and symbols used.
These instructions for use contain instructions on handling the
traction boot with regard to operation, hygiene, service, main-
tenance, and disposal.
This user manual may contain inaccuracies or printing errors. The
information provided here is updated periodically and changes
are incorporated in later issues in the course of product modi-
cations. Thus, changes or improvements are possible at any time
without previous notication.
Should you have further questions, please contact Condor®
directly.
These instructions for use are to be read and used by all persons
who use or operate the traction boot.
In addition to the instructions in this manual and any binding
regulations for the prevention of accidents in the country and at
the location of use, observe accepted rules for safe and professi-
onal work.
1.2 Symbols used in the text
The following signal words and/or symbols are used in this
manual to indicate especially important information.
Danger!
This symbol indicates safety instructions warning
of risks to personal health and safety. It indicates
imminent danger of death or serious injury.
Caution!
This symbol indicates potentially dangerous
situations involving a risk of light injury.
Attention!
This symbol is used with safety instructions indica-
ting a risk of damage to the device or other property.
a
This symbol indicates additional useful informa-
tion.
• A dot in front of the text means:
This task is mandatory.
Indented text describes the result of your action.
– A dash in front of the text means:
This is part of a list.
h
g
v
1.3 General safety instructions
The traction boot is constructed according to the state of the art
and complies with accepted safety rules. However, its use may
present risks to the patient or third parties or risk of damage to
the device or other property.
Use the traction boot only when in proper working condition,
within the scope of the intended use, in consideration of safety
and potential hazards and in compliance with this user manual.
Immediately repair any defects that could possibly aect safety.
Always keep this manual readily accessible at the location of use.
In addition to this manual, observe all applicable laws and other
regulations on accident prevention and environmental protec-
tion.
Do not make any changes, extensions, or conversions to the trac-
tion boot without the manufacturer‘s permission. Spare parts
must comply with the requirements stipulated by the manu-
facturer. Original spare parts always comply with these require-
ments.
Ensure safe and environmentally-friendly disposal of operating
and auxiliary materials, as well as replacement parts!

Instructions for Care and Use Condor® Traction boot – Edition 2022-07-13 EN 4
Summary of the safety instructions
Danger!
Continuous traction and pressure may cause
damage to tissue. Regularly check the position and
relieve the leg.
Danger!
Danger of infection! Dirt particles can become en-
capsulated and this can lead to the product not
reaching the necessary level of germ reduction af-
ter disinfection. The product must be thoroughly
cleaned of soiling and encapsulated dirt particles
before disinfection.
Danger!
A foot that is not xed correctly can loosen from the
extension device. Always ensure that the traction
boot is xed securely to the extension device.
g
g
g
g
Danger!
The traction boot is designed for a maximum
traction of 80 kg. Traction that exceeds this does not
correspond to the manufacturer‘s recommendations. Danger!
Dispose of all single-use components after use.
Reusing articles that are intended for single use
deviates from the manufacturer‘s specication.
Danger!
If the transport, positioning, and cleaning and
disinfection information is not observed, material
breakage may occur. Always comply with these
instructions for use.
g
g
g
Danger!
Insucient padding can lead to the shoe t beco-
ming less secure. Check the padding and increase
if required by additional padding with cotton wool. Danger!
Danger of infection!The product can be contaminated.
Always wear gloves during cleaning / disinfection.
Danger!
Danger due to incorrect handling of cleaning and
disinfection agents! Always observe the cleaning
and disinfection agent Manufacturer‘s specication
on use, as well as the hospital‘s currently applicable
hygiene rules.
g
g
g
Danger!
A padding tongue that is not turned over can be the
cause of Insucient padding. Ensure that the foot
is t securely in the traction boot. For this, turn the
padding tongue over and lay it in doubled.
Danger!
Danger of explosion! Agents containing alcohol
form ammable mixtures that could lead to explosi-
ons in the case of high-frequency applications. Do
not use agents containing alcohol in the case of
high-frequency applications.
Danger!
Multiple use of the mounting brackets can lead to
instability. A suciently secure t cannot be guaran-
teed in the case of multiple use.
g
g

Instructions for Care and Use Condor® Traction boot – Edition 2022-07-13 EN 5
Summary of the safety instructions
Caution!
Worn mounting brackets or buckles can loosen un-
intentionally and cause injuries. Check that the trac-
tion boot is xed securely. Only use traction boots
with new components. Document the single use.
Caution!
Improper cleaning and disinfection may lead to
damage!
Caution!
Damage due to improper cleaning and disinfection!
Always perform visual and functional checks after
cleaning and disinfection.
Caution!
Only use components that are specied for single
use on one patient.
Caution!
Damage due to improper cleaning! Residues from
physiological salt solutions (e.g. sodium chloride)
attack the product‘s surfaces. Remove residues of
physiological salt solutions with a cloth that has
been dampened in clear water. Afterwards dry the
product with a dry lint-free cloth.
Caution!
Positional damage may occur due to high traction
and pressure forces when used for a longer duration.
Regularly check the position in the foot area in order
to prevent positional damage.
Caution!
Damage due to improper cleaning! Do not splash
cleaning agent directly into joints or cracks and do
not use a high-pressure cleaner!
Caution!
When removing the patient from the traction
boot, ensure that the leg returns securely to its
original position. Carry out this procedure in a team
if possible.
Caution!
Damage due to improper cleaning and disinfection!
Only use as much cleaning and disinfection agent
as necessary.
Caution!
Damage due to long exposure times! If the
prescribed exposure time of the disinfection agent
is exceeded, the surfaces may be damaged. Obser-
ve the exposure time prescribed by the disinfection
agent manufacturer.
v
v
v
v
v
v
v
v
v
v

Instructions for Care and Use Condor® Traction boot – Edition 2022-07-13 EN 6
Summary of the safety instructions
Attention!
User‘s duty of documentation. Use the documenta-
tion code and labels supplied with the product as
proof of single use.
Attention!
Pay attention to the patient‘s position each time the
extension table is adjusted, and check this! Avoid
unintended tensile loads and rotation of the legs.
Attention!
Reduce all changes of position during the operation.
Attention!
Check all components for proper function before
every use. If certain parts display wear, they must
be re-ordered. Returning a shoe may also prove
necessary. Always carry out visual inspections!
Attention!
The entire patient weight should not exceed a
maximum of 250 kg. Use the specication of the
respective extension device / operating table to
determine this. If the specication are under 250 kg,
then this weight must not be exceeded.
Attention!
Use the given table and regularly perform inspec-
tions on the product. Document this procedure.
Expand the table according to your needs!
Attention!
Document instruction in the medical product
according to medical products law.
Attention!
Always follow the handling guidelines in
these instructions for use.
Attention!
The traction boot (RO.0162.2018, RO.0074.2018,
RO.0073.2018) are suitable from shoe size 37 to 45
according to experience. Please note that the entire
anatomy must be taken into account when
selecting the shoe (e.g. calf circumference, foot
width).
Attention!
Experience has shown that the traction boot in size
S (RO.0081.2019, RO.0082.2019) are suitable for shoe
sizes 32 to 37. Please note that the entire anatomy
must be taken into account when selecting the shoe
(e.g. calf circumference, foot width).
Attention!
The manufacturer is freed from all legal
responsibility in the case of unintended use, or use
that deviates from these instructions.
Attention!
Make sure the locking bolts, clamping screws, and
other locking options between traction boot and
extension device, are xed securely.
Attention!
Only use all-purpose cleaning agents that are slight-
ly alkaline (soap solution) and contain surfactants
and phosphates as cleaning-active components. In
the case of extremely soiled surfaces, use concen-
trated all-purpose cleaners.
Attention!
All serious incidents which occur in conjunction
with the product must be reported to the manu-
facturer and to the responsible authority in the
member state in which the user is located.
Attention!
If the surfaces of the product are strongly soiled,
we recommend cleaning the product additionally
before disinfection.
Attention!
Do not use cleaning tools that can scratch (e.g. steel
wool). This could damage the surfaces.
a
a
a
a
a
a
a
a
a
a
a
a
a
a
a
a

Instructions for Care and Use Condor® Traction boot – Edition 2022-07-13 EN 7
1.4 Graphical symbols used
The following graphical symbols are used in accordance with
DINISO 15223-1.
Table 1 Graphical symbols used
Graphical symbol Identication
Identication in agreement
with ISO 15223-1 standard.
Symbol for‘product number’
Identication in agreement
with ISO 15223-1 standard.
Symbol for‘serial number’
Identication in agreement
with ISO 15223-1 standard.
Symbol for‘name and address
of the manufacturer’
Identication in agreement
with ISO 15223-1 standard.
Symbol for„date of
manufacture“
Identication in agreement
with ISO 15223-1 standard.
Symbol for‘observe
instructions for use’
Identication in agreement
with ISO 15223-1 standard.
Symbol for‘protect against
sunlight’
Identication in agreement
with ISO 15223-1 standard.
Identication of packaging
material.
Symbol for‘protect against
wetness’
Identication in agreement
with ISO 15223-1 standard.
Symbol for‘temperature
range’
Identication in agreement
with ISO 15223-1 standard.
Symbol for‘relative humidity’
Graphical symbol Identication
Identication in agreement
with ISO 15223-1 standard.
Symbol for‘air pressure’
Symbol for‘latexfrei’
Identication in agreement
with ISO 15223-1 standard.
Symbol for‘do not re-use’
Identication in agreement
with ISO 15223-1 standard.
Symbol for‘product not
sterile’
Identification in agreement
with ISO 15223-1 standard.
Symbol for „Medical Device“
Identification in agreement
with ISO 15223-1 standard,
displays a carrier that
contains information on a
unique product identifier
(UDI).
Symbol for„Unique Device
Identifier“.
Labelling of products
developed and marketed in
accordance with relevant
European legal provisions.
Marking shows the
authorized representative in
Switzerland.

Instructions for Care and Use Condor® Traction boot – Edition 2022-07-13 EN 8
Interface with quick-release fastener
Article number: RO.0074.2018
Article number: RO.0081.2019
Article number: RO.0073.2018
RO.0110.2020
Illustration 2 Quick-release fastener
Round interface
Article number:
Article number: RO.0110.2020 S
Illustration 3 round interface
2.3 Variants
The following variants of the traction boot can be obtained:
2. Basic requirements
2.1 Intended use
The traction boot is used for patient positioning during
operations on the lower extremities.
The traction boot is used to fixate the foot and the shank
during medical procedures within the scope of hip
arthroplasty, hip arthroscopy and trauma surgery on the
thigh, hip and pelvis. The traction boot is used before, during,
and after, an operation, examination, or treatment.
The traction boot is only used in the non-sterile area. The
entire shoe does not come into contact with injured tissue or
with open wounds.
The traction boot is intended for human medical
applications exclusively. It is an accessory for a medical device
and must only be used in conjunction with an operating table
and an extension system.
The traction boot may only be used by medical personnel
who have familiarised themselves with the product through
the inst-ructions for use. It may only be used in complete
accordance with the user manual. We will not accept liability for
property damage or personal injuries caused by third-party
accessories or noncom-pliance with the intended use.
The specified application is the intended use. This use is
made fully apparent to the owner or user from the labelling
and the user manual. The traction boot may only be used in
complete accordance with the user manual.
We cannot undertake any liability for damage to persons or
the product that has been caused by external accessories or
subse-quent deviation from the intended purpose,
exceeding max. load, re-use of single use materials, or non-
observance of functi-onal and visual checks.
2.2 Interfaces
Interface with wing screwArticle number: RO.0162.2018
Article number: RO.0082.2019
Illustration 1 Wing screw
REF Designation
With wing screw interface:
RO.0162.2018 Traction boot RotexShoe with slide rail
connection
RO.0082.2019 Traction boot RotexShoe, Small
with slide rail connection
With Quick-release fastener
RO.0074.2018 Traction boot RotexShoe with quick
release for RotexTable® and ES
RO.0081.2019 Traction boot RotexShoe, Small
with quick release for RotexTable® and ES
With attachable guide clamp:
(see chapter 4.3 and illustration 24)
RO.0073.2018 Traction boot RotexShoe® for
minimal-invasive surgery
With round interface
RO.0110.2020 Traction boot RotexShoe with round
interface
RO.0110.2020 S Traction boot RotexShoe, size S with
round interface

Instructions for Care and Use Condor® Traction boot – Edition 2022-07-13 EN 9
2.4 Device description
Illustration 4 Device description I
shell
padding
buckles
mounting bracket 1
mounting bracket 2
Illustration 5 Device description II for single-use components
padding tongue
padding for
sole
padding for
ankle
mounting
bracket 1
mounting
bracket 2

Instructions for Care and Use Condor® Traction boot – Edition 2022-07-13 EN 10
3. Storage
The single-use padding must be stored protected from sunlight.
In the packaged state, the traction boot may be exposed to
environmental conditions within the following limit values:
Surrounding temperature -10°C
+50°C
Tolerance: Temporary
exceeding or falling below
+/-10°C, for max. one day
Relative humidity
10%
95%
Air pressure
500hPa
1060hPa
Store protected from light
Table 2 Storage
4. Operation
4.1 General information
The traction boot is used for xating the foot and the during and
after an operation, examination, or treatment in accident surgery
and the orthopaedic area. Here the traction boot is used in the
area of fracture treatment (pelvis, hips, thighs), endoprosthetics
(hips), and arthroscopy (hips).
The traction boot is only used in the non-sterile area. The shell of
the traction boot should not come into contact with the patient‘s
skin so that pressure marks are avoided. The padding is applied at
the foot and parts of the calf. The entire shoe does not come into
contact with injured tissue or with open wounds.
The traction boot consists of a robust shell with the respective
accessories. Additional padding may be necessary in the case of
small feet in order to ensure secure fixation in the shell.
From experience, the traction boot is suitable for shoe sizes
from 32 - 37 (size S) and from 37 - 45. Consider the entire
anatomy of the foot when selecting the shoe!
Always make sure that there is sufficient padding. For small feet,
additional padding or folding of the padding may be necessary
to ensure a secure fit in the shell.
Safety information for operation
Attention!
Check all components for proper function before
every use. If certain parts display wear, they must
be re-ordered. Returning a shoe may also prove
necessary. Always carry out visual inspections!
Attention!
Always follow the handling guidelines in these ins-
tructions for use.
Attention!
The entire patient weight should not exceed a
maximum of 250 kg. Use the specication of the
respective extension device / operating table to de-
termine this. If the specication are under 250 kg,
then this weight must not be exceeded.
Attention!
Use the given table and regularly perform inspec-
tions on the product. Document this procedure.
Expand the table according to your needs!
Attention!
Document instruction in the medical product
according to medical products law.
a
a
a
a
a
Attention!
The traction boot (RO.0162.2018, RO.0074.2018,
RO.0073.2018) are suitable from shoe size 37 to 45
according to experience. Please note that the
entire anatomy must be taken into account when
selecting the shoe (e.g. calf circumference, foot
width).
Attention!
Experience has shown that the traction boot in
size S (RO.0081.2019, RO.0082.2019) are suitable
for shoe sizes 32 to 37. Please note that the entire
anatomy must be taken into account when
selecting the shoe (e.g. calf circumference, foot
width).
a
a

Instructions for Care and Use Condor® Traction boot – Edition 2022-07-13 EN 11
Attention!
Reduce all changes of position during the opera-
tion.
Attention!
Pay attention to the patient‘s position each time the
extension table is adjusted, and check this! Avoid
unintended tensile loads and rotation of the legs.
a
a
Attention!
Make sure the locking bolts, clamping screws, and
other locking options between traction boot and
extension device, are xed securely.
Danger!
Continuous traction and pressure may cause
damage to tissue. Regularly check the position and
relieve the leg.
Danger!
The traction boot is designed for a maximum trac-
tion of 80 kg. Traction that exceeds this does not
correspond to the manufacturer‘s recommenda-
tions.
Danger!
Insucient padding can lead to the shoe t beco-
ming less secure. Check the padding and increase
if required by additional padding with cotton wool.
Danger!
A padding tongue that is not turned over can be
the cause of Insucient padding. Ensure that the
foot is t securely in the traction boot. For this, turn
the padding tongue over and lay it in doubled.
Danger!
A foot that is not xed correctly can loosen from
the extension device. Always ensure that the trac-
tion boot is xed securely to the extension device.
Danger!
If the transport, positioning, and cleaning and
disinfection information is not observed, material
breakage may occur. Always comply with these
instructions for use.
a
g
g
g
g
g
g
Caution!
Worn mounting brackets or buckles can loosen un-
intentionally and cause injuries. Check that the trac-
tion boot is xed securely. Only use traction boots
with new components. Document the single use.
v
Caution!
Positional damage may occur due to high traction
and pressure forces when used for a longer durati-
on. Regularly check the position in the foot area in
order to prevent positional damage.
Caution!
When removing the patient from the traction
boot, ensure that the leg returns securely to its
original position. Carry out this procedure in a team
if possible.
v
v
Attention!
The manufacturer is freed from all legal respon-
sibility in the case of unintended use, or use that
deviates from these instructions.
a
Attention!
User‘s duty of documentation. Use the documenta-
tion code and labels supplied with the product as
proof of single use.
a

Instructions for Care and Use Condor® Traction boot – Edition 2022-07-13 EN 12
Illustration 6 Lay the padding in the shell Illustration 7 Shell with padding
Please observe that the entire procedure takes
place in the non-sterile area. None of the products
is used sterilely or is approved for the sterilisation
process.
Illustration 8 Traction boot with foot
• Afterwards, lay the foot in the shell with padding
(Illustration 8).
• Position the padding tongue (1) on the shin-bone
(Illustration 9).
Illustration 9 Traction boot with foot and padding
1
• Position the single-use interior padding in the traction boot
(Illustration 6 and 7).
4.2 Positioning with disposable
inlay incl. mounting brackets
(RO.0148.2018 and RO.0148.2018 S)
4.2.1 Fixate foot and ankle in the traction boot (disposable
inlay incl. mounting brackets)
Observe the following steps for positioning the patient‘s foot in
the traction boot.

Instructions for Care and Use Condor® Traction boot – Edition 2022-07-13 EN 13
• Using the mounting bracket 2, xate the top padding at the shin-bone (Illustration 10 and 11).
Illustration 10 Traction boot with padding and mounting bracket Illustration 11 Mounting bracket xated on shin-bone
h
The padding tongue of the single-use interior
padding protrudes over the foot end. By turning the
padding tongue over again, you increase / double the
padding area at the ankle.
• Turn down the padding for the ankle of the single-use interior
padding so that you double the padding height at the ankle
(Illustration 12).
• Now xate the lower padding at the ankle with mounting
bracket 1 (Illustration 13 and 14).
Illustration 13 Mounting bracket xations Illustration 14 Fixated mounting bracket
Illustration 12 Padding for ankle
2
2
1

Instructions for Care and Use Condor® Traction boot – Edition 2022-07-13 EN 14
h
You can double the padding both at the shin-bone and
the ankle by folding it in before xation of the ankle
(Illustration 15).
Illustration 16 Inserting mounting brackets in buckles
Illustration 15 Double padding at the shin-bone
Illustration 17 Fixating the mounting brackets by pressing
• Fixate the mounting brackets in the buckle by evenly pressing
the mounting bracket (Illustration 17).
• To xate the mounting brackets, insert their ends into the
buckles attached to the shoe (Illustration 16).
4.2.2 Fixation of mounting brackets
Observe the following steps for positioning the patient‘s foot in the traction boot.
2

Instructions for Care and Use Condor® Traction boot – Edition 2022-07-13 EN 15
4.2.4 Documentation
In order to record that you have only used the single-use
products as intended, scan in the corresponding sticker on each
package, or stick it to the documentation form.
This is proof that you only used the product once in the case of
damage.
Illustration 18 Detailed image of quick-release lever
Illustration 20 Releasing the buckle to open the mounting
bracket
4.2.3 Release of mounting brackets
• If the xation is not sucient, it is possible to readjust it using the large quick-release lever (Illustration 18: 1 and Illustration 19).
• To open the quick release fastener again and to remove the
mounting brackets, use the small levers (Figure 18: 2). For this,
press the lever down (Illustration 20).
Make sure you release the two levers for each mounting bracket
(left and right) simultaneously, so that the mounting bracket
does not catch.
Illustration 19 Re-tigthening the mounting brackets
2
1
Illustration 21 Example of sticker
4.3 Fastening and positioning the
traction boot at extension device
After the patient‘s foot has been xated in the traction boot,
the shoe has to be fastened at the extension device. The shoe is
pushed sideways using a guide tool onto the corresponding rail
of the extension device (1) and xated properly.
In the case of xation via the clamping screw (2), this has to be
done from the side and it must be tightened manually. Make
sure that the clamping screw is xed securely.
1
2
Article number: RO.0162.2018 / RO.0082.2019
Illustration 22 Details of the interface with wing screw

Instructions for Care and Use Condor® Traction boot – Edition 2022-07-13 EN 16
4.4 Removing traction boot
•Hold the patient‘s foot in order to support the opening of
the clamping screw.
• Open the clamping screw (3) or the release.
•Push the traction boot sideways (1) from the rail of the ex-
tension device.
If possible, remove the patient in a team, not alone.
Proceed in exactly the same way in the case of an attachable
guide block (4). To remove the guide block, press the red button
(5) and the long button (6) with one hand, as you would when
attaching it, so that you can remove the guide block (4) with the
other.
If the traction boot is to be removed interoperatively, the
two red buttons must also be pressed simultaneously. When
releasing the shoe, make sure that the shoe and the leg are su-
ciently secured to prevent the leg from falling down and possibly
injuring the patient. The safety mechanism of the 2 buttons
avoids accidental removal of the shoe.
3
5
64
Article number: RO.0074.2018 / RO.0081.2019
Illustration 23 Details of the interface with quick-release fastener
Article number: RO.0027.2018 / RO.0073.2018
Illustration 24 Details of the attachable guide block
In the case of an attachable guide block (4) the locking is achieved
as described for the quick-release fastener (3).
For this purpose, the attachable guide block is xed to the corre-
sponding rail.
Then the guide block can be placed on the cross bar of the
shoe. To do this, press the red button (5) with your thumb while
at the same time your ngers surround the crossbar and keep
the long push button (6) pressed. Then the traction boot can be
connected to the attachable guide block (see gure 24) and thus
xed to the rail.
In case of a locking bolt (3) fastening is automatic. However,
make sure that the locking bolt is xed securely.
To move the traction boot only touch the shoe at the end of the
foot. The extension device provides you with setting options.
Article number: RO.0110.2020 / RO.0110.2020 S
Illustration 25 Traction boot with round interface
IIn the case of an traction boot with a round interface (see Fig.
25), this is inserted into the interface of the corresponding
extension table. Make sure that the shoe is locked in place on
the extension unit. Please also observe the operating
instructions for the extension table.

Instructions for Care and Use Condor® Traction boot – Edition 2022-07-13 EN 17
5. Hygiene
5.1 Safety information
Clean and treat the traction boot with wipe disinfectant after
each use.
g
Danger!
Danger due to incorrect handling of cleaning and
disinfection agents! Always observe the cleaning
and disinfection agent Manufacturer‘s specication
on use, as well as the hospital‘s currently applicable
hygiene rules.
g
Danger!
Danger of explosion! Agents containing alcohol
form ammable mixtures that could lead to explo-
sions in the case of high-frequency applications.
Do not use agents containing alcohol in the case of
high-frequency applications.
g
Danger!
Danger of infection! Dirt particles can become en-
capsulated and this can lead to the product not
reaching the necessary level of germ reduction
after disinfection. The product must be thoroughly
cleaned of soiling and encapsulated dirt particles
before disinfection.
g
Danger!
Dispose of all single-use components after use.
Reusing articles that are intended for single use
deviates from the manufacturer‘s specication.
g
Danger!
Danger of infection! The product can be contami-
nated. Always wear gloves during cleaning / disin-
fection.
a
Attention!
Only use all-purpose cleaning agents that are
slightly alkaline (soap solution) and contain surfac-
tants and phosphates as cleaning-active compo-
nents. In the case of extremely soiled surfaces, use
concentrated all-purpose cleaners.
v
Caution!
Damage due to improper cleaning and disinfecti-
on! Always perform visual and functional checks
after cleaning and disinfection.
v
Caution!
Improper cleaning and disinfection may lead to
damage!
v
Caution!
Damage due to improper cleaning! Residues from
physiological salt solutions (e.g. sodium chloride)
attack the product‘s surfaces. Remove residues of
physiological salt solutions with a cloth that has
been dampened in clear water. Afterwards dry the
product with a dry lint-free cloth.
v
Caution!
Damage due to improper cleaning! Do not splash
cleaning agent directly into joints or cracks and do
not use a high-pressure cleaner!
v
Caution!
Damage due to improper cleaning and disinfec-
tion! Only use as much cleaning and disinfection
agent as necessary
Do not use the following products during cleaning and
disinfection:
• Products containing alcohol (e.g. hand disinfectant)
• Halides (e.g. uorides, chlorides, bromides, iodides)
•Halogen-splitting compounds (e.g. uorine, chlorine, bromi-
ne, iodine)
•Products that can scratch surfaces (e.g. abrasives, wire brus-
hes, steel wool)
• Commercially available solvents (e.g. benzine, thinner)
• Water containing iron particles
• Cleaning sponges containing iron
• Products containing hydrochloric acid
To clean the product, use a soft, lint-free cloth.

Instructions for Care and Use Condor® Traction boot – Edition 2022-07-13 EN 18
5.2 Cleaning
For cleaning we recommend clinical cleaners. Plastic parts and
operating elements must only be treated with suitable cleaning
agents. When cleaning, make sure that no liquids get into the
device. For cleaning, a weakly alkaline cleaner, for example mild
detergent, soapy water or clinical cleaners can be used.
•Depending on the degree of surface soiling, use an all-pur-
pose cleaner with clear water according to the cleaning
agent manufacturer‘s specication. Comply with the manu-
facturer‘s specication for correct dosing.
• Wet the traction boot with the all-purpose cleaner.
• Using a soft cloth, thoroughly wipe down the traction boot.
•Make sure that the traction boot is free of soiling and en-
capsulated dirt particles.
• Wet the traction boot slightly using clear water.
• Using a soft cloth, thoroughly wipe down the traction boot.
•Make sure that the traction boots is free of cleaning agent
residues.
•Dry the traction boot with a dry, absorbent, and lint-free
cloth.
This reduces the growth of germs on the product surface.
Perform this procedure after every use. After this, use the wipe
disinfectant.
Disinfectants containing alcohol can cause inammable gas
mixtures. Therefore, you should also use an aldehydic surface
disinfectant. It should be listed in the VAH list.
5.2.1 Mounting brackets
It is not necessary to clean the mounting brackets after use.
The mounting brackets are meant for single use and should be
disposed of afterwards. (For this, see also 4.2.5).
g
Danger!
Multiple use of the mounting brackets can lead
to instability. A suciently secure t cannot be
guaranteed in the case of multiple use.
5.3 Disinfection
5.3.1 General information
g
Danger!
Danger of explosion! Agents containing alcohol
form ammable mixtures that could lead to explo-
sions in the case of high-frequency applications.
Do not use agents containing alcohol in the case of
high-frequency applications.
v
Caution!
Damage due to long exposure times! If the pre-
scribed exposure time of the disinfection agent is
exceeded, the surfaces may be damaged. Observe
the exposure time prescribed by the disinfection
agent manufacturer.
a
Attention!
If the surfaces of the product are strongly soiled,
we recommend cleaning the product additionally
before disinfection.
5.3.2 Disinfectants that can be used
For disinfection, only use surface disinfectants based on the
following active substance combinations:
– Aldehydes
– Quaternary ammonium bases (QAB)
– Guanidine derivatives
5.3.3 Disinfection procedure
After each cleaning, treat the traction boot with a wipe disinfec-
tant according to the disinfectant manufacturer‘s specication.
a
Attention!
Make sure that the product is free from disinfectant
residues.
• Perform a visual inspection and functional test.

Instructions for Care and Use Condor® Traction boot – Edition 2022-07-13 EN 19
6. Service and Maintenance
To re-order the traction boot, accessories, and spare parts, please contact:
Service hotline Condor® MedTec GmbH: +0049 5258 99160
6.1 Spare parts
The following items may cause a required service at Condor:
Description Article number Illustration Type of exchange
Buckles B-24-ERGO-BL
Illustration 26 Buckle
Service
Table 3 Spare Parts
6.2 Accessories
The following articles can be made available to you:
Description Article number Illustration Type of exchange
Padding set incl. mounting
brackets RO.0148.2018
Illustration 27 Padding set
Shipment
(PU 10 pieces)
Padding set incl.
mounting brackets
size S
RO.0148.2018 S
Illustration 28 Padding set S
Shipment
(PU 12 pieces)
Table 4 Accessories
The respective order numbers for the complete traction boot can be found in chapter 2.3 Variants.
6.3 Inspection and Maintenance
The traction boot does not require special maintenance. Ageing and wear are the result of regular use and could impact the safety-
relevant functions of the traction boot.
Always check the condition of the traction boot before use (For this, see also 6.4).
This manual suits for next models
6
Table of contents
Other Condor Medical Equipment manuals